Western Digital Elements External Hard Drive Disassembly
The Western Digital Elements External Hard Drive has a plain black enclosure. It’s as if WD made it for people who want to hide their hard drive or keep people from noticing it.

If you look around the case, you’ll find no screws or holes of any kind. There is only a power port, an USB port, and a LED can be found on the back-side of the enclosure. WD even put the bright white LED on the back to keep this drive covert.

You can find a seam on the bottom of the drive, all around the edge. If you slip a miniature flat-head screwdriver, you can easily pry the enclosure apart (see photo below). The plastic is made to snap together easily, so it’s a good candidate for re-use. Unfortunately, the SATA to USB adapter isn’t reusable (see below).

The SATA to USB adapter is mounted to the internal hard drive with two screws. A ground contact is snapped onto the USB port and touches the drive like a clip.
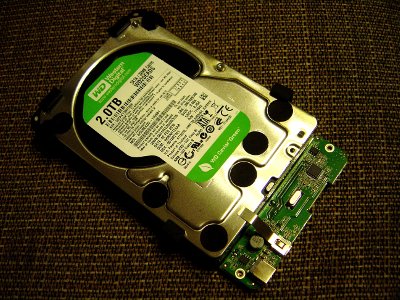
The internal hard drive in the 2TB version is a Western Digital WD20EADS. It is a 3.5″ 5400 RPM SATA drive with 32MB of cache.

Is the Internal Hard Drive Replaceable?
The question is whether it’s possible to replace the drive inside the case with another SATA drive. We might want to do this when the 2TB drive eventually fails. Or maybe we simply want to use the 2TB drive somewhere else and swap a different SATA drive into this case.
The answer is no. I tried a 1.5 TB drive, a 750 GB drive, and a 500 GB drive in the case. None of these drive work. After applying power to the USB adapter with the other drives attached, the LED blinks on and off. The USB adapter also doesn’t spin the drive up. If I try to do anything with the drive in Disk Management, it would say access denied. If you are able to get any other drive to work, please let us know.
Update 1: Some Does Work
Other users have reported, in the discussion, that their USB adapter works with other drives. Based on the amount of ye and nay reports, I suspect that there are two versions of USB adapters being supplied with this external hard drive. Some versions of the adapter will work with other hard drives, while some will not.
The USB adapter that came in my enclosure, which does not work, has the following designations:
OASiS DESKTOP 1607P
REV A
4060-705078-001
Please report the USB adapter board that you have and whether it works with other hard drives in the discussion thread.
Update 2: Getting Other Drives to Work
Frank de Lange has posted (in the discussion) technical reasoning why the adapter won’t work with some drivers. He has also figured out how to format drives in Linux to make them work with the adapter.
Karel van der Walt figured out (see discussion) that using an earlier version of the WD Element adapter to low-level format the drive causes it to work with the newer adapter. I suspect that the same technical reason that Frank de Lange provide applies here. Question is: will low-level format the drive with another USB adapter work?
Does the Internal Hard Drive Work Without the Case?
After pulling the 2TB hard drive out of the Western Digital case, I was able to use it with an USB adapter and within a Seagate USB case. So the internal hard drive is really just a normal hard drive.
Related Links
-
— Amazon User Reviews — Amazon User Reviews — Amazon User Reviews — Amazon User Reviews — Amazon User Reviews — Amazon User Reviews
Attach | Edit | Revisions
Related Content
Attachments
-
(58 KB) (27 KB) (58 KB) (55 KB) (54 KB)
136 Users Online

Fun for Photographers
Fail, Teardown: WD Elements SE 4TB 2.5″ USB 3.0 Hard Drive (WDBJRT0040BBK-0A)
Just this week, my Dad came to me asking for help with an external bus-powered USB hard drive that just seemed to be stuck. It seemingly stopped working properly and he wanted me to just reformat it – to hell with the data that was on it as it wasn’t so important. Unfortunately, that proved to be more difficult than expected … and eventually led to the drive being taken out of service permanently.
The Drive

The drive in question is pretty basic – a matte and gloss black plastic shell with the WD logo on the top …

… and some rubber feet on the bottom. It’s rounded a little around the edges and tapered slightly. The drive is a WD Elements SE – those who know technology have reason to pause for the “SE” branding, but sometimes is believed to stand for s*** edition. This drive was Made in Malaysia with a part number of WDBJRT0040BBK-0A and a capacity of 4TB.

The interface to the drive is a microUSB-B port of the USB 3.0 variety with a hole for the drive activity indicator. Other than that, it feels quite similar to a Toshiba Canvio or countless other basic 2.5″-based “thick” external hard drives.

The Symptoms
Trying to get it formatted or even read was a nightmare. First plug and the drive just started to blink non-stop as the OS was trying to enumerate the partition table and the only one partition on it. I tried to grab the SMART data from it which took forever, but it said it had twelve pending sectors. This didn’t look good for the drive, but there were no reallocations and some drives can be saved by a full rewrite (e.g. if the pending sectors were caused by an improper power-down during write, for example, or a one-off marginal write).
After a bit of struggle, I managed to rewrite the partition table and quick-format the drive on a Linux machine and returned the drive to my Dad. Usually in these circumstances, the drive will retry the pending sector on the next write and reallocate if necessary, thus if the drive was still sound it should be workable.
The next day, it came back, much the same as before but now with twenty pending sectors. The drive was probably toast, but to make sure of it, I decided to do a full random fill on the drive …

… which didn’t go so well. The drive refused to report write errors, instead becoming very very excruciatingly slow at writing, accompanied by the troubling presence of constant “clicking” and “clunking” as the heads were loaded and unloaded repeatedly as part of a retry mechanism. After about nine hours of trying to random-fill the drive, it only managed the first eight percent.

The SMART data indicated 1725 pending sectors, a number that seemingly did not continue to grow (list full, perhaps). But I’ve seen enough and decided the drive should retire. Checking it on the WD Warranty Checker, it was just out of warranty by half-a-year, and it seems they only offered two-years on this drive which was very fortunate for them. For us, it is rare to see a drive to have failed after just 95 power-on hours, but I really can’t advise buying such drives anyway because I’ve never had great experiences with them (speed and reliability-wise).
While I did expect the pending sector count to reduce as the drive rewrote the bad areas, perhaps this behaviour may be related to the drive’s architecture. Perhaps this drive is an SMR drive, so when things go bad, they may go really bad really quickly. Whatever the case may be, since this one was going into the bin (and I didn’t want data escaping the house), I was going to take it apart for a photo shoot.
Inside the Box
I’ve never seen the inside of a WD Elements SE drive, so this will be a first for me. Starting at the corner opposite the USB connector, I managed to get my way into the seam and pry apart the casing enough to hear the plastic “snap” unbuckle. Continuing my way around, the case was opened with no damage at all.

The underside of the drive actually faces the WD logo top shell, so the drive is being used “upside down”. It won’t harm the drive, but it’s a curious way to do things. The drive’s underside can be seen which is mostly the bottom of the casted tub and the controller PCB of which the USB port is integrated into the PCB (no bridge boards here). The drive is mounted using screws and silicone vibration-dampening suspension. To ensure the drive feels solid, copious amounts of foam rubber tape are used on the top cover, on the drive’s sides and even on the bottom.

The whole drive assembly can be eased out of the bottom of the casing with a bit of help from a flat-blade screwdriver.

The drive is branded WD Blue on the label, which is interesting, because it’s a label which you usually would never see. It’s marked “USB, Not for Resale”. The manufacturing date was 13th June 2018, so not even three years of age.

A closer look at the underside of the drive – there seems to be a foil label over a slot which is used to do factory alignment of the head or servo-writing. The motor is integrated into the tub of the drive as is common on modern drives.

The edge has the USB-connector for drive interface, as well as a row of contact pins, probably used during manufacturing and a plastic light pipe for a white activity LED.

A closer look at the underside of the PCB shows its very custom shape littered with lots of test points. There also seems a bit of a partial fingerprint in the tarnishing from someone who may have assembled the USB connector area of the board.

Five Torx screws need to be removed to free the PCB from the drive. The drive uses spring-loaded contacts to contact the three pads on the flexible flat cable to the motor, but the connection to the head-stack assembly is made via a rather small, high-density high-speed connector of some sort. The main controller has a thermal pad to use the drive tub as a heatsink.

They really packed everything onto this board – the buffer DRAM and the serial Flash chip are both at the absolute edge of the board which must be a bit of an assembly challenge as well. The USB bridge is the familiar Asmedia ASM1151W which is a Western Digital special. The power, spindle motor and voice coil motor seems to be handled by a chip marked WD Redfin, which I haven’t seen before.

The markings on the main controller was a bit hard to see so I grabbed some thermal grease to make the markings stand out – a Marvell 88i1047-NDB2.

The lid of the drive comes off with nine Torx screws. The top lid has the breather air hole filter while the recirculation filter is on the bottom. So far, the platters look visibly undamaged, so perhaps the issue is with the heads. The drive has the (expected) ramp load/unload system that is now commonplace.

What a gorgeous mechanism, what a shame the drive doesn’t work right!

The ramp load and unload with the heads resting in the parked position. There seems to be a speck of metal on the ramp but as long as it doesn’t move, it shouldn’t affect the drive.

The platters are secured to the spindle motor with just a single Torx screw. How’s that for minimalism? Perhaps the drive may have been physically dropped and disk shift or run-out is part of the reason the drive is having difficulties … I’ll never know.

What I did notice was the drive has five platters. That’s a lot of platters for a portable drive … which also means ten heads. That’s a lot of potential for something to go wrong.

The head controller is on the flexible flat cable on the arm itself – it’s a lot more sophisticated than some of the older drives I’ve taken apart. The flexible flat cable is laminated to an aluminium base plate, folded around to lead to the connection through the tub.

I removed the head-stack assembly and flattened out the aluminium guide to get a better look at the head controller.

That’s a lot of connections to the heads … gone are the days of two, four or even six connections. But it also makes a visually interesting image.

The flexible flat cable leading to the head slider has nine soldered connections. The design of the surface also has a rather interesting, complex shape with many ridges.

There are even connections made to the two gold foils near the head as well. I wonder if that’s being used for a capacitor, or for some active purpose to control the head height or tilt … it’s not something I’ve remembered seeing before.

In the end, this drive is now very much a bag of bits … most of it thrown into the bin, but it is fascinating just to see what a modern drive looks like inside.
Conclusion
The Western Digital Elements SE 4TB drive didn’t last very long and failed in a clunky, pending-sector-filled way. Perhaps this drive was an SMR drive with issues with its head, or perhaps it had some disk shift caused by mechanical shock, but whatever the case may be, it only served about 90 hours before it became problematic. As expected, the drive had USB integrated on the circuit board, using an Asmedia ASM1151W bridge chip. The drive itself had an amazing five-platter, ten-head design which I would have never guessed from just looking at it. The heads themselves had nine connections, while there were other elements on the flexible flat cable which may have served some purpose (but I don’t know exactly what). It may have failed as a drive, but at least I got a chance to tear down a recently made drive.
An Aside …
If you’ve been wondering why it’s been quiet (again), it’s because I’ve been crazy busy as normal. Work had me on a project delivering a rather long report and combined with the recently delivered RoadTest, it really took all of my (mental) energy. I guess after doing a lot of writing, the thing you’d least want to do is … even more writing. So instead, I’ve been doing a few other things but they haven’t quite made it to the blog yet as they might be awaiting some parts or work … they’ll be posted as soon as they’re ready.
Just this week, I noticed one of my more frequently used Skyhawk 8TB drives is starting to click a little differently than usual. It’s now got almost 200,000 ramp load-unload cycles, which suggests to me that maybe something is mechanically wearing even though it is specified for 300,000 cycles. As a result, I’m doing an archive backup of the drive right now … just in case, but it’s still seemingly healthy other than a change in noise.
Finally, before I forget, a Happy Chinese New Year to all my readers. May 2021 be a happier and more productive year for all.
Попытка оживить WD Elements 1TB USB 3.0 Часть 1.
Как всегда заранее — это не инструкция, не руководство к действию, а история из жизни. Заметки экспериментатора, если позволите. Цель всей этой писанины, в первую очередь, прочесть комментарии от более опытных коллег и, вероятно, почерпнуть новых знаний. Ну и если этот материал окажется еще и полезным кому то, то я буду непомерно счастлив, что хоть где то от меня есть польза.
Было у отца три сына. Тьфу, три винчестера то есть было у меня в ремонте.
Принес мне мой постоянный клиент очередную партию дисков. Что он с ними делает не знаю, но знаю этот парень лазит по горам, видимо вместе с хардами. Один внешний старенький на 250 гб с бедами, которые вешают систему при инициализации, второй из ноута тоже посыпавшийся, третий тот самый WD из заголовка.
Я не имею ни профессиональных программно-аппаратных комплексов как в лабораториях, ни знаний и навыков в серьезном ремонте хардов. Поэтому все мои манипуляции по добыче информации ограничиваются посекторным клонированием полумертвых дисков на здоровые при помощи hddrawcopy, работой с клонами в прогах Viktoria и R-Studio. Так и в этот раз были решены проблемы с первыми двумя дисками — подвешиваю «больного» на Sata интерфейс рядом со «здоровым» винтом такого же или большего объема. Клонирую, потом вычитываю(иногда предварительно делаю быстрое форматирование диска) все что можно и сохраняю на еще один винт уже в привычном для человека виде файлами и каталогами.
А вот с WD начались непонятки сразу после разборки
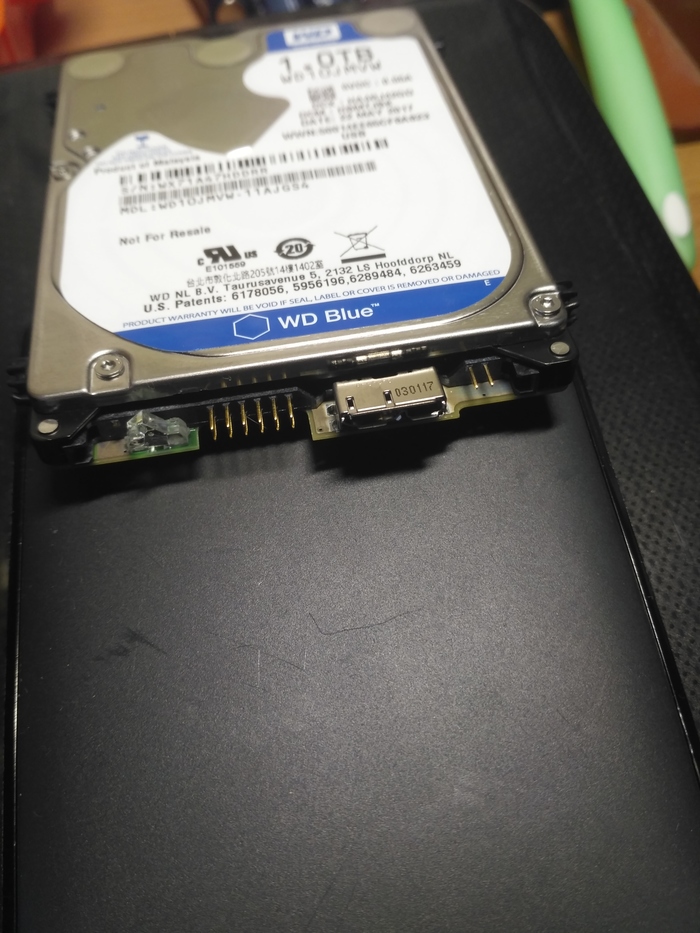
Забыл упомянуть его предысторию. Со слов клиента : лежал на полке долго, а как вставил в комп — не определяется. У меня тоже, поэтому, когда вскрыл бокс и не увидел привычной дополнительной платы с мостом Sata -> USB, пошел курить и гуглить.
Как оказалось, я был прав в догадках, мост уже распаян на плате самого винчестера. Надо просто найти куда запаять Sata шнурок на sata контролер. Великий гугл вывалил много инфы, даже на Пикабу есть маленькое упоминание.
Руки ноги голова — вон они, нужные мне тестпоинты
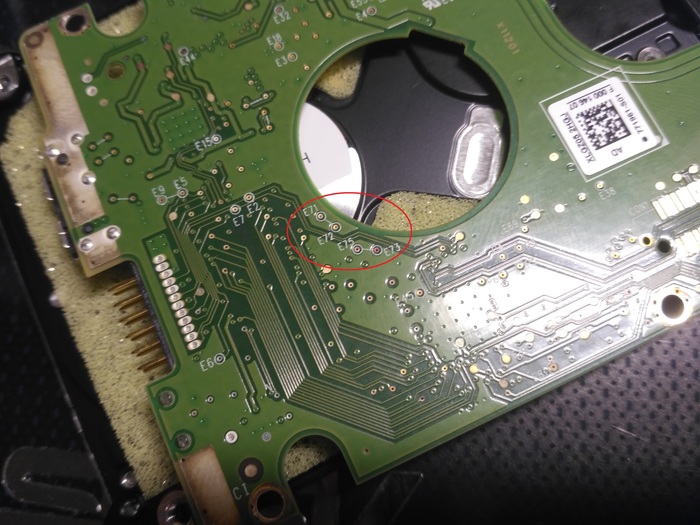
Сбегал под стол, выволок кучу всякой всячины и давай вонять флюсом на всю квартиру.
Первым делом надо «развязать» Sata контролер от USB — для этого надо выпаять с платы 4 кондера керамических: С13, С18, С31, С37

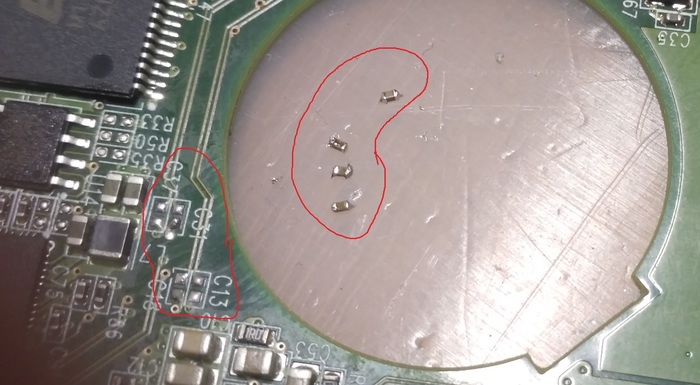
Они мне больше не нужны, так что можно смело чихать на стол не прикрываясь.
Теперь надо напаять на тестпоинты сата-кабель, ну или разъем саташный. Кабеля я зажал, а вот мертвых винтов у меня достаточно, поэтому тупо содрал разъем с первой попавшейся платы.

Перелопатив много инфы в тырнетах, выяснил, что провода не должны быть слишком длинными и толстыми, что бы не было наводок. Я достал старый айфоновский кабель и пустил его под нож и паяльник, а для верности еще и горячими соплями капнул.
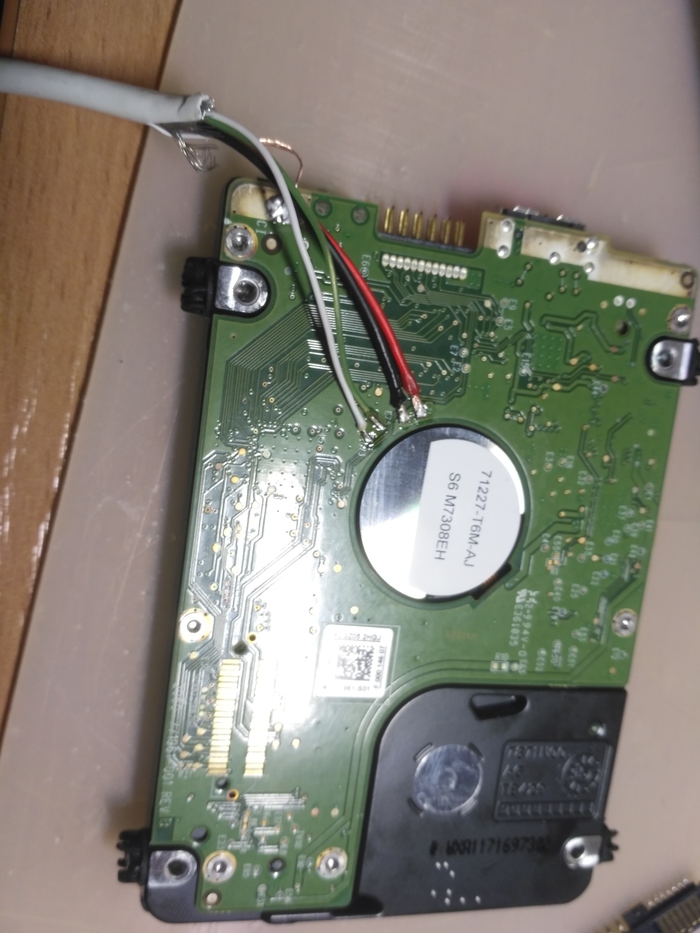
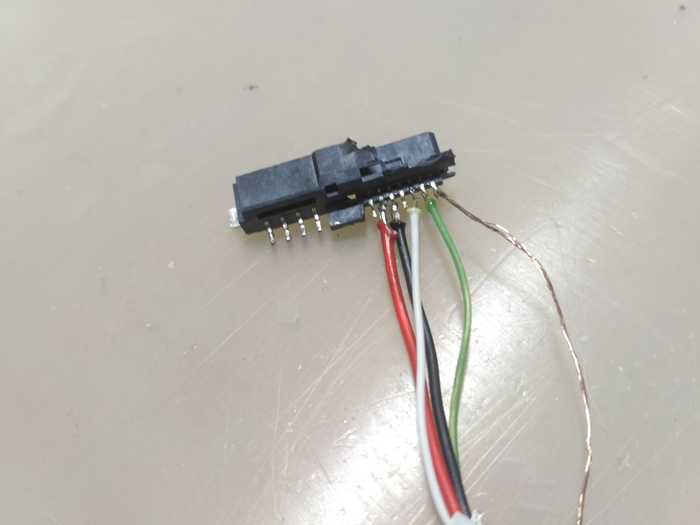

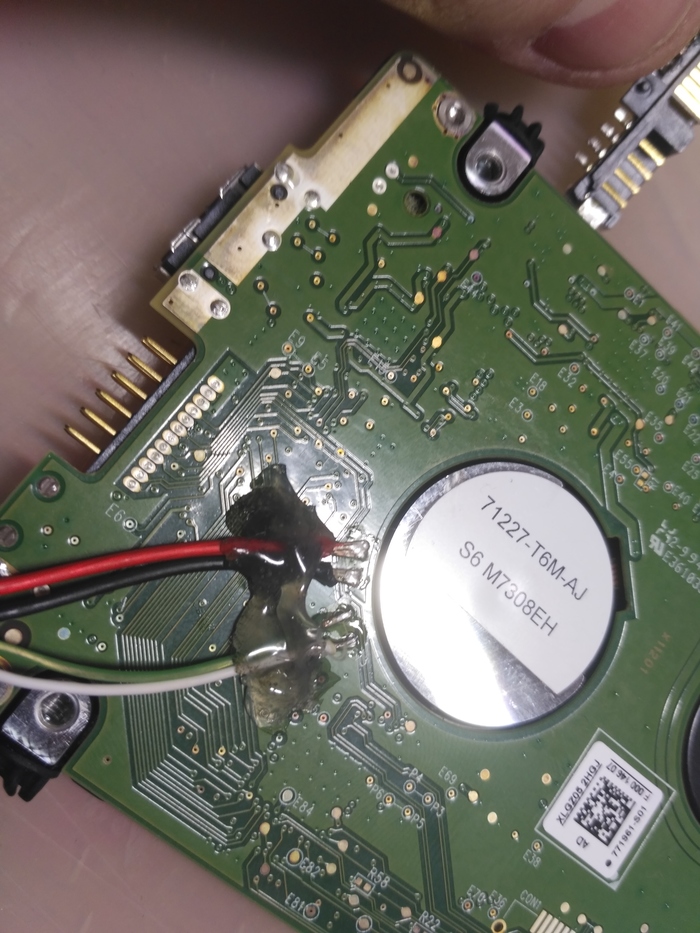
Вот, собрал воедино распиновку Сата и теспоинты для подсматривания во время пайки. Если решишься повторить, то и тебе пригодится.
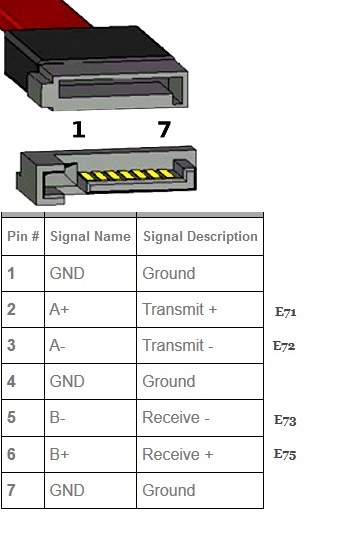
Но то только канал данных, винту нужно еще и питание, поэтому надо либо подпаять на плату провода и запиать их в молекс, либо воспользоваться микро-усб разъемом, в который питание пойдет с УСБ порта компа. Замечу, что только питание надо брать с УСБ, если ты будешь юзать микро-усб кабель от телефона, то у тебя система будет пытаться определить УСБ-контролер на плате винчестера. Что бы этого не произошло — надо обрезать D+ D- опять же на плате, либо пересобрав кабель, вырезав всю его семью проводки передачи данных(белый и зеленый). У меня же нашелся шнурок от повербанка, где провода данных напрочь отсутствуют. Подсоединил на выключенной машине всю эту порнографию
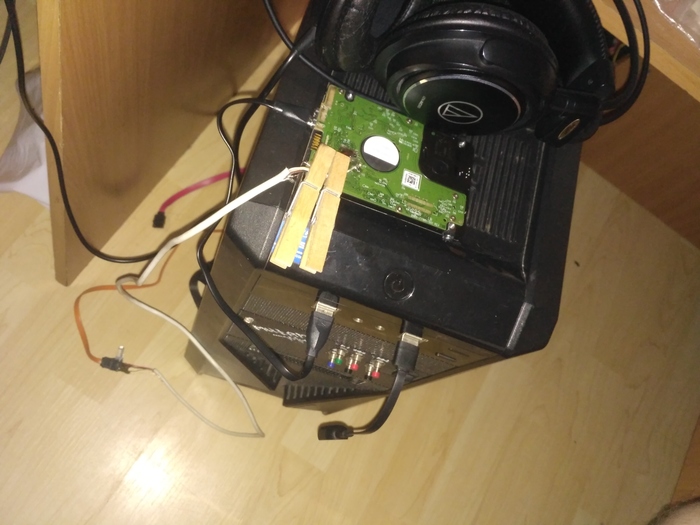
Затем стартуем комп и
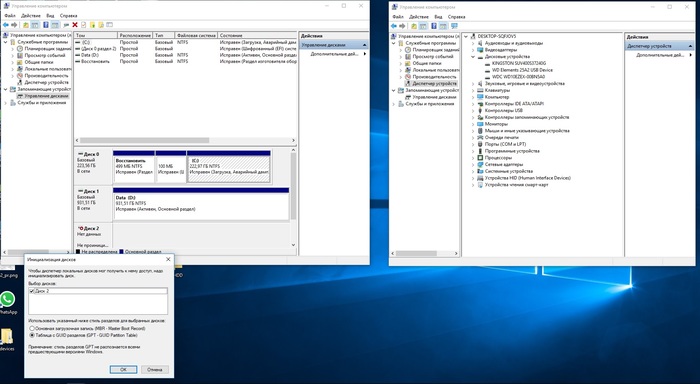
Это исчадие ада не хочет специализироваться, хотя в диспетчере устройств он отобразился, что не может не радовать. Но к сожалению ни Виктория, ни р-студио не хотят работать с винтом, который не прошел инициализацию.
Лезем в гугл. Так, на очередном форуме, в этот раз каких то реально спецов, я надыбал название программы WD Marvel и очень мало понятной информации как она работает. Мало того, бесплатная версия ограничена в функциях, но что делать — качаю. Поставил, пошарился и понял, что вин совсем как то не корректно отображается, он обнаруживается как мой диск-файлопомойка, всегда установленный в машине.
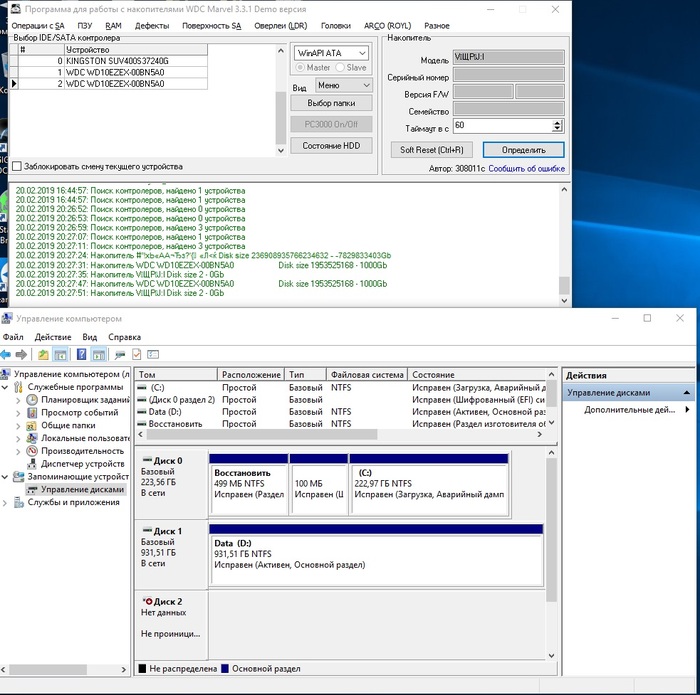
Состояние диска тоже некорректно отображается(наверно, но это не точно) — ну вряд ли будут везде нули.
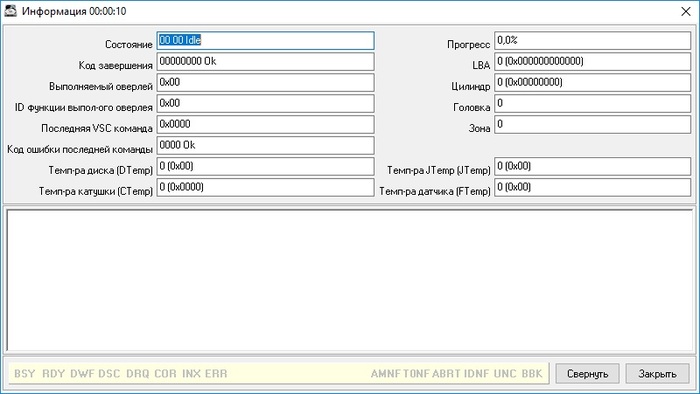
Ни одна из малопонятных для меня, но доступных в демо-версии утилиты функций мне не помогла, как бы я не вычитывал форумы. Пришел к выводу, что помер и Сата контролер на плате диска. Зная что в лабораториях меняют платы с доноров, я решил порыться в сусеках дядюшки Ляо, вбивая модель диска и партномер платы.

нашел подходящую по партномеру с хорошим рейтингом и не единичными заказами
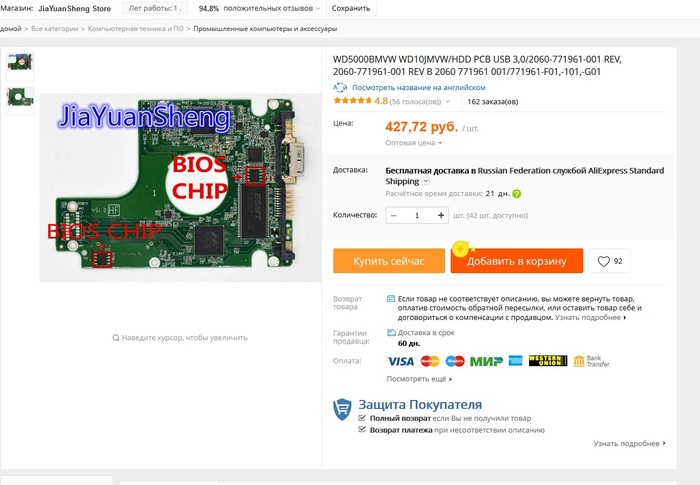
согласовал с клиентом и заказал.
На этом сказочке конец первой части, а вторая, надеюсь, будет последней, где все решится в лучшую сторону.
Если есть знающие мастера, которые на этом собаку съели — с удовольствием прочитаю ваши комменты и буду мегаблагодарен за советы.
Пы.Сы.1 Для того что бы новая плата завелась, надо будет перепаивать микросхемы биоса с родной платы. Китайцы даже в описании товара заботливо об этом написали, а так же обвели их на фотке.
Пы.Сы.2 На момент написания поста, плата уже приехала в Питер, надо только ее забрать и снова постигать непостигнутое ранее.
Внешний HDD USB3.0 WD 4TB: бездна пространства
Комплектация
Винчестер
Кабель USB3.0
Чехол
Руководство пользователя
Чек о покупке на сумму 122$
Заказ я сделал в начале карантина и боялся, что посылка надолго зависнет в чреве логистических компаний. Но она ко мне благополучно добралась за три недели. Причем, передали посылку не государственной «Укрпочтой», а более качественным частным аналогом- «Новой почтой».
Все дошло в целости и сохранности, посылка даже не помялась 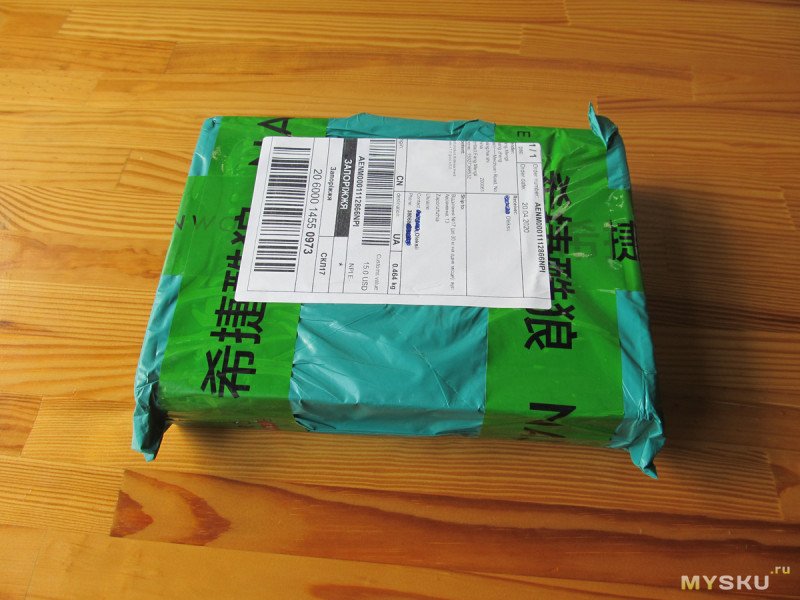
В посылке внешний винчестер и простенький чехол под него 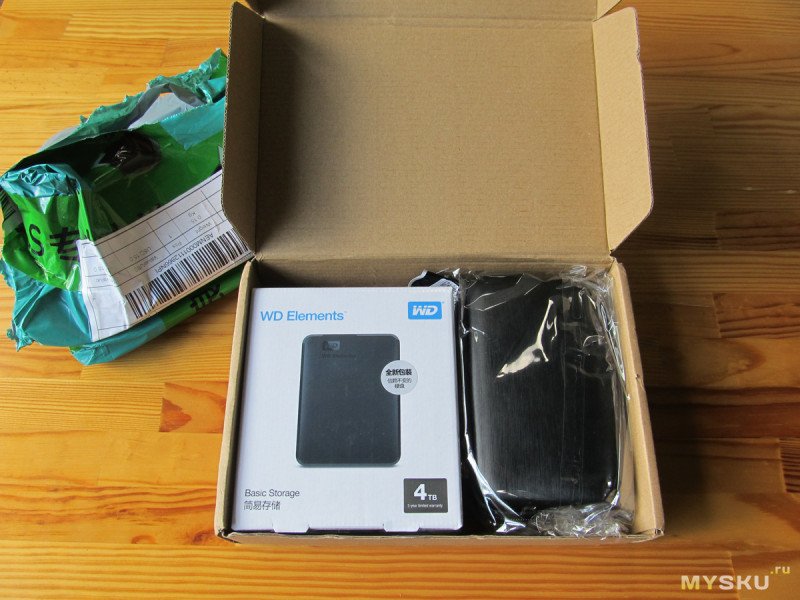
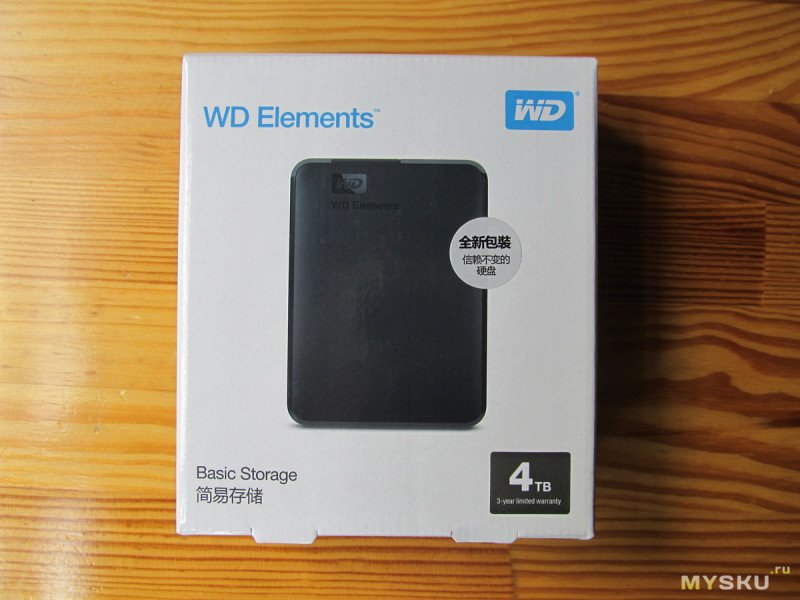
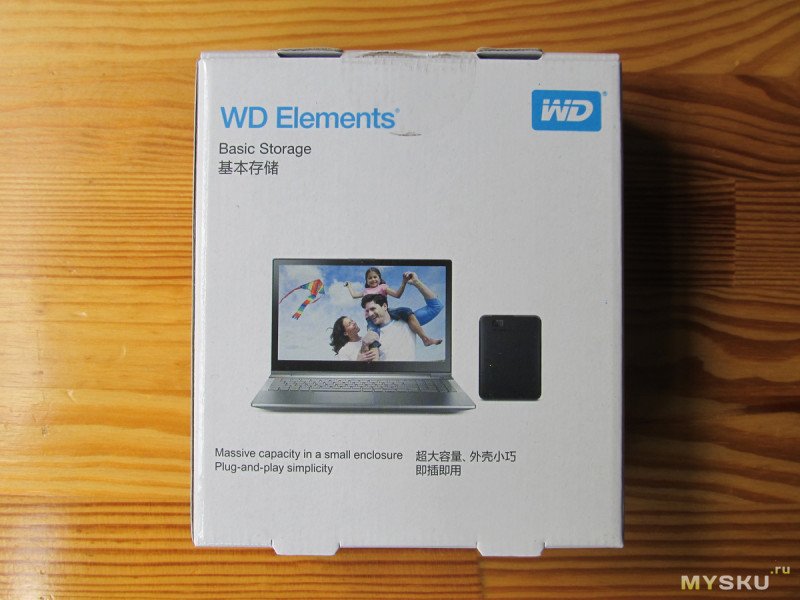
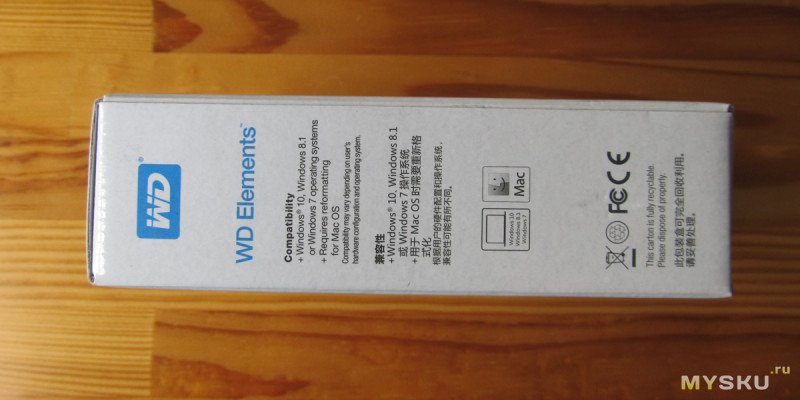
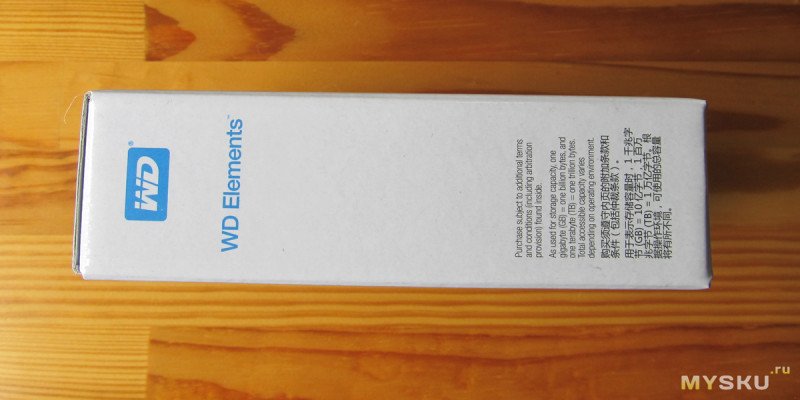
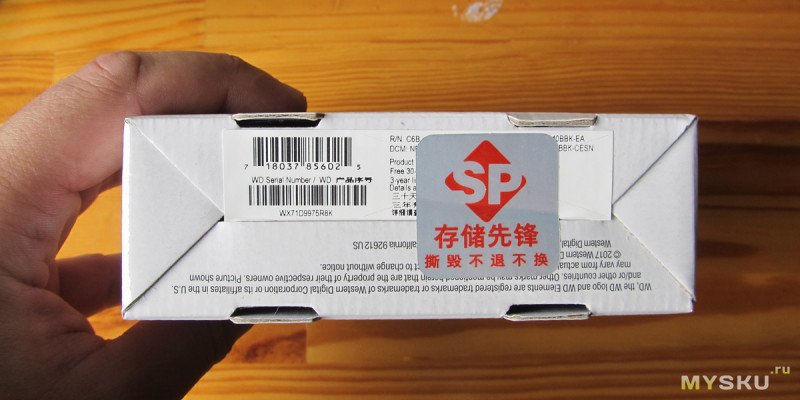
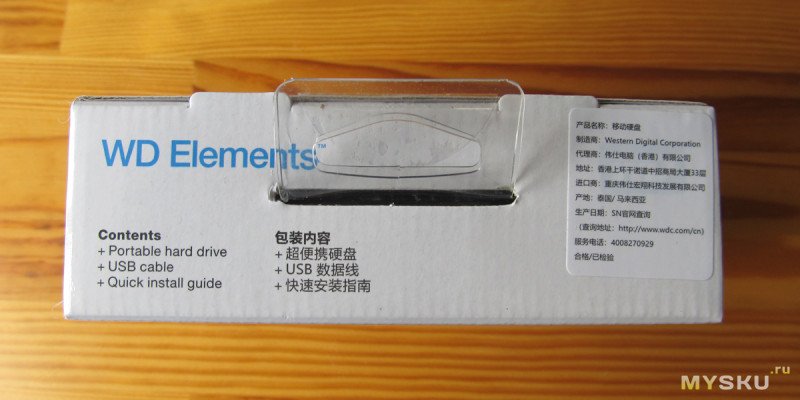
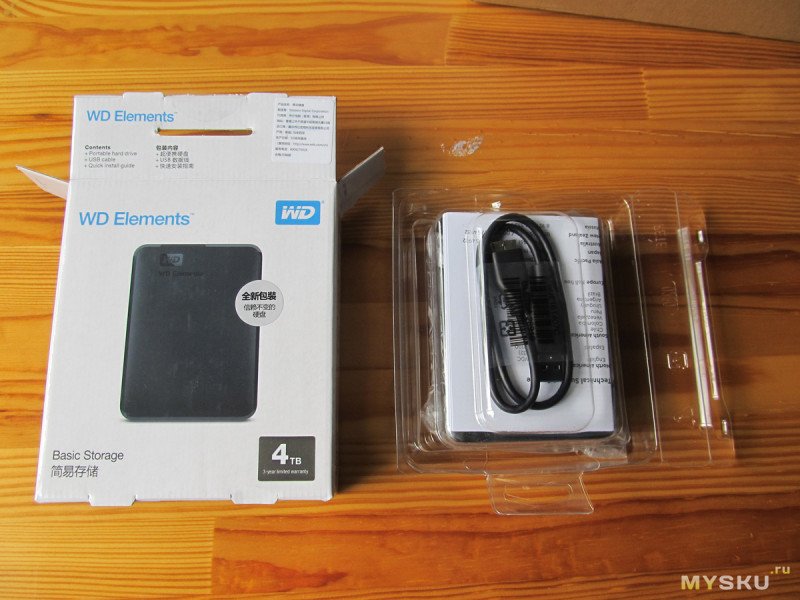
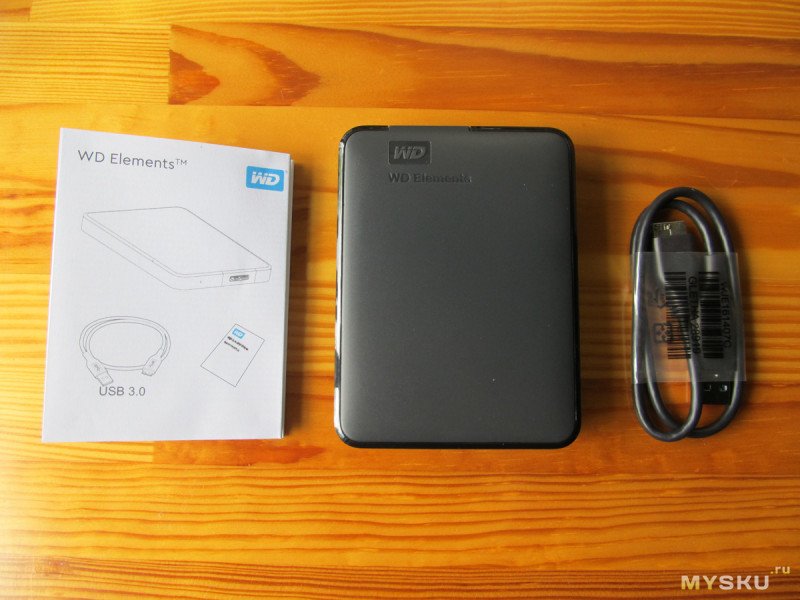
Собственно сам винчестер 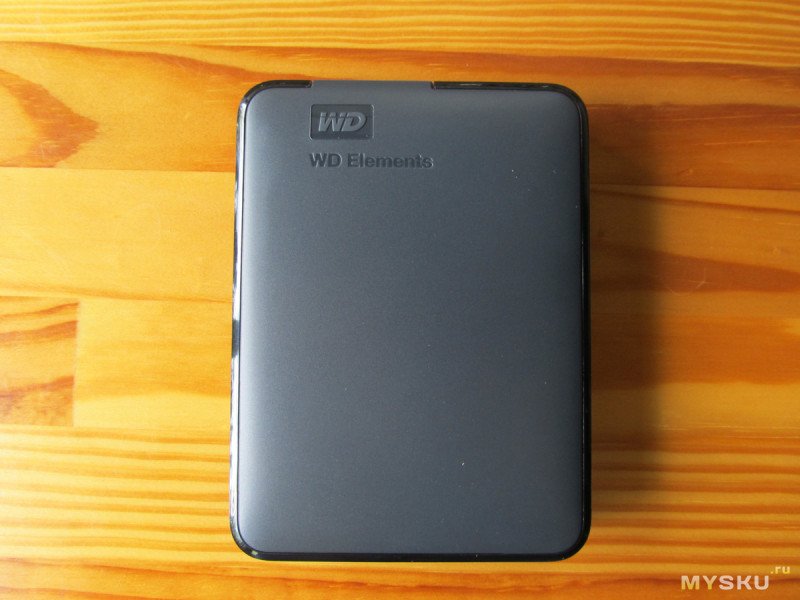
Разъем USB3.0. Левее от него- крошечный светодиод, который горит при обмене данными с винчестером 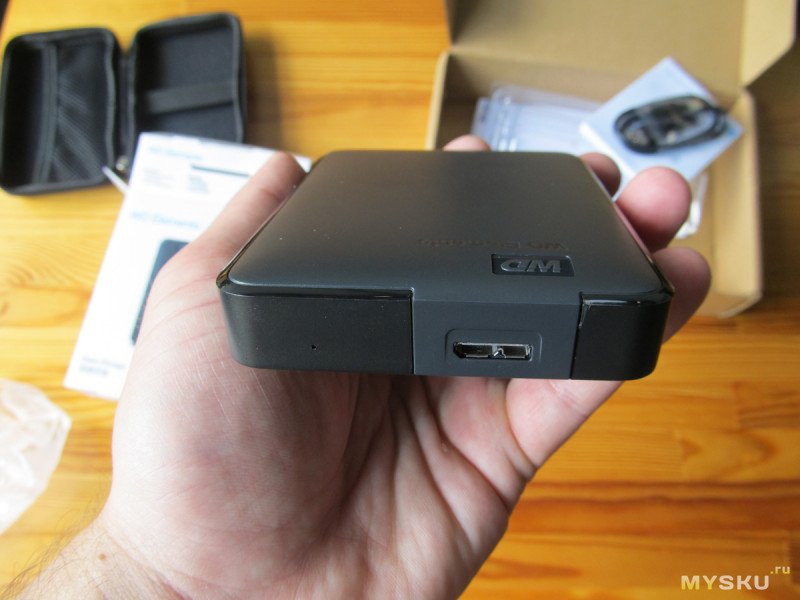
Снизу имеется шильдик и гравировки многочисленных сертификатов 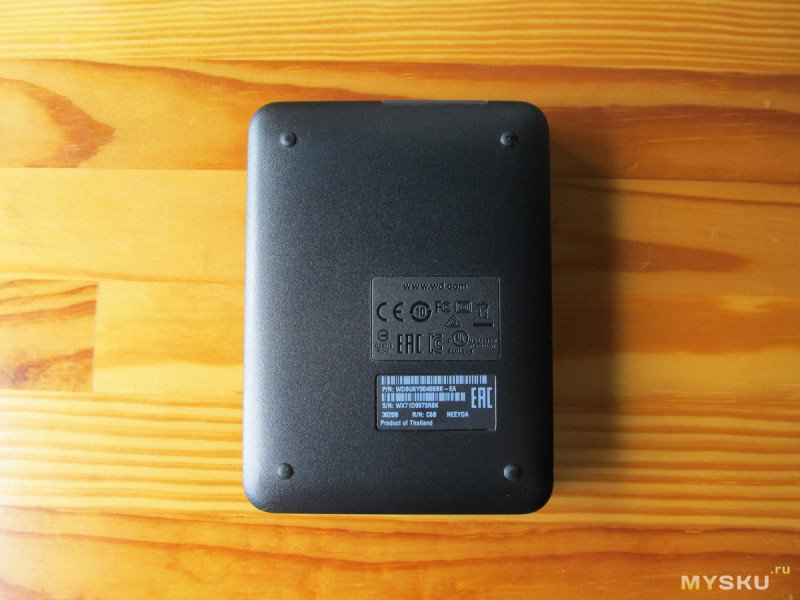
Шильдик 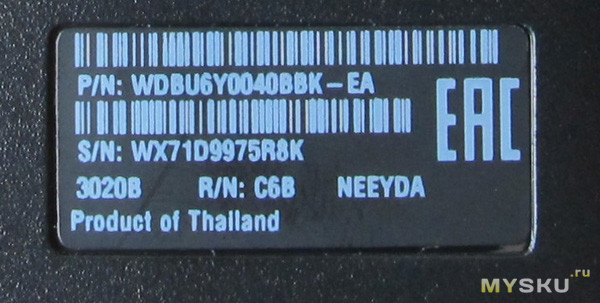
Внешний USB-винчестер в комплектном чехле 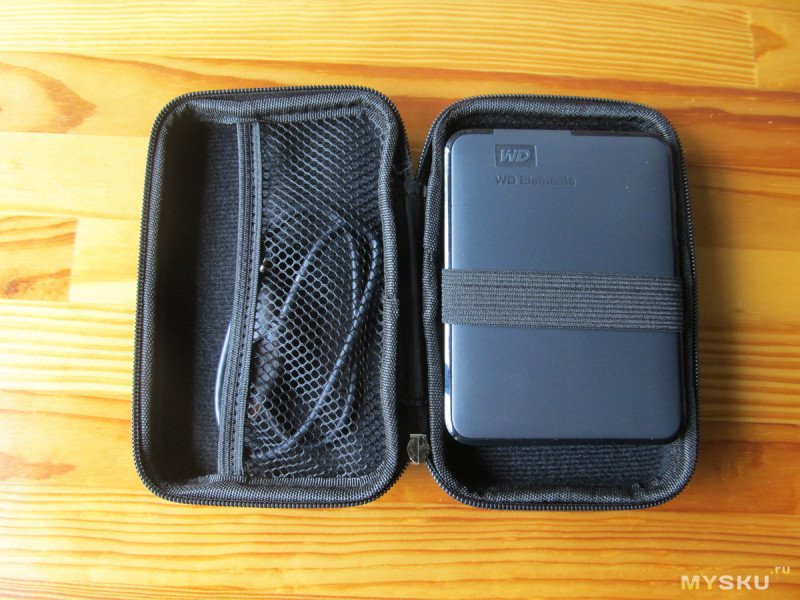
Чехол простенький и дешевый, пахнет синтетикой. Но это лучше, чем ничего.
Разборка корпуса
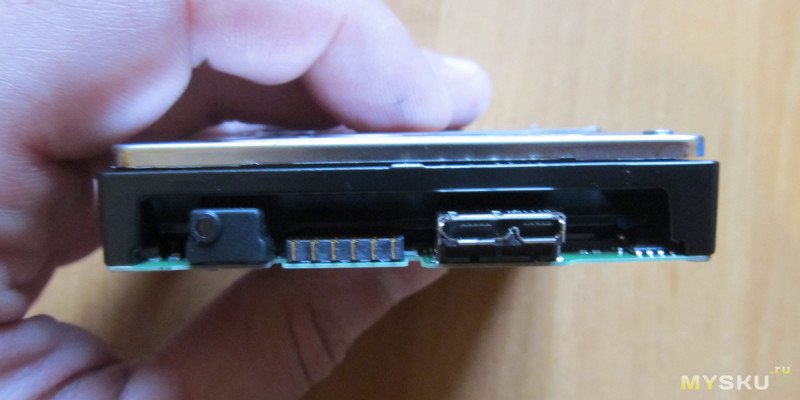
Корпус разборной, внутри находится винчестер 2.5». Разъем USB припаян прямо на плату винчестера, разъем SATA на плате отсутствует. 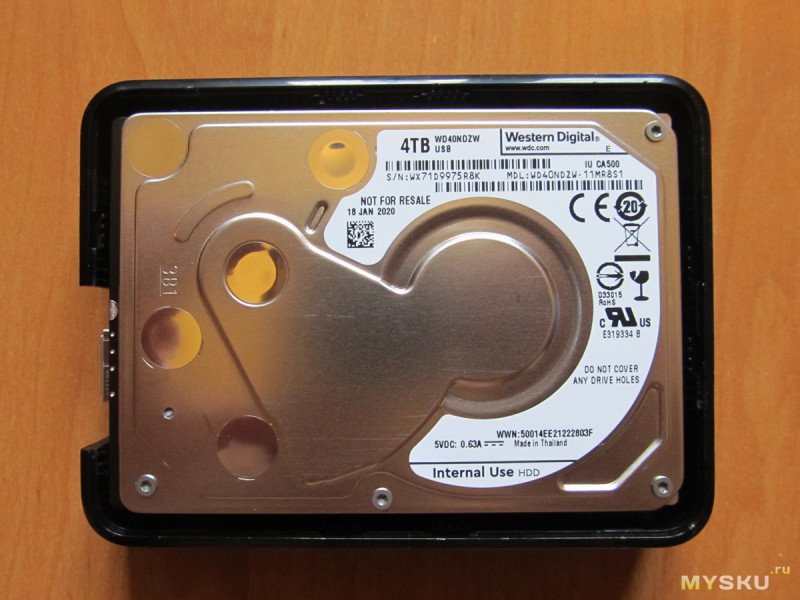
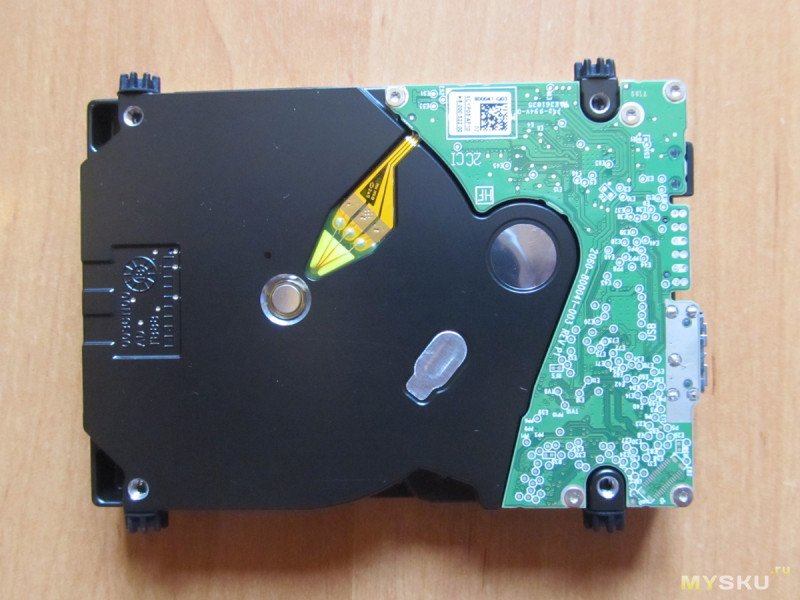
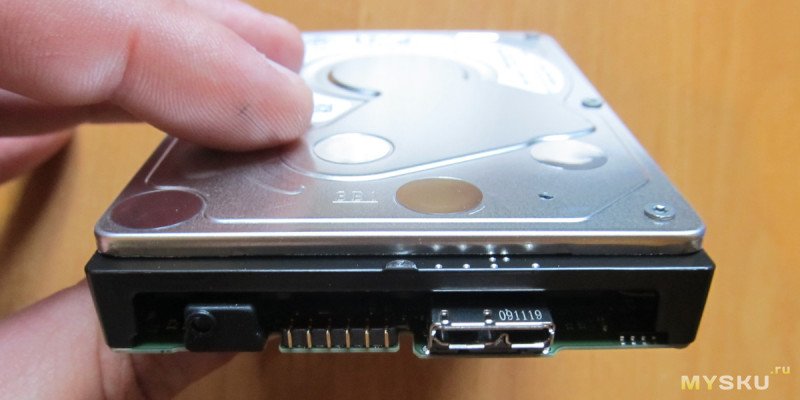
Работа
Работает винт тихо, не скрипит, не стучит 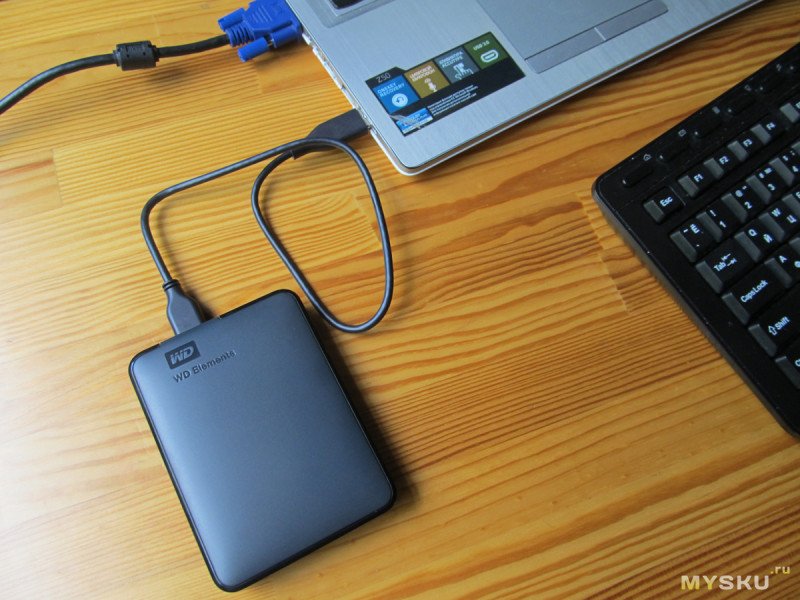
CrystalDiskInfo 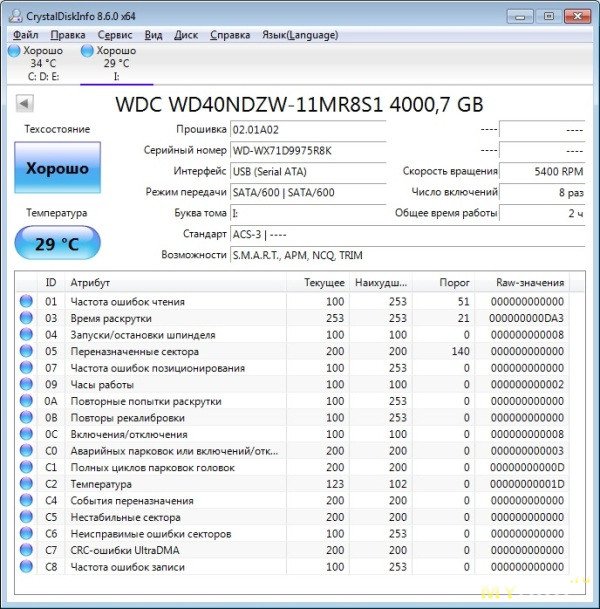
Естественно, реальный объем диска меньше заявленных 4Тб. Система видит 4000 гигабайт, а это только 3.6 терабайта 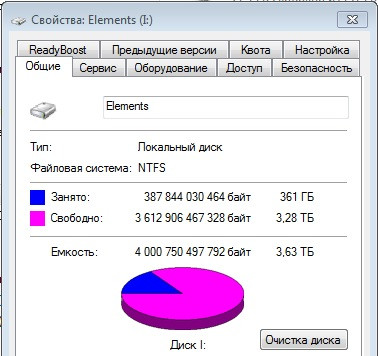
Тут компания WD включает дурачка и говорит, что по их мнению 1 гигабайт равен 1 миллиарду байт, а 1 терабайт равняется 1 триллиону байт. Соответствующую надпись они даже разместили на упаковке 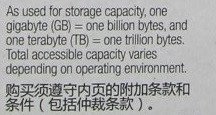
Но не будем слишком строги к WD, подобным грешат многие производители.
По этому поводу китайский продавец в описании товара написал с иронией: "Не рекомендуется покупать идеального человека".
Victoria HDD 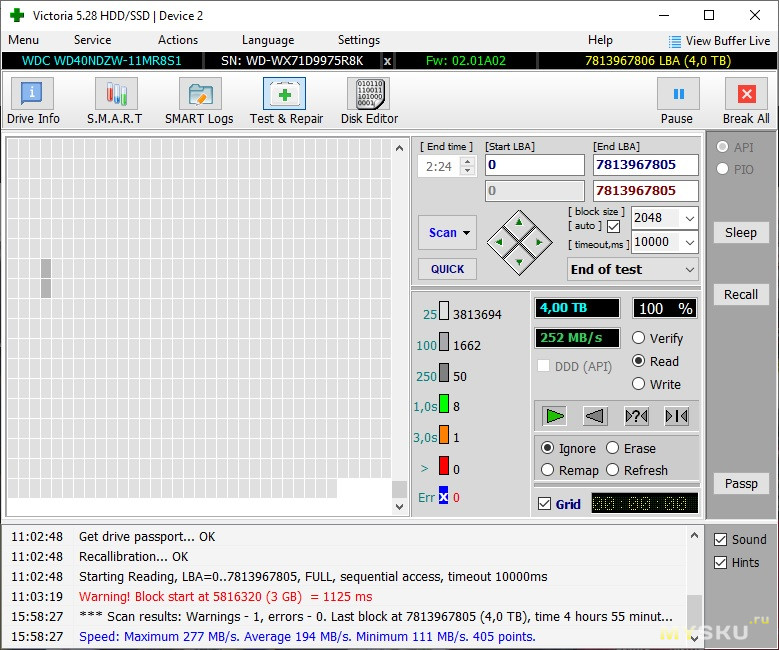
CrystalDiskMark
Скорость при работе через порт ПК usb2.0 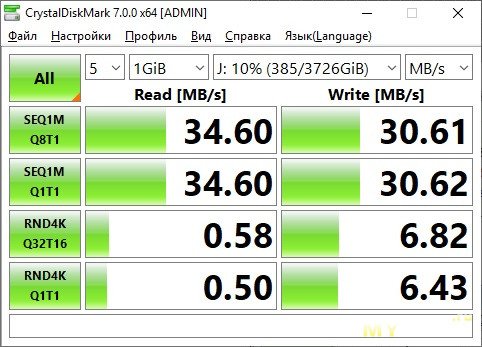
Скорость при работе через порт ПК usb3.0 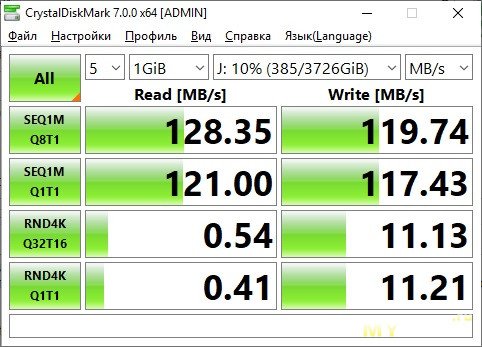
Винт очень шустро работает через порт USB3.0, 90-гигабайтную виртуальную машину я переписал из ноутбука(ssd) на этот внешний винт за 16 минут. Оказалось даже, что можно раскрыть виртуальную машину прямо с внешнего винчестера и вполне быстро работать в этой виртуалке.
Гарантия
Однако, хотя на винт я и получил 3-летнюю гарантию (вообще-то 37 месяцев), но гарантия эта не глобальная, а региональная- в Китае действует, а на Украине нет. 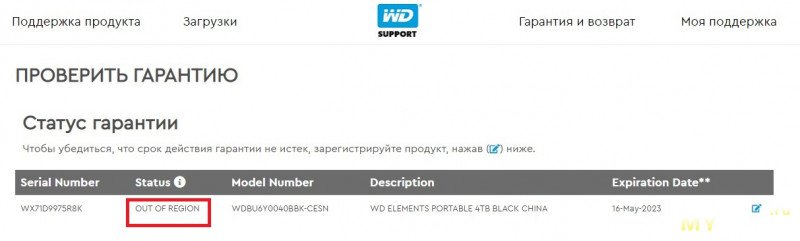
Обновление 2020-06-29:
Связался с техподдержкой WD и они со второй попытки через неделю мне ответили, что в случае проблем гарантийный регион можно поменять:
Стоимость
Как я писал, внешний винт WD 4TB мне обошелся в 122$. Перед заказом на Али я мониторил стоимость этого девайса в местных интернет-магазинах и оказалось, что здесь в начале марта в Украине он стоил 160$. Выгода в 40 баксов вполне оправдывала для меня риски заказа винчестера в Китае. Однако сейчас в местных интернет-магазинах этот винт стоит те же 120 долларов! При этом в магазине на Алике, где я закупался, подняли цену до 133$. Так что именно сейчас нет никакого смысла покупать данный девайс на Алиэкспресс.
Еще важный момент: международные посылки стоимостью более 100 евро на Украине облагаются таможенным налогом. Но продавец задекларировал стоимость посылки в 15$, поэтому я дополнительно ничего не платил.