Easy Transfer Sketch From One Drawing To Another Fusion 360 for Beginner

Click edit > paste or press ctrl+v. You should always consider if the rectangular or circular pattern features are better suited for your design.
Transfer Sketch From One Drawing To Another Fusion 360, Download the file in fusion archive (f3z) format. Use a cad tool like inventor or solidworks, and you’ll start to notice a difference in how assemblies are organized. I need this sketch in another file (filetwo.f3d).
Solved F360 Copy and Paste to another drawing? Autodesk From forums.autodesk.com
Needless to say, that change has caused some confusion for fusion 360 users young and old. Moveing a component from one sketch to a new sketch in fusion 360: Download the file in fusion archive (f3z) format. This instructable is on move a component from one sketch in fusion360 to a new sketch using past new.i will also be showing how to fix the component if the sketch was created on a plane.it is quite simple but a lot of people don�t know how to do it.
Solved F360 Copy and Paste to another drawing? Autodesk
Creating a new sketch can also be done in the reverse order. Select create sketch in the toolbar. You should always consider if the rectangular or circular pattern features are better suited for your design. Take, for example, a simple design like an adjustable wrench. I can not find the way how to copy one sketch from one project (fusion file) to another. @bedadevelopment for more content and 3d prints!let�s learn how to move a sketch in fusion 360!link to forum topic:
Solved F360 Copy and Paste to another drawing? Autodesk, Click edit > paste or press ctrl+v. Check out the following quick tip and enjoy this sneak peak into upcoming. Search �copying and pasting entire sketches� in the solidworks knowledge base. That said, there’s also some new functionality coming out soon that could also help you out of this bind. They might look like they line up, but they aren’t.
Fusion 360 Bodies vs. Components Fusion 360 Blog, Moveing a component from one sketch to a new sketch in fusion 360: So, as before, if you accidentally stop a sketch, just double click on it in the timeline to jump back to it! They might look like they line up, but they aren’t the same drawing, it’s the same thing with fusion 360, if you start a sketch,.

ZW3D vs Fusion 360 Lesson 3 Assembly, A window will appear to provide a choice of destinations for the folders/files. Use a cad tool like inventor or solidworks, and you’ll start to notice a difference in how assemblies are organized. I used this method for printing out a mechanical drawing (400x125mm) of a backplate i designed in f360. Navigate to fusion 360�s hub dashboard. Select the solid.

Learn Fusion 360 in 60 Minutes 3D CAD/CAM Modeling Tutorials, Create sketch lines, rectangles, circles and arcs using fusion 360; They might look like they line up, but they aren’t the same drawing, it’s the same thing with fusion 360, if you start a sketch, stop, and create a new one, fusion 360 won’t connect those lines, even if they look connected. By the end of this video, you’ll have.

Learning Autodesk Fusion 360 in Arabic 27 GrabCAD, To export a pdf (or other formats, like csv,dxf,dwg) file of a drawing do the following: So, as before, if you accidentally stop a sketch, just double click on it in the timeline to jump back to it! I’ll also show you many problems that. Click in the sketch or document where you want to paste the center of the.
Solved How to copy and paste a sketch Autodesk Community, Check the box next to any folders or files that are going to be moved. Sketch entities will move based on all of the sketch constraints, so not necessarily the first one selected. To copy a drawing and model so that the association between the part and drawing remain intact: How to create 2d drawings in fusion 360 (for beginners).

Learning Autodesk Fusion 360 in Arabic 15 GrabCAD, Foolishly, i�ve fully constrained them with multiple features (which i may later want to edit) before creating components or each one. Unfold the browser tree in the drawing environment. How to create 2d drawings in fusion 360 (for beginners) // welcome to day #26 of learn fusion 360 in 30 days. This instructable is on move a component from one.

The 5 Things That Made Me Take Another Look At Fusion 360, Rectangle is here just to take the place. To copy and paste a sketch: Click the eye* next to the sketch to show it. How to create 2d drawings in fusion 360 (for beginners) // welcome to day #26 of learn fusion 360 in 30 days. Moveing a component from one sketch to a new sketch in fusion 360:

IRONCAD vs Fusion 360 Lesson 3 Assembly, In fusion 360, i�ve created a bunch of parts (bodies). Create sketch splines and slots using fusion 360 If the projects reside on a personal hub then some files cannot be moved between projects. Rectangle is here just to take the place. Download the file in fusion archive (f3z) format.

June 22, 2016 Update What�s New DESIGN DIFFERENTLY, Download the file in fusion archive (f3z) format. Search �copying and pasting entire sketches� in the solidworks knowledge base. The drawing file can be created from a full assembly or individual components / bodies. One of the drawbacks, is that after 25+ years of accessing data locally through directories and files, we’re having you do it in a different way..

Fusion 360 Components, Drawings, & Assemblies, Then practice more advanced techniques, including attached canvases, splines, and sketch projections. After completing this module, you�ll be able to: To export a pdf (or other formats, like csv,dxf,dwg) file of a drawing do the following: Check the 3d sketch box in the sketch palette. This is the only way to export a file.
Preview September 2015 Update Fusion 360 Blog, Rectangle is here just to take the place. Share a public link of the drawing file. Explain key differences in design workflow to fusion 360 from tinkercad. To copy and paste a sketch: Take, for example, a simple design like an adjustable wrench.

Fusion 360 question(s), Click the eye* next to the sketch to show it. Select the closed sketch in the featuremanager design tree. The second great thing is that, it scales and aligns the airfoil to the selected construction line during the import. Needless to say, that change has caused some confusion for fusion 360 users young and old. Check the box next to.
How to copy typical reinforcement from one beam to another, Choose the destination and click move. Moveing a component from one sketch to a new sketch in fusion 360: Click edit > copy or press ctrl+c. Autodesk fusion 360 training and course tutorial how to move a sketch with move tools or by using midpoint snaps for beginner at basic level, check it out. In this tutorial, i’ll show you.
Solved F360 Copy and Paste to another drawing? Autodesk, Needless to say, that change has caused some confusion for fusion 360 users young and old. Create sketch lines, rectangles, circles and arcs using fusion 360; How to create a 2d drawing from a design in fusion 360 that can be printed or exported. Create sketch splines and slots using fusion 360 In fusion 360, copying a sketch has many.
Disable Fusion 360 Auto Projection While Sketching, Click edit > copy or press ctrl+c. Autodesk fusion 360 training and course tutorial how to move a sketch with move tools or by using midpoint snaps for beginner at basic level, check it out. Select the solid tab in the design workspace. In this tutorial, i’ll show you how to copy sketches within a sketch, to other sketches, and.

Verschieben einer Komponente von einer Skizze in eine neue, Use a cad tool like inventor or solidworks, and you’ll start to notice a difference in how assemblies are organized. Copy and move designs from one folder to another. The rectangle tool is a commonly used sketch tool in any cad program. Which means that the airfoil comes at the right dimension and with the right angle (provided you selected.

Learning Autodesk Fusion 360 in Arabic 26 GrabCAD, Unfold the browser tree in the drawing environment. One of the drawbacks, is that after 25+ years of accessing data locally through directories and files, we’re having you do it in a different way. That said, there’s also some new functionality coming out soon that could also help you out of this bind. On the folowing picture is source sketch.

When to use Fusion 360 Bodies and Components Design & Motion, How to create 2d drawings in fusion 360 (for beginners) // welcome to day #26 of learn fusion 360 in 30 days. Rectangle is here just to take the place. Click the eye* next to the sketch to show it. Follow the steps to create a 2d drawing from a 3d design: That said, there’s also some new functionality coming.

Moving sketch in z plane Autodesk Community, How to create 2d drawings in fusion 360 (for beginners) // welcome to day #26 of learn fusion 360 in 30 days. Create a 3d sketch in fusion 360. In fusion 360, copying a sketch has many different nuances based on where you’re wanting to paste the sketch. I prepared an empty sketch as the place where i want to.

Fusion 360 Drawings Workspace Basic Training Part 1, I need this sketch in another file (filetwo.f3d). If the projects reside on a personal hub then some files cannot be moved between projects. Search �copying and pasting entire sketches� in the solidworks knowledge base. In fusion 360, i�ve created a bunch of parts (bodies). By the end of this video, you’ll have a solid understanding of all three rectangle.
Solved How to copy the sketch from one Fusion file to, Click edit > copy or press ctrl+c. That said, there’s also some new functionality coming out soon that could also help you out of this bind. Click the eye* next to the sketches folder containing the sketch to show it. Click model and select drawing from design. How to create 2d drawings in fusion 360 (for beginners) // welcome to.
June 22, 2016 Update What�s New DESIGN DIFFERENTLY, After completing this module, you�ll be able to: Search �copying and pasting entire sketches� in the solidworks knowledge base. To copy and paste a sketch: Check the box next to any folders or files that are going to be moved. Creating a new sketch can also be done in the reverse order.

The 5 Things That Made Me Take Another Look At Fusion 360, Unfold the browser tree in the drawing environment. In this tutorial, i’ll show you how to copy sketches within a sketch, to other sketches, and to other fusion 360 files. If the projects reside on a personal hub then some files cannot be moved between projects. The rectangle tool is a commonly used sketch tool in any cad program. Check.

5 Ways Fusion 360 Improves Team Collaboration SolidSmack, By the end of this video, you’ll have a solid understanding of all three rectangle commands that are available in fusion 360. Select the closed sketch in the featuremanager design tree. To make things even more efficient, fusion 360 offers 3 types of rectangles, all of which i’ll be covering in this video. I will delete it later. Simple guide.
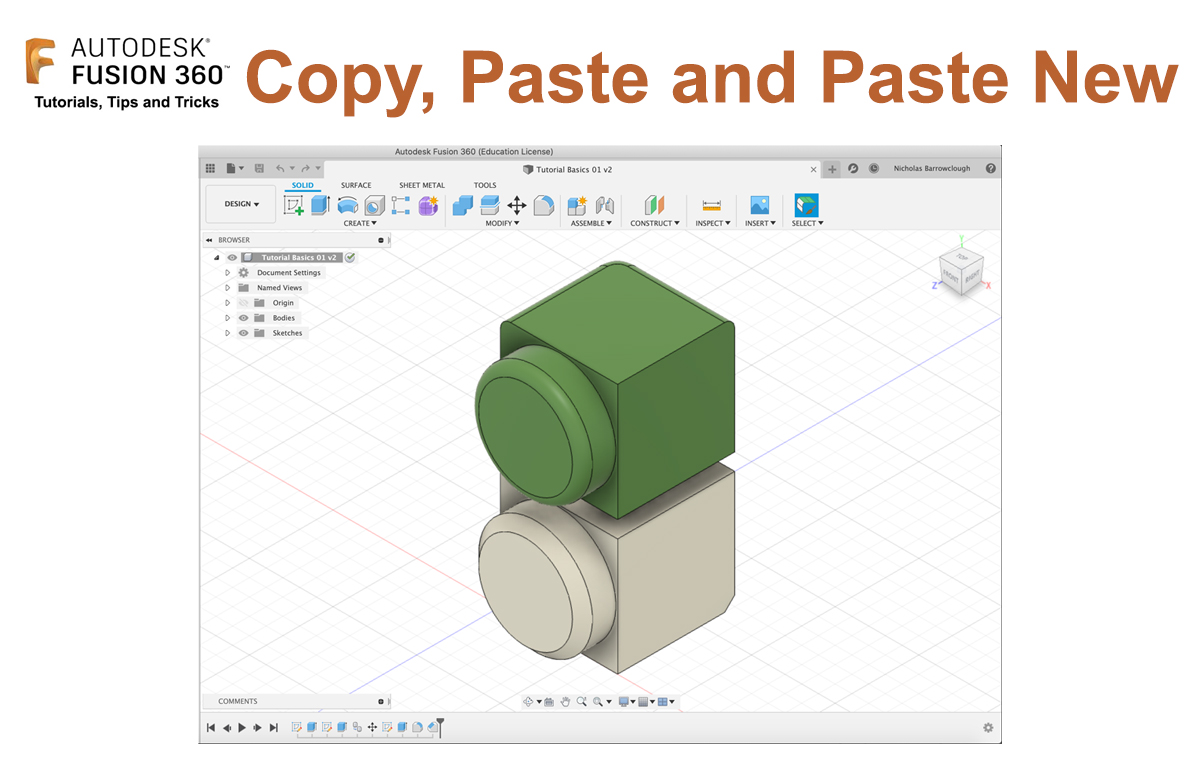
Fusion 360 – Copy, Paste, Paste New
In Fusion 360 you have bodies and components, which are created by the various modeling tools available to us. Sometimes you may have created a complex shape and to save time, wish to duplicate, or copy and paste this object. Sometimes you want it to remain as a clone of the original, so if you make changes they affect every copied object. Sometimes you need an independent new object that is a starting point but can be changed with no consequence to the original.
- Post author
In Fusion 360 you have bodies and components, which are created by the various modeling tools available to us. Sometimes you may have created a complex shape and to save time, wish to duplicate, or copy and paste this object. Sometimes you want it to remain as a clone of the original, so if you make changes they affect every copied object. Sometimes you need an independent new object that is a starting point but can be changed with no consequence to the original.
When working with bodies, it’s simple to copy and paste, or move and copy an object, to create a new version that can be edited independently., However, when working with components things are a little different,. Move and copy creates a clone, and now whatever you do the one happens to all. So the move copy command isn’t applicable in this case for a component, you need to use the copy and paste new command instead.
Skills Covered
Move and Copy
Copy a Body
Copy a Component
Pase and Paste New
How to Copy and Paste a Sketch in Fusion 360 [Update 2022]
To copy a sketch or any sketch elements onto the clipboard is very easy, and there are multiple ways to do it. First, you can select the sketch entities in the graphics window using either a window select or holding CTRL while selecting the sketch entities you want to copy. Alternatively, you can select the sketches in the browser tree or the timeline.
Notice that when selecting your sketches, you don’t have to limit it to sketch entities in only one sketch. You can copy from multiple sketches — you don’t even need to be in a sketch to use the copy command.
After you select the sketches or sketch entities you want, either right-click and select Copy or hold down CTRL + C on your keyboard.
How to paste a sketch in Fusion 360
To paste your sketches into a new sketch, you must first either enter an existing sketch or start a new sketch. If you try and paste without being in a sketch, nothing will happen. Once you are in a sketch either right-click and select Paste or hold down CTRL + V on your keyboard.
Now you know how to copy and paste a sketch in Fusion 360. To learn more about the Sketch Environment in Fusion 360, check out this Sketch Basics video series from our self-paced learning portal. Ready to test out your sketch skills? Download Fusion 360 today.
Copy and Paste Sketches, Bodies, and Components in Fusion 360
In Fusion 360, copying a sketch has many different nuances based on where you’re wanting to paste the sketch.
You should always consider if the Rectangular or Circular Pattern features are better suited for your design. The pattern features are more precise and provide a better method of editing.
Be aware that how you select the sketch geometry is important and can affect the outcome.
Selecting Sketch Geometry
If you’re wanting to select the entire sketch you can simply click and drag over the sketch geometry.
Dragging from the upper lefthand corner to the lower right will select everything within the bounding box.
Contrary, dragging from the lower right-hand corner to the upper left will select only the sketch geometry that is touched by the bounding box.
3 Ways to Copy a Sketch
After selecting the desired sketch geometry there are three ways to copy a sketch.
- Right-click in the canvas window and select “Copy” from the menu.
- Use the copy shortcut combo, CTRL + C (Windows) or CMD + C (Mac).
- Use the keyboard shortcut letter “M” to activate the “Move/Copy” feature. Then, select the “Create a Copy” checkbox in the dialog.
Pasting a Sketch Within the Same Sketch
To paste a sketch within the same sketch you can use the following three methods. Note: You must be in the sketch environment to paste a sketch.
- Right-click in the canvas window and select “Paste” from the menu.
- Use the paste shortcut, CTRL + V (Windows) or CMD + V (Mac)
- After selecting the “Create a Copy” checkbox in the dialog you can move the sketch into place. You will need to click “OK” to confirm (or paste) the sketch.
Pasting a Sketch to Another Sketch
To paste sketch geometry to another sketch you will need to make sure the second sketch, or desired pasting location, is currently active. If not, double-click on your sketch in the timeline to “edit” the sketch. Otherwise, you will need to create another sketch with the “Create Sketch” command in the toolbar.
Fusion 360 does not allow sketches to float in space. This is why you won’t see the “Paste” option from the right-click menu when you’re not in a sketch environment.
You need to create a new sketch on one of the origin panes, a construction plane, or if you already have some bodies with faces, you can create a new sketch of any one of the planar faces.
Copy Bodies in Fusion 360
Fusion 360 bodies can be copied similarly to sketches. To copy, right-click on a Body in the Browser and select “copy.” You can also select the body in the Browser to use the keyboard shortcuts CTRL + C (Windows) or CMD + C (Mac).
Pasting a Body in the Same File
Bodies can be copied within the same design file while in Parametric Modeling (History-Based) mode or Direct Editing mode.
There are two ways to paste a body within the same file.
- Right-click in the canvas and select “Paste” from the menu
- Use the keyboard shortcut CTRL + V (Windows) or CMD + V (Mac)
Pasting a Body to Another Design File
Pasting a body to a second design file can only be done if you’re in Direct Editing mode. To enter Direct Editing mode, right-click on the top-level compoennt and select “Do not capture design history.”
The reason it has to be Direct Editing mode is that bodies do not have the sketches and other reference geometry tied to it. Therefore, Fusion 360 would not be able to properly place the body in the parametric timeline.
As a workaround, you can always create a new component from a body. Then, you can copy the component from one design file to another, as outlined below.
Copy Components in Fusion 360
Fusion 360 components can be copied similarly to sketches and bodies. To copy, right-click on a Component in the Browser and select “copy.” You can also select the body in the Browser to use the keyboard shortcuts CTRL + C (Windows) or CMD + C (Mac).
Pasting a Component in the Same File
Many users go to paste the component with the right-click menu or keyboard shortcut, only to find that it won’t let them paste. The reason is due to the copied component being the active component in the Browser. You cannot paste an active component within itself.
You will first have to activate the top-level component in the Browser. You can then right-click, which presents you with the “Paste” and “Paste New” options.
Paste vs Paste New Explained
The Paste command will create an instance of the copied component.
When using the paste command, the names are the same, except for the instance number that shows after the name.
Any updates or changes made to the first component will be reflected in the second component.
Contrary, the “Paste New” option will create a completely new component, which includes the copied geometry. This means (with the paste new option) the component will not be tied to the original component.
When using the “Paste New” command, you’ll notice the component name has a number 1 in parenthesis at the end of the name. This lets us know that the component was copied, but it’s a different name, and thus it’s not tied to the original component. This is also why I would recommend always renaming your components after utilizing the paste new command.
Pasting a Component to Another File
Because components do include the relevant sketches, construction geometry, and other reference geometry, they can be copied between design files.
Use the right-click menu or the keyboard shortcuts CTRL + V (Windows) or CMD + V (Mac) to paste the component.
Note that when pasting a component to another file you are only given the “Paste New” option, which is what the shortcut will use. This is because the files cannot be the same instance, without them being linked components (discussed below).
Linking Components Between Files
If you want a component in another design file to be tied to the original then you will need to use the method, “Insert Into Current Design”.
First, right-click on the component to select “Save Copy As”. This will save just the component to the data panel, not the entire design file, allowing you to insert the component alone.
Open the second design file in another tab.
With the data panel open, right-click on the design file or the component and select “Insert Into Current Design”.
After the component is placed into the second design file you can change the component’s location. The component will have a link icon, signifying the component is tied to the original.
Any changes to the original component will be updated on the second design file, as long as they remain linked.
Should you ever need to unlink the components, you can do so by selecting the “Break Link” option from the right-click (component) menu.
Break links with caution, as once you do this you can’t get it back without inserting the component again. Although, you can still hit the Undo command if you haven’t made any changes.
Questions?
Don’t hesitate to comment your questions below!
In this tutorial, I’ll show you how to copy sketches within a sketch, to other sketches, and to other Fusion 360 files. I’ll also show you many problems that users face when trying to copy sketches in Fusion 360.
Second, we’ll take a look at copying bodies and components, including the difference between “Paste” and “Paste New” in Fusion 360.
Transcript:
Hey there, it’s Kevin Kennedy and today I’m going to show how to copy and paste sketches, bodies, and components in Fusion 360. There are two different scenarios for copying sketches. We’ll start by copying the sketch within the same design file, and then we’ll look copying a sketch to a second design file.
Afterward, we’ll look at two ways to copy bodies and components, including within the same design file and to another design file.
I’ve gone ahead and saved a file and I’ve created a new component for the first example.
Let’s first just sketch out a simple rectangle so we can see how sketch geometry copies. I’ll hit the keyboard shortcut letter “R,” as in Romeo, to activate the 2-point rectangle.
I’ll just draw this out on the XY origin plane to a random distance. Then, I’ll clear out the rectangle command with the escape key.
Let’s first take a look at copying this sketch geometry within the same sketch. I should note, that if it makes sense for your design, you should always utilize the rectangular or circular pattern, as that will provide more precise results.
However, if you need to copy the sketch for another reason, then you can select the sketch geometry one-by-one or you can simply click and drag over the entire sketch.
Regardless of how you select it, once the geometry to copy is selected, you have three options. First, you can right-click and select “copy” from the menu. The second option would be to use the standard copy shortcuts of CTRL + C on a Windows Machine and CMD + C if you’re on a Mac. Then, to paste the sketch you can either right-click to select “Paste” or you can use the standard paste shortcut of CTRL or CMD + V.
Notice how when you paste your sketch it opens up the Move / Copy dialog. Before I show you a few more tricks, I’m going to hit cancel, so I can show you the third way to copy, which is my favorite.
With the sketch geometry select, I’ll hit the keyboard shortcut “M,” as in Mike, to active the “Move/Copy” command. I’ll select the “Create Copy” checkbox in the dialog, and we’re back at the same position we were after using the first two options.
I simply find this third way to be a bit faster, but ultimately they’re all the same.
Because I’m going to cover quite a few methods and workflows in this tutorial, you may find it helpful to reference them later on my webpage. Head to ProductDesignOnline.com/31 or simply click the link down below in the video description.
At this point, our darker blue lines show the copied sketch geometry that needs to be placed.
We can use the Move command by dragging the directional arrows, typing out an exact value in the dialog, or by the free form square in the middle of the arrows. Of course, you can also utilize the number of “Move Type” options, or set your pivot point to a new point, if you’re trying to align the sketch in a specific manner.
Before I show you how to copy a sketch to a completely different sketch, I want to show you one common error or cause of confusion that users often ask about.
If you click and drag over the sketch geometry from the upper left corner, then your selection will include anything that was completely within the bounding box. In other words, the selection should encompass everything that you want to copy and paste.
If I go to create a copy of this, then as you’d expect, everything that was within the selection box is included in the geometry to be copied.
On the other hand, if you click and drag from the lower right towards the upper left this will select everything that your bounding box touches. However, it does sometimes appear that all the geometry is selected.
For example, look at how this rectangle appears to be selected. But when I go to create a copy you’ll see that only the two sketch lines in the lower right are included, as those are the only two lines that my selection was touching. I’ve seen many people get tripped up on this so I just wanted to spend a minute to make this more clear. You’ll find it easiest to select sketch geometry one-by-one if you’re not selecting the entire sketch.
Let’s now take a look at copying one sketch to another sketch. First, I’m going to create a few circles so this sketch has more entities to copy. I’ll then hit the finish sketch button.
Right-clicking on the Sketch in the browser, you’ll see that there is not a copy option. This is somewhat misleading, as we can copy the sketch without the sketch environment being active. However, I should note that you do need to be extremely careful when doing this. I only have this one sketch, so it wouldn’t be a problem. But, if you have other sketches, you can select any of their sketch geometry if you’re not in an active sketch environment.
If you have other sketches I would recommend hiding them in the browser before you go to select over the entire sketch. Alternatively, you may find it faster to simply double-click on the sketch in the timeline to edit the sketch, where you can then select it without any concerns.
We’re going to need to copy it using the right-click menu or the shortcut keys. I’ll use the hotkeys CMD + C.
Pasting the model is where many users get confused and wonder why it’s not working. As you saw while we’re in an active sketch environment, we can simply hit CTRL or CMD + V to paste the model or we can use the right-click menu. However, if I right-click, you’ll see the paste option doesn’t come up. And if I hit CMD + V, you’ll see that nothing happens. This is because we need to be in an active sketch, as Fusion 360 does not allow sketches to be floating around in space.
We need to create a new sketch on one of the origin panes, a construction plane, or if you already have some bodies with faces, you can create a new sketch of any one of the planar faces.
For this demo, I’m going to hit the “Create Sketch” button in the toolbar, and this time I’ll select the XZ origin plane.
Watch what happens when I hit CMD + V to paste it (or CTRL + V if you’re on Windows). You’ll see the sketch is copied over to the new sketch without a problem, and we’re thrown into the “Move/Copy” command where we can move the sketch geometry into the desired position.
To remember this, you can think of this being similar to working in a word document. Let’s say we have document A open, which contains a few paragraphs. You decide you want to copy the first paragraph over to a second document, which we’ll call document B. And we can think of the documents as representing our Fusion 360 sketches. You select the paragraph and copy it to your clipboard. If you were to hit paste, it would paste it within the same document, it wouldn’t automatically open a new document.
Thus, we would need to open document B first, and then we can paste it. Remember this as a reminder that you always need to be in the second sketch environment to paste one sketch to another.
Going off the document analogy, you may be wondering if you can copy a sketch to another Fusion 360 design file.
I’ll toggle to this second design file and I’ll hit CMD + V. Again, you’ll see this doesn’t do anything, as Fusion 360 doesn’t allow sketches to be floating in space. We need to tell the program which planar surface the sketch should be placed on.
If I create a new sketch on one of the origin panes I can then right-click to select paste or I can use the keyboard shortcuts.
Again, notice how the selected sketch geometry can be copied over as long as you’re pasting it in an active sketch environment.
The last thing I want to cover with copying sketches before we move onto components is a common question about why can’t I just copy the entire sketch in the browser.
The reality is you can, however, you can only do this in “direct editing mode.” Fusion 360 is not able to do this with parametric modeling, because it wouldn’t be given a relationship to the features in the history timeline.
If I right-click on the sketch in the Browser, you’ll see there is no copy option. However, once I right-click on the top-level component and turn off the design history, you’ll see that I can right-click on the sketch again, and there is now the option to copy an entire sketch, without the need to select the individual geometry.
By default, when you paste the sketch, it will be on the same sketch plane. However, because we’re given the move command, you can use the rotation sliders, to rotate the sketch onto its own plane.
If you edit the sketch, you’re then placed in the normal sketch environment, where Fusion 360 automatically looks at the sketch.
The downside to this method is the fact that when you turn the “Capture Design History” back on, you’re going to lose the ability to edit the sketch because this will all be treated as a base feature, within the history-free mode.
I’m curious how often you find yourself copying and pasting sketches, versus projecting sketches or simply creating them from scratch. Join the conversation by commenting on this video down below!
While you’re at it, help me out by clicking that thumbs up icon if you’re enjoying this tutorial, or the thumbs down icon if you’re not.
Let’s now take a look at the methods and tricks behind copying components within the same file.
Back in the first design file, I’m going to extrude one of these sketches, so the component has at least one body. This will give us a better idea of how the component is copying and what happens to the bodies.
We can first duplicate one of the bodies, by selecting “body 1” in the browser. Again, we can then either right-click to select copy or we can use the shortcut.
I’ll click “OK,” after placing the copied body with the move command.
Let’s now try to copy the component. I’ll right-click on the component and I’ll select “Copy”.
I’ll then, right-click on the canvas, and you’ll see that there is no “Paste” option, nor will the shortcut work. This is another common roadblock that I see users asking about.
The reason is due to the copied component being the active component in the Browser. You cannot paste an active component within itself.
If we activate the top-level component, we can-right click and you’ll see that we’re then given two options. We can either “Paste” the design or we can select “Paste New”.
Let’s start by selecting the “Paste” command. The Paste command will create an instance of the copied component. I’ll just move this over to the right and I’ll place it.
Notice how the component names are the exact same, except for the instance number that shows after the name. This means any updates or changes made to the first component will be reflected in the second component.
We can quickly test this by hiding one of the component bodies. As you’ll see, they’re tied together.
Let’s now take a look at the “Paste New” option. I’ll make sure that Component 1 is still copied by copying it again and then I’ll right-click on the top-level component, this time selecting the “Paste New” option.
The “Paste New” command will create a completely new component, which includes the copied geometry. This means the component will not be tied to the original component.
I’ll move this to the left so we can take a look at this. First off, you’ll notice this component has a number 1 in parenthesis, at the end of the name.
This lets us know that this was copied, but it’s a different name, and thus it’s not tied to the original component. I would recommend always renaming your components after utilizing the paste new command.
If we toggle one of the bodies of component 1 off again, we’ll see that the 3rd component or the paste new component is not affected at all.
I should also clarify that you can also right-click on the canvas window, to use either paste or paste new, as long as the copied component is not currently active.
Last but not least, let’s take a look at copying both a body and component to a different Fusion 360 file.
I’ll first copy one of the bodies in the browser.
In the second design file, you’ll see that I cannot paste the body with the shortcut keys or the right-click menu.
With bodies, you can only copy them within the same design file while in parametric or the history-based design mode. However, you can copy bodies to another design file if you’re in direct modeling mode, where the design history is not captured. The reason it has to be direct editing mode when copying a body to another file is that bodies do not have the sketches and other reference geometry tied to it. Therefore, Fusion 360 would not be able to properly place the body in the parametric timeline.
If you have a body that’s not in a component, that you’re wanting to copy, you could right-click and select “Create component from bodies.”
Because components do include the relevant sketches, construction geometry, and other reference geometry, we can copy them between design files.
Back in the first design file, I’ll copy the component, and I’ll head to the second file. You’ll see that I’m now given the option of “Paste New”.
Now you’re only given the option of “Paste New” because this method of copying components into another design file will not sync the component to the original.
If you want the component in another design file to be tied to the original then you will need to use the method, “Insert Into Current Design”.
First, back in design file 1, we’ll need to right-click on the component to select “Save Copy As”. This will save just the component to the data panel, not the entire design file.
I’ll open the second design tab and then I’ll open the data panel. Right-click on the design file or the component we saved, and select “Insert Into Current Design”.
You’ll notice the component is now placed, and after you confirm its location the component will have a link icon, signifying the component is tied to the original. This way, any changes to the component in design file 1 will be updated accordingly in design file 2, as long as they remain linked.
Should you ever need to unlink the components, you can do so by selecting the “Break Link” option from the right-click menu. Just do this with caution as once you do this you can’t get it back without inserting the component again. Although, you can still hit the Undo command if you haven’t made any changes.
To summarize, there are many workflows, tricks, and different quirks to understand to successfully copy sketches, bodies, and components within the same or different design files.
Remember, with sketches, you can copy a sketch whether or not your sketch is active, but you can only paste a sketch if you’re in an active sketch environment.
With bodies, you can paste them within the same component or file, but bodies can only be pasted into a second design file if the design history is turned off.
Components can be pasted within the same file as linked instances or new copies. They can also be pasted into another design file as a new copy. To insert a linked instance of a component, you’ll need to use the “Insert into current design” feature from the data panel.
Last but not least, I wanna give a quick shoutout to those who supported the channel this past week via my Buy Me a Coffee page.
Special thanks to Bertram Huang, Woodsy, and Mark Heist.
As always, I appreciate you taking the time to watch this tutorial. Click that thumbs up icon if you learned something in this video and be sure to click that playlist in the lower right-hand corner to learn more about Fusion 360 sketching.
Reader Interactions
Comments
Nothing more difficult, simple copy within a sketch would be neat.
When I use “M”, the only option is move. The copy box is not available
I made a square sketch, tried ctrl+C and ctrl+V, nothing happens. I checked C/V with word, works fine.
Something simple but yet is beyond my understanding. I select the object, it turns blue, then if I use “M”, it asks me to select the object which may be a clue for you.
I’ve followed all examples for 2 hours and this simple copy paste is not working for me.
I have ‘sometimes’ been able to copy paste a body, it seems to always drop the paste on top of the copied object so you’re not sure where it is.
I’ve tried to copy a sketch, create a new sketch click the plane and paste, nothing happens.
Just can’t be this hard. I’m missing something simple.
The ‘Create Copy’ checkbox will appear at the bottom of the Move dialog once you select the objects. It will be that way for sketches, bodies, and components.
Generally, I find it easier to select the desired object(s) first, then activate Move. Whenever you activate Move first, you’ll have some of the snapping and other move functions in the way.
When trying to copy/paste sketch geometry into a second sketch, you must first create the sketch. It sounds like you’re trying to paste sketch geometry onto a plane before the sketch is active/created.
That said, it’s generally best practice to avoid copy/pasting sketches because one should be focusing on making sure sketches are fully defined. If you do proceed with copy/pasting sketch geometry, be sure to take the time to dimension and constrain the sketches as necessary.
How much sketch geometry are you trying to copy/paste? Can you share your file in the PDO Commmunity?
Hi Sir, Newbie here. ? Why does my copied sketch flip when I paste it on top of another sketch. It’s a car body. Both are facing right but when it’s pasted it’s facing left.
Great article here!
Thanks, Robert
Hi Robert,
I don’t believe I’ve seen that happen before. Could you share your Fusion 360 file so I can take a look at it?