Compile to a stand-alone executable (.exe) in Visual Studio
how can I make a stand-alone exe in Visual Studio. Its just a simple Console application that I think users would not like to install a tiny Console application. I compiled a simple cpp file using the visual studio command prompt. Will the exe work even if the .NET framework is not installed? I used native C++ code.
8 Answers 8
Inside your project folder their is a bin folder. Inside your bin folder, there are 2 folders, a Release and a Debug. For your polished .exe, you want to go into your Release folder.
I’m not quite sure if thats what youre asking
If I understand you correctly, yes you can, but not under Visual Studio (from what I know). To force the compiler to generate a real, standalone executable (which means you use C# like any other language) you use the program mkbundle (shipped with Mono). This will compile your C# app into a real, no dependency executable.
There is a lot of misconceptions about this around the internet. It does not defeat the purpose of the .net framework like some people state, because how can you lose future features of the .net framework if you havent used these features to begin with? And when you ship updates to your app, it’s not exactly hard work to run it through the mkbundle processor before building your installer. There is also a speed benefit involved making your app run at native speed (because now it IS native).
In C++ or Delphi you have the same system, but without the middle MSIL layer. So if you use a namespace or sourcefile (called a unit under Delphi), then it’s compiled and included in your final binary. So your final binary will be larger (Read: «Normal» size for a real app). The same goes for the parts of the framework you use in .net, these are also included in your app. However, smart linking does shave a conciderable amount.
Как создать приложение (exe) на языке C#
Как создать независимое приложение и собрать все рабочие файлы в один exe
Уважаемые, кто знает — подскажите! Как создать независимое приложение и собрать все рабочие файлы в.
На каком языке создать файл *.exe для работы с Интернетом??
Хочу написать приложение *.exe которое берёт и обрабатывает данные с моего сайта и базы данных.
 Не получается кодом создать графическое приложение на языке С#
Мне, для выполнения лабы по программированию, нужно с помощью кода (а не визуального.
на каком языке (технологии) создать онлайн приложение?
всем привет, хочу создать онлайн веб приложение; у меня немалый опыт в создании проектов на.
Среды разработки для С
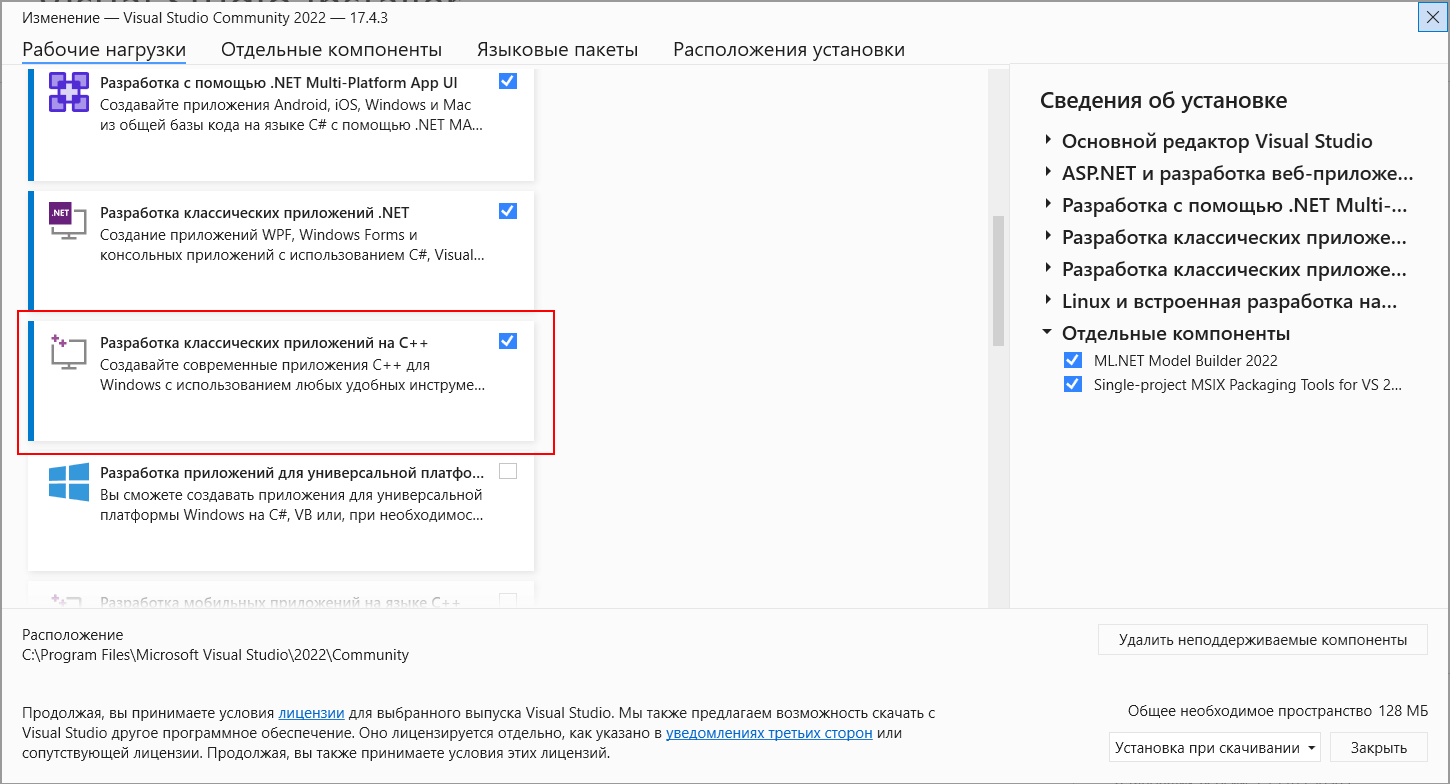
Одной из распространенных сред разработки для программирования на Windows является Visual Studio . В данном случае мы будем использовать бесплатную и полнофункциональную среду Visual Studio 2019 Community, которую можно найти по адресу https://visualstudio.microsoft.com/ru/vs/community/.
После загрузки и запуска установщика Visual Studio в нем необходимо отметить пункт Разработка классических приложений на C++ :
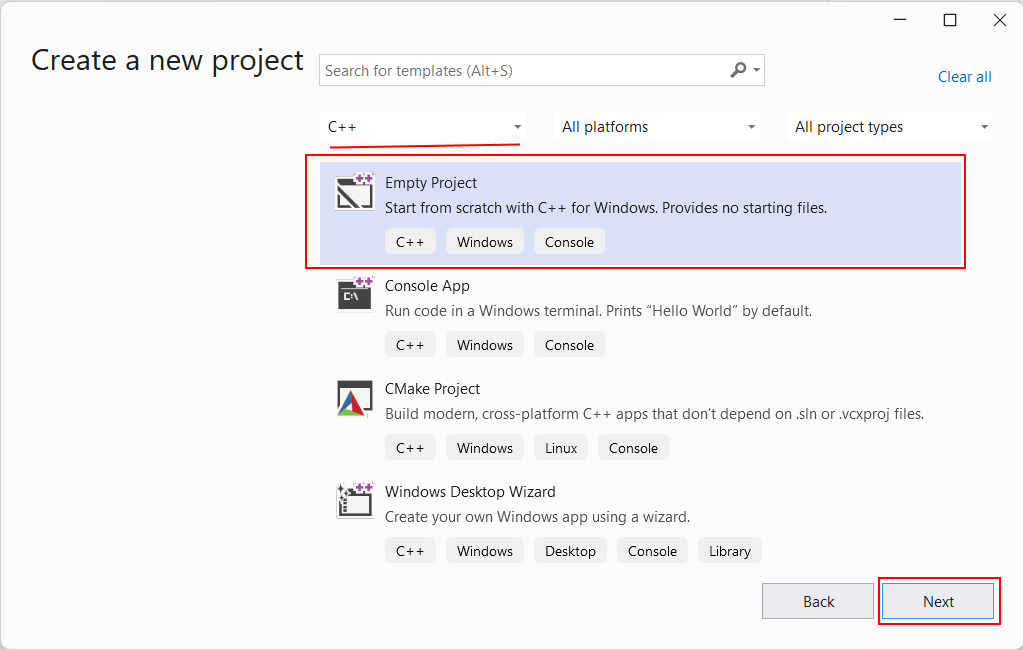
Выбрав все необходимые пункты, нажмем ОК для запуска установки. После установки Visual Studio создадим первый проект. Для этого откроем Visual Studio. На стартовом экране выберем тип Empty Project для языка C++:
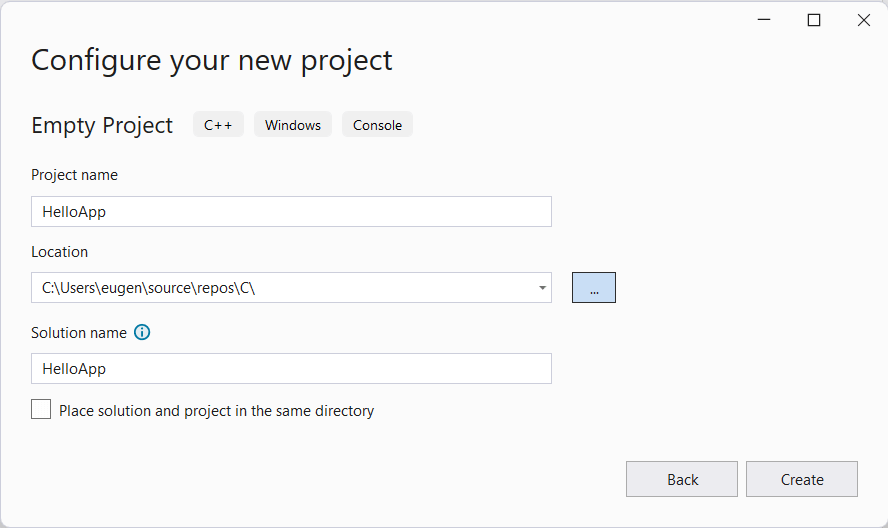
На следующем экране в поле для имени проекта дадим проекту имя HelloApp и также можно указать расположение проекта. И затем нажмем на Create для создания проекта.
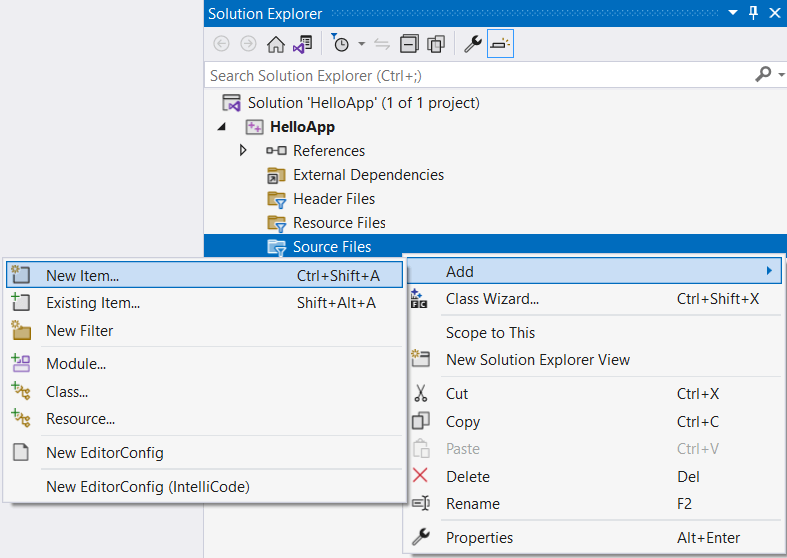
После этого Visual Studio создаст пустой проект. Добавим в него текстовый файл для набора исходного кода. Для этого в окне Solution Explorer (Обозреватель решений) нажмем правой кнопкой мыши на узел Source Files и в контекстом меню выберем Add -> New Item. :
Затем нам откроется окно для добавления нового элемента:
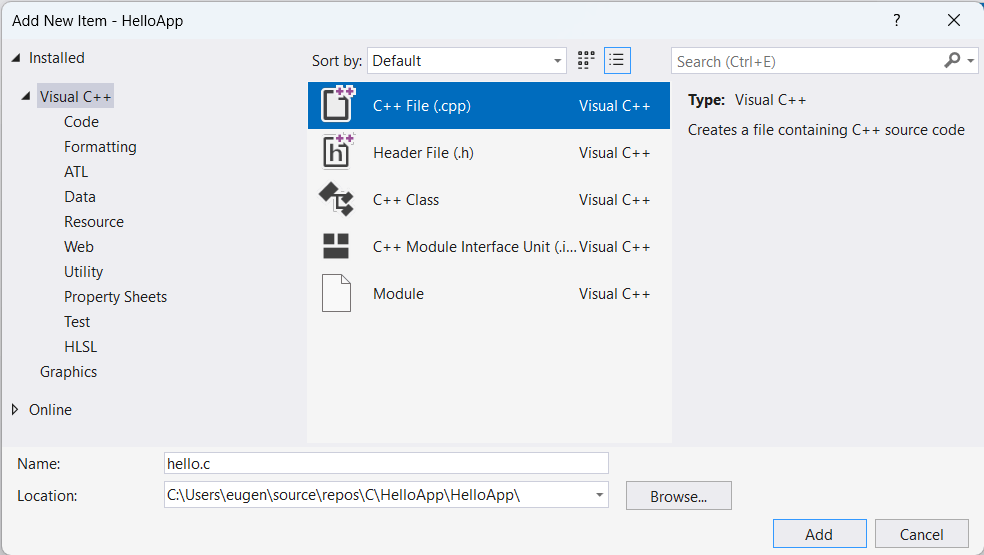
Здесь нам надо выбрать пункт C++ File(.cpp) , а внизу окна укажем для файла имя hello.c . Как правило, исходные файлы на Си имеют расширение .с . Оно указывает, что этот файл содержит исходный код на языке С, и он будет обрабатываться соответствующим компилятором.
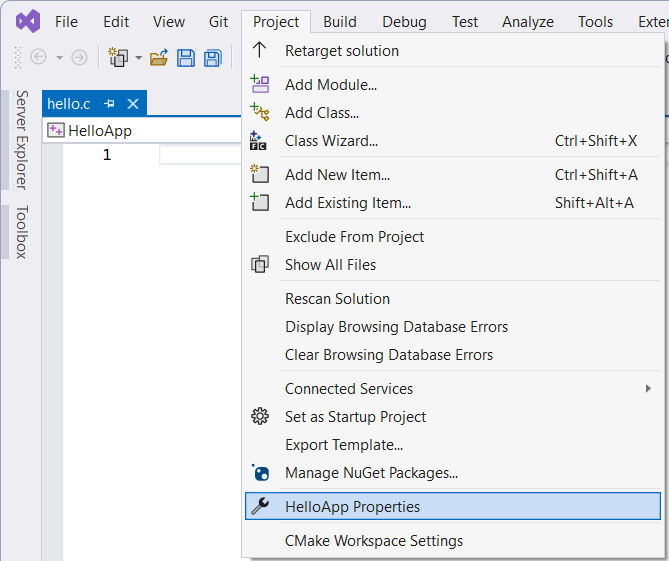
Настройка проекта
После добавления файла изменим опции проекта. Для этого перейдем к пункту меню Project -> Properties
В окне свойств проекта в левой части перейдем к секции С/С++ и далее к пункту Advanced :
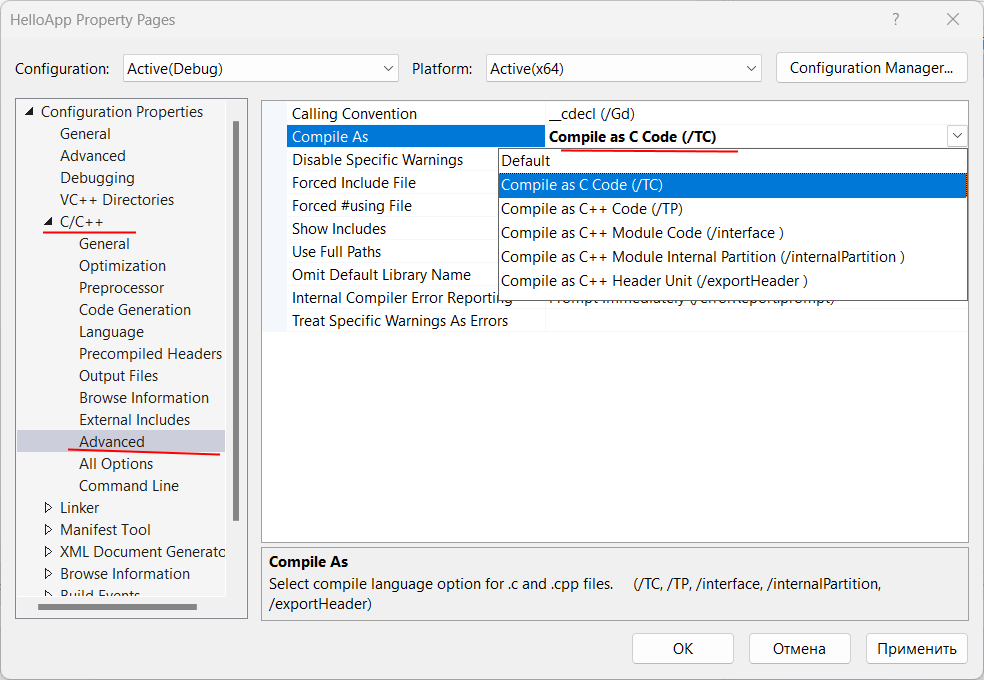
В правой части окна для поля Compile As установим значение Compile as C Code (/TC) . Тем самым мы говорим, чтобы по умолчанию исходный код компилировался именно как код С, а не С++.
После установки этого значения нажмем на кнопку «Применить», чтобы новые настройки конфигурации вступили в силу.
Для работы с языком Си может быть полезна еще одна настройка — установка стандарта языка. Перейдем к пункту С/С++ -> Language . Здесь в поле C Language Standard мы можем установить один из доступных стандартов для языка Си, который будет применяться для компиляции:
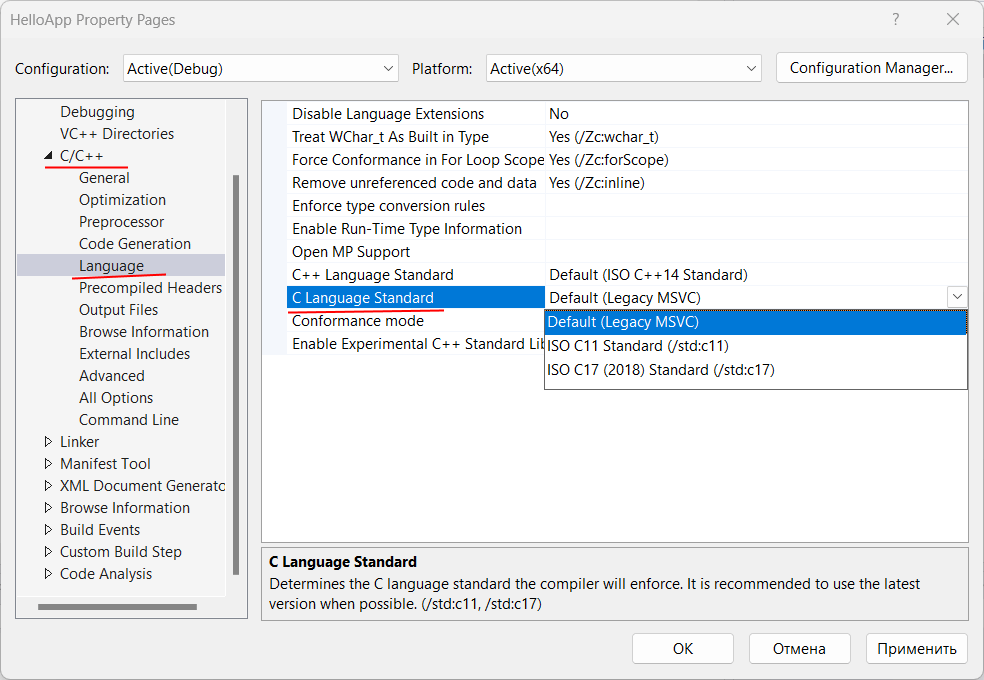
Правда, в данном случае он не играет значения, поэтому оставим для этого параметра настройку по умолчанию.
Определение кода программы
После добавления файла >hello.c проект будет иметь следующую структуру:
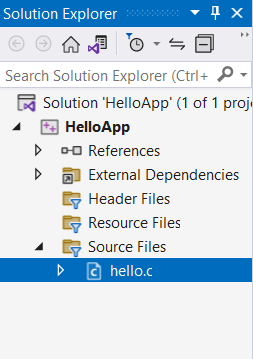
Вкратце пробежимся по этой структуре. Окно Solution Explorer содержит в решение. В данном случае оно называется HelloApp. Решение может содержать несколько проектов. По умолчанию у нас один проект, который имеет то же имя — HelloApp. В проекте есть ряд узлов:
External Dependencies : отображает файлы, которые используются в файлах исходного кода, но не являются частью проекта
Header Files : предназначена для хранения заголовочных файлов с расширением .h
Resource Files : предназначена для хранения файлов ресурсов, например, изображений
Source Files : хранит файлы с исходным кодом
Теперь определим в файле hello.c простейший код, который будет выводить строку на консоль:
Здесь использован весь тот код, который был рассмотрен в предыдущих темах про компиляцию с помощью GCC.
Теперь запустим программу. Для этого в Visual Studio нажмем на сочетание клавиш Ctrl+F5 или выберем пункт меню Debug -> Start Without Debugging :
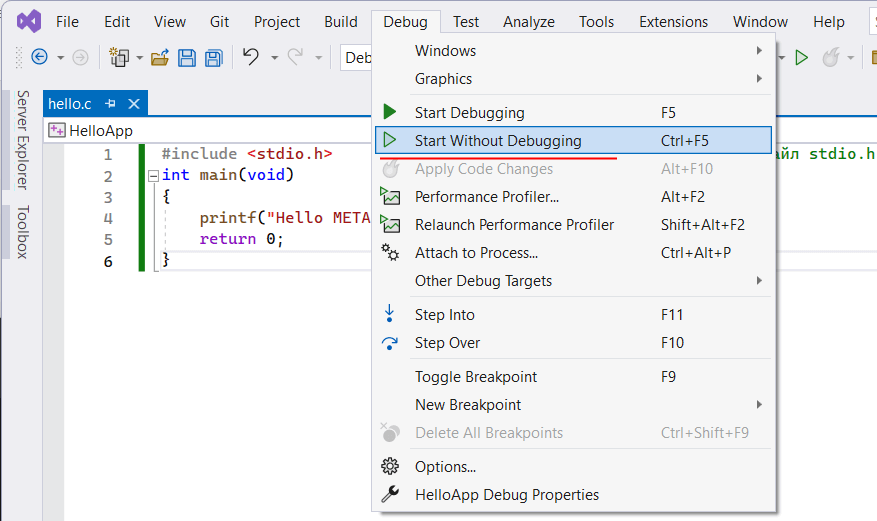
И в итоге Visual Studio передаст исходный код компилятору, который скомпилирует из кода исполняемый файл exe, который потом будет запущен на выполнение. И мы увидим на запущенной консоли наше сообщение:

Затем в проекте в папке x64/Debug мы можем увидеть скомпилированный файл exe, который мы можем запускать независимо от Visual Studio:
How to create exe in C# .net?
Here you will learn how to create exe file in visual studio. Making and Running an Executable File. You can make an executable file (.exe) from Visual Studio using the following procedure. I’m using visual studio 2013 for this.
Step 1.
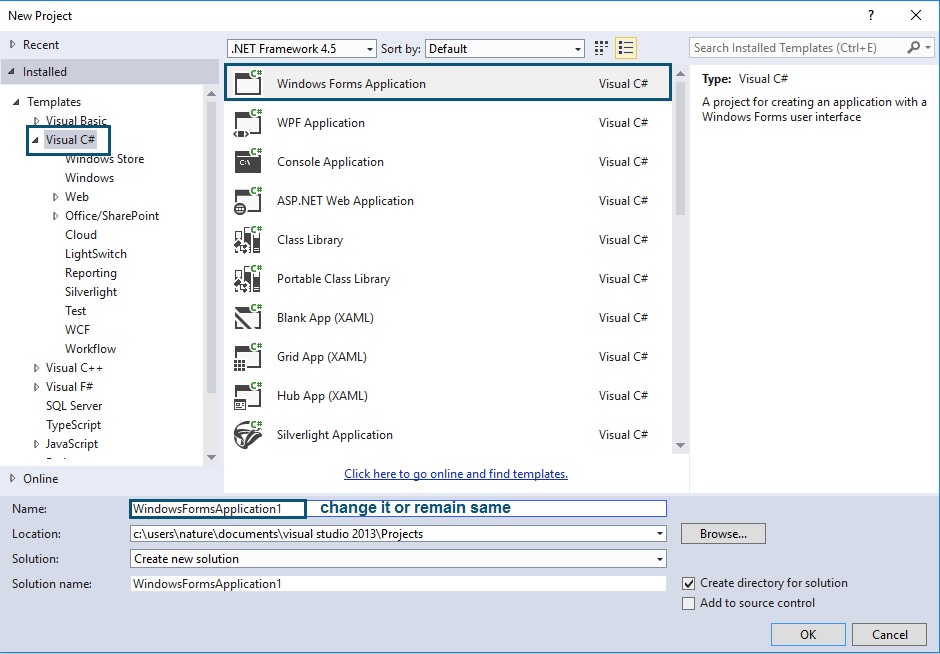
Create a New Window Application Form in Microsoft Visual Studio.
Step 2.
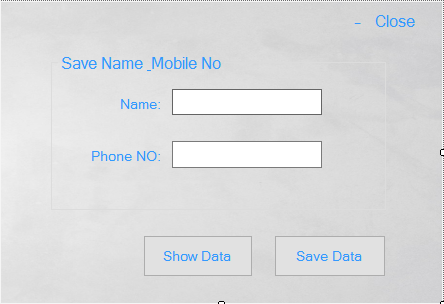
Design your Window Application Form like below form. This is design of my application. You can design your application with your own style. Here I am creating application with database. In this application I am storing and retrieving Name and Phone No of any type.
Step 3.
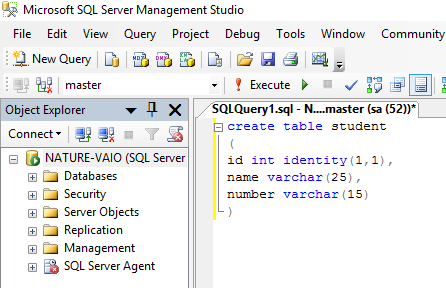
Open your Microsoft SQL Server and Create a Table like as below.
Select Start Menu → All apps → Microsoft SQL Server 2014 →SQL Server 2014 Management Studio. I am using default database as master database or you can create your own database if you like.
Step 4. Coding Part
After creating table in Sql Server move back to your window application form and double click on Save Data button. Now write following code in button click event. First you need to add one namespace. Open the code view form (Form1.cs) and write the below namespace.
Step 5.
Now create a second Form 2 for retrieving the data from database. Now double click on Show Data button in first form and write the below coding. This code for calling the second form on button2 click event.
Step 6.
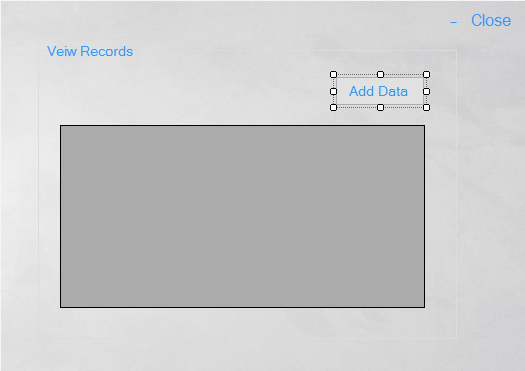
Now design your Form 2 like below. Add two control in form 2. One Gridview control and one Button control for calling the Form1. Double click on form.
Step 7.
Add below code on form load event.
Step 8.
You are done now. Next step is for making exe file.
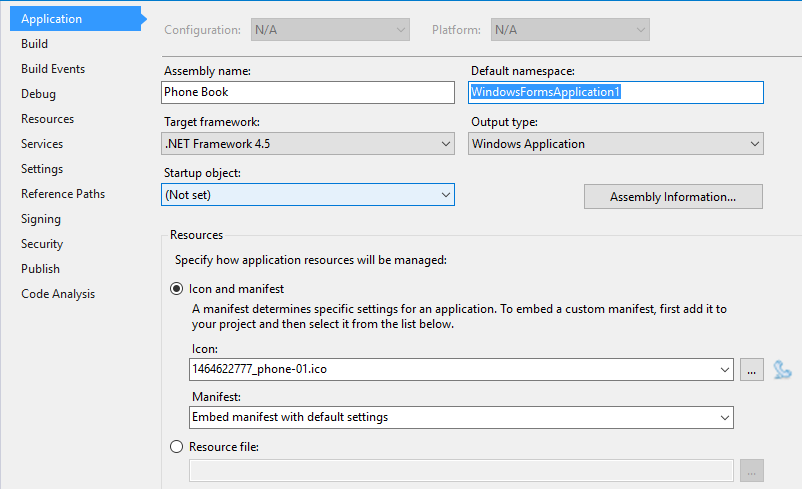
Go to → Solution explorer → Right click on your project → Properties. One Project window will display like below. Click on application tab and set your application name icon etc.
Step 9.
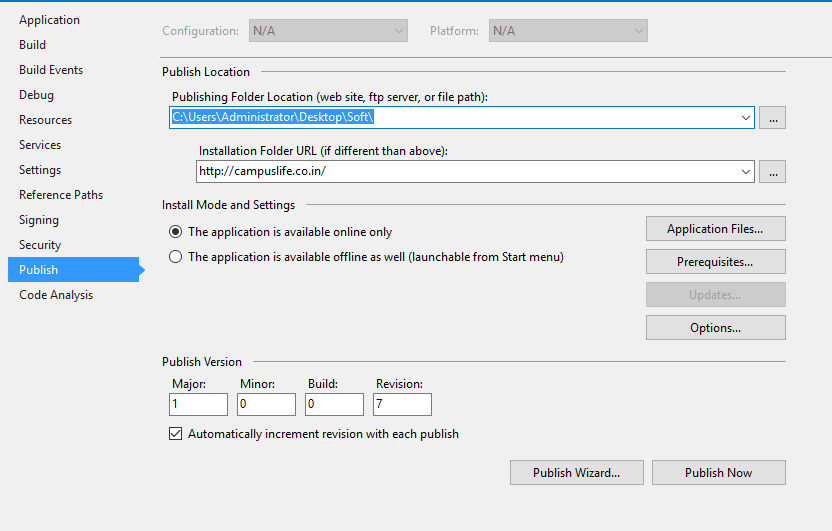
After that go to publish tab in left side of window. Set the path of your application. Then click on Publish Wizard button.
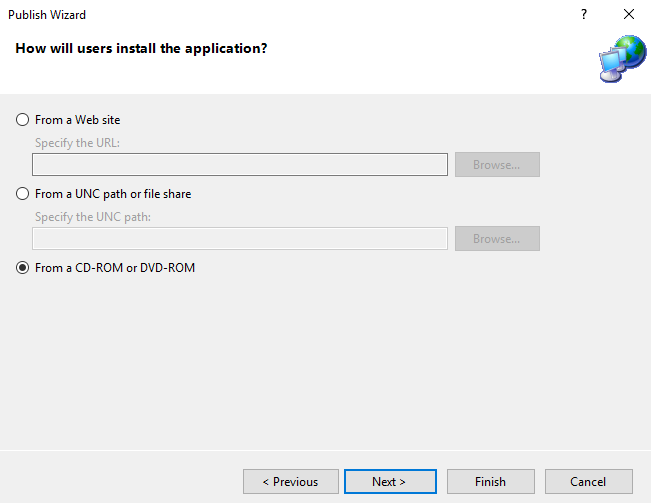
Step 10.
One dialog box will appear. Set your path or just click next. Now set installation method which you want. See picture below. Now click on Finish button.
Now go to your setup file location. Double click on step file and install it. After completing the installation process. Run your Application. See Picure below.
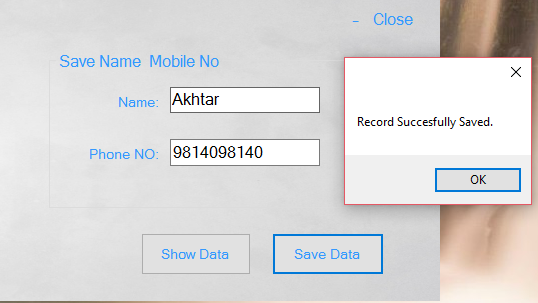
To view the record click on Show Data button and to add the record click on Add Data button.