How To Remove All The Grid Lines In The 3D Viewport?
Don’t miss out on our biggest sale of the year. Get 70% OFF on our selected products.
Please enable JavaScript
At times when designing 3D objects and scenes, you may want to get a preview of the scene in the 3D viewport, and for that preview, you will want it to be as close to the render as possible, and that includes getting rid of all the overlays.
To remove the viewport lines and other overlays in the viewport, go to the button in the top right-hand corner of the viewport and left-click on the button with the icon of a full and empty circle overlapping. You can also access to overlays menu using the arrow next to the button to turn off specific items.
Now you should no longer see any lines in the viewport and have a good representation of your image and what it is expected to look like when rendered. But what about when you only want to get rid of certain items? Which of these can you hide?
How To Create A Preview Of Your Render In The 3D Viewport?
Let’s start by looking at how to fully create that preview of your image. You want to set it up so that your view in the viewport looks exactly how it should look in the render, but without having to render to see it. There are a few steps that need to be completed to do this…
Getting The Camera In The Right Position
The first step is to get your camera in the correct position and then view your scene through your camera, which you can do in the viewport.
A quick way of getting the camera to the right position is to in fact do things in reverse. First, orbit your view so that you have the angle that you want for your render, then you will want to zoom out a little bit.
When we move our camera to this position it is going to snap to the correct location but will zoom in slightly, so zoom out of your ideal view a bit beforehand to correct this.
Then you need to transport the main camera to the location of your view. Select the camera in the outliner and then use the hotkey combination of Control + Alt + 0 on a windows device or Command + Option + 0 on a mac to snap the camera to the current view.
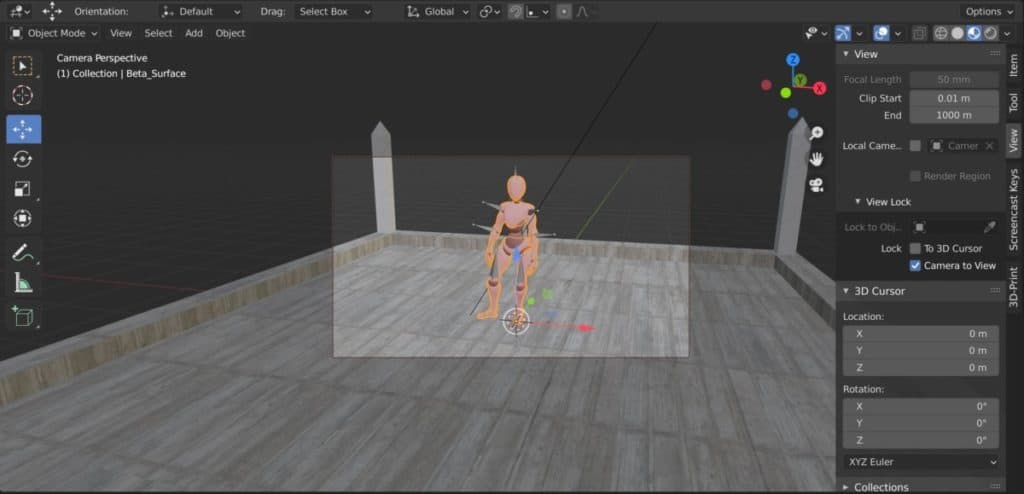 Camera View With Control + Alt + 0
You should also now be looking through the camera when you do this. If you are still not happy with the placement of the camera, go to the side panel in the viewport by pressing the N key, and under the View tab you will see the option Camera To View under View Lock .
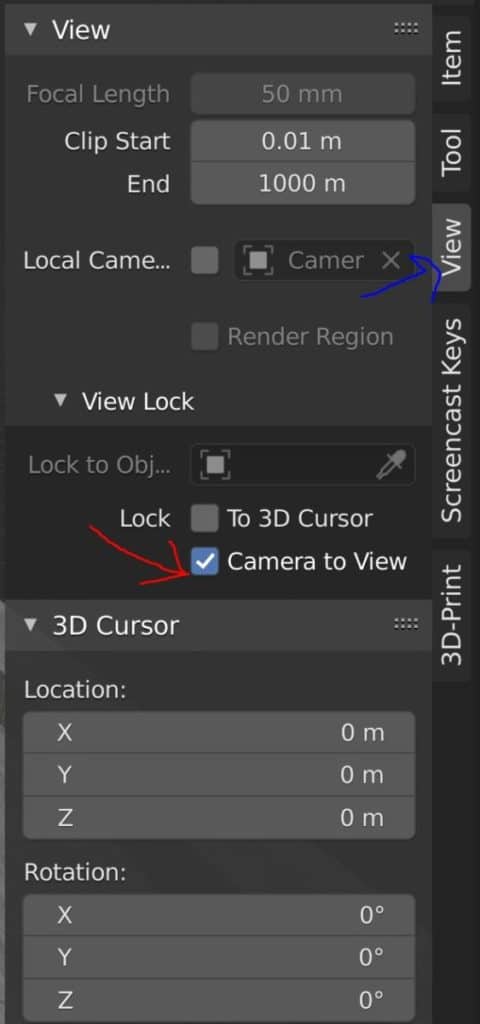 The Lock Camera To View Option
If you enable this option then when you navigate your view you will also be able to move the camera based on your view.
To come out of this setting return to the side panel and untick the box when you have found the correct view. A common error from Blender users is they do not deactivate the tool straight away and then inadvertently navigate away from that position.
Selecting The Correct View Method
The next step is to set the viewport method to match the view conditions of the actual render. There are four viewport shading methods that are visible as a row of buttons across much of the top right-hand corner of the viewport.
From left to right, you have a wireframe view, which displays all of the objects as wired meshes based on their vertices and edges, with no faces displayed.
The next is the solid view, which is the default shading method in Blender. In this view, only the geometry of the objects is visible, which means vertices, edges, and faces.
Then we have the material preview, where in addition to the geometry we have the materials and textures on show, and a placeholder HDRi to preview how the materials react only to an environmental light source.
The final icon is for the rendered view, which displays all of the information in the scene, this includes the geometry, materials, textures, and lighting setup.
The rendered view is the representation of our actual render and allows us to work on our lighting set up in the viewport.
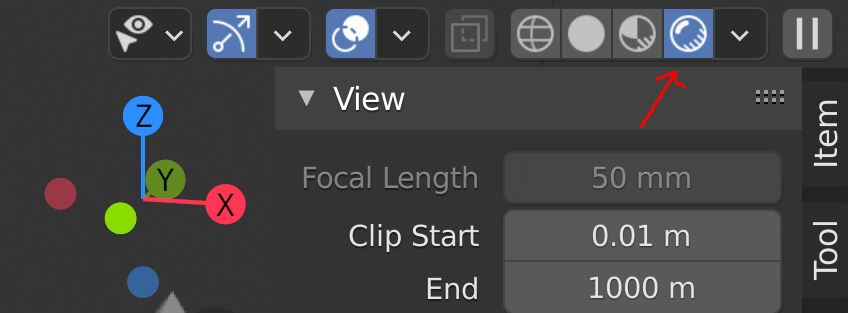 Rendered Viewport Shading
The icon for this button is a circle with a reflection at the top, and lines to indicate shadows at the bottom. Click on this button to switch to rendered view.
Turning Off Your Overlays
The third and final step is the reason why you searched for this article in the first place, to get rid of those pesky overlays.
Doing so requires the press of a single button, and this button is found just to the left of our viewport shading options. Look for the icon of one shaded circle overlapping an empty circle, which will probably be highlighted Blue as it will be enabled at this point, and left click to turn it off.
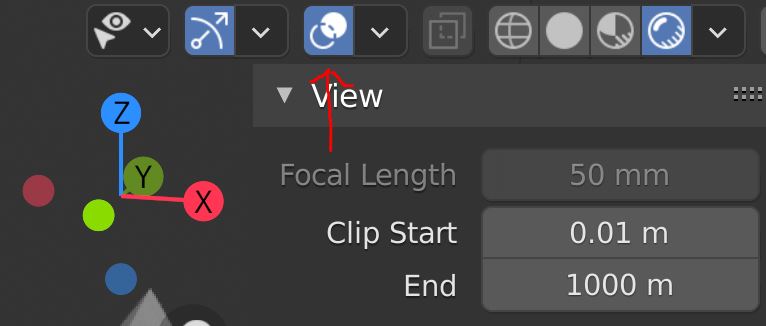 Overlays Toggle
And like magic all of the grid lines and other overlays will disappear from the viewport, leaving you with a like-for-like preview of what you will see after you press the render button.
What Other Reasons For Turning On/Off Overlays?
There may be other reasons besides previewing a render where you want certain overlays to be turned off. By the way, an overlay is an item that provides information and context to the user with regards to the scene but does not affect anything in the scene itself nor is it visible in the render.
Beginners to Blender often feel overawed by everything that is thrown at them on the screen. Most people would prefer to minimize what they can see on their software and then access those tools only when required.
Another example is when working with models that are rigged for animations you may want to hide those rigs from view, this is another element that can be hidden with the overlays button.
For me, I sometimes turn off the overlays in my viewport to get a quick preview of the scene, and then turn them back on again, as there is a lot of value in these overlays being displayed.
What Overlays Can You Turn Off Or On From The Menu?
Next to the overlays button, you will find an arrow that opens up the overlays menu, where you will be able to turn on and off specific elements in the 3D viewport.
For example, you will see in Blender a red line to indicate the X-axis and a green line to indicate the Y axis, however, there is no line for the Blue axis as this is turned off by default. But in the overlays menu, you can control the visibility of the axis lines individually.
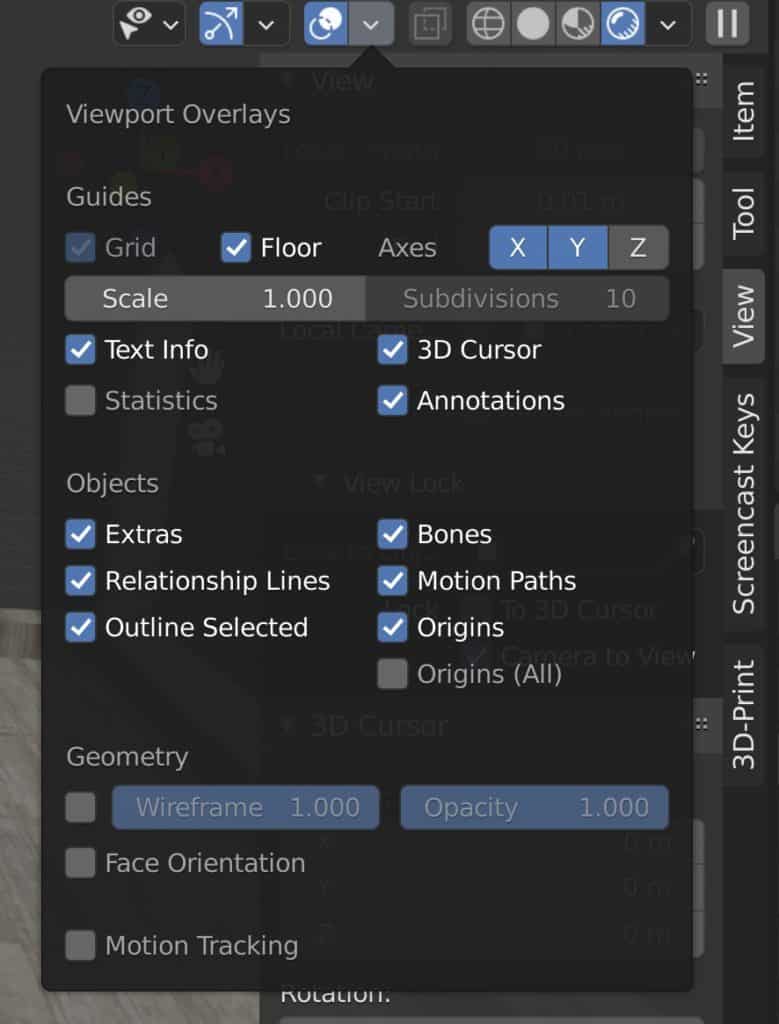 Viewport Overlays Menu
You can also control the visibility and scale of the Blender grid, which is often one of the main things that users normally want to hide. The Blender grid is based on the currently selected unit of measurement, and so the scale value is comparable to that measurement. For example at a scale of 1 when meters are used, each square will be 1 meter in each direction.
Most of the overlays here are turned on by default, in particular those related to the selected object, like the object origin.
Towards the bottom, you have two very handy overlays for object geometry that are switched off. The first creates a wireframe overlay which is very useful for displaying the geometry of the model in object mode. This way you can also view how your modifiers affect your topology.
Then you have the face orientation overlay. In 3D space, a face has two sides, an inward-facing side, and an outward-facing side, based on the direction of its normals. When you turn this overlay on your geometry will appear as one of two colors, either red or blue.
You want to only be able to see the color blue in your scene, as seeing red indicates incorrect normals, which will need to be fixed before sending models over to game engines.
You can learn more about normals and how to fix them by reading our article on the topic here.

Unveiling Blender 3D: Features, Benefits, and More
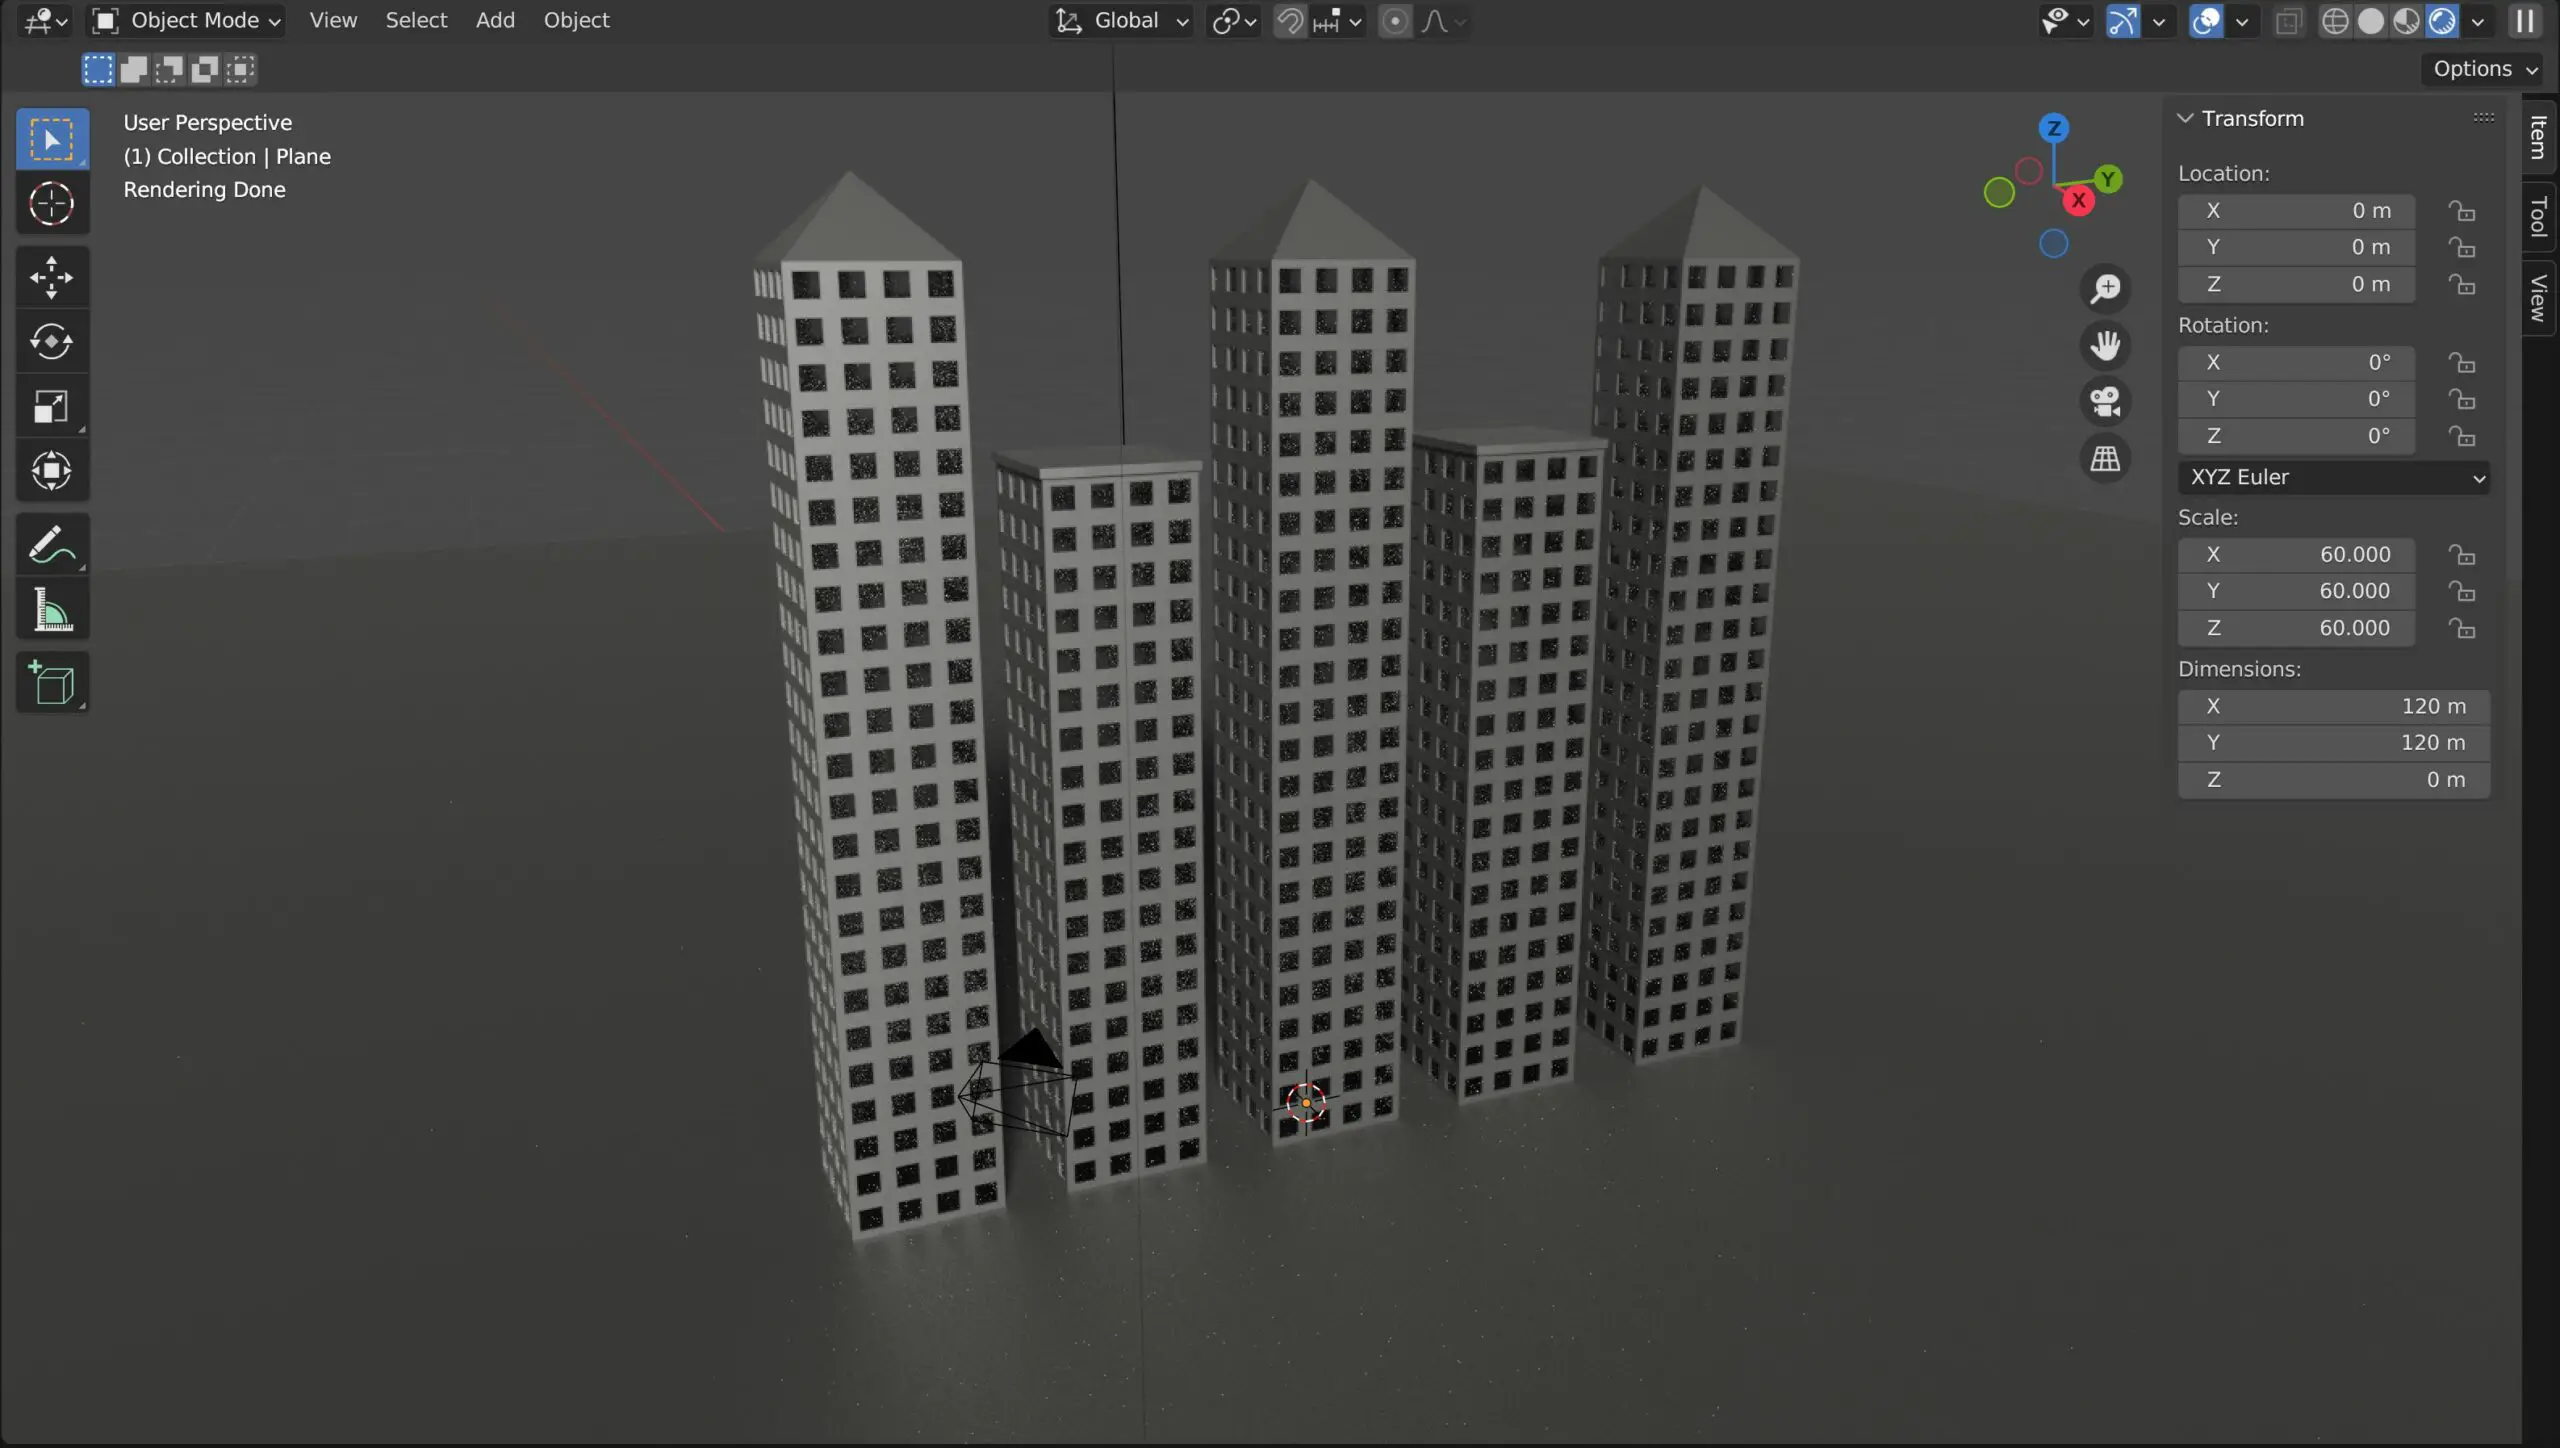
In the dynamic world of digital design and 3D animation, Blender 3D has emerged as a formidable powerhouse of an application, captivating artists, filmmakers, and designers worldwide. At its core,
Where Can I Find 3D Models That Are Free To Download And Use?
3D modeling has revolutionized the way we design and create digital content. From video games to product design, 3D models have become an essential tool for professionals and enthusiasts alike.
What Is Filament Used For In 3D Printing?
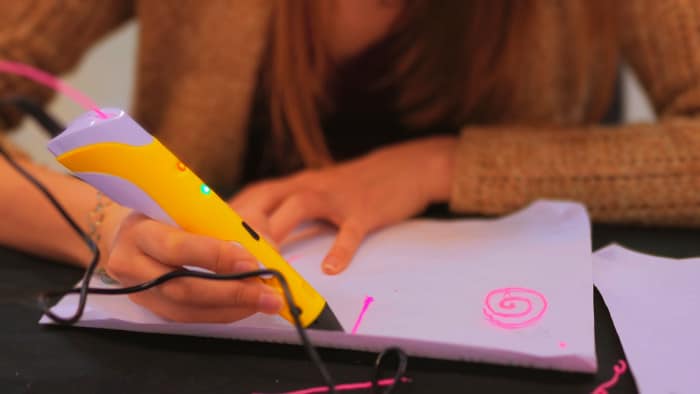
If you are new to the process of 3D printing, then you will need to learn not only how to use digital applications to form your designs as concepts but
Как убрать сетку с фигуры blender
«Обводятся» черным все полигоны, в обьектном режиме тоже

в режиме редактирования вообще сетка на сетку ложится господи

снять галку с варфрейм
благодарю, нашла из-за первой ссылки как в целом вьюпорт отключить (справа сверху), но вместе с ней пропадает и координатная сетка, живём
Шо я наделал. Как убрать сетку? ��
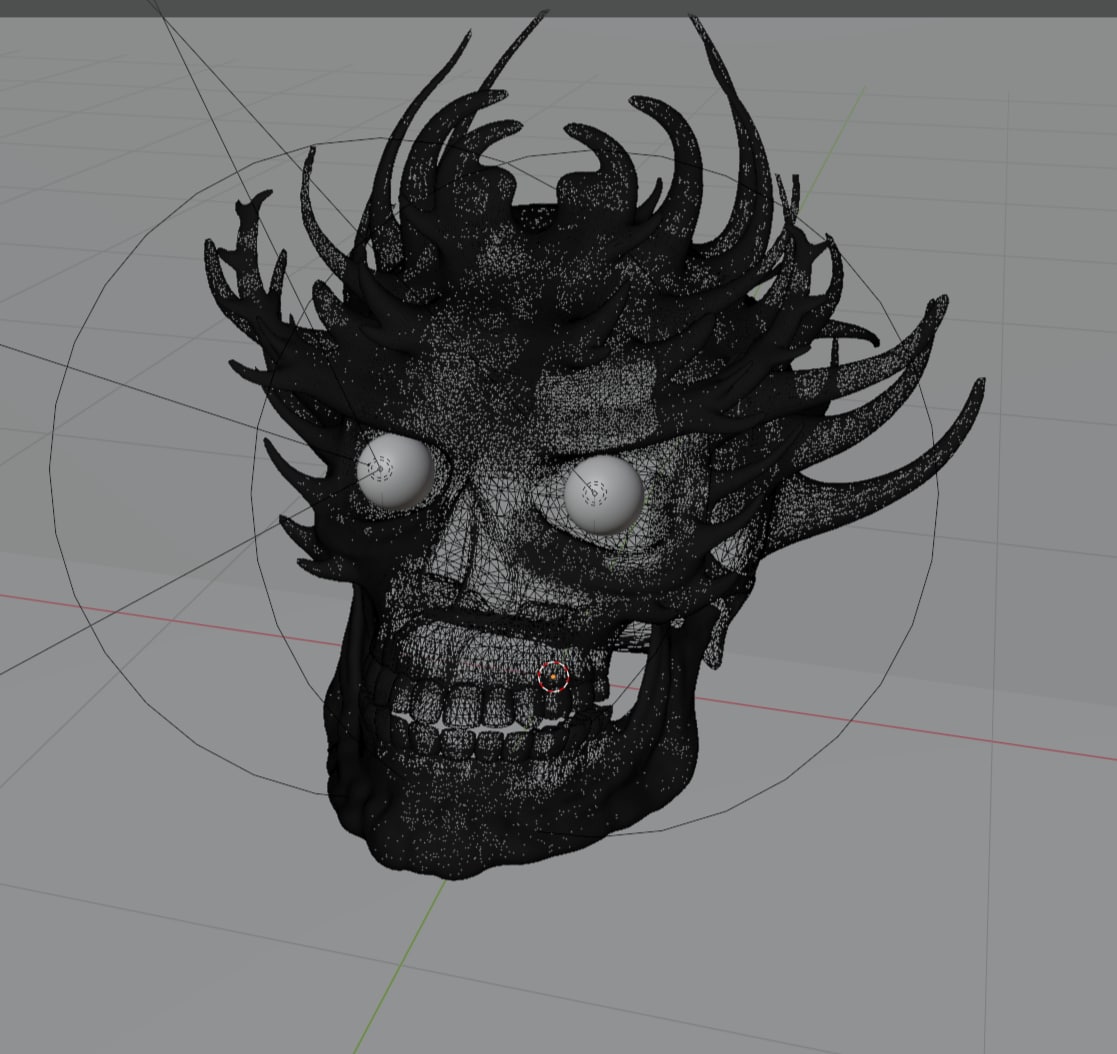
Эмм, что? Это произошло после симуляции дыма, моделька была flow объектом.
Yetinox
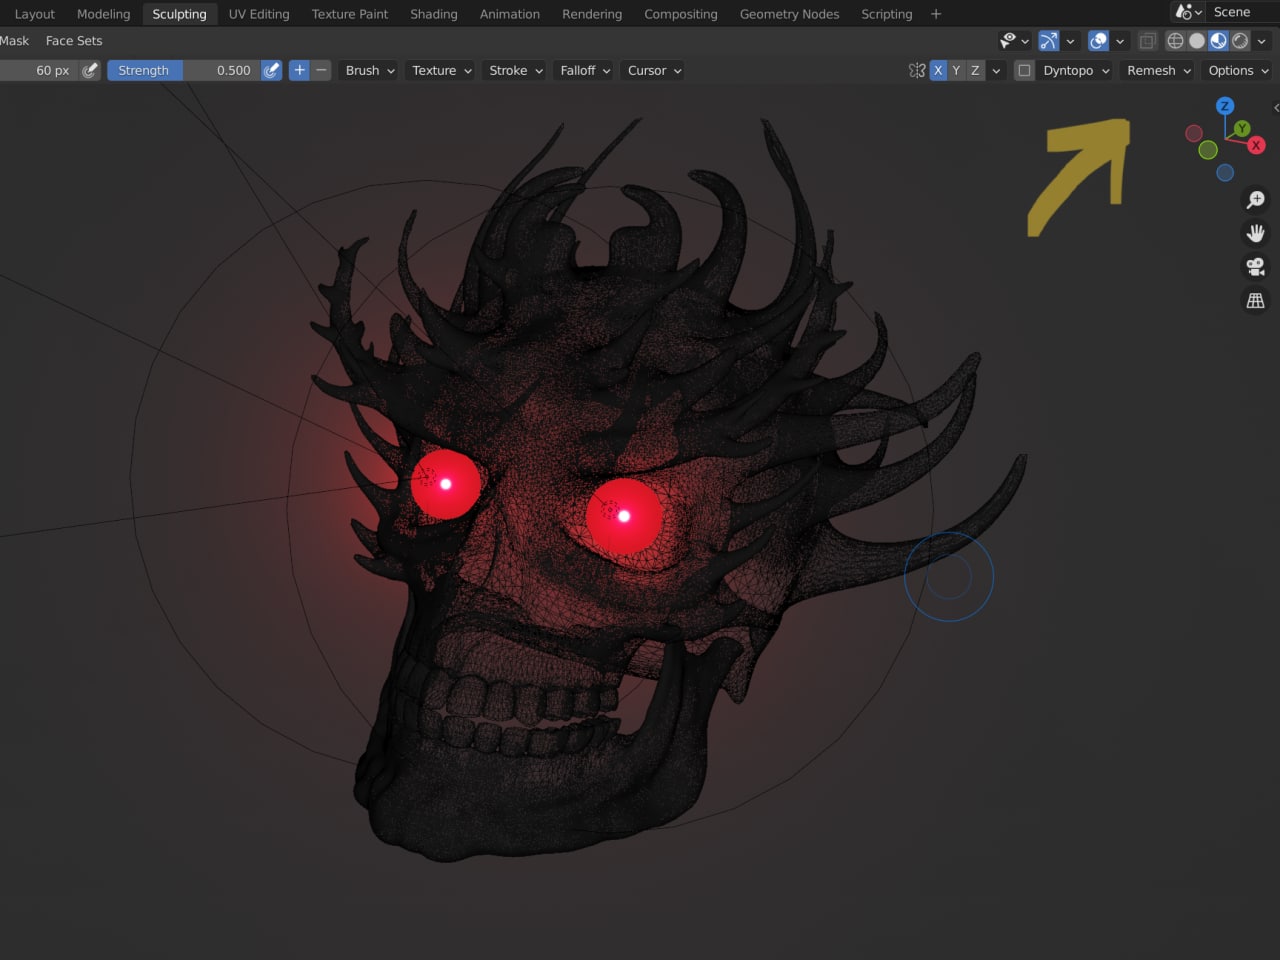 вроде нет(
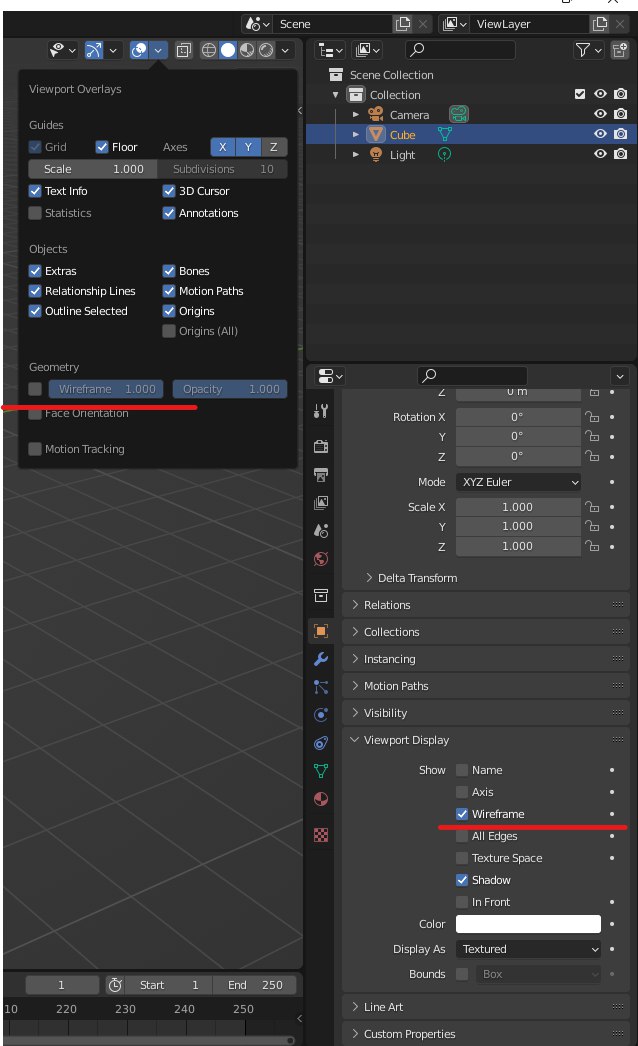
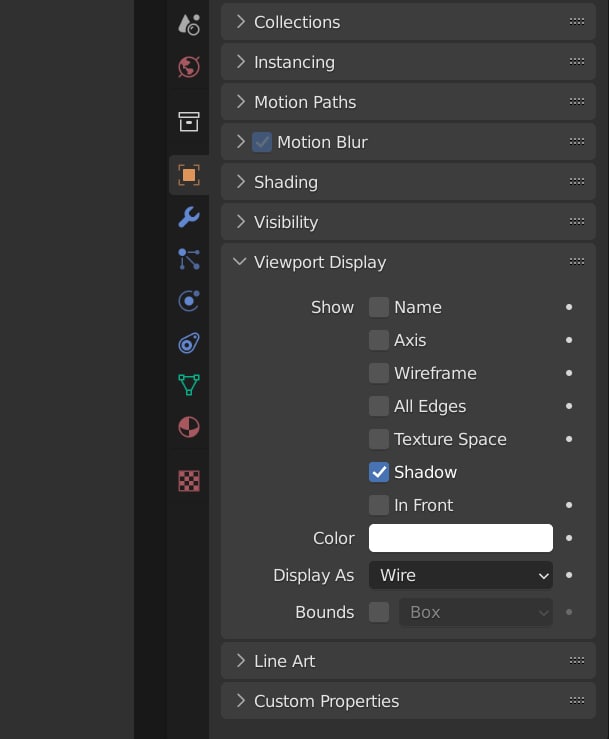
Проверь эти 2 галки.
Роман
Проверь эти 2 галки.
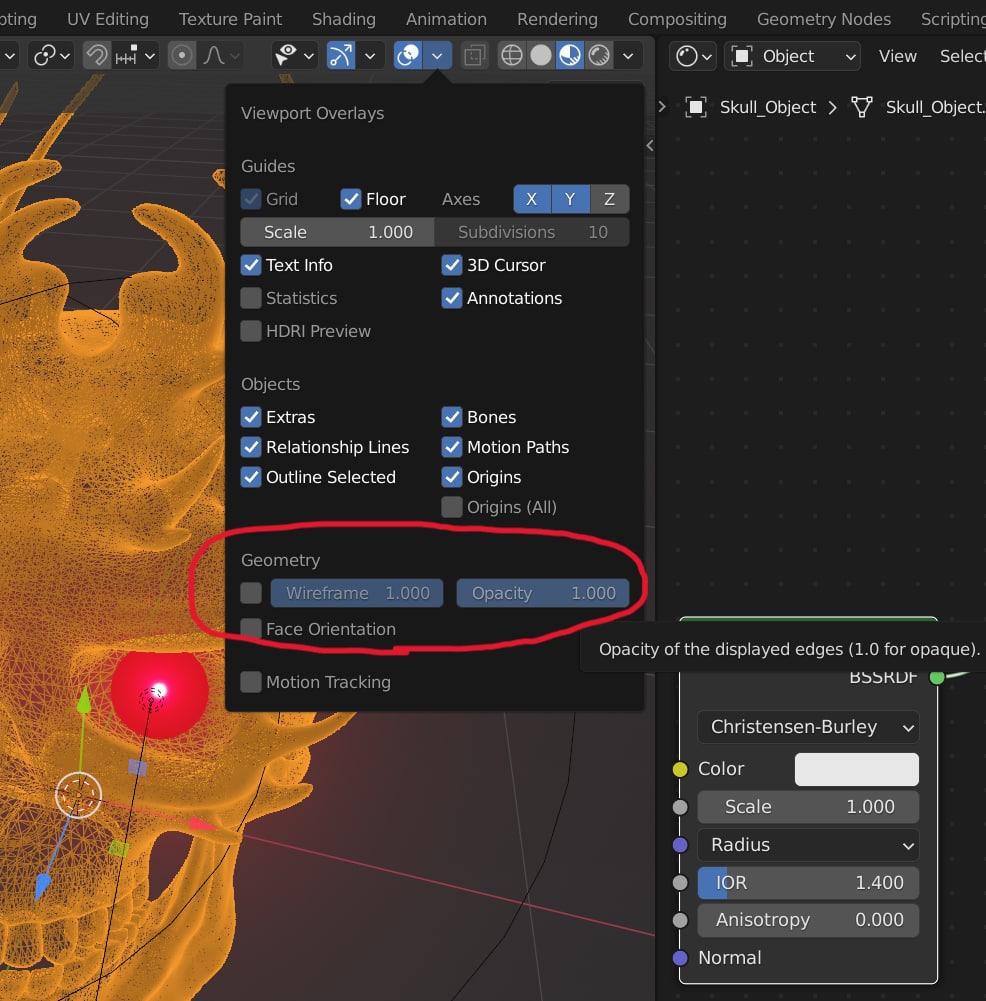
Yetinox
(((
Yetinox
��
Вот оно. Display As поменяй. На солид или текстуред.
Похожие вопросы

Всем привет! Почему при запекании карты нормалей на лоуполи отображаются странные вырезы, хотя их на хайполи нет.
Скажите пожалуйста как сделать так чтобы объект перестал иметь статус link? Если я нажимаю unlink он просто исчезает.
а как исправить? )
Посоветуйте пожалуйста гайд по гео нодам? Задумал сделать свой генератор sci-fi платформ и панелей.
Добрый день, Боги блендера) подскажите, пожалуйста — как убрать тело под particals что б его не было видно при рендере и как сделать что бы шары друг на друга не залазили? дел.
Товарищи, в Geometry Nodes можно из float цивилизованно сделать boolean? Я вывод Math -> Greater Than соединяю с boolean-входом, это допустимо, но хочется избавиться от пункти.
Ребят.Привет.Помогите пожалуйста.У меня изображение,которое я импортировал в блендер принимает освещение HDRI карты,а как сделать так чтобы не принимало?
Ребятки, кто понимает, вот в аддонах сообщение, он просит удалить эти файлы что в путях прописаны?
Так, а почему вот тут пунктир? Соединяю вектор с вектором же.
когда я пытаюсь анимировать 100 флагов в течение 1 минуты, компьютер застревает, а блендер выключается. Оперативная память: 32 ГБ. Видеокарта: 6 ГБ. Почему так?
Guides (grid settings)
The Lines, Scale and Subdivision options formally part of the Display section of the Properties sidebar ( N ), are now accessed from the Overlays menu located top-right of the 3D View in Blender. Here the options to alter the grids physical appearance in the 3D View, for both ‘free’ and ‘locked’ points of view, are grouped under Guides.
Design note: free and locked views largely refers to the manual manipulation of the 3D View in both perspective and orthogonal ( NumPad 5 ) versus fixed points of view, i.e. Front ( NumPad 1 – looking along the Y axis), Right ( NumPad 3 – looking along the X axis), Top ( NumPad 7 – looking down the Z axis) etc. – in ‘free’ perspective and orthogonal, Scale is visible, Subdivision increments beyond the default are not, they are only visible in fixed ortho.
Guides not Grid
Clicking the Overlays menu opens the Viewport Overlays menu and a set of context sensitive properties under which grid Scale and Subdivisions can be found sub-sectioned within Guides. Here, numerical input alters the grids physical appearance, the relative size (scale) and the number of major and minor divisions, or rows and columns, shown (subdivisions). To change the relative size of the grid increase the Scale value to make it larger, or decrease to make it smaller (lowest value 0.001, default 1). To change the number of row/columns displayed, increase Subdivisions to add more per major division or decrease to reduce (lowest value 1, default 10).
Design note: although the two can be used together to defined a useful measurement and display system it’s important to understand that Guides, GRID scale and subdivisions, work independently of UNIT scale and subdivisions. Note also that grid scale and Unit scale tend to do the opposite of one another, increasing Guide scale makes the grid larger, increasing Units scale makes it appear smaller.

Grid settings for Blender can be found in the 3D View’s Overlays options now organised as part of the Guides system.

Changing the grid using the Scale and Subdivisions settings found under Guides will do the opposite of Unit Scale – whereas the former (Guide based Scale) makes the grid appear larger, the latter (Unit based Scale) makes it appear smaller.
Guides, found within the Overlays options of the main 3D View, ostensibly replace ‘grid settings’,now esentially just Scale and Subdivisions. —>
Hide the Grid
Guides also includes additional settings for related aspects of the grid. To show or hide the grid itself (toggle visibility), select or deselect the Grid checkbox (this disables/hides the Scale and Subdivision options). Similarly to show/hide the primary X, Y and Z grid Axes, click the X, Y and Z buttons to activate or deactivate each axis (defaults X and Y). Disabling both settings essentially clears the Scene of any orientation prompts (both grid and axes).
Design note: turning off the settings discussed in the above simply hide the grid and axes, they do not disable grid snapping or the units measurement system.

Hiding the main grid and axes markers to clear the Scene of orientation cues.
The main grid in the 3D View can be (toggled) hidden, along with the X, Y and Z Axes indicators from Overlays options. —>