Как создать прозрачный фон с помощью Paint 3D
Изображение с прозрачным фоном больше привлекает таких авторов, как мы, чтобы использовать его для разных целей. Мы, как создатели, используем его для избранных изображений или для чего-то еще. Но не каждое изображение доступно без прозрачного фона, и нам нужно целенаправленно искать его, чтобы получить это конкретное изображение без фона. Если вы являетесь пользователем Windows, возможно, вы слышали о приложении Paint 3D, которое поставляется с ним предварительно. А с помощью приложения Paint 3D вы можете создать прозрачный фон для любых изображений.
Это забавное небольшое руководство, с помощью которого вы можете сделать фон любого изображения прозрачным и использовать его для своих задач. В этом руководстве мы расскажем, как создать прозрачный фон с помощью Paint 3D. Это руководство, которым я лично хотел бы поделиться, так как довольно много людей будут искать такой крутой и простой трюк, чтобы избавиться от нежелательного фона изображения. Итак, без лишних слов, давайте сразу перейдем к самой статье:
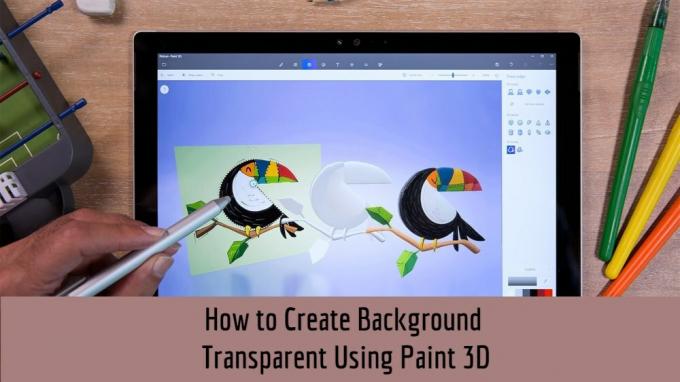
- 1 Как создать прозрачный фон с помощью Paint 3D
- 2 Удалить фон
- 2.1 Способ 1:
- 2.2 Способ 2:
Как создать прозрачный фон с помощью Paint 3D
- Прежде всего, откройте приложение Paint 3D из меню «Пуск».
- Загрузите изображение, для которого вы хотите сделать прозрачный фон в Paint 3D.

- Затем, когда изображение загружено, нажмите на опцию Magic Select, расположенную на верхней панели.

- Появится окно выбора, которое вам нужно настроить на изображении, для которого вы хотите удалить фон.

- Нажмите на кнопку «Далее», как показано на изображении выше.
- Paint 3D автоматически обнаружит объект внутри изображения.
- Как только вы закончите с выбором, нажмите Готово.
- Нажмите на инструмент «Удалить» и выберите часть изображения, которую вы хотите удалить из своего выбора.
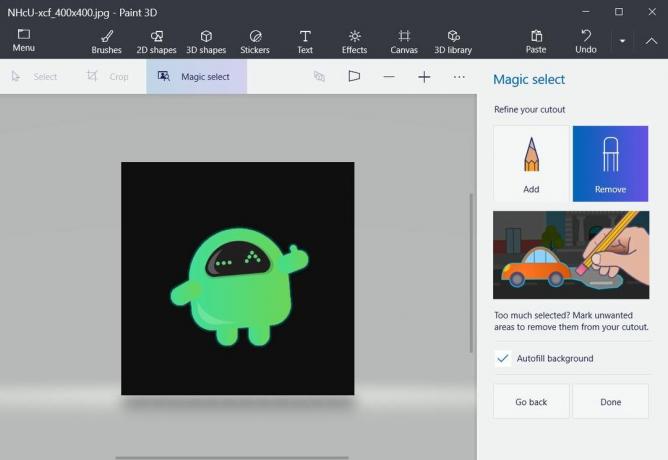
- Как только вы нажмете кнопку «Готово», вы увидите другое окно выбора. Но это поле, которое будет указывать на то, что выбранное изображение является отдельным объектом.

Удалить фон
Способ 1:
- Удерживая изображение в режиме выбора (шаг 9 выше), перетащите его за пределы поля.

- Нажмите на опцию Select и нарисуйте рамку на фоне, как показано.
- Либо нажмите кнопку «Удалить» на клавиатуре, либо кнопку с правой стороны.

- Вы заметите, что фон станет белым.
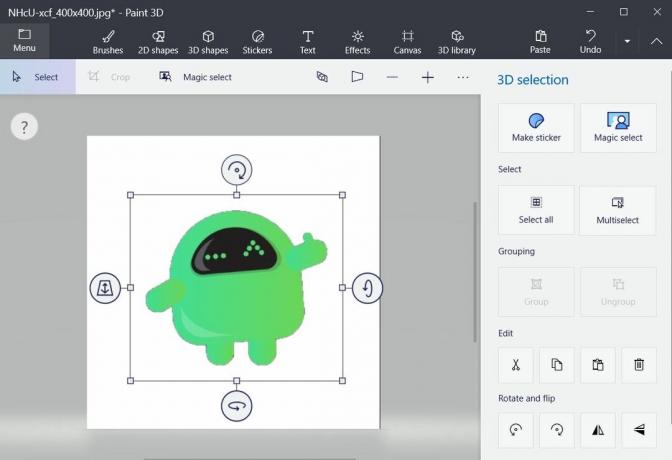
- Теперь вы удалили фон.
Способ 2:
- Вы можете скопировать извлеченное изображение.
- Вставьте его в новый файл.
- Это оно! Ваше изображение скопировано без фонового изображения.
Сделать фон прозрачным
- Щелкните параметры холста, как показано ниже.

- Включите опцию «Прозрачный холст».
- Вы заметите, что белый фон исчез.
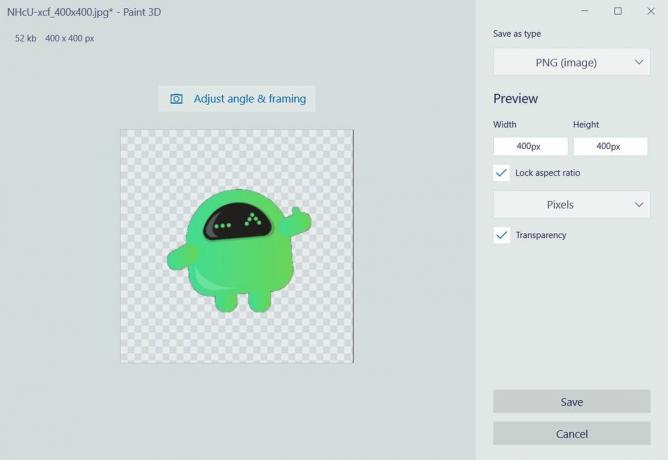
- Теперь нажмите значок меню и сохраните изображение.
- Выберите формат как PNG и обязательно нажмите на опцию Прозрачность.
- Это оно!
Итак, вот это с моей стороны в этом посте. Надеюсь, вам понравился этот пост, и вы смогли удалить фон изображения и сделать его прозрачным с помощью Paint 3D. Дайте нам знать в комментариях ниже, понравился вам этот пост или нет. До следующего поста… Ура!
Remove the background of a photo with Paint 3D
The Paint 3D app in Windows helps you remove the background of an image. You can then save the edited image as a new file to do with as you see fit.
Open Paint 3D
On the Windows taskbar, select Start.
In the Search box, type: Paint 3D
Select the Paint 3D app to open it.
Open the image file you want to edit
If you have copied an image to your clipboard, press Ctrl+V to paste it on the Paint 3D canvas. Otherwise, if the image file already exists on your device, open it in Paint 3D like so:
Select Menu.
Under Open, select Browse files.
Navigate to the file you want to edit. Select it, then select Open.
Remove the background of the image
On the toolbar, select Magic Select.
Adjust the focus area to fit around the area of the image you want to keep.

Select Next.
Look closely to see whether the tool accurately isolated your target image from the background. Some adjustments may be necessary. Use the Add and Remove options to change what areas are isolated by the tool. (To mark an area that you want to keep or remove, trace its outline or use brush strokes.)

When your cutout is satisfactorily marked, select Done.

Your focus object has now been lifted from the background of the picture. Select it and drag it to one side of the canvas (the white rectangle shown in the image below) temporarily.
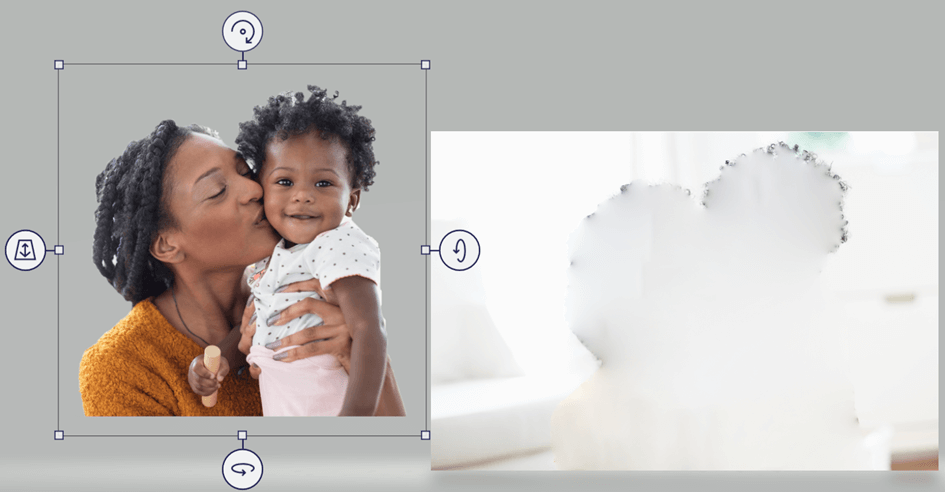
Delete the remainder of the picture from the canvas area: Click and drag over the canvas area to select it, then press Delete.
On the toolbar, select Canvas.
In the Canvas pane on the side, turn on Transparent canvas.
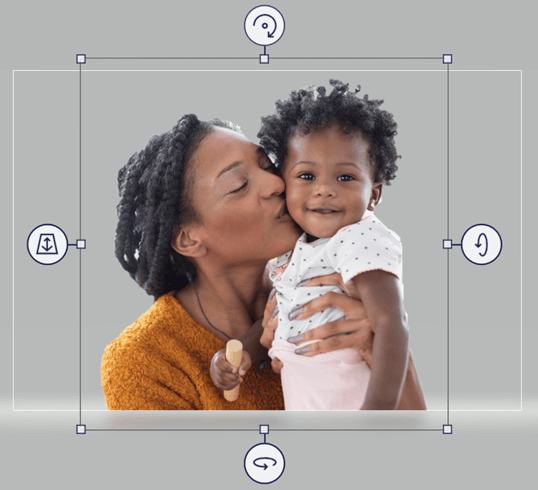
Move your object back on the canvas area, and adjust the dimensions of the canvas, if you want.
To save the edited image, select Menu > Save as > Image. Then select Save, then specify a location and a name for the image file. Select Save.
The saved image file is now ready for you to do with as you wish—send it to someone, insert it in a document, etc.
Как сделать прозрачный фон в paint 3d у картинки

Windows 10
Привет! Сегодня я покажу вам как сделать прозрачный фон у картинки, в программе Paint 3D, на компьютере Windows 10. Вы можете в паинте сделать белый фон прозрачным. Всё очень просто и быстро! Смотрите далее!
Как сделать прозрачный фон в paint 3d у картинки
На рабочем столе, внизу экрана слева, откройте меню Пуск . В открывшемся окне, в списке всех приложений, найдите программу Paint 3D . Нажмите по названию.

Дождитесь, пока программа загрузится. Затем, вверху в меню, перейдите на вкладку Холст .
Обратите внимание . На белом фоне, у вас должна отображаться какая-нибудь картинка.

Далее, в инструментах справа, включите параметр Прозрачный холст . После чего, картинка будет отображаться без фона, то есть он станет прозрачным.

Всё готово! Вот так просто и быстро вы можете сделать прозрачный фон у картинки в paint 3d.
Также Вы можете скачать Фотошоп и с помощью инструмента ‘Волшебная палочка’ (Magic Wand Tool) из панели слева сделать прозрачный фон у картинки в несколько кликов.
How to make a background transparent in MS Paint and Paint 3D

Paint is the inbuilt app of Microsoft Windows it is pre-installed in each version of Window. The app has limited features with a simple interface that make it easy to use. However, Microsoft has added a new version of paint in Windows 10 “Paint 3D”. The new Paint is completely different from the classic Paint with new features, tools, and functioning. In both, Paint and Paint 3D you can make the background transparent. You can make the background transparent by cutting out the foreground area of a picture. Alternatively, by removing an area form an image. Here is how to make a transparent background in Paint and Paint 3D.
How to make a picture’s background transparent in Paint
1. Click the ‘Cortana’ button.
2. Type ‘Paint’ in the search box of Cortana.
3. Select ‘Paint’ from results to open it.
4. Now, click on the ‘File.’
6. Find and select a picture to open.
7. Then, click on the ‘Select’ button.
8. Select ‘Transparent selection’ from the drop-down options.
9. Then, click on the ‘Free-form selection’ in the same dropdown menu.
10. Move the cursor on the picture to select an area to make transparent.
11. Left-click and hold down the button.
12. And select the object.
13. When the rectangle appears on the selected portion, right click on it.
14. Select ‘Cut’ from the menu.
15. After cutting, open a new picture.
16. And paste (Ctrl + V) the paste part on the new image.
17. Left click on the pasted part to adjust and set up.
As you’ve selected the ‘Transparent selection,’ only the object will paste, and all will remain the same in the new image.
How to make a picture’s background transparent in Paint 3D
In the classic Paint app, after cutting the foreground part, it leaves a blank space, and it remains blank if you save and open the image again. In Paint 3D app there is no full layers tool, but you can insert one image on another.
2. Type and search for the ‘Paint 3D’.
3. Select ‘Paint 3D’ from the results to open it.
4. Click on ‘Menu.’
6. Then ‘Browser files’.
7. Find a picture to open.
8. Click an image to open it in Paint 3D.
9. Click the ‘Canvas’ button at the top.
10. Click and turn off ‘Transparent canvas.’
11. Click on ‘Select’ at the top.
12. Move the selection rectangle to an area of the picture to delete.
13. Press ‘ Ctrl + X’ to cut the selected area.
14. Click on ‘Menu.’
15. Select ‘Save as.’
16. Select ‘2D PNG’ for the file type.
17. Click the ‘File name’ field to change the name of your painting.
18. After that, click on ‘Menu.’
19. Select ‘New’ for a new drawing sheet.
20. To open a saved file, open menu> select Open > browse the file and open.
21. To open the transparent picture you saved, open menu > select insert > click ‘select.’
That’s it! The image will fill the transparent area, and you can resize and rotate it to adjust.