За что отвечает ACPI драйвер, и как его удалить ?
Промышленный стандарт управления питанием компьютера и его устройствами с помощью ОС был необходим технологии как воздух, ведь постоянные конфликты операционной системы и оборудования мешали разработке и того, и другого. BIOS никак не мог угодить операционке, она — ему. Каждый хотел конфигурировать устройства по-своему. Представляете, что бы было, если бы не существовал ACPI при нынешнем многообразии различных девайсов? Даже подумать страшно. Вот поэтому ведущими IT-компаниями было принято решение отделить «софт от харда» и разработать системную архитектуру, которая брала бы на себя всю тяжесть общения с BIOS’ом. Заодно разработчики не забыли об энергопотреблении, поэтому ACPI еще должен был управлять питанием. 1 декабря 1996 года консорциум, состоящий из Hewlett-Packard Corporation, Intel Corporation, Microsoft Corporation, Phoenix Technologies Ltd. и Toshiba Corporation, объявил о завершении работы над новым стандартом — ACPI, что расшифровывается как Advanced Configuration and Power Interface, или расширенный интерфейс конфигурирования и управления питанием компьютера. ACPI состоял из множества составляющих, главной из которых был специальный участок кода BIOS, обеспечивающий поддержку компьютером новой архитектуры. То есть со старым оборудованием новый стандарт был несовместим.
Разумеется, это повлекло за собой обновление парка компьютеров. Как это обычно делается, мы с вами, уважаемые читатели, очень хорошо знаем. За примером даже ходить далеко не надо — достаточно вспомнить историю с PCI-E. Правда, парк компьютеров еще не полностью обновился, ведь апгрейд обходится достаточно дорого. Но, как ни крути, плата без PCI-E уже считается устаревшей. С ACPI было точно так же, только польза от него не так сомнительна. Скорее даже наоборот, ведь вместе с ACPI пришел APIC, а это значит, что одно прерывание теперь могло использоваться несколькими устройствами! Для того времени это была настоящая сенсация. Первым процессором с поддержкой ACPI можно считать самый ранний Celeron, однако поддержка нового интерфейса была реализована настолько криво, что эту функцию приходилось отключать. Важно также отметить, что ACPI окончательно вытеснил Plug and Play и, по словам создателей, «обеспечил использование существующих интерфейсных разъемов более безопасным и потенциально более эффективным способом». Помимо участка кода BIOS, в состав ACPI также входила улучшенная схема управления питанием (Advanced Power Management), прикладной программный интерфейс (API), специальный машинный язык (ACPI Machine Language) и еще некоторые полезные вещи. Появился новый термин — OS Power Management, где ACPI, разумеется, отводилась главная роль.
Acp hda node что это
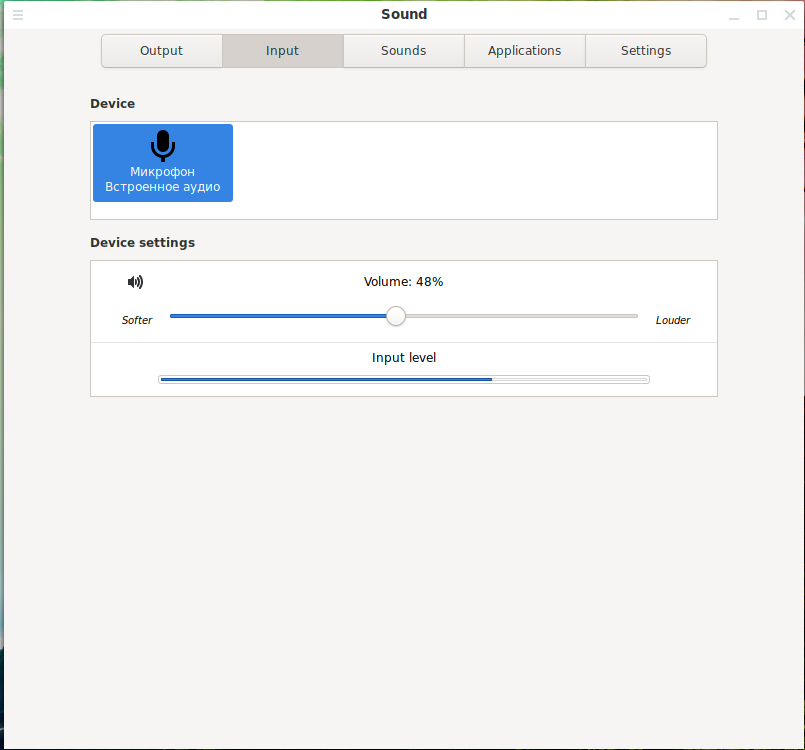
Система linux fedora 37 не видит звуковую карту. Ноутбук huawei matebook d15 на amd 5 5500u. В настройках звука существует только Dummy Output, при использовании которого звук не выводиться. Вывод возможен только при подключенных bluetooth наушниках. Прошу, помогите решить проблему.
так же параллельно на другом подразделе диска стоит windows 11
Pavucontrol установи и там посмотри.
Подобный вопрос уже неоднократно задавали, применительно к федоре. Решение ищется на ЛОРе по «Dummy Output».
Если сам не найдешь, я потом подскажу. А пока попробуй выключить комп, обесточить и опять включить и загрузить линукс. Сдается мне, звуковая обнаружится.
видит только Dummy
]$ echo «options snd-intel-dspcfg dsp_driver=1» > /etc/modprobe.d/alsa.conf bash: /etc/modprobe.d/alsa.conf: Отказано в доступе
выключил, не давал питание, подождал, не помогло
Это было только предположением с моей стороны. Столько раз слышал, что Windows захватывает устройства, и под линукс они уже не работают должным образом, что хотелось проверить. )
Запустить команду с sudo.
]$ sudo echo «options snd-intel-dspcfg dsp_driver=1» > /etc/modprobe.d/alsa.conf bash: /etc/modprobe.d/alsa.conf: Отказано в доступе

вы два идиота, не понимающие ни sudo, ни >
Да, есть нюанс, с которым я почти никогда не сталкиваюсь, т.к.:
- или запускаю файловый менеджер с sudo и вручную правлю файлы
- или в терминале переключаюсь на root, командой su, а потом выполняю нужную строку
запустил с su, перезагрузил, не помогло
Выложи для наглядности wpctl status .

И dmesg на pastebin
PipeWire ‘pipewire-0’ [0.3.66, sssaaddnneesss@fedora, cookie:3429170450] └─ Clients: 31. uresourced [0.3.66, sssaaddnneesss@fedora, pid:1286] 32. WirePlumber [0.3.66, sssaaddnneesss@fedora, pid:1312] 33. WirePlumber [export] [0.3.66, sssaaddnneesss@fedora, pid:1312] 49. pipewire-pulse [0.3.66, sssaaddnneesss@fedora, pid:1409] 50. GNOME Shell Volume Control [0.3.66, sssaaddnneesss@fedora, pid:1333] 51. GNOME Volume Control Media Keys [0.3.66, sssaaddnneesss@fedora, pid:1530] 52. xdg-desktop-portal [0.3.66, sssaaddnneesss@fedora, pid:1768] 62. Google Chrome input [0.3.66, sssaaddnneesss@fedora, pid:2437] 63. wpctl [0.3.66, sssaaddnneesss@fedora, pid:3317] 75. Mutter [0.3.66, sssaaddnneesss@fedora, pid:1333]
Audio ├─ Devices: │ 41. Renoir Radeon High Definition Audio Controller [alsa] │
├─ Sinks: │ * 44. Renoir Radeon High Definition Audio Controller Цифровой стерео (HDMI) [vol: 0.90] │
├─ Sink endpoints: │
├─ Sources: │
├─ Source endpoints: │
└─ Streams:
Video ├─ Devices: │ 39. ov9734_techfront_camera [v4l2] │ 40. ov9734_techfront_camera [v4l2] │
├─ Sinks: │
├─ Sink endpoints: │
├─ Sources: │ * 42. ov9734_techfront_camera (V4L2)
│
├─ Source endpoints: │
└─ Streams:
Опции для драйвера snd-hda-intel
HD-audio — это новый стандарт встроенного аудиокомпонента на современных ПК после AC97. Хотя Linux уже давно поддерживает HD-audio, с новыми машинами часто возникают проблемы. Часть проблемы — сломанный BIOS, остальное — реализация драйвера. В этом документе объясняются краткие методы устранения неполадок и отладки оборудования HD-audio.
Компонент HD-audio состоит из двух частей: микросхемы контроллера и микросхем кодека на шине HD-audio. Linux предоставляет один драйвер для всех контроллеров, snd-hda-intel. Хотя в названии драйвера содержится слово известного производителя оборудования, оно относится не только к нему, а ко всем микросхемам контроллеров, в том числе и других компаний. Поскольку предполагается, что контроллеры HD-аудио совместимы, в большинстве случаев должен работать один драйвер snd-hda. Но, что неудивительно, существуют известные ошибки и проблемы, характерные для каждого типа контроллера. В драйвере snd-hda-intel есть несколько способов их исправить, они описаны ниже.
У контроллера может быть несколько кодеков. Обычно у вас есть один аудиокодек и, возможно, один модемный кодек. Теоретически может быть несколько аудиокодеков, например для аналоговых и цифровых выходов, и драйвер может работать неправильно из-за конфликта элементов микшера. Это должно быть исправлено в будущем, если такое оборудование действительно существует.
Драйвер snd-hda-intel имеет несколько различных парсеров кодеков в зависимости от кодека. В качестве запасного варианта у него есть общий синтаксический анализатор, но до сих пор эта функциональность довольно ограничена. Вместо общего синтаксического анализатора обычно используется синтаксический анализатор кодека (закодированный в patch_*.c) для реализаций, зависящих от кодека.
Опции модели для кодека HD-Audio
Наиболее частая проблема с драйвером HD-audio — это неподдерживаемые функции кодека или несоответствующая конфигурация устройства. Большая часть кода, специфичного для кодеков, имеет несколько предустановленных моделей, чтобы либо переопределить настройку BIOS, либо предоставить более полные функции.
Драйвер проверяет идентификатор SSID PCI и просматривает таблицу статической конфигурации, пока не будет найдена соответствующая запись. Если у вас новый компьютер, вы можете увидеть сообщение, подобное приведённому ниже:
Между тем, в более ранних версиях вы бы увидели такое сообщение:
Для просмотра записей системного журнала связанных с snd-hda-intel используйте команду:

Даже если вы видите такое сообщение, не надо паниковать. Прежде всего, это информационное сообщение, без предупреждения и без ошибки. Это означает, что PCI SSID вашего устройства не указан в списке известных предустановленных моделей (белом списке). Но это не значит, что драйвер сломан. Многие драйверы кодеков предоставляют механизм автоматической настройки на основе настроек BIOS.
Аудиокодек HD обычно имеет виджеты «контактов», а BIOS устанавливает конфигурацию каждого контакта по умолчанию, которая указывает местоположение, тип подключения, цвет разъёма и т. д. Драйвер HD-аудио может угадать правильное соединение, исходя из этих значений конфигурации по умолчанию. Однако некоторые коды поддержки кодеков, такие как patch_analog.c, не поддерживают автоматическое зондирование. И BIOS часто, да, довольно часто ломается. Он устанавливает неправильные значения и портит поведение драйвера.
Модель пресетов (недавно названная «исправлением») предназначена в основном для преодоления такой ситуации. Когда соответствующая модель пресета найдена в белом списке, драйвер предполагает статическую конфигурацию этой предустановки с правильной установкой контактов и т. д. Таким образом, если у вас есть более новая машина с немного другим SSID PCI (или SSID кодека) от существующий, у вас может быть хороший шанс повторно использовать ту же модель. Вы можете передать параметр модели, чтобы указать предустановленную модель вместо поиска SSID PCI (и кодека).
Доступные значения параметров модели зависят от микросхемы кодека. Проверьте свою микросхему кодека в файле proc кодека.
Он покажет название производителя/продукта вашего чипа кодека. Затем смотрите файл HD-Audio Codec-Specific Models, раздел HD-audio driver. Вы можете найти список кодеков и вариантов моделей, принадлежащих каждому кодеку. Например, для чипа кодека Realtek ALC262 укажите model=ultra для устройств, совместимых с Samsung Q1 Ultra.
Сделайте резервную копию файла, если он уже существует:
Для исправления достаточно добавить строку в файл /etc/modprobe.d/alsa-base.conf:
со следующим содержимым
Вместо слово МОДЕЛЬ нужно вписать значение, которое вы найдёте для модели вашего ноутбука на странице HD-Audio Codec-Specific Models.
Причём там не обязательно будет точное название модели — просто найдите то, что ближе всего к ней. Например, модель моего ноутбука ASUS GL703GE, самое похожее, что я смог найти, это «asus-g73jw», тогда строка, которую я добавил в файл /etc/modprobe.d/alsa-base.conf, следующая:
Сохраните этот файл и перезагрузитесь — после этого проблема должна исчезнуть.
Вместо перезагрузки вы можете перезапустить модуль драйвера — это особенно удобно, если вы хотите попробовать несколько значений.
Таким образом, первое, что вы можете сделать для любого совершенно нового, неподдерживаемого и неработающего оборудования для HD-аудио, — это проверить HD-аудиокодек и несколько различных значений параметров модели. Если вам повезёт, некоторые из них могут хорошо подойти к вашему устройству.
Есть несколько специальных значений опций модели:
- когда передаётся «nofixup», специфичные для устройства исправления в анализаторе кодеков пропускаются.
- когда передаётся «generic» синтаксический анализатор кодека пропускается, и используется только общий синтаксический анализатор.
Вывод на динамик и наушники
Одна из наиболее частых (и очевидных) ошибок с HD-аудио — это бесшумный вывод звука через встроенный динамик или разъем для наушников или их обоих. В общем, сначала стоит попробовать выход на наушники. Для выхода динамика часто требуются дополнительные элементы управления, такие как биты внешнего усилителя. Таким образом, выход на наушники имеет немного больше шансов.
Перед отправкой отчёта об ошибке ещё раз проверьте, правильно ли настроен микшер. Последняя версия драйвера snd-hda-intel обеспечивает в основном «Master» регулятор громкости, а также «Front» (где Front указывает передние каналы). Кроме того, могут быть отдельные элементы управления «Наушники» и «Динамик».
То же самое и для выхода на динамик. На некоторых кодеках может быть переключатель «Внешний усилитель». Включите это, если есть.
Ещё одна проблема, связанная с этим, — это автоматическое отключение звука на динамиках при подключении наушников. Эта функция реализована в большинстве случаев, но не для каждой предустановленной модели или кода поддержки кодеков.
В любом случае попробуйте другой вариант модели, если у вас есть такая проблема. Некоторые другие модели могут подходить лучше и предоставлять вам больше возможностей для соответствия.
Intel High Definition Audio
Intel High Definition Audio refers to the specification released by Intel for delivering high-definition audio that is capable of playing back more channels at higher quality than previous integrated audio codecs like AC97.
Contents
Identifying HDA on a machine
All HDA devices appear on the PCI bus with a specific VendorID and DeviceID. Many HDA devices have a Vendor ID of 8086 (Intel), and a Device ID such as 2668 or 27D8, but other Vendor IDs are also in use, e.g. Vendor ID 1002 (AMD) and Device ID 4383. If you find any others, please add them into this page. The best way to identify HDA is probably just to look for the Class code (4h) and subclass (3h), but the HDA specification doesn’t tell you to do this.
Overview
The HDA specification (link at the bottom of this page) spells out how to set up devices at the two ends of a link and there is no substitute for working from it, but it takes several readings through its 200+ pages before a clear picture eventually begins to emerge from it, so this overview is aimed at making the most frustrating parts clear from the outset.
You can communicate with the HDA device via memory-mapped ports, but much of the action takes place further away in hardware codecs containing many widgets, and the communication link through to them is rather slow. Setting things up at the near end is relatively easy, part of it being done by keyhole surgery through a couple of ordinary ports in the PCI device configuration space, while the rest is done through the memory mapped ports located at an address found at index 10-17h (though the lowest four bits should be taken as zeros). You may not need to change anything in the PCI configuration space at all, but there’s a fair bit to do with the memory mapped ports to set up and control several DMA engines. Setting things up at the codec end is much more complicated though as you have to interrogate them to find out what they are and what functionality they offer, and then you have to work out how to set them up correctly to create active paths between devices (speakers and mic.s) and DACs/ADCs. All your communications with the codecs and the many widgets they contain will be done by sending special commands via the link.
Data and commands are sent across the link in frames with strict timings and bit limits, but the work of packaging the different kinds of data into packets to go into these frames is all done for you, so all you need to do is set up a number of buffers. Two of these buffers are called CORB (command output ring buffer) and RIRB (response input ring buffer) — each buffer has a DMA engine dedicated to it which will in one case send commands from the CORB buffer across the link to codecs, and in the other case will write responses from codecs into the RIRB buffer. There will in many implementations also be an immediate command port which allows you to send commands to codecs/widgets and to receive responses from them without going through the CORB and RIRB mechanisms, but this route should not be used at the same time as CORB/RIRB as they may conflict, so it should really be reserved for initial exploration while designing your driver. The purpose of CORB and RIRB is to allow large numbers of these relatively slow communications to take place in the background while the processor goes off to do something else.
There are also buffers and DMA engines dedicated to four input streams and four output streams (or at least, it’s four of each in current implementations, but your software ought to check the actual number), each stream needing a descriptor buffer which must contain two or more descriptors (up to 256) which define a list of data buffers used by that stream, and the data buffers which these descriptors define will contain the actual sound samples (or have samples written into them) structured like the content of .wav files (though 20 and 24-bit samples must be padded out with zeros at the LSB end to make them all 32-bits long). The combined length of the sound data buffers can be anything up to 4GiB, so you could set things up to play or record a very long sound file and leave it going all by itself. In reality though, you’ll probably work with chunks of memory a just few megabytes in size (or smaller) as one megabyte gives you room for about six seconds of 16-bit stereo data at 41.1KHz. For performance reasons, making the length of these data buffers a multiple of 128 bytes is recommended.
With all these buffers, the DMA engines jump back to the start and carry on running from there infinitely until you stop them, although with CORB there is a register which stores the last valid command which the DMA engine must stop at (after sending that command) and it will only move on again when that register is modified (by you) to enable more commands to be sent. It is the job of your software to collect data from input buffers before they are overwritten on the next lap. The set of sound data buffers defined by descriptors for a single stream collectively comprise a cyclic stream buffer, but it’s divided up into chunks defined by descriptors to enable an interrupt to be generated at the end of each chunk (interrupt optional) to help you write new data into an output buffer that’s just been sent before the DMA engine returns to that buffer on the next lap, or to copy data out of an input buffer that’s just been written by a DMA engine to make way for more data to be written on the next lap.
At the codec end, you will need to start out by interrogating the root node of each of 15 possible codecs. The STATESTS register at offset 0Eh indicates which codec addresses have codecs at the end of them. The verb F00h will then be used with an 8-bit parameter to request information such as vendor ID, device ID and the starting node number and number of nodes for the function groups in the codec. Having found the function groups, you can use the same verb to interrogate them to find out the starting node number and number of nodes of their widgets, and also the type of the function group itself — AFG (audio function group) is the one you want (unless you’re looking for a modem). You can then interrogate each widget to ask it what its type is (e.g. output converter (DAC), input converter (ADC), mixer, selector, pin complex, power widget, volume knob). Another verb, F02h, allows you to get a connection list of other widgets in the same function group directly connected to the widget you’re interrogating, though you need to use verb F00h first and the parameter at 0Eh to get the connection list length. On the Netbook I program on there is only one codec, one function group (AFG) and 37 widgets (about half of which are vendor defined audio widgets, though many of those don’t exist on the codec manufacturer’s datasheet as they are just holding places for real widgets used on more advanced sound cards). Don’t be surprised if you don’t find a volume control widget — the volume can also be controlled by setting different amplifier levels at the input and output controllers.
Device Registers
The following commands can be sent to specific CODEC nodes using the CORB ring buffer:
- Write 0x2 to Command port to clear IRV
- Write verb to Output port
- Write 0x1 to Command port to set ICB
- Now is verb sending to CODEC
- Wait for IRV is set and ICB is clear what means that response is here
- Now you can read response from Input port
Setting up the AFG codec
Each programmer will likely have their own way of going about this, but the main aim will be to set out to identify which pin complexes are connected to actual speakers, headphone sockets, microphones and microphone sockets before following the trail of connections back to the most appropriate DAC or ADC to handle the stream. How you end up connecting things up will depend on what you want to do: you could, for example, use the same DAC for the speakers as for the headphone jack, but there might be occasions when you want to send different sound streams to each. Similarly, you might use the same ADC for the built-in microphone as for the microphone jack, but you could use a different ADC for each if you need to collect different inputs from different microphones (perhaps using one to collect background noise to subtract from the other input). You might also want to send sound out through the microphone socket so that two people can listen to the same music at the same time on headphones, or you might want to use the headphone socket as an extra microphone socket, perhaps to set up a pair of stereo microphones in a tetrahedron arrangement in order to calculate the direction a sound is coming from. Try to make your driver flexible enough to cover all those cases, or at least to make it easy to adapt it to cover them later.
Here’s an suggestion as to how the initial task might be broken down, but use it only as a rough guide:-
(1) Use verb F00h with parameter 4 and NID 0 (the root node) to find the number of function groups in the codec, then check those nodes using their NID and with verb F00h and parameter 5 to hunt for an AFG function group.
(2) Use verb F00h with parameter 4 and the correct NID for the AFG function group to get the start node (first widget) and number of nodes (widgets).
(3) Collect the following data for each widget: param 9h (primarily to get the widget type); Ch (pin capabilities); Dh (input amplifier details); 12h (output amplifier details); Eh (connection list length); 13h (volume knob capabilities). Also, use verb F1Ch to collect the configuration defaults, and verb F02h to collect the first few entries in the connection list. Don’t worry about whether useful responses are available for each widget — they will send back all zeros wherever they are not relevant.
(4) Sort the results into groups of DACs, ADCs, mixers, pins, etc.
(5) Identify the pins with actual speakers, microphone and sockets for jacks by using the configuration defaults which you collected earlier. Bits 31-30 state which pins have devices attached to them, telling you whether they are integrated devices or sockets into which things can be plugged. Bits 23-20 tell you what the integrated device is or what kind of device will normally be plugged into the socket. Some machines may have multiple output sockets for sound and may in rare cases have more than one set of integrated speakers to play surround sound, so you might need to look at bits 7-4 (default-association) to find out which ones are grouped together as a set, and bits 3-1 (sequence) to determine which are the main speakers in that set. In a few badly configured machines which fail to provide correct information in some of these bits, EAPD capability may serve as an additional clue for tracking down the speakers.
(6) Make two lists of pins: one for those you want to send outputs to, and the other for inputs.
(7) Try to find the shortest paths from the speakers and headphone jacks back to DACs, though you may wish to use different DACs for different pins. See the section «Finding all useful paths through the codec» below for guidance on this, but the first connection in the connection list for a widgit should help you find the right paths for the most common uses, although you may need to explore more items in the connection lists for some of the widgets.
(8) Try to find the shortest paths from the ADCs to any built-in microphone and microphone jack. Again you may wish to use different ADCs for the different inputs or you may wish to share the same one.
(9) Set up the paths you want to use by setting an intitial volume/gain and turning off the mutes at every widget in the chain wherever there is one needing to be set. Use verb 2h to set Format for any DACs and ADCs you’re going to use, and verb 706h to set the stream and the lowest channel. Verb 707 must be used to enable input/output at the pins (and read up on VrefEn for mic.s, if you can find any good information on this — I’m still searching for it). Remember to set Unsol for the jacks too if you want pins to report headphones/microphone being plugged in or removed, but you can poll them if you prefer.
(10) For each path, create a list of volume controls, mutes and the range of numbers that can be used with each volume/gain control to guide the creation of suitable controls for the user to manipulate in order to control each input/output.
(11) Set EAPD to enable the external amp for the speakers.
After you’ve done all that, get the near end of the link set up to get the DMA engines to handle the streams (read the specification carefully and act on it) and with luck you’ll soon have sound coming in and out. If it doesn’t happen that easily, you can set up the DMA position buffer to see if the DMA engines are actually running and looping correctly through the cyclic stream buffers. If all is well there, you might find it useful to use the codec ID to find the datasheet for it just to make sure you aren’t missing anything out in the way you’re setting it up. Also, feel free to improve the instructions on this page so that others can gain from your solutions to any problems you encounter.
Finding all useful paths through the codec
The paths that are potentially useful are the ones that lead from pins with output devices connected to them back to a DAC, plus all the paths from those same pins back to all other pins with an input device connected to them (some codecs allow inputs to be mixed into outputs for such purposes as karaoke, so your device driver might as well make this option available if the codec supports it), plus all the paths from ADCs to all pins with an input device connected. A socket for a jack can be both an output and input device, but not at the same time.
An algorithm guaranteed to find all useful paths is as follows. Write a routine to start at a pin with an attached output device and then call it for each such pin in turn. The routine will look at the association list for the pin it’s starting at and follow the path to the first widget listed there. If it finds a DAC (or a pin with an input device attached), the path can be stored. Else, look at the association list for this widget and repeat the process to examine the next widget in the path. The search will backtrack to the previous widget in the chain once a DAC or pin has been reached, and then the next item in the association list for that previous widget tells you which widget to examine next. If there isn’t a next item in the association list, backtrack again to the widget before it. In this way, all paths are explored, and the task is complete once you’ve run out of items in the association list to explore for the pin you started at. It may be wise to keep count of the number of links in the path just in case a codec sends you round in circles — you should abandon any paths that get too long (perhaps a ten link limit would be safe). For inputs the algorithm is much the same, but you start at each ACD and store any paths that link through to a pin which has an input device attached.
Once you have your list, you can select the first suitable one found for each purpose, while the rest can be offered to the user as alternative options accessed either via a user-interface for the device driver or from the interface of an advanced application which directly offers these other paths whenever they exist on the machine. An audio player could, for example, allow you to sing along with the music it’s playing such that you hear your voice in the headphones (without any delay from the input being put through a conversion to digital and back).
Playing Audio
The following steps must be performed to play audio on an HD Audio device:
(1) Create a buffer list structure, and add at least two buffer entries to the list.
(2) Setup an output stream descriptor, normally located at memory offset 0x100 in the register table above. This descriptor contains the address of the buffer table from step 1, the audio format (44.1k stereo 16-bit, etc.), the total buffer length, the current buffer position, the number of buffers in the buffer list, and most importantly, the RUN bit that will start streaming data to any DACs currently configured to play audio from this stream.
(3) Find at least one speaker or headphone node in the CODEC that you want to use to play your audio, and turn it on by sending a SetPinWidgetControl command to it.
(4) Use the speaker node’s connection table to find out which DAC node it is connected to.
(5) Configure the DAC to use the stream number that you configured above in step 2 by sending it a SetStreamChannel command.
(6) Make sure that the DAC is fully powered (in D0 state). The SetPowerState command is used for this.
(7) By default, the DAC’s output amplifier is muted. Clear the mute bit, and set the gain (volume) by sending the DAC node a SetAmplifierGain command. You can find the maximum gain value by reading the OutputAmplifierCapabilities property on the DAC node (or in some cases, its parent node). Do not be surprised if the maximum volume is the one with 0dB gain — the job of the amplifier at a DAC is to reduce the volume rather than to increase it, so all the other values will usually be negative.
(8) Enable the configured stream from step 1 by clearing its corresponding bit in the StreamSynchonization register.
The audio will play until the end of the last buffer in the buffer list, then it will begin playing the beginning of the first buffer again. You can enable the proper interrupt to be notified when a buffer has been played, so that you can refill the buffer with the next block of audio data.
Unlocked Realtek HD Audio Drivers for Windows 11 (Dolby Digital Live/DTS Interactive)
Guide to enable Dolby Digital Live and/or DTS Interactive:
1. Uninstall your existing Realtek drivers with Display Driver Uninstaller (DDU) and reboot. You will have to disable the use of signed drivers (How To Disable Driver Signature Enforcement, How to disable mandatory use of signed drivers)
2. Download and extract zip file containing original Realtek HD audio drivers R2.80 (In my case I use the version R2.80).
3. Use Pihto’s patch to patch the DLL files (the password is »realtek»). The target filenames are listed on the patcher window. They begin with "rltkAPO64.dll, rltkAPO.dll" and may be in "win32" and "win64" subfolders of the Realtek package. You will have to manually select each file to patch and run the patcher multiple times to patch all matching files.
4. Now run the Realtek setup program. You may be asked to install unsigned drivers. Choose yes.
5. Do not immediately reboot. Instead, open regedit and ensure the "DisableProtectedAudioDG" registry fix is still present. If not, add it again. You need to create it for that, select right click on the blank => New => DWORD (32 bit) value and then name it »DisableProtectedAudioDG» with hex value »1»
6. Reboot, and Dolby Digital Live/DTS Interactive should be available.
7. Working properly on Windows 11 with Realtek version R2.80
This guide only works for the S/PDIF interface and will unlock Dolby Digital Live and DTS Connect
Attachments
Ferather
- Jan 30, 2022
- #2
Gustavo Sicha
- Jan 31, 2022
- #3
This is interesting because the truth is that I don’t know anything about compilation, I don’t know how to sign and I always had problems with the DCH, currently I use my Sony BDV-N9200W/N9200WL Home Theatre System AV Receiver since it is compatible with DTS and Dolby Digital in the interface SPDIF, instead my 4K Q7FN 55» TV only supports Dolby Digital and Dolby Digital+ (ARC) it does not support DTS, DTS HD or DTS X and the HDMI input only supports 2 PCM channels so I connect directly from my PC to the Receiver AV BDV-N9200W / N9200WL via SPDIF interface
Sony BDV-N9200W/N9200WL Home Theatre System
Ferather
- Jan 31, 2022
- #4
AudiophiIe
- Feb 2, 2022
- #5


also have dolby digital live (5.1Surround) selected in realtek
Gustavo Sicha
- Feb 2, 2022
- #6
what an exaggeration man, my spdif barely supports dts and dolby digital xD
for now i only have those encoders
Note: DTS X and Dolby Atmos for home theater don’t work because they send me to the microsoft store and I have the 2 legally purchased licenses.
AudiophiIe
- Feb 2, 2022
- #7
I don’t think there is a connector or device with such availability because it’s a very extensive modding process that bypasses the manufacturer’s device allocation for audio formats
I’m working on a method to unlock the following spatial sound formats for everyone, regardless of device and licenses.
"Dolby Atmos for built-in speakers"
"Dolby Atmos for Home Theater"
& "DTS:X for Home Theater"
but first i will finish a browser extension and merge my project with @emanresu ‘s and release it here in this forum.
other formats can already be unlocked with the help of modding knowledge and appropriate driver modifications, which can be downloaded here in the forum
for example, of course, your featured mod! and the mods by Ferather Alan Fox and Alan Finotty!
DTS DCH Driver for Realtek [DTS:X] | TechPowerUp Forums
DTS:X APO4 + DTS Interactive for Most Devices | TechPowerUp Forums
Making Audio Enhancers Work on Windows | TechPowerUp Forums (Apo Driver)
Realtek DCH Modded Audio Driver for Windows 10 | TechPowerUp Forums
you also can take a look at https://hifi.ooo
_________________________________________
spdif formats

Formats
Gustavo Sicha
- Feb 2, 2022
- #8
I don’t think there is a connector or device with such availability because it’s a very extensive modding process that bypasses the manufacturer’s device allocation for audio formats
I’m working on a method to unlock the following spatial sound formats for everyone, regardless of device and licenses.
"Dolby Atmos for built-in speakers"
"Dolby Atmos for Home Theater"
& "DTS:X for Home Theater"
but first i will finish a browser extension and merge my project with @emanresu ‘s and release it here in this forum.
other formats can already be unlocked with the help of modding knowledge and appropriate driver modifications, which can be downloaded here in the forum
for example, of course, your featured mod! and the mods by Ferather Alan Fox and Alan Finotty!
DTS DCH Driver for Realtek [DTS:X] | TechPowerUp Forums
DTS:X APO4 + DTS Interactive for Most Devices | TechPowerUp Forums
Making Audio Enhancers Work on Windows | TechPowerUp Forums (Apo Driver)
Realtek DCH Modded Audio Driver for Windows 10 | TechPowerUp Forums
you also can take a look at https://hifi.ooo
Windows Registry Editor Version 5.00
[HKEY_LOCAL_MACHINE\SOFTWARE\Microsoft\Windows\CurrentVersion\MMDevices\SPDIF_Formats\ ]
"DisplayName"="AAC"
"TestFile"="%windir%\\system32\\mmres.dll,-3152"
[HKEY_LOCAL_MACHINE\SOFTWARE\Microsoft\Windows\CurrentVersion\MMDevices\SPDIF_Formats\ ]
"DisplayName"="DTS Audio"
"TestFile"=hex(2):25,00,77,00,69,00,6e,00,64,00,69,00,72,00,25,00,5c,00,73,00,\
79,00,73,00,74,00,65,00,6d,00,33,00,32,00,5c,00,6d,00,6d,00,72,00,65,00,73,\
00,2e,00,64,00,6c,00,6c,00,2c,00,2d,00,33,00,31,00,35,00,30,00,00,00
[HKEY_LOCAL_MACHINE\SOFTWARE\Microsoft\Windows\CurrentVersion\MMDevices\SPDIF_Formats\ ]
"DisplayName"="Dolby Digital Plus"
"TestFile"=hex(2):25,00,77,00,69,00,6e,00,64,00,69,00,72,00,25,00,5c,00,73,00,\
79,00,73,00,74,00,65,00,6d,00,33,00,32,00,5c,00,6d,00,6d,00,72,00,65,00,73,\
00,2e,00,64,00,6c,00,6c,00,2c,00,2d,00,33,00,31,00,35,00,31,00,00,00
[HKEY_LOCAL_MACHINE\SOFTWARE\Microsoft\Windows\CurrentVersion\MMDevices\SPDIF_Formats\ ]
"DisplayName"="DTS-HD"
"TestFile"=hex(2):25,00,77,00,69,00,6e,00,64,00,69,00,72,00,25,00,5c,00,73,00,\
79,00,73,00,74,00,65,00,6d,00,33,00,32,00,5c,00,6d,00,6d,00,72,00,65,00,73,\
00,2e,00,64,00,6c,00,6c,00,2c,00,2d,00,33,00,31,00,35,00,30,00,00,00
[HKEY_LOCAL_MACHINE\SOFTWARE\Microsoft\Windows\CurrentVersion\MMDevices\SPDIF_Formats\ ]
"DisplayName"="Dolby TrueHD"
"TestFile"=hex(2):25,00,77,00,69,00,6e,00,64,00,69,00,72,00,25,00,5c,00,73,00,\
79,00,73,00,74,00,65,00,6d,00,33,00,32,00,5c,00,6d,00,6d,00,72,00,65,00,73,\
00,2e,00,64,00,6c,00,6c,00,2c,00,2d,00,33,00,31,00,35,00,31,00,00,00
[HKEY_LOCAL_MACHINE\SOFTWARE\Microsoft\Windows\CurrentVersion\MMDevices\SPDIF_Formats\ ]
"DisplayName"="Dolby Digital"
"TestFile"=hex(2):25,00,77,00,69,00,6e,00,64,00,69,00,72,00,25,00,5c,00,73,00,\
79,00,73,00,74,00,65,00,6d,00,33,00,32,00,5c,00,6d,00,6d,00,72,00,65,00,73,\
00,2e,00,64,00,6c,00,6c,00,2c,00,2d,00,33,00,31,00,35,00,31,00,00,00
[HKEY_LOCAL_MACHINE\SOFTWARE\Microsoft\Windows\CurrentVersion\MMDevices\SPDIF_Formats\ ]
"DisplayName"="Dolby Atmos (Dolby Digital Plus)"
"TestFile"=hex(2):25,00,77,00,69,00,6e,00,64,00,69,00,72,00,25,00,5c,00,73,00,\
79,00,73,00,74,00,65,00,6d,00,33,00,32,00,5c,00,6d,00,6d,00,72,00,65,00,73,\
00,2e,00,64,00,6c,00,6c,00,2c,00,2d,00,33,00,31,00,35,00,31,00,00,00
[HKEY_LOCAL_MACHINE\SOFTWARE\Microsoft\Windows\CurrentVersion\MMDevices\SPDIF_Formats\ ]
"DisplayName"="DTS:X (E1)"
"TestFile"=hex(2):25,00,77,00,69,00,6e,00,64,00,69,00,72,00,25,00,5c,00,73,00,\
79,00,73,00,74,00,65,00,6d,00,33,00,32,00,5c,00,6d,00,6d,00,72,00,65,00,73,\
00,2e,00,64,00,6c,00,6c,00,2c,00,2d,00,33,00,31,00,35,00,30,00,00,00
[HKEY_LOCAL_MACHINE\SOFTWARE\Microsoft\Windows\CurrentVersion\MMDevices\SPDIF_Formats\ ]
"DisplayName"="Dolby Atmos (Dolby MAT 2.0)"
"TestFile"=hex(2):25,00,77,00,69,00,6e,00,64,00,69,00,72,00,25,00,5c,00,73,00,\
79,00,73,00,74,00,65,00,6d,00,33,00,32,00,5c,00,6d,00,6d,00,72,00,65,00,73,\
00,2e,00,64,00,6c,00,6c,00,2c,00,2d,00,33,00,31,00,35,00,31,00,00,00
[HKEY_LOCAL_MACHINE\SOFTWARE\Microsoft\Windows\CurrentVersion\MMDevices\SPDIF_Formats\ ]
"DisplayName"="Microsoft WMA Pro Audio"
"TestFile"=hex(2):25,00,77,00,69,00,6e,00,64,00,69,00,72,00,25,00,5c,00,73,00,\
79,00,73,00,74,00,65,00,6d,00,33,00,32,00,5c,00,6d,00,6d,00,72,00,65,00,73,\
00,2e,00,64,00,6c,00,6c,00,2c,00,2d,00,33,00,31,00,35,00,32,00,00,00
[HKEY_LOCAL_MACHINE\SOFTWARE\Microsoft\Windows\CurrentVersion\MMDevices\SPDIF_Formats\ ]
"DisplayName"="DTS:X (E2)"
"TestFile"=hex(2):25,00,77,00,69,00,6e,00,64,00,69,00,72,00,25,00,5c,00,73,00,\
79,00,73,00,74,00,65,00,6d,00,33,00,32,00,5c,00,6d,00,6d,00,72,00,65,00,73,\
00,2e,00,64,00,6c,00,6c,00,2c,00,2d,00,33,00,31,00,35,00,30,00,00,00
[HKEY_LOCAL_MACHINE\SOFTWARE\Microsoft\Windows\CurrentVersion\MMDevices\SPDIF_Formats\ ]
"DisplayName"="Dolby Atmos (Dolby MAT 2.1)"
"TestFile"=hex(2):25,00,77,00,69,00,6e,00,64,00,69,00,72,00,25,00,5c,00,73,00,\
79,00,73,00,74,00,65,00,6d,00,33,00,32,00,5c,00,6d,00,6d,00,72,00,65,00,73,\
00,2e,00,64,00,6c,00,6c,00,2c,00,2d,00,33,00,31,00,35,00,31,00,00,00
some more digital spdif formats.
AudiophiIe
- Feb 2, 2022
- #9
I don’t think there is a connector or device with such availability because it’s a very extensive modding process that bypasses the manufacturer’s device allocation for audio formats
I’m working on a method to unlock the following spatial sound formats for everyone, regardless of device and licenses.
"Dolby Atmos for built-in speakers"
"Dolby Atmos for Home Theater"
& "DTS:X for Home Theater"
but first i will finish a browser extension and merge my project with @emanresu ‘s and release it here in this forum.
other formats can already be unlocked with the help of modding knowledge and appropriate driver modifications, which can be downloaded here in the forum
for example, of course, your featured mod! and the mods by Ferather Alan Fox and Alan Finotty!
DTS DCH Driver for Realtek [DTS:X] | TechPowerUp Forums
DTS:X APO4 + DTS Interactive for Most Devices | TechPowerUp Forums
Making Audio Enhancers Work on Windows | TechPowerUp Forums (Apo Driver)
Realtek DCH Modded Audio Driver for Windows 10 | TechPowerUp Forums
you also can take a look at https://hifi.ooo
Windows Registry Editor Version 5.00
[HKEY_LOCAL_MACHINE\SOFTWARE\Microsoft\Windows\CurrentVersion\MMDevices\SPDIF_Formats\ ]
"DisplayName"="AAC"
"TestFile"=hex(2):25,00,77,00,69,00,6e,00,64,00,69,00,72,00,25,00,5c,00,73,00,\
79,00,73,00,74,00,65,00,6d,00,33,00,32,00,5c,00,6d,00,6d,00,72,00,65,00,73,\
00,2e,00,64,00,6c,00,6c,00,2c,00,2d,00,33,00,31,00,35,00,32,00,00,00
[HKEY_LOCAL_MACHINE\SOFTWARE\Microsoft\Windows\CurrentVersion\MMDevices\SPDIF_Formats\ ]
"DisplayName"="DTS Audio"
"TestFile"=hex(2):25,00,77,00,69,00,6e,00,64,00,69,00,72,00,25,00,5c,00,73,00,\
79,00,73,00,74,00,65,00,6d,00,33,00,32,00,5c,00,6d,00,6d,00,72,00,65,00,73,\
00,2e,00,64,00,6c,00,6c,00,2c,00,2d,00,33,00,31,00,35,00,30,00,00,00
[HKEY_LOCAL_MACHINE\SOFTWARE\Microsoft\Windows\CurrentVersion\MMDevices\SPDIF_Formats\ ]
"DisplayName"="Dolby Digital Plus"
"TestFile"=hex(2):25,00,77,00,69,00,6e,00,64,00,69,00,72,00,25,00,5c,00,73,00,\
79,00,73,00,74,00,65,00,6d,00,33,00,32,00,5c,00,6d,00,6d,00,72,00,65,00,73,\
00,2e,00,64,00,6c,00,6c,00,2c,00,2d,00,33,00,31,00,35,00,31,00,00,00
[HKEY_LOCAL_MACHINE\SOFTWARE\Microsoft\Windows\CurrentVersion\MMDevices\SPDIF_Formats\ ]
"DisplayName"="DTS-HD"
"TestFile"=hex(2):25,00,77,00,69,00,6e,00,64,00,69,00,72,00,25,00,5c,00,73,00,\
79,00,73,00,74,00,65,00,6d,00,33,00,32,00,5c,00,6d,00,6d,00,72,00,65,00,73,\
00,2e,00,64,00,6c,00,6c,00,2c,00,2d,00,33,00,31,00,35,00,30,00,00,00
[HKEY_LOCAL_MACHINE\SOFTWARE\Microsoft\Windows\CurrentVersion\MMDevices\SPDIF_Formats\ ]
"DisplayName"="Dolby TrueHD"
"TestFile"=hex(2):25,00,77,00,69,00,6e,00,64,00,69,00,72,00,25,00,5c,00,73,00,\
79,00,73,00,74,00,65,00,6d,00,33,00,32,00,5c,00,6d,00,6d,00,72,00,65,00,73,\
00,2e,00,64,00,6c,00,6c,00,2c,00,2d,00,33,00,31,00,35,00,31,00,00,00
[HKEY_LOCAL_MACHINE\SOFTWARE\Microsoft\Windows\CurrentVersion\MMDevices\SPDIF_Formats\ ]
"DisplayName"="Dolby Digital"
"TestFile"=hex(2):25,00,77,00,69,00,6e,00,64,00,69,00,72,00,25,00,5c,00,73,00,\
79,00,73,00,74,00,65,00,6d,00,33,00,32,00,5c,00,6d,00,6d,00,72,00,65,00,73,\
00,2e,00,64,00,6c,00,6c,00,2c,00,2d,00,33,00,31,00,35,00,31,00,00,00
[HKEY_LOCAL_MACHINE\SOFTWARE\Microsoft\Windows\CurrentVersion\MMDevices\SPDIF_Formats\ ]
"DisplayName"="Dolby Atmos (Dolby Digital Plus)"
"TestFile"=hex(2):25,00,77,00,69,00,6e,00,64,00,69,00,72,00,25,00,5c,00,73,00,\
79,00,73,00,74,00,65,00,6d,00,33,00,32,00,5c,00,6d,00,6d,00,72,00,65,00,73,\
00,2e,00,64,00,6c,00,6c,00,2c,00,2d,00,33,00,31,00,35,00,31,00,00,00
[HKEY_LOCAL_MACHINE\SOFTWARE\Microsoft\Windows\CurrentVersion\MMDevices\SPDIF_Formats\ ]
"DisplayName"="DTS:X (E1)"
"TestFile"=hex(2):25,00,77,00,69,00,6e,00,64,00,69,00,72,00,25,00,5c,00,73,00,\
79,00,73,00,74,00,65,00,6d,00,33,00,32,00,5c,00,6d,00,6d,00,72,00,65,00,73,\
00,2e,00,64,00,6c,00,6c,00,2c,00,2d,00,33,00,31,00,35,00,30,00,00,00
[HKEY_LOCAL_MACHINE\SOFTWARE\Microsoft\Windows\CurrentVersion\MMDevices\SPDIF_Formats\ ]
"DisplayName"="Dolby Atmos (Dolby MAT 2.0)"
"TestFile"=hex(2):25,00,77,00,69,00,6e,00,64,00,69,00,72,00,25,00,5c,00,73,00,\
79,00,73,00,74,00,65,00,6d,00,33,00,32,00,5c,00,6d,00,6d,00,72,00,65,00,73,\
00,2e,00,64,00,6c,00,6c,00,2c,00,2d,00,33,00,31,00,35,00,31,00,00,00
[HKEY_LOCAL_MACHINE\SOFTWARE\Microsoft\Windows\CurrentVersion\MMDevices\SPDIF_Formats\ ]
"DisplayName"="Microsoft WMA Pro Audio"
"TestFile"=hex(2):25,00,77,00,69,00,6e,00,64,00,69,00,72,00,25,00,5c,00,73,00,\
79,00,73,00,74,00,65,00,6d,00,33,00,32,00,5c,00,6d,00,6d,00,72,00,65,00,73,\
00,2e,00,64,00,6c,00,6c,00,2c,00,2d,00,33,00,31,00,35,00,32,00,00,00
[HKEY_LOCAL_MACHINE\SOFTWARE\Microsoft\Windows\CurrentVersion\MMDevices\SPDIF_Formats\ ]
"DisplayName"="DTS:X (E2)"
"TestFile"=hex(2):25,00,77,00,69,00,6e,00,64,00,69,00,72,00,25,00,5c,00,73,00,\
79,00,73,00,74,00,65,00,6d,00,33,00,32,00,5c,00,6d,00,6d,00,72,00,65,00,73,\
00,2e,00,64,00,6c,00,6c,00,2c,00,2d,00,33,00,31,00,35,00,30,00,00,00
[HKEY_LOCAL_MACHINE\SOFTWARE\Microsoft\Windows\CurrentVersion\MMDevices\SPDIF_Formats\ ]
"DisplayName"="Dolby Atmos (Dolby MAT 2.1)"
"TestFile"=hex(2):25,00,77,00,69,00,6e,00,64,00,69,00,72,00,25,00,5c,00,73,00,\
79,00,73,00,74,00,65,00,6d,00,33,00,32,00,5c,00,6d,00,6d,00,72,00,65,00,73,\
00,2e,00,64,00,6c,00,6c,00,2c,00,2d,00,33,00,31,00,35,00,31,00,00,00
Acp hda node что это
Две недели пользую этого малыша. Что могу сказать: доволен полностью. Искал такой вариант, даже не мог предположить, что найду в серии ROG 🙂
Что восторгает в модели:
1. Клавиатура. Печать без пропусков, в отличие от многих других ноутбучных клавиатур. Одно удовольствие — печатать!
2. Компактность, трансформируемость, мощь, качество экрана, долгое время работы.
3. Корпус! Это литиево-магниевый сплав, из которого делают только премиальные машины. Легкий и прочный.
4. На удивление, звук! Очень приятный, хорошо разносится на два канала.
1. Шумит, конечно, сильно, когда не используешь в качестве печатной машинки. Например, в играх.
2. Греется прилично, выдувая почти огонь из сопел по бокам и снизу. На коленях при нагрузке не подержишь, — горячо!
3. При подключении к внешнему монитору по USB-C (в мониторе встроенная док-станция), ощущение, что работает медленнее: страницы и файлы открываются с задержкой. Возможно, субъективное мнение. Может, потом поправят в драйверах, а может, DRWEB тормозит ноутбук. Все-таки процессор новейший.
4. Отвалился один раз тачпад, пришлось удалять и по новой устанавливать драйверы.
В любом случае, для меня это — универсальная машина (для работы, для путешествий, для игр), чему я безумно рад.
В моем экземпляре экран полностью ложится на резиновые ножки.
Разрядка в обычном режиме использования — профиль «тихий» + актив iGPU — от -5500mW до 8500-9000mW, в среднем около 6500-7000mW.
Сразу активировал порог заряда до 80%, так как использую от батареи крайне редко и недолго.
Есть у кого идеи как активировать доп. функционал F1-F12 без удержания Fn? Искал решение в MyAsus, Armoury Crate и в биосе — безрезультатно. Ставил софтину с официального сайта Asus, якобы именно для этих целей — аналогично.
Новые новости будет версия с rtx 3050 и rtx 3050 ti (дискретка в замест gtx1650 max q). В Европе вроде моджно уже приобрести как и в Америке на best buy, там другой код не gv301qh, а gv301qe (Вроде проц там будет стоять не Ryzen 5800hs, а Ryzen 5900hs). Интерестно энергопотребление и температура под надгрузками.
Сообщение отредактировал Samuel2388 — 18.05.21, 09:27
Нет. крышка абсолютно плоская и достаточно жесткая, если не давить коленом не гнется 😉
подтверждаю 🙂 Корпус очень прочный: все-таки магниевый сплав. Как уже писал выше, слабое звено — краска, так как корпус крашеный.
Тачпад отваливается периодически, потом сам «воскресает» после перезагрузок. Апдейты БИОСА прилетают с регулярной завидностью. Видимо их будет несть числа, так как ноутбук — на новом железе.
У меня DRWEB тоже ошибку выдал месяц назад, сейчас поправили: в поддержке так и заявили, что проц новый, поэтому будут допиливать продукт.
Как определить и удалить контроллер High Definition Audio (Microsoft)
зайди в "Диспетчер устройств " -> "Вид" — > " Ресурсы по подключению" находишь шину, на которой "висит" наше проблемное устройство . Определившись с шиной, удаляем её (будет предлагать удалить драйверы — не удаляй). После удаления шины потребуется перезагрузка. Войдя в систему, мы сможем понаблюдать как Windows 7 сама ищет и устанавливает устройства, которые были удалены вместе с шиной и с большой долей вероятности наше устройство заработает как надо!
1.Проблеммное устроство это Контроллер High Definition Audio (Microsoft)
В Н И М А Н И Е В О П Р О С ! !
Как мне Определить и удалить правильно эту шину!
Контроллер High Definition Audio (Microsoft) Запуск этого устройства невозможен. (Код 10)
Помогите, уже не знаю что делать. Переустановил Windows с х32 на х64 и пропал звук. Драйвера.
Контроллер high definition audio (microsoft) код 10
Помогите плиз! Пропал звук на ноутбуке acer aspire e1-571g! В диспетчере устройств контроллер high.
Не работает звук — нет драйвера на Audio Device on High Definition Audio Bus
Переустановил систему на компе на виндуоз XP. Звука нет Диспетчер устройств говорит, что нет.
как возпроизвести микрофон на звуковухе IDT High Definition Audio CODEC
дело вот в чем..я подключаю к своему ноуту на микрофонный выход лиюо микрофон либо еще что нить и.