Добавление чата в OBS Studio
Популярный видеохостинг даёт возможность стримить в формате до 4K всем зарегистрированным в Google пользователям, обладающим каналом на данной платформе.
Шаг 1: Получение ссылки
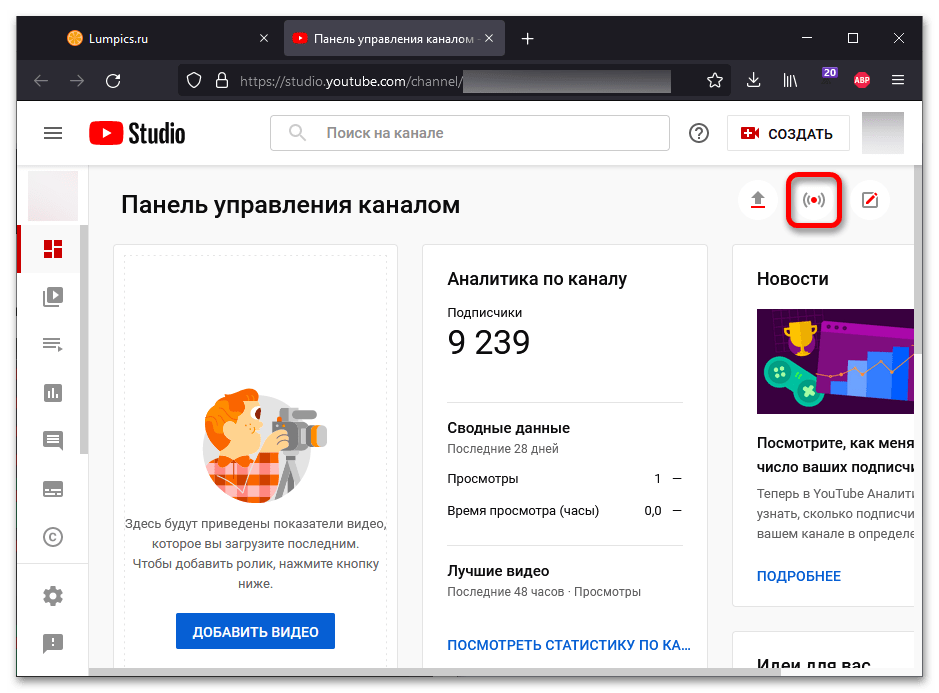
- Откройте Творческую студию YouTube, используя кнопку выше.
- Нажмите иконку сигнала (при наведении курсора подписывается словами «Начать трансляцию»), чтобы перейти к параметрам проведения эфира.
Шаг 2: Оформление
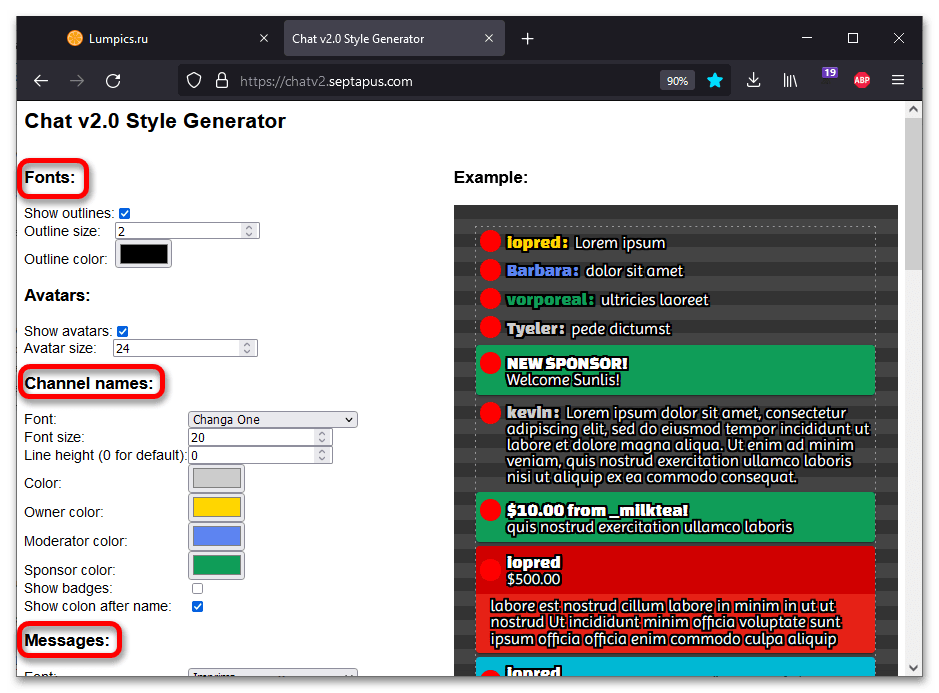
Маловероятно, что чат в исходном виде будет вписываться в стиль оформления остальных графических элементов, таких как оверлей, окна с донатами, баннеры и прочие. Именно поэтому следует кастомизировать вывод сообщений.
-
После перехода на страницу генератора стилей отредактируйте основные параметры: «Fonts», «Messages», «Channel Names». Остальные опции тоже можно изменить, однако они не играют существенной роли.
Важно! Если случайно перезагрузить страницу, все установленные параметры будут сброшены. Если планируется детально настроить все опции отображения, время от времени создавайте резервные копии, просто копируя стили в текстовый документ.
Шаг 3: Добавление
Заключительный этап — добавление чата в OBS.
- Перейдите к сцене, на которой должен отображаться чат. Под сценой подразумевается «экран» (например, простая надпись «Пауза» или геймплей какой-либо игры с оверлеем стрима и подобными элементами). Во вкладке «Источники» кликните «+».
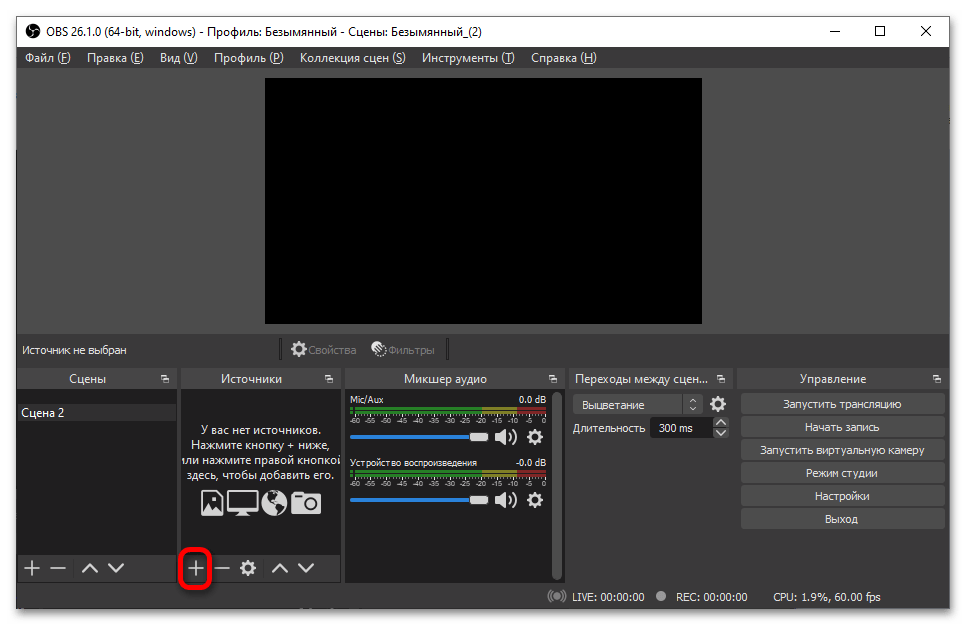
- Выберите вариант «Браузер».
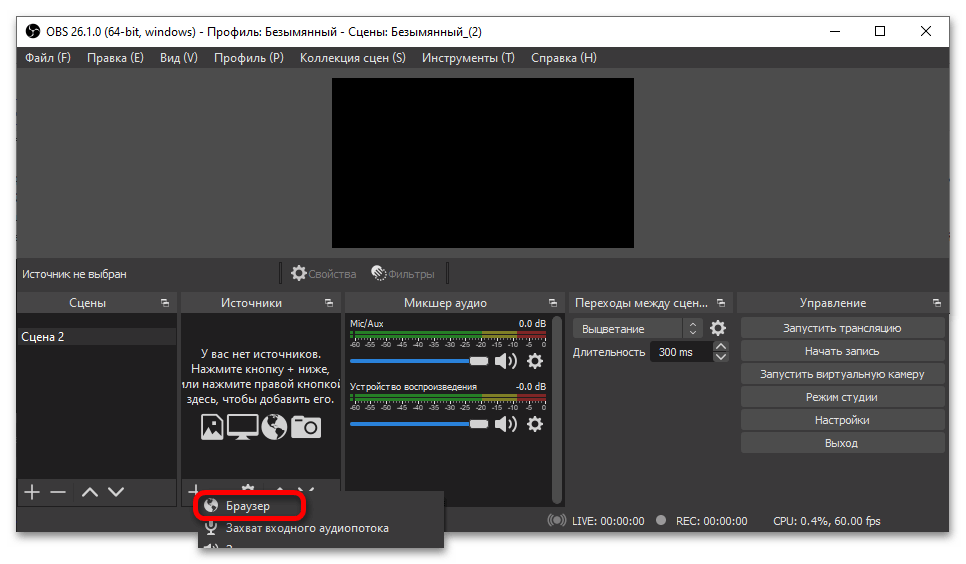
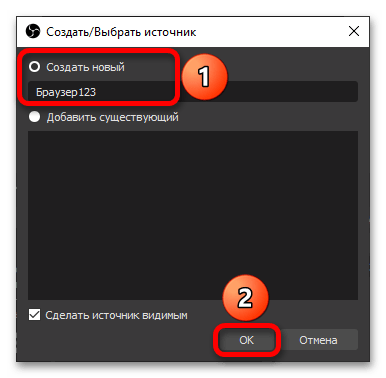
- Нажмите «Создать новый» и придумайте имя для источника. Название не будет нигде отображаться, кроме как в интерфейсе программы. Щёлкните «ОК».
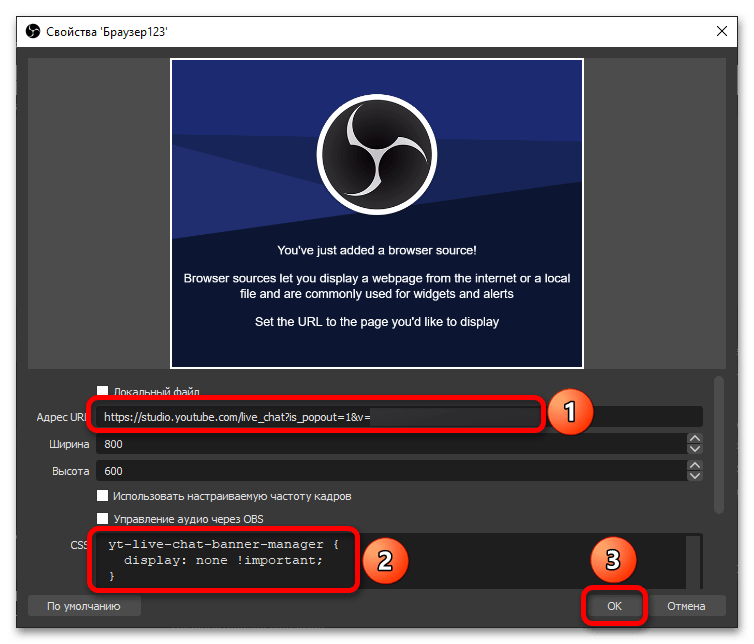
- В поле «Адрес URL» вставьте ссылку на чат, полученную в разделе «Шаг 1» настоящей статьи. Содержимое формы «CSS» полностью сотрите и вставьте вместо имеющихся правил оформления те, что были сделаны в онлайн-генераторе на «Шаге 2».
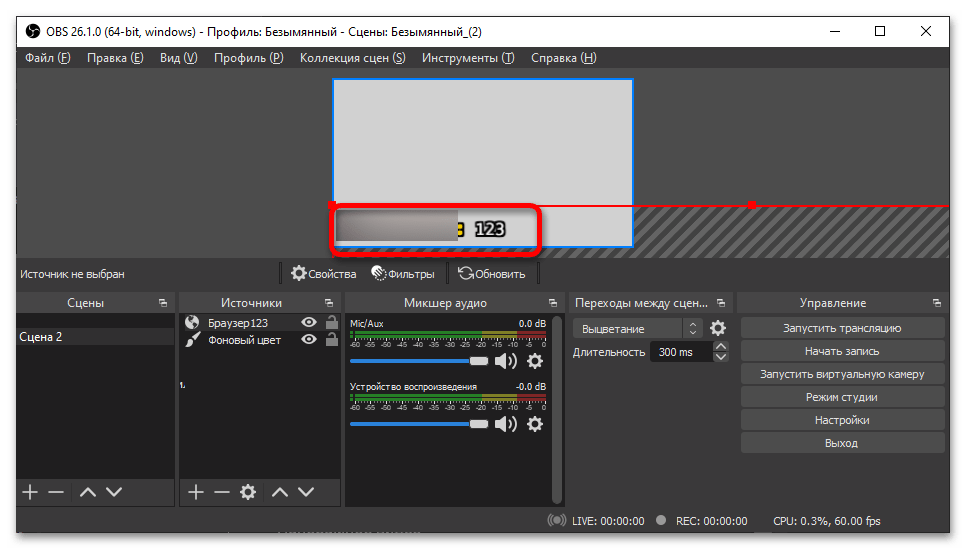
- Разместите окно в нужном месте, перетаскивая его прямо на экране предварительного просмотра. Можно также управлять размером чата.
Внимание! Если после добавления данного виджета вы видите окно с ошибкой, проверьте настройки доступа к стриму. Он не должен быть приватным: отображение сообщений поддерживается только для трансляций с доступом для всех или по ссылке.
Способ 2: Twitch
Решение задачи вывода чата в эфир, проводимый на площадке Twitch, подробно рассмотрено в общей статье о настройке OBS для стриминга на нашем веб-сайте.
Обратите внимание! Twitch печально известен выдачей стримерам блокировок за нарушение правил пользователями их чатов. Подумайте над вариантами модерации выводимых сообщений, чтобы избежать бана из-за тех или иных действий со стороны зрителей.
How to Add Twitch Chat to OBS Studio? (2 Great Options)
There are two ways to add your Twitch stream chat as a window in OBS Studio. You can link your Twitch, which will automatically set up a chat window. If you don't want to link your account, you can manually set it up by using the "Popout Chat" feature in your Twitch Chat Settings. Copy the URL and put it in an OBS browser dock. That's it!
I don't have dreams of becoming the next huge streamer, but I do a little video game streaming in my free time, using Twitch. My nephew came to me wanting to get his Twitch chat box to show up in OBS so he could read and interact with his viewers while playing. I have this in my stream, so I was able to show him how to set it up in just minutes.
If you've been trying to figure out how to add Twitch chat to OBS Studio, I'd be glad to show you how to get this setup. Let's get right into it.
How to Add a Twitch Chat Window to OBS Studio?
Your stream chat is how viewers on your Twitch channel can communicate with you and comment on what you're doing, whether you're playing video games or doing something else.
For people with a single monitor streaming setup, adding Twitch chat as a dockable window in OBS Studio can be extremely helpful. You can see the game you're playing, as well as interact with your viewers, all on a relatively simple setup.
Even people with more than one monitor can benefit from a separate window in OBS that has their stream chat. The alternative is having Twitch open in a separate browser window on another monitor. While this gets the job done, it can be very resource-intensive on your computer.
No matter what your circumstances are, there are two ways to have a chat section in OBS Studio. Note that these methods won't put a chat overlay over your stream. You'll be the only person who can see this chat box.
Add Stream Chat Window By Linking Twitch Credentials
The easiest way to move your chat to OBS Studio is by connecting your account on Twitch to this streaming software.
The developers have made things super easy when you do this. You will automatically get custom browser docks that will display your stream activity and chat within OBS Studio.
If you're worried about sharing your credentials with OBS, you'll be glad to know that you aren't. You're basically logging directly into Twitch, using an OAuth window.
Follow the steps below to link your Twitch channel to OBS:
- Launch "OBS Studio" on your PC.
- Open "Settings". One way to find this option is to click "File" in the top bar.
- Click "Stream" in the left sidebar.
- Open the drop-down menu beside "Service" and choose "Twitch".
- Click the "Connect Account" button.
- This will bring up a new browser window with the login page. Type in your credentials.
- Press "Log In" to finish up.
Once you're done with this, you will have two dockable windows: one is a chat box and the other contains your stream activity, like subs and donations.
Add Twitch Chat Using Popout Chat
If you're not comfortable sharing your Twitch credentials with OBS Studio, that's fine. There's another way that you can add chat to your OBS window, and that's by using the popup chat option.
To get your chat from this popular streaming service set up in OBS, just follow the steps below:
- Launch your web browser of choice.
- Open Twitch.com and go to your channel. Note that you don't necessarily need to be logged in for this method.
- Look for the chat box on your stream. Click the gear icon at the bottom of the chat.
- Select "Popout Chat" from the bottom of the menu. This will open the chat box in a new window.
- Copy the URL link from the new chat window.
- Open "OBS Studio".
- Click the "View" menu from the top bar.
- Expand the "Docks" menu.
- Select "Custom Browser Docks. ".
- In the first empty box under "Dock Name", type in what you want to name the chat. "Twitch Chat" is a good example you can use.
- Inside the "URL" box, paste the URL that you copied from the chat window.
- Click "Apply".
Now, you'll have a window in OBS showing your chat in real time, straight from the source.
How to Insert Chat Box for Other Streaming Services?
If you're someone who uses YouTube Gaming, Trovo, or any live streaming service that supports a popup chat option, you can get a chat box in OBS using the exact same steps, but with the respective URL.
However, Facebook Gaming is one popular service that lacks this chat option. However, there's another way you can get a Facebook Gaming chat window in OBS. You'll need to use StreamElements' OBS.Live plugin.
- Download OBS.Live from the official website.
- Launch the installer and follow the prompts.
- Once the plugin is enabled, sign in using your Facebook credentials.
- Select the elements you want to have in a dock. In this case, it's "Facebook Gaming Chat".
Just like that, you can now have your Facebook Gaming chat show up in your OBS window.
How to Add a Chat Overlay in OBS Studio?
When you watch a stream in fullscreen mode, you won't be able to see the chat any longer. For this reason, I usually don't watch streams that way.
However, did you know that you can put a chat box overlay on your stream content itself, allowing your users to see the chat window even when in fullscreen mode?
The best part is that you can do this easily from your OBS Stream using the features in the app, and any streaming service that supports a popout chat window.
- Open a web browser of your choice.
- Open Twitch in this browser.
- Go to your channel.
- In the chat section, click on the gear icon to open the settings.
- Select "Popup Chat".
- This will open a chat widget in a separate window. Copy the widget URL.
- Launch "OBS Studio".
- Click the plus icon under "Sources".
- We are going to use a browser source, so select "Browser".
- Make sure "Create new" is selected, and type in a name for your chat overlay.
- Press "OK".
- Enter the "URL" you copied.
- You can edit the size of the chat overlay as well.
- Press "OK" to finish up.
The chat you've just added will have a transparent background by default, which makes it more convenient.
Final Words
You can easily get your Twitch chat to show up in OBS Studio by connecting your account in the "Stream" section in OBS settings. This is the simplest way, but you can also manually add it using a custom browser dock.
If you want to, you can even put a chat overlay directly over your stream, which is a great option if you want your content to be enjoyed in fullscreen mode.
How to Add Twitch Chat to OBS
Viewing your chat while streaming is very important to let you interact with your audience. Adding Twitch chat to your stream overlay can be a fun way to make your community feel heard, or give context to what you’re talking about, or who you’re talking to in a YouTube highlight.
- How to Add Twitch Chat to OBS
- How to Pop Out Twitch Chat in OBS
If you’re using OBS Studio as your streaming software, you might be curious as to how you can add stream chat. This guide will cover how you can add Twitch chat to OBS, both as a chat box overlay on your stream and a popout chat for your own viewing.
How to Add Twitch Chat to OBS
Adding a chat box overlay on OBS Studio can be done in two steps:
- Picking a chat box widget
- Adding it to OBS
It’s fairly easy to do, too, so let’s get started.
Pick a Chat Widget
Unlike Streamlabs Desktop (formerly Streamlabs OBS) which has a built-in function to add a chat widget to your stream, OBS Studio doesn’t. To add your own chat box to this streaming service, you will need to do so by using a third-party tool. Here are some of the best ones:
- KapChat
- Streamlabs Chat Box
KapChat by NightDev
KapChat allows you to show BetterTTV and FrankerFaceZ emotes in your chat overlay. It has great customization options if you have any skills using CSS, but if not, you can use their presets which have a more basic style. It’s also the easiest to resize within OBS to fit your overlay and won’t warp.
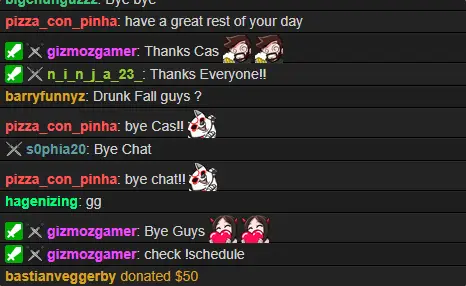
Personally, I use KapChat because I like the ability to change the chat window size in OBS without returning to the website. Moreover, it can be customized using CSS in the future.
By default, KapChat will hide bots from your chat to give it a cleaner look on stream. The other options listed also have this functionality.
Streamlabs Chat Box
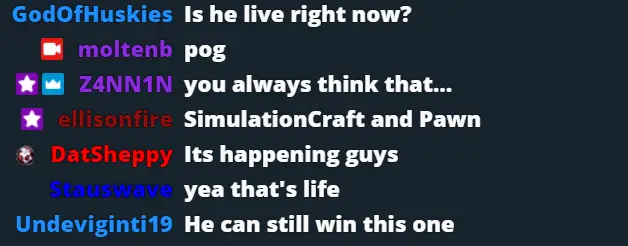
Streamlabs Chat Box is quick and easy to set up. You can use it for free if you have an account on Streamlabs, but with Streamlabs Prime, you can make your chat look great without needing any technical know-how, although this makes costs money.
You can also use HTML/CSS to change the appearance of your chat box.
Like Kapchat, you can have BetterTTV and FrankerFaceZ emotes visible in your chat and 7TV. You can also set Streamlabs to ignore certain users in chat so their messages won’t display on your chat box overlay. Additionally, you can ban particular words from appearing.
Add the Chat Overlay Service to OBS Studio
After picking a third-party service for your chat overlay, you can now add it to your OBS stream. Once you do, it will also automatically show on your Twitch streams.
For this tutorial, we will use KapChat, but from Step 4 onwards, everything will go exactly the same as with other third-party tools. Here’s how:
Step 1 – Get the widget URL from your preferred service and copy it to your clipboard. This is what you will be adding to your OBS sources to add the chat to your overlay. If you’re using KapChat, this will be given to you after you choose your basic options for your chat design and layout.

Simply go to KapChat’s official webpage, and click the “Get It” button. This popup window above will automatically appear.
Fill in the details and then click “Generate.”
Copy the given link.
From here on out, the process will be the same for all third-party chat widget services.

In the “Sources” section of OBS, go to the “+” in the bottom left corner. Then, choose “Browser” to create a new browser source window.

On the new window, paste the URL that you got from your chosen chat widget into the URL box. Then, press “OK” in the bottom right corner.
If you want to resize your chat window to fit a specific place in your overlay, this can be done in the widget editor for Streamlabs online.
With KapChat, you can change the “Width” and “Height” properties of the browser source within OBS and it will resize automatically. Generally, it’s a bad idea to resize chat windows by dragging the edges of the box in the editor window, as this will warp the text and won’t look as clean or professional.
How to Pop Out Twitch Chat in OBS
When you go live on Twitch, it’s a good idea to be able to see your chat to moderate it and talk directly to your viewers. OBS has an option to show your Twitch chat within the application, so you can have one less window open while streaming. This does not show on stream, and it’s only there for you to moderate the chat while streaming using a second monitor.
The popup chat should default show when you open OBS Studio after connecting your Twitch account.
In OBS Studio, click Docks on the list of options. You can find this on the toolbar or the “ribbon bar” of the window.
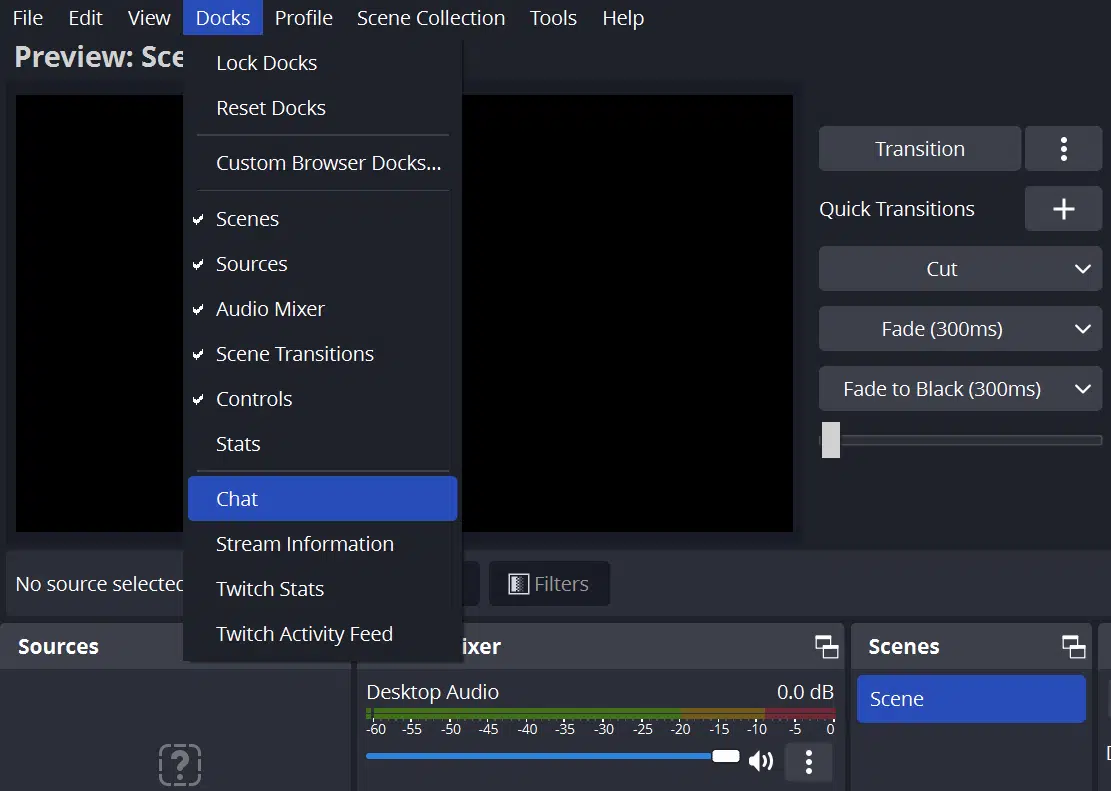
Note: You can also select Custom Browser Docks for this one, and then enter a chat widget URL. But since popout chats are just for viewing yourself (which won’t show on your streams), customizing its appearance is unnecessary unless you want to.
Conclusion
Adding chat to your overlay may be daunting at first, but it can quickly provide something special to your stream, especially if you’re the type who’s focused on talking with your audience or you plan to make a YouTube video out of your stream content. With various chat window styles and customization options, there’s sure to be one perfect for you!
Как вывести чат на экран стрима в OBS Studio
Для большинства зрителей намного удобнее смотреть стрим и следить за чатом прямо с экрана трансляции. Ведь если не видеть сообщений из чата, не всегда будет понятно о чем говорит стример в некоторых моментах.
Чат от StreamLabs
Для тех кому не удобно устанавливать дополнительные приложения (программы) на компьютер, могут воспользоваться сервисом StreamLabs.com
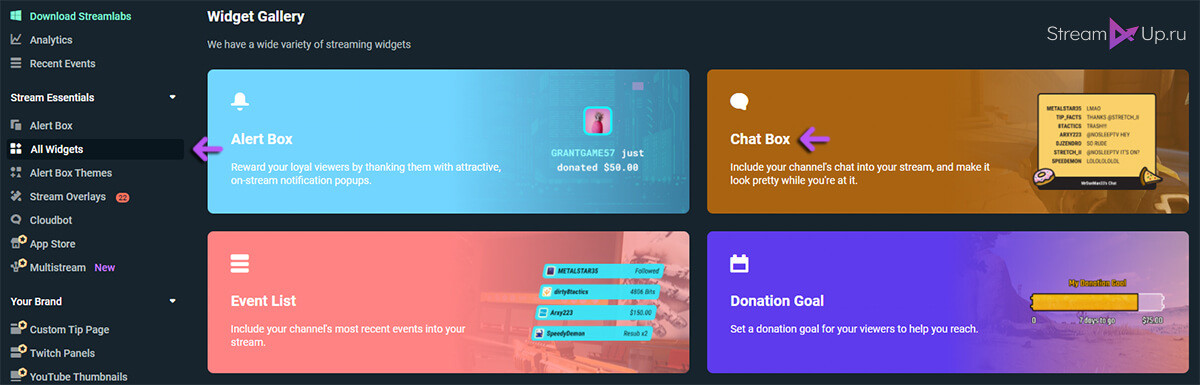
Установка и настройка виджета чата StreamLabs простая, но, к сожалению, мало бесплатных тем оформления.
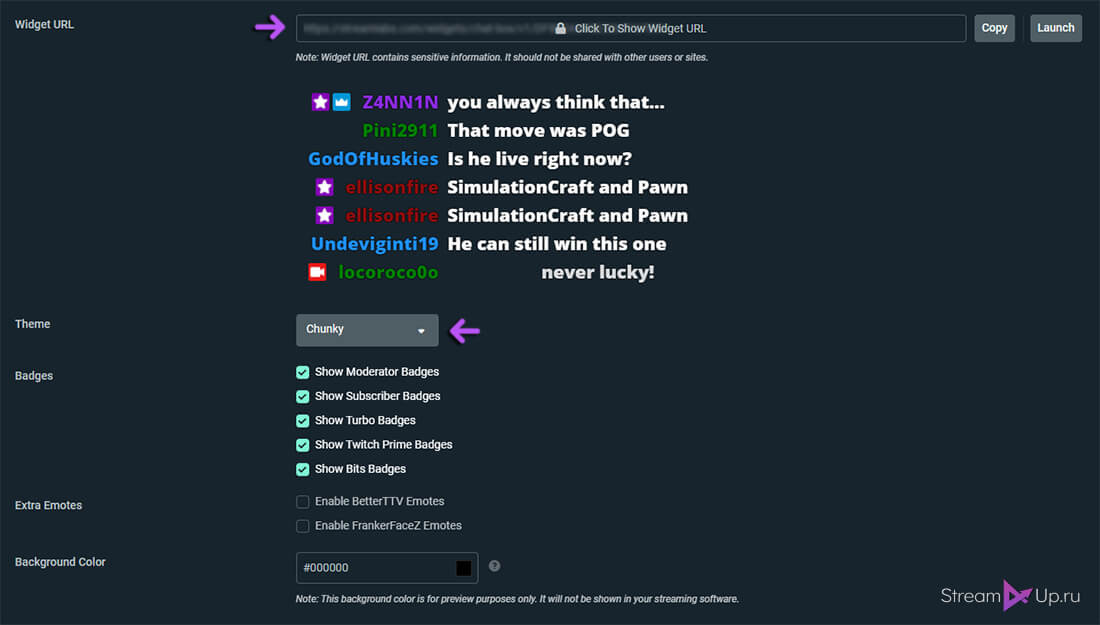
Чат от Restream Chat
Установка и настройка Restream Chat также проходит быстро. Подробнее об этой программе вы сможете узнать из нашего ранее опубликованного поста
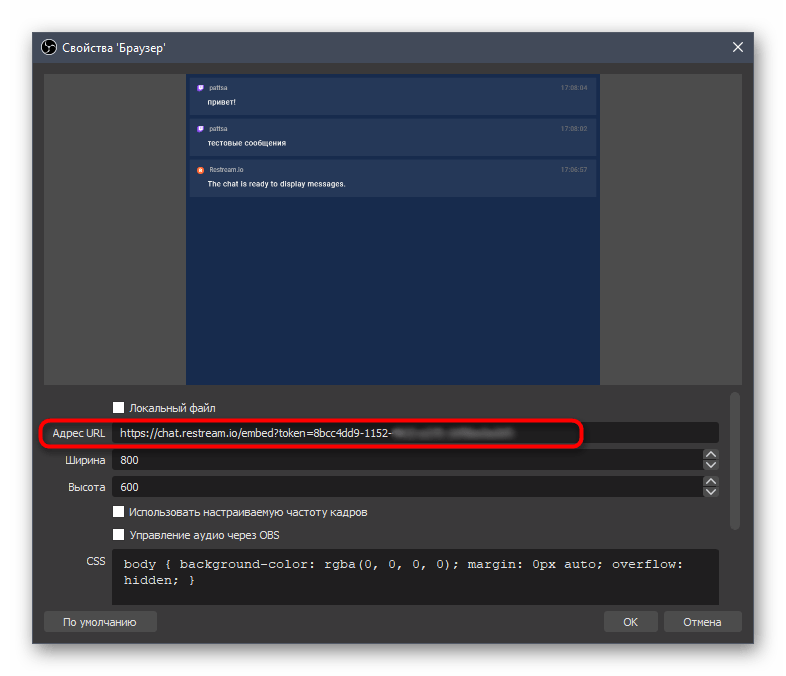
Ссылка для установки чата в OBS Studio находится в настройках Вставка в стрим.
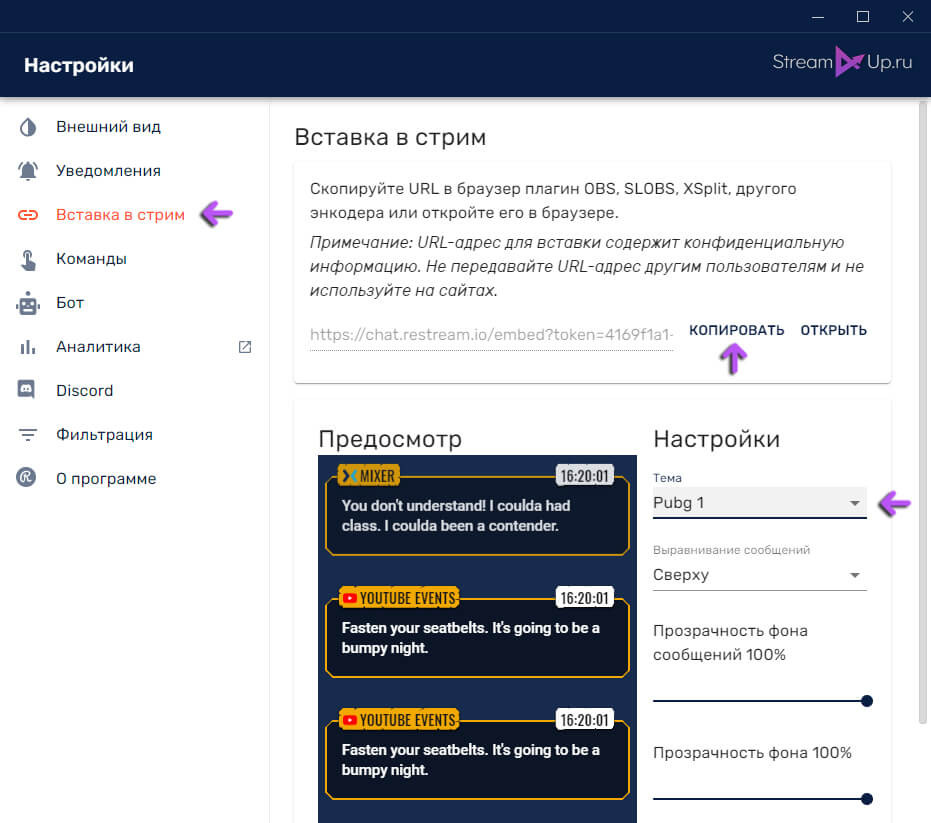
В отличии от виджета StreamLabs, здесь есть много различных тем оформления чата. Вы легко сможете подобрать стиль под тематику своего канала.
Установка чата в ОБС
Чтобы встроить ваш чат стрима на экран, необходимо скопировать URL виджета и вставить его в OBS Studio
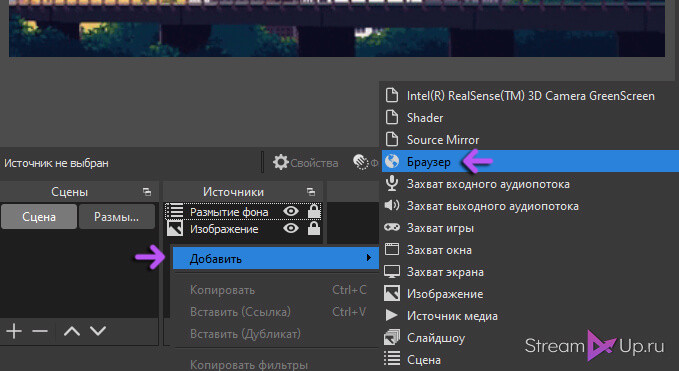
Добавьте к вашей сцене источник Браузер. И вставьте ранее скопированный URL в поле Адрес URL.
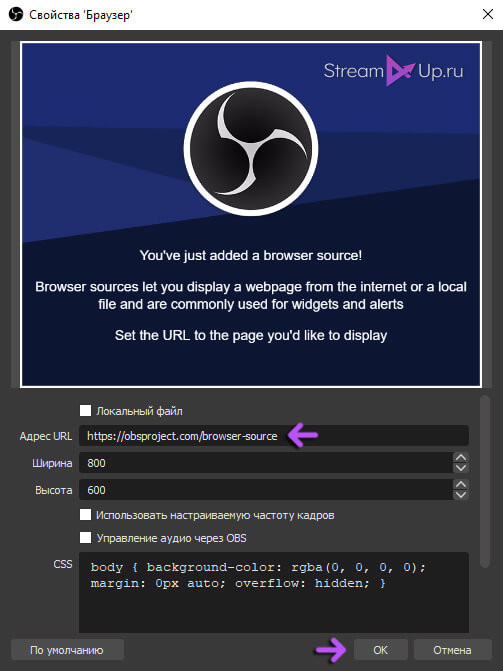
Ширину и высоту вы можете не менять, а все настройки по размеру и оформлению чата делать только в самих виджетах StreamLabs и Restream Chat.
Вы также можете оригинально разместить чат на экране стрима, добавив на источник Браузер в OBS Studio фильтр 3D Transform от плагина StreamFX