DaVinci Resolve: как добавить текст, способы добавления текста в DaVinci Resolve
После того, как вы закончили работу с текстом, вы можете экспортировать свой проект в нужном формате. Для этого выберите вкладку «Рендер» в верхней части экрана.
Выберите нужный вам формат для экспорта, настройте параметры экспорта и щелкните на кнопке «Рендер». Ваш проект будет экспортирован в выбранный вами формат и готов для использования.
How to Add Text in DaVinci Resolve
The advent of social media has made video creation more important than ever before. As small of a detail as it may seemingly be, text is one of the most important tools in a video editors toolbelt, especially for those posting to social media platforms.
Statistics show that 85 percent of Facebook users watch videos on mute, and that 69% of people view videos in public places with zero sound at all. Youtube videos, Tiktok content, and Instagram reels all tend to be watched with little to no sound. This is a massive number, leading to an increased demand for subtitles and motion graphics.
Available for both Mac and Windows devices, DaVinci Resolve offers a lot when it comes to creating beautiful text and subtitles. In this post, we’ll go over how to add text in DaVinci Resolve 16, DaVinci Resolve 17, and DaVinci Resolve 18.
This guide will also show you how you can use Simon Says’ transcription and captioning software to seamlessly work with text directly in DaVinci Resolve.
Why use text in DaVinci Resolve
Text is a great tool to get information across to your audience. It can be used in tutorials to emphasize a point to your viewers, to grab audiences’ attention at the start of the video, or simply to get as much information out on screen as possible.
Text can range from simple title screens or credits to complex motion graphics with slick animation and colorful fonts. The text you use will entirely depend on the type of content you’re looking at creating.
A filmmaker, for instance, is most likely going to use text sparingly in DaVinci Resolve. Text might only be used for the opening title and credits, barring a few exceptions. There are definitely areas where filmmakers can use text creatively. UI Huds, for instance, in films such as Iron Man use text for informational purposes.
Commercial and social media creators are more likely to use text in order to enhance the content seen on screen. The text style in these scenarios tends to be more boisterous and flashy. Text in advertisements can be used for lower thirds, letting viewers know the person’s name and occupation when they appear on the screen. Videos for platforms like TikTok and Instagram may also use flashy subtitle text to draw people in.
Adding text to videos in Resolve
Adding text in DaVinci Resolve is incredibly simple for beginners, with plenty of advanced options for more technical users. Everything you need can be found by clicking on the Edit page at the bottom of the screen.
There’s also the media page, the cut page, the color page, the fairlight page, and the deliver page. These various pages offer different tools such as color grading and motion graphics.
However, the Edit page is the main one to focus on though, and is where most of the key editing features can be found in DaVinci Resolve.

To add text, go to the Effects library in the top left-hand corner. This will open up a small pop-up window in the lower left-hand corner.

The effects toolbox contains a series of transitions, presets, and text titles. Creating text can be done by clicking on Title and going down to Text. Dragging and dropping this text icon into your timeline will create a basic text layer.

You can edit text and change things such as the font, color, size, and position of your text by going to the video tab on the top right-hand side of the screen. You’ll also have options for more visual effects such as drop shadow and background color.

If you want, you can also utilize keyframes in the video tab which allows you to animate text. Keyframes can be added by clicking the diamond icon next to any of the effects.

To animate the motion of the text, click the diamond icon next to Position. Moving the playhead forward a bit and then moving the positioning of the text will give you a text animation upon playback.
You can do the same thing for pretty much every text option including things such as zoom and rotation angle. To view the keyframes, you’ll want to go down to the timeline and click on the diamond icon on your text.

If you right-click on the keyframes inside of the text layer, you’ll be able to set that specific keyframe to Linear or Ease-in.

Adding Text Using Fusion
More advanced users can also add text from the Fusion page, allowing for even more advanced customization. Fusion uses a node-based workflow which may look confusing for those starting out but gives you much more control over your effects.
You can add Text + or 3D Text by clicking on the icons at the lower hand of the Fusion screen. Clicking on either of these will bring up a text box containing similar text options to those on the Edit page. The Fusion Text allows for much more keyframe options though such as Line Spacing and Tracking.

The great thing is that you don’t need to always go into Fusion to access some of these effects. If you go back to the Edit tab and then go to Effects, you can add Text + straight from the Effects library. Drag it right into the timeline as you would for the traditional text effect.

How to add effects to text in DaVinci Resolve
The effects library also offers a wide array of animated text. The Fusion Titles section gives you a slew of presets to play around with. Most of these options are animated as well.

You can also add effects to the text layer as you would any other clip in your timeline by going to either Video Transitions or by going to Effects.
An alternative for adding text in DaVinci Resolve
Today, there are billions of hours of video content, all of it more readily available to the public than ever. While this is amazing for consumers, it can be a double-edged sword for video creators. More videos floating around means that each video a creator produces really has to stand out. Everything from the shooting to the editing to the presentation has to be perfect and meticulously crafted.
This includes subtitles and closed captioning as well. In the age of social media, closed captioning and subtitles have become more critical than ever for video content creators. As we mentioned earlier, many viewers will consume content on these platforms without any audio.
As such, video editors must find new ways to convey the message of your content. Subtitles and captions allow you to do this, but implementing them often comes at the cost of an efficient editing workflow. This is where Simon Says comes in.
With Simon Says, you can add captions and subtitles to footage natively within DaVinci Resolve in 100 languages — all with the click of a button. To say this can significantly improve your video editing workflow is an understatement. Teams can go from spending hours adding subtitles to just minutes.
Simon Says can also translate the transcripts you generate in Resolve to any of the supported languages. Plus, the app is lightweight so you don’t have to worry about it hindering the performance of Resolve.
How to Add Text in DaVinci Resolve: Step by Step Guide
DaVinci Resolve is one of the most intuitive video editing software options, offering high-quality tools while being free and compatible with most operative systems. Plus, with the DaVinci Resolve plugins, you can expand the effects library at your disposal and bring to life truly professional content.
With DaVinci Resolve, you can edit video and add and edit audio tracks in no time. Today, I want to talk about how to add text in DaVinci Resolve to create titles, subtitles, captions, and other forms of text to your video content.
In this guide, I’ll walk you through all the necessary steps to add text to your videos with DaVinci Resolve, an amazing (and free) video editing software.
Step 1. Import a Video Clip to DaVinci Resolve
Let’s start with the first settings you need to adjust before adding text to your video editing software. There are three ways to import media in DaVinci Resolve:
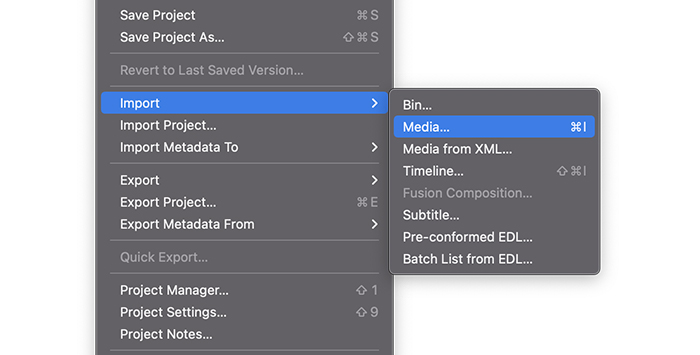
1. On the upper menu, go to File > Import File > Media. Find the folder where your clips are and click Open.
2. You can also import media with CTRL+I on Windows or CMD+I on Mac.
3. The third way to import a video or folder is by dragging it from your Explorer window or Finder and dropping the video clip into DaVinci Resolve.
Now, you should see a video clip in our media pool. However, you can’t edit it from there: you need to create a Timeline.
Step 2. Creating a New Timeline in DaVinci Resolve
You need to create a new Timeline to add the clip you just imported. First, make sure you change your view to the Edit page from the icons at the bottom. As customary with DaVinci Resolve, there are different ways you can create a new Timeline.
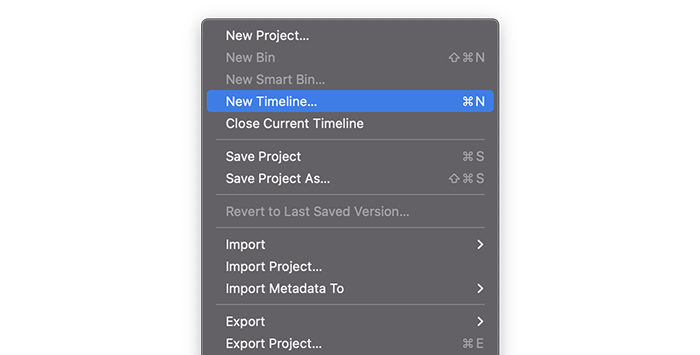
1. Go to File on the menu bar and select New Timeline. In the pop-up window, you can choose your settings, such as Start Timecode, change the Timeline name, and select the number of audio and video tracks you want and the audio track type.
2. If you prefer working with shortcuts, you can bring the Create New Timeline window with CTRL+N or CMD+N.
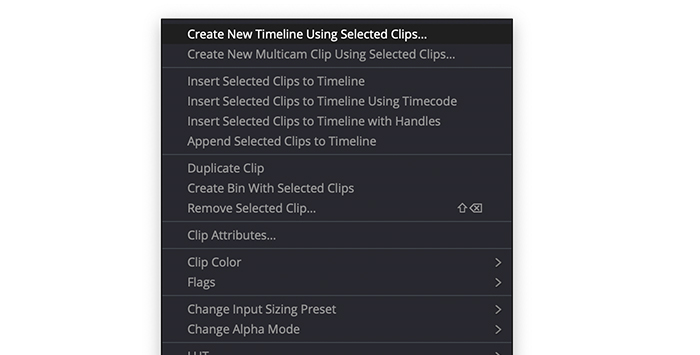
3. You can also create the Timeline from the Media Pool by right-clicking the clip we imported and selecting Create New Timeline Using Selected Clips.
4.Dragging and dropping the clip to the Timeline area will also create a new Timeline from the video clip.
Step 3. Add Text Using the Effects Panel
DaVinci Resolve has many effects that allow you to include text. Let’s take a look at four different types of texts you can find in DaVinci Resolve: Titles, Fusion Titles, 3D Text, and Subtitles. I’ll show you how to add each one of them and what you can do with these types of text.
1. Click on the tab Effects library on the upper left menu if you cannot see the Effects Control Panel.
2. Select Toolbox > Titles.
3. You’ll see many options available separated into three categories: Titles, Fusion Titles category, and Subtitles.
4. To add the effect, drag and drop it to your Timeline above the video clip.
5. In the Timeline, you can move the title where you want to place it.
This is how you can add text effects to your video, but now, let’s delve deeper into each type of text effect.
How to Add Basic Titles in DaVinci Resolve
In Titles, you can choose between some preset Titles to appear on the left, middle, or right side, scroll titles, and two types of simple text. We’ll create a basic title using the Text effect.
1. On the Effects library, go to Toolbox > Titles > Titles.
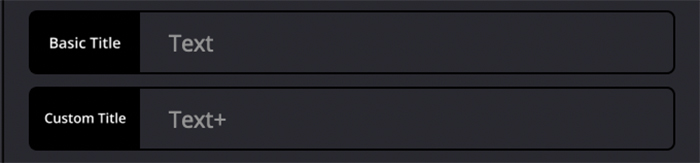
2. Below Titles, scroll down to find Text or Text+. These two are simple titles, but Text+ has more advanced options than the other.
3. Drag the effect to your Timeline above the video clip.
Edit basic Titles settings
We can change the font, font style, color, size, positions, background color, and many other settings from the Inspector. Follow these steps to edit a basic title.

1. In the Timeline, select the text and open the Inspector tab on the upper left menu.
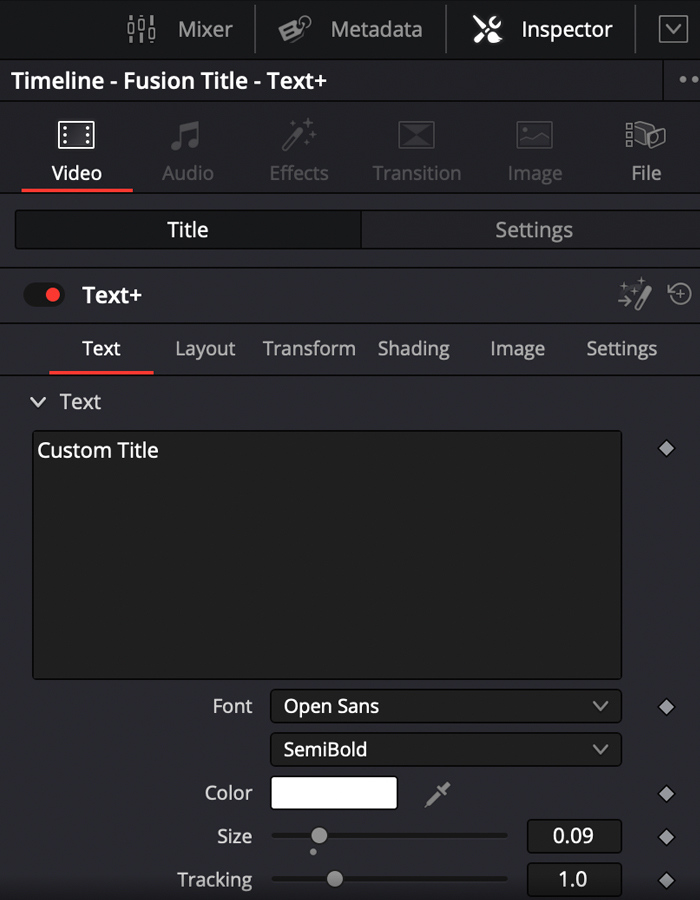
2. In the Title tab, you can write the text you want to appear on your video.
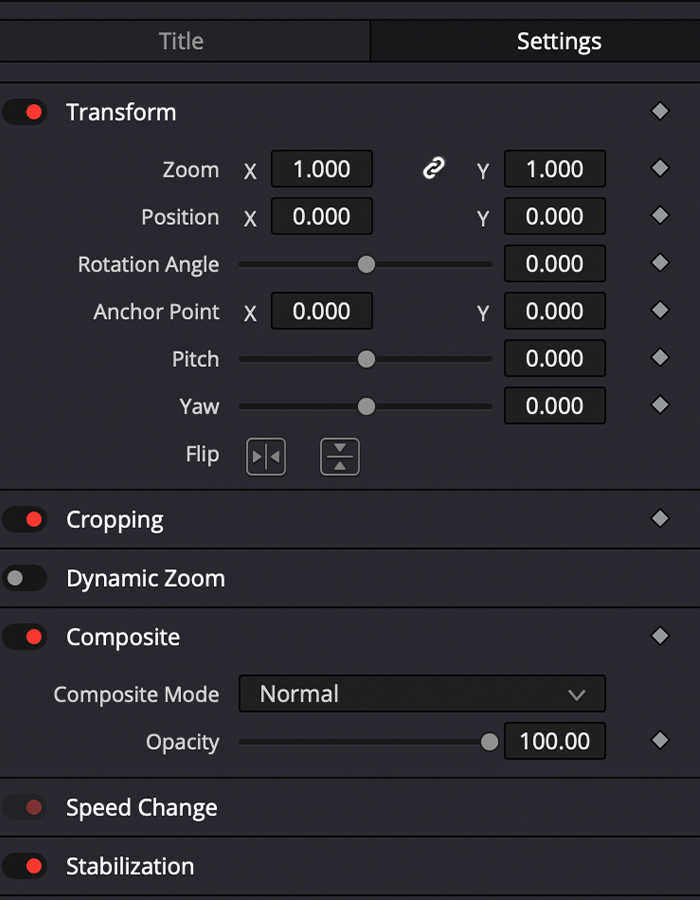
3. Under the Setting tab, you can adjust the zoom, starting position, and rotation.
4. Adjust the settings to create the perfect titles for your videos, preview them, and exit the Inspector when you obtain the desired effect.
After making changes, you can undo them with CTRL+Z or CMD+Z, so don’t worry if something goes differently than planned.
How to Add Fusion Titles in DaVinci Resolve
Fusion Titles are more advanced techniques to add text in DaVinci; most are animated titles or have a more complex design for movie titles or credits. Let’s add some Fusion Titles to our project in just a few clicks.
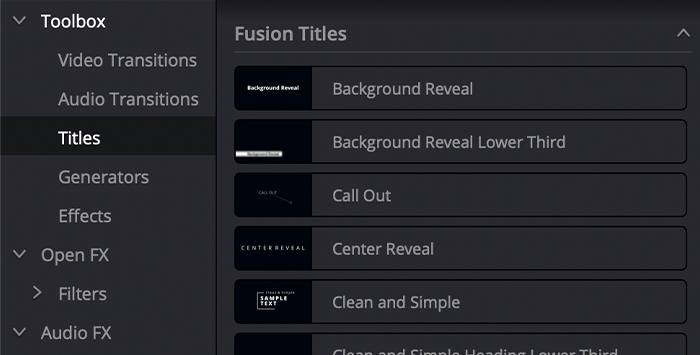
1. Follow the path Effects Library > Toolbox > Titles > Fusion Titles.
2. Under this category, you can preview each title if you hover the mouse over the effect.
3. To add a Fusion Title, drag and drop it to the Timeline like any other effect. It can be placed anywhere in the Timeline, but if you want your video to be visible with the title, put it above the video clip.
Fusion PAGE settings
You can edit the Fusion feature in the Inspector as we did with the basic titles.
How to Add Subtitles in DaVinci Resolve
DaVinci Resolve offers an easy way to create subtitles for our videos. With this option, you don’t have to make a text effect for every line of dialogue on your videos. Whether you want to add subtitles in a foreign language or use them as captions for your video tutorial, follow the next steps to add text to your video.
Step 1. Create a Subtitle track
1. Make sure you are in the Edit tab by clicking on it from the bottom menu.
2. Go to Effects Library > Toolbox > Titles.
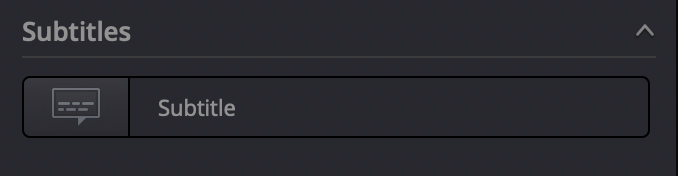
3. Scroll down to the end to find the subtitles category.
4. Drag and drop it into the Timeline to create a new track called Subtitles.
5. You can create the new subtitle track from the Timeline by right-clicking on the track area and selecting Add Subtitle Track from the dropdown menu.
Step 2. Add subtitles
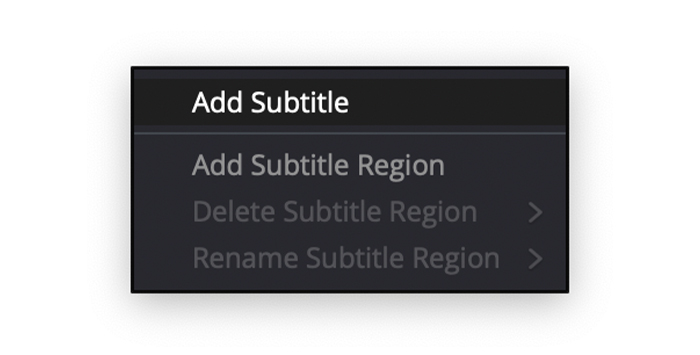
1. Right-click on the Subtitle Track area in the Timeline and select Add Subtitle from the dropdown menu.
2. The new subtitle will be created where we left the playhead, but you can move the new subtitles wherever you want and make them as long or short as you need them.
Step 3. Edit subtitles
1. Select the new subtitle clip and open the Inspector to edit your subtitles track. You can also access the Inspector by double-clicking the subtitle clip.
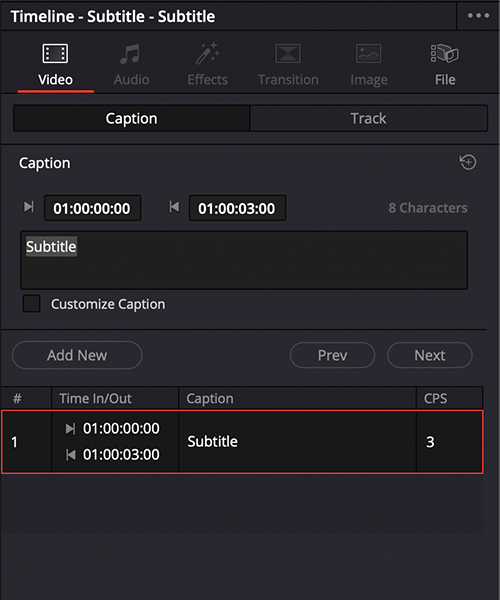
2. On the Caption tab, we can adjust the duration.
3. Next, we have a box to write the subtitles we want to audience to read.
4. The last option is to create a new subtitle from the Inspector and move to the previous or next subtitle to edit.
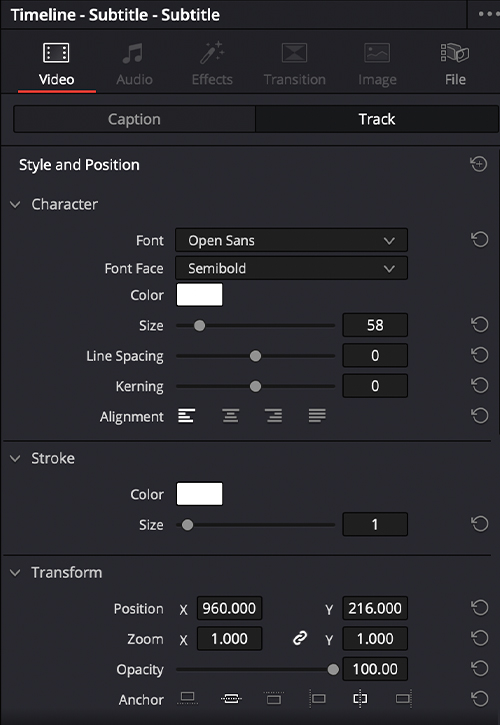
5. On the Track tab, we’ll find options to change the font, color, size, or position. We can add a stroke or a drop shadow and change the background color, with each section having its settings to adjust to your preferences.
How to Add 3D Text in DaVinci Resolve
3D text is another type of text we can use in our videos to make texts more dynamic. These simple steps allow you to add basic 3D texts with Fusion.
Step 1. Create the node sequence
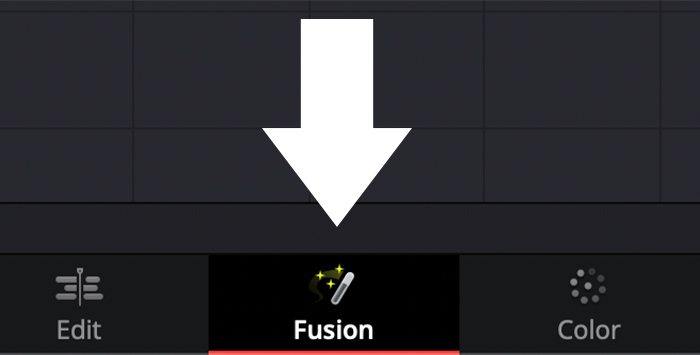
1. Switch to the Fusion tab on the bottom menu.
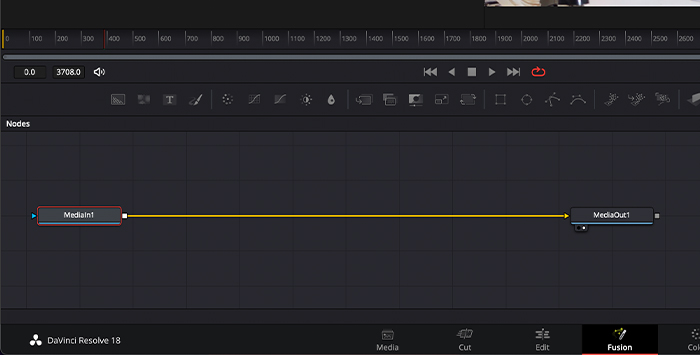
2. You’ll see right now there are only the MediaIn and MediaOut nodes.
3. Below the player controls are options to add all the nodes, separated by a bar in sections. The ones on the far right are the 3D options. We’ll add Text 3D, Renderer 3D, and Merge 3D nodes.
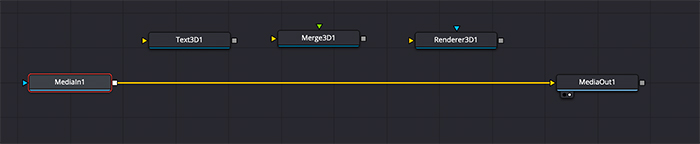
4. To add these nodes, click and drag them to the node workspace.
5. Connect each other in the following sequence: the Text 3D output to the Merge 3D scene input and the Merge 3D output to the Renderer 3D scene input.
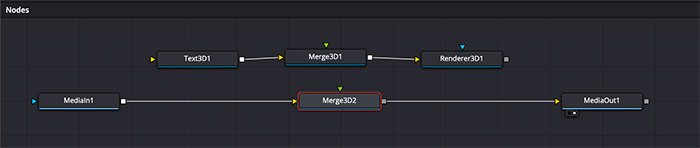
6. Once we have them all connected, we need to add a regular Merge between MediaIn and MediaOut. Drag it in the middle, and it will automatically connect between them.

7. Now we need to connect the output of the Renderer 3D to the Merge that we just added between MediaIn and MediaOut.
Step 2. Activate viewers
To see our video and text, we need to activate the viewers.
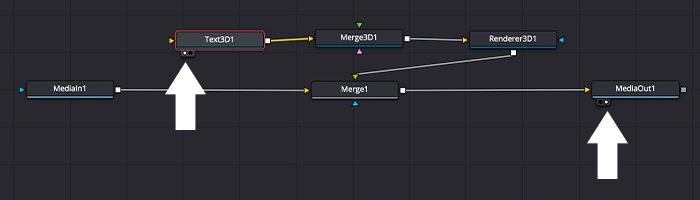
1. Select the Text 3D node. You’ll notice two little circles appear at the bottom, select one to display the text on the first viewer.
2. Select the MediaOut node, then select the second circle to activate the second viewer, where we’ll see the merge of the video clip with the text.
Step 3. Edit 3D Text
I won’t get too deep into Fusion because it’d require a separate article to describe all its functions; instead, I’ll provide you with a quick guide on creating 3D texts.
1. Double-click the Text 3D node to open the Inspector.
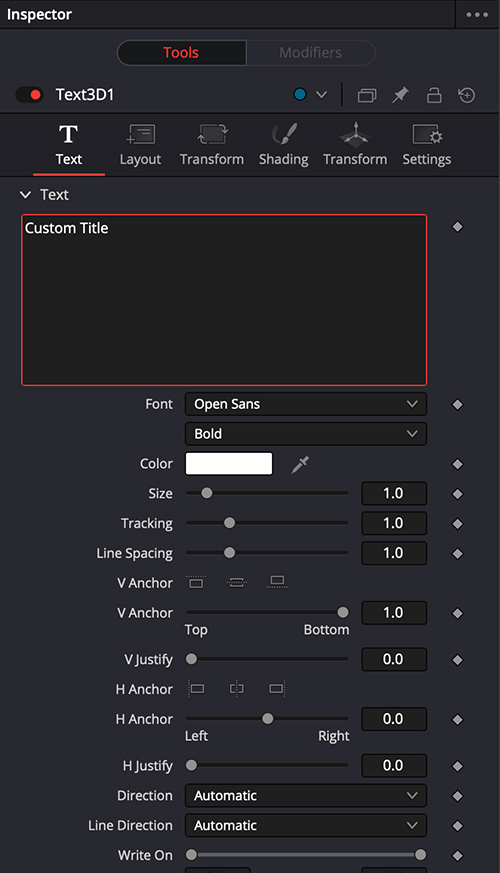
2. The first tab will allow us to write the text we want and change font, color, and size. The Extrusion Depth will add that 3D effect you need.
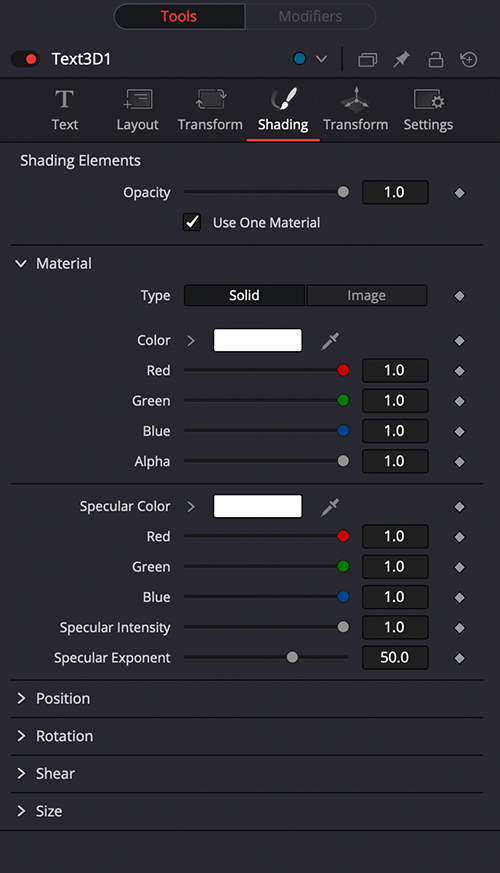
3. In the Shading tab, you can change the material of our texts under Material. Change from Solid to Image to add more settings at the bottom. Select Clip as the Image Source and then browse for the picture you want to use.
4. Play with the settings as much as you need to achieve creative 3D texts.
Step 4. Add Animation to Your Texts in DaVinci Resolve
If you choose a basic title, you should animate your texts to give a nice touch to your videos. Let’s find out how to do it with transitions and keyframes.
Video Transitions
We can add video transitions to our text clips to create an easy and fast animation for our Titles.
1. Select the text clip and go to Effects > Toolbox > Video Transitions.
2. Select the transition you like and drag it at the beginning of the text clip.
3. You can add an effect at the end too.
Fade-In and Fade-Out Effect With Keyframes
Keyframes will allow us to create a fade-in and fade-out effect on our texts in DaVinci Resolve. Let’s create a basic animation of the text entering from the left and disappearing from the right side.
1. Double-click on the text to open the Inspector.
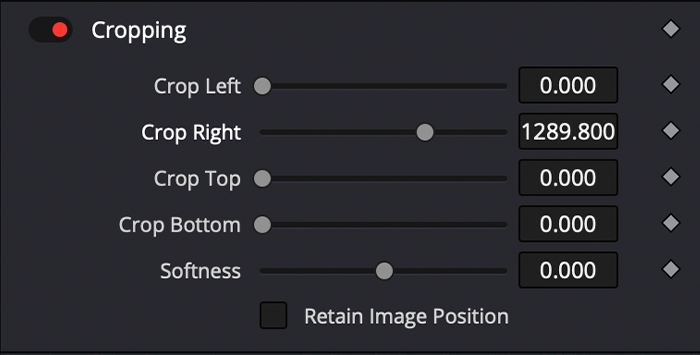
2. Switch to the Setting tab and scroll down until you find Cropping.
3. We’ll move the Crop Right slide until the words disappear and click on the diamond at the right to create the first keyframe.
4. Move the playhead and change the Crop Right slider until you see the words; it will add text in a second keyframe.
5. Now, move the playhead again and create a keyframe in the Crop Left slider for the fade-out effect.
6. Move the Playhead one more time where you want your words to disappear, and move the Crop Left slider to create your last keyframe.
7. You can preview the keyframes you created by clicking the little diamond at the bottom of the text clip. From there, you can rearrange them if needed.
Final Thoughts
Now that you have learned how to add text in DaVinci Resolve, you’re ready to upgrade your future projects with professional text! Adding text to videos is fundamental in many areas of filmmaking, especially if you’re working with commercials and need to add product information, need captions for dialogues, or want to create titles and subtitles for movies.
DaVinci Resolve has it all; it’s just a matter of diving into this video editing software, adding text, and letting your imagination run wild.
How to differentiate between 3D text and 2D text in Davinci Resolve?
A 2D text is a two-dimensional form of text. It’s the classic text you see in videos as titles and subtitles. It’s flat and only has an X and Y axis.
The 3D text allows us to create more depth thanks to the Z axis. It’s a form of text with three dimensions, showing a more defined text that can be “filled” with colors and images. It can feature other effects, such as lightning reflections and drop shadows.
How do Text and Text+ differ from one another?
The Text effect will only allow us to change basic settings such as color, size, font tracking, zoom, background, and shadow color.
The Text+ Effect will allow us to adjust more settings rather than just text. You can change the layout, shading elements, properties, image settings, and much more.
Простой учебник | Как добавить текст в DaVinci Resolve 17.16.18
![]() Нола Джонс
Нола Джонс
DaVinci Resolve, разработанное Blackmagic Design, представляет собой мощное универсальное программное обеспечение для редактирования, получившее широкое признание ютуберов и голливудских профессионалов. Хотя интерфейс похож на Premiere Pro, DaVinci Resolve — единственное решение для выполнения всех задач с помощью всего одного инструмента, включая редактирование, цветокоррекцию, визуальные эффекты, анимированную графику и постобработку звука. Для новичков, которые только начали использовать этот полезный редактор, вот базовое руководство о том, как добавить текст в DaVinci Resolve 16, 17 и 18 на вашем компьютере. Взгляните и начните полировать свои видео с помощью цветного текста.
Быстрый просмотр:
- Откройте библиотеку эффектов, выберите «Заголовки» и выберите стиль текста.
- Перетащите текст и наложите его над временной шкалой.
- Измените цвет, шрифт, размер и положение в Инспекторе.
Часть 1. Добавление текста в DaVinci Resolve 17.16.18
Независимо от того, есть ли на вашем компьютере DaVinci Resolve 16, 17 или 18, следующее руководство подходит для всех с небольшими различиями в расположении кнопок. После добавления текста в DaVinci Resolve вы можете сделать его более красивым или ярким, настроив его формат или анимировав. Продолжайте нырять, чтобы найти все эти шаги.
DaVinci Resolve: добавьте текст за четыре шага
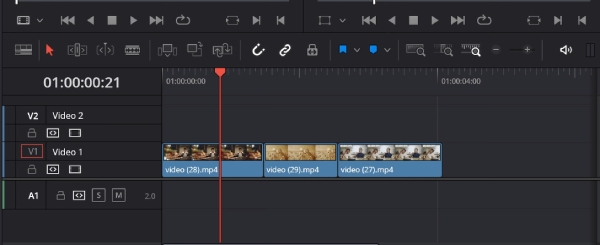
Шаг 1. Импортировать видеоклип
Чтобы добавить текст, импортируйте видеофайл на временную шкалу в DaVinci Resolve. Вы можете импортировать видео, нажав кнопку Файл, Импорт файла , и Медиа последовательно. Затем видео будет в вашем медиапуле. Вы можете перетащить его прямо в раздел временной шкалы, чтобы создать новый.
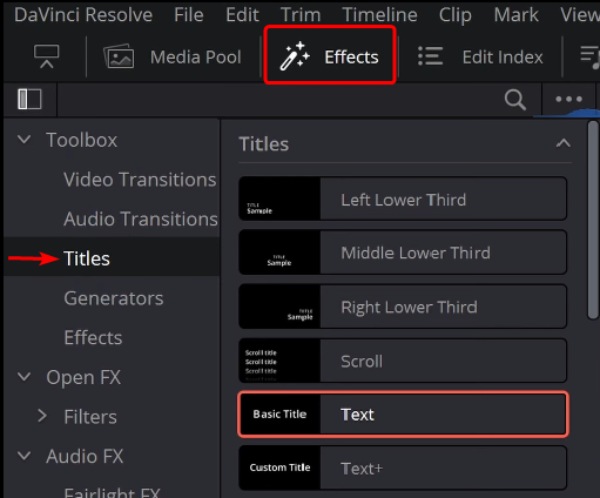
Шаг 2. Выберите заголовки
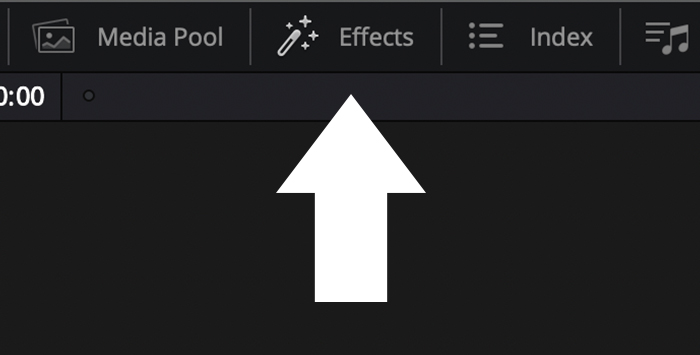
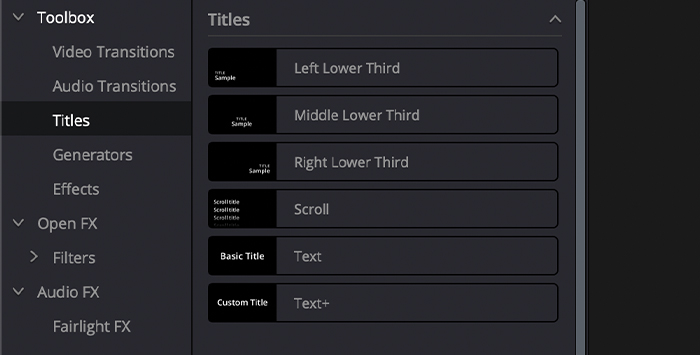
Затем вы должны выбрать предустановку текста. Нажмите на Эффекты кнопку слева и выберите Титулы из Ящик для инструментов . Там вы увидите разные заголовки с разными пресетами. Вы можете просто выбрать основной заголовок и перетащить его на временную шкалу. Поместите заголовок над вашим видео на временной шкале.
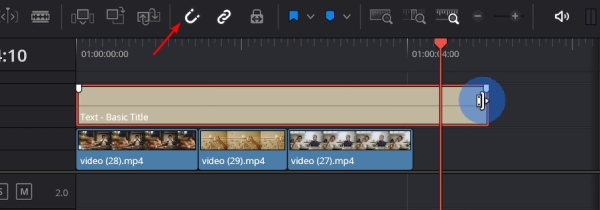
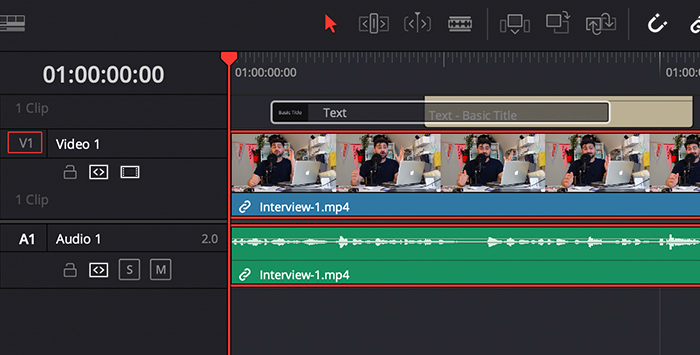
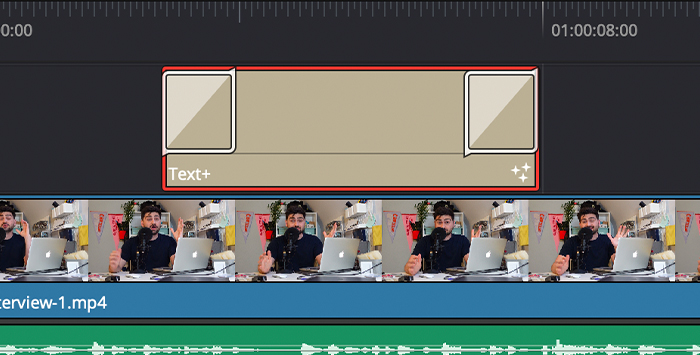
Шаг 3. Обрезать длину заголовка
Чтобы обрезать заголовок и сделать его таким же длинным, как длина вашего видео, щелкните инструмент «Привязка» со значком магнита и перетащите конец заголовка. Он будет прикреплен к концу вашего видео и будет такой же длины, как и у вас.
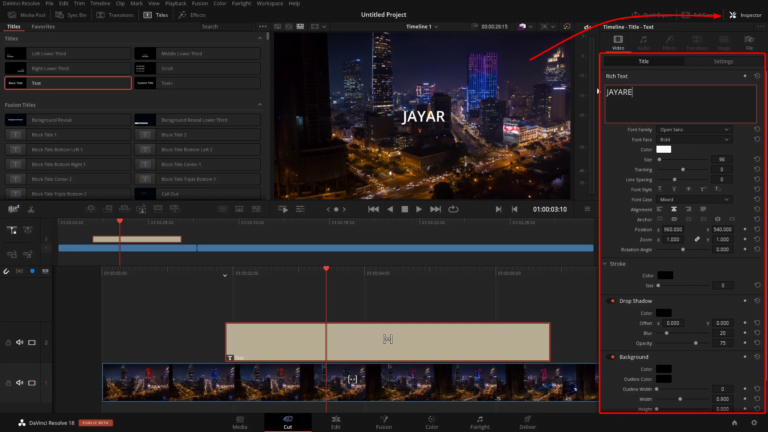
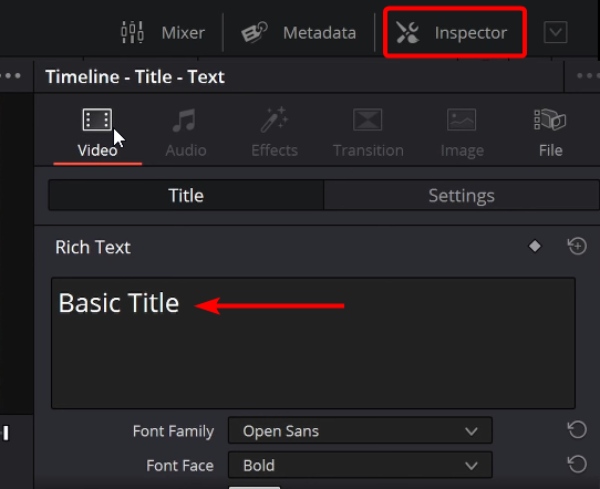
Шаг 4. Введите текст
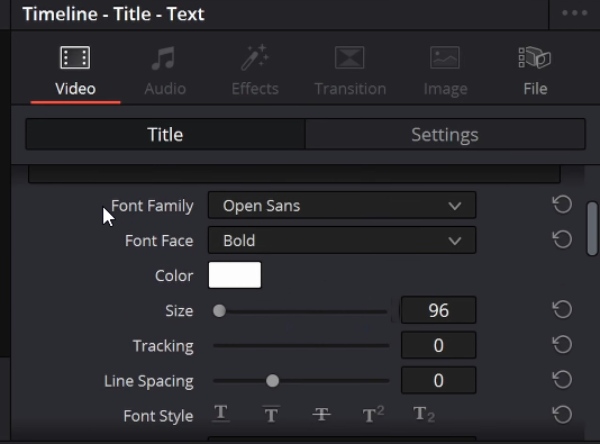
Нажмите Инспектор выше и прокрутите вниз под видео вкладка Введите текст в пустое место. Затем вы можете изменить шрифт текста, щелкнув значок Семейство шрифтов выпадающий вариант.
Формат текста: настройка стиля и анимации
После использования DaVinci Resolve для добавить текст к видео, вы можете настроить формат текста, изменить стиль или сделать анимированный текст.
Настройте стиль текста в DaVinci Resolve:
На панели инспектора прокрутите вниз под своим текстом. Существуют различные параметры: Начертание шрифта, Цвет, Размер, Отслеживание, Межстрочный интервал, Стиль шрифта и т. д. Вы всегда можете дважды щелкнуть эти параметры, чтобы сбросить значения. Между тем, если вы перетащите текст на монитор, вы можете напрямую отрегулировать положение.
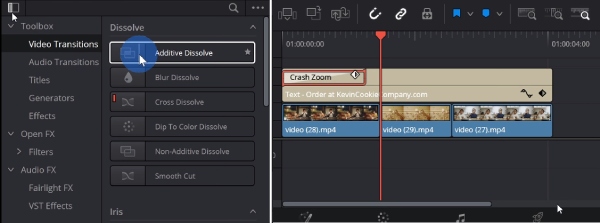
Сделайте текстовую анимацию в DaVinci Resolve:
Наличие анимированного текста в вашем видео может сделать его более интересным. Чтобы добавить анимацию, вернитесь на панель «Эффекты» слева и выберите «Видеопереходы» на панели инструментов. Перетащите один из них и поместите на свой текст на временной шкале, чтобы применить эффект. Вы можете изменить продолжительность анимированного эффекта, выравнивание и другие параметры на панели «Инспектор».
После настройки видео и текста вы можете использовать DaVinci Resolve для экспорта видео в MP4, AVI или QuickTime.
Часть 2. Решение: почему мои заголовки не отображаются в DaVinci Resolve
Некоторые ситуации могут привести к тому, что заголовки не будут отображаться в DaVinci Resolve; найдите тот, который соответствует вашему ниже, и попробуйте следующие решения, чтобы решить проблему.
Текст не отображается после рендеринга или экспорта
Проверьте трек, который содержит ваш текст. Убедитесь, что он включен, прежде чем экспортировать все видео.
Текст не отображается в окне предварительного просмотра
Вы можете использовать готовый шаблон для добавления текста, но на вашем компьютере недостаточно оперативной памяти. В этом случае необходимо обновить аппаратное оборудование.
Текст находится за видеодорожкой
Щелкните правой кнопкой мыши текстовую дорожку на временной шкале и выберите «Добавить Fusion Clip». Затем выберите фигуру и залейте ее сплошным цветом. Поместите фигуру позади текста. Тогда ваш текст будет виден на видео.
Текст не отображается: мультимедиа отключено
Когда вы видите, что медиа в автономном режиме приводит к тому, что текст не отображается, вы должны заставить DaVinci Resolve визуализировать ваше видео, потребляя при этом несколько ресурсов. Для этого нажмите кнопку «Воспроизведение», а затем «Разрешение временной шкалы прокси». Затем выберите «Половина» или «Четверть».
Часть 3. Быстрая альтернатива добавлению текста в DaVinci Resolve
Помимо добавления текста в DaVinci Resolve, есть еще один более простой инструмент, AnyRec Video Converter, чтобы быстро добавить простой и понятный текст для видео. Самым большим преимуществом добавления текста в конвертер является то, что вам не нужно беспокоиться о формате. Поскольку этот конвертер от AnyRec совместим с более чем 1000 медиаформатов, вы можете экспортировать видео в обычные форматы, такие как MP4, MKV или AVI, для более удобного обмена. При добавлении текста конвертер позволяет выполнять основные операции, такие как изменение цвета/шрифта текста, настройка положения, настройка прозрачности и т. д.
Импортируйте любые видео или аудио файлы для редактирования или преобразования.
Одновременное применение нескольких текстов к видео.
Контролируйте время появления вашего текста в видео.
Экспортируйте видео в исходном или высоком качестве.
Предоставьте различные инструменты редактирования, такие как Trimmer, Rotator, Cropper и т. д.
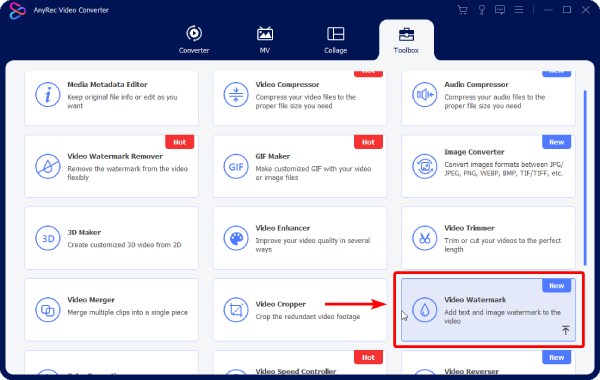
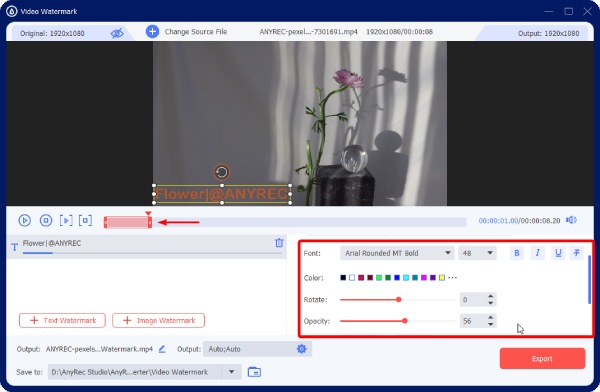
Шаг 1. Установите и запустите конвертер на своем компьютере. Перейдите к панели инструментов и выберите инструмент Video Watermark. Появится окно. Нажмите значок «Плюс», чтобы импортировать видео и добавить текст.
Шаг 2. После импорта видео нажмите кнопку Добавить текстовый водяной знак кнопка для добавления текста. Вы можете продолжать нажимать кнопку, чтобы добавить более одного текста.
Шаг 3. Введите текст в пустое место. Затем вы можете изменить формат текста с помощью параметров ниже. Например, вы можете изменить шрифт, размер, цвет и прозрачность текста. Между тем, чтобы контролировать продолжительность текста, перетащите временную шкалу, чтобы настроить ее.
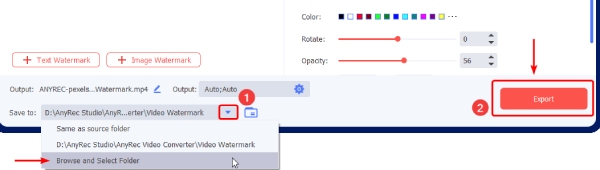
Шаг 4. Далее вы можете сохранить видео. Выберите папку назначения, щелкнув стрелку вниз рядом с Сохранить . Тогда выбирай Просмотр и выбор папки и выберите папку на вашем компьютере. После этого нажмите кнопку «Экспорт», чтобы экспортировать видео с текстом.
Часть 4. Часто задаваемые вопросы о добавлении текста в DaVinci Resolve
Есть ли в DaVinci Resolve водяной знак?
Нет, это не так. Хотя DaVinci Resolve является бесплатным программным обеспечением, на экспортируемом видео нет водяных знаков. Но если вы используете такие функции, как шумоподавление или другие, доступные только для версии Studio, на вашем видео будет водяной знак.
Безопасен ли DaVinci Resolve?
Да, это. Между тем общедоступная бета-версия от DaVinci Resolve также безопасна. Но бета-версия может работать медленно на вашем компьютере.
Могу ли я добавить субтитры в DaVinci Resolve?
Вы можете добавлять субтитры, многократно добавляя текст в DaVinci Resolve, чтобы получился субтитр. Если вам нужен менее трудоемкий способ, вы можете обратиться за помощью к другим генераторам субтитров.
Заключение
Теперь вы должны хорошо знать точные шаги по добавлению текста в DaVinci Resolve. Независимо от того, какую версию DaVinci Resolve вы используете: 16, 17 или 18, описанное выше руководство подходит для всех. Между тем, если вы обнаружите, что текст не отображается после рендеринга видео, вам также помогут приведенные выше решения. Поделитесь этой статьей с друзьями, незнакомыми с работой DaVinci Resolve, и помогите большему количеству людей освоить навыки редактирования видео.