Flipping, Mirroring, Rotating and Arrays
With SketchUp’s flipping and rotating tools, your geometry becomes as nimble as an acrobatic troupe. The Flip Along command enables geometry to backflip 180 degrees along any axis. With the Rotate tool, your geometry can spin and fold like a professional gymnast.
Table of Contents
Using the Flip Tool
The Flip tool does exactly what it says on the box, helps you flip your geometry so that you can quickly re-orient objects or make symmetrically oriented copies.
You’ll find the Flip tool in one of the following locations:
- The Getting Started toolbar
- The Large Toolset
- The Edit menu
- (MacOS) The Standard toolbar
Just like other tools you can always use SketchUp’s search bar and assign it your own keyboard shortcut.
- Select the geometry you want to flip before activating the Flip tool, or simply activate the Flip tool and hover over the geometry you want to flip.After hovering, clicking once begins the Flip operation
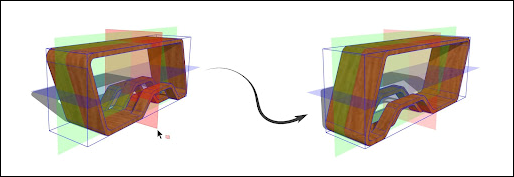
- Three semi-transparent planes appear, each corresponding to the selection’s cardinal orientation.
- If needed, adjust each plane by click-dragging along one of the primary axes. Inferences will appear when dragging to help with placement.
- Hover over one of the planes and click once to flip the geometry about that plane.
Flip Tool Modifiers
Copy Mode
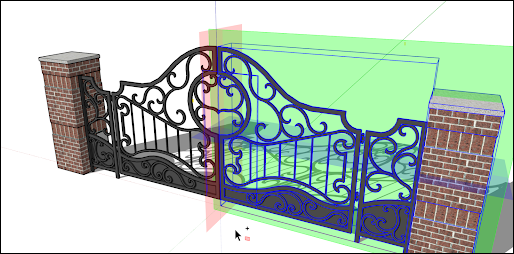
With the Flip tool active, pressing Ctrl (Windows) or Option (macOS) engages Copy mode. When engaged, click and drag a plane to the desired spot. When you release your mouse button, SketchUp creates a flipped copy of your selected geometry.
Axes Mode
If you prefer to flip an object using its parent (or context) axes, use the Alt key on Windows or Command on Mac. Activating this mode toggles Flip between a selected object axes orientation and the parent axes orientation.
Rotating geometry at an angle
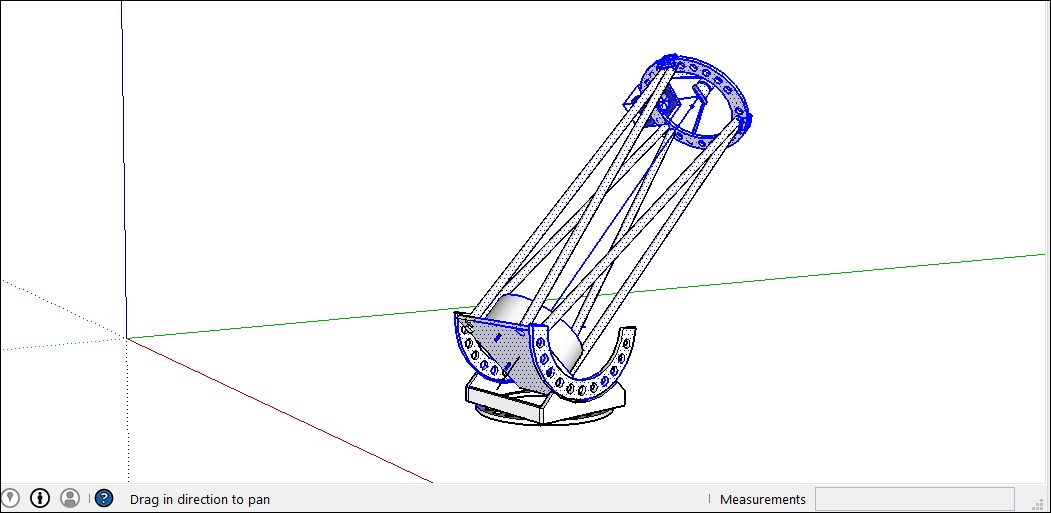
With the Rotate tool, you can rotate geometry at any angle. For example, say you want to rotate this telescope so that it points at a different angle or a different part of the sky.
Here’s how to use the Rotate tool to spin geometry around:
- With the Select tool (
 ), select the geometry you want to rotate. Here, the geometry that points the telescope into the sky is selected, but not the base, which needs to stay on the ground.
 - Select the Rotate tool (
 ). The Rotate tool’s protractor-shaped cursor appears
 - Move the cursor around until it’s on the plane you want to use for your rotation. To lock the plane, press the Shift key until you click to set the angle’s vertex. When your plane is perpendicular to an axis, the cursor turns red, green, or blue, respectively, as shown in the figure.
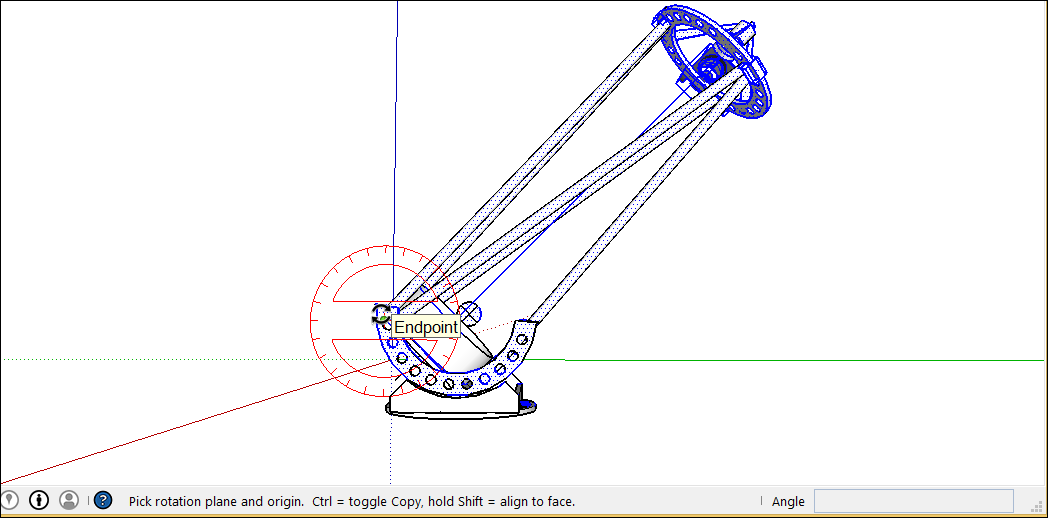
Tip: In this example, inferring from a face that’s on the same plane as the desired rotation is the easiest way to find the right plane. Hold down the scroll wheel of your three-button mouse to temporarily switch to the Orbit tool ( ) and find a good view of your desired plane. See Viewing a Model for details about viewing options.
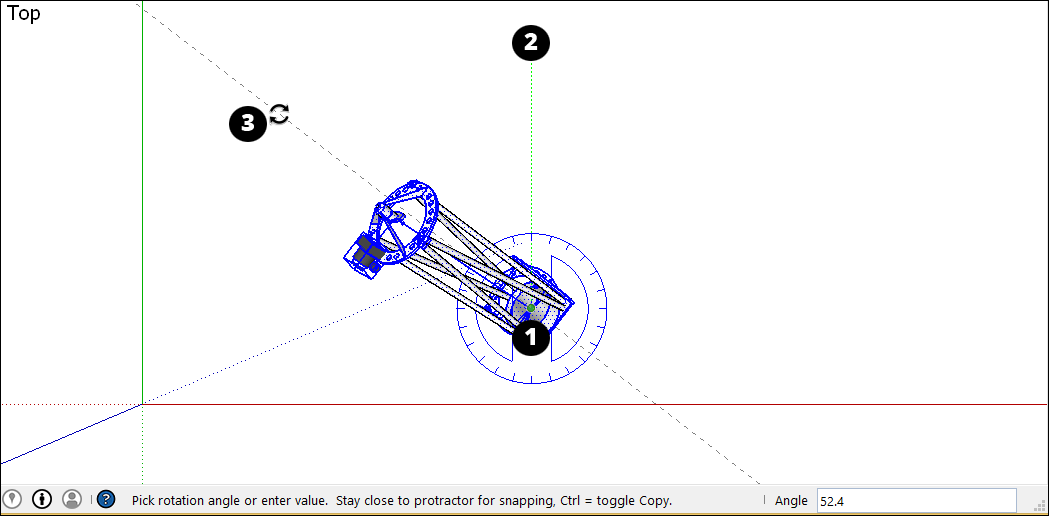
Here’s another example to help you understand how to achieve your desired rotation angle. Imagine you need to rotate the whole telescope to a different part of the sky (northwest, say, instead of due north). Start by selecting the whole telescope and then select Camera > Standard Views > Top to see the telescope from above. (Viewing a Model explains SketchUp’s viewing options.) With the Rotate tool selected, you then lock the protractor cursor in the blue direction and click the top to set the angle’s vertex (Callout 1). Click to start your angle at due North (2) and then click again to complete the angle at your desired Northwest direction (3).
In the following video, watch the Rotate tool in action, where you see how to rotate clock hands and open a vault door, fold a SketchUp face into a paper airplane, and more.
Corner Inference Grips
When selecting or hovering over a component/group, you’ll notice there are inference icons. These reference icons are presented differently depending on the geometry and action being performed. In the image below, the corners of the component/group’s bounding box to help you better rotate the component/group. The component/group grips are represented as a gray dot at every corner of the box. You can grab and rotate the object using these grips.
When you move your cursor over a corner which is obscured by other geometry, the gray dot will become blue and your component will display as transparent to help you see the obscured corner and geometry behind for placement.
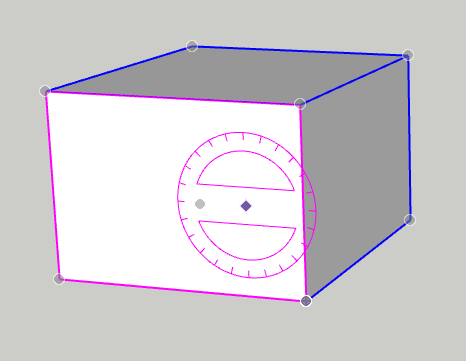
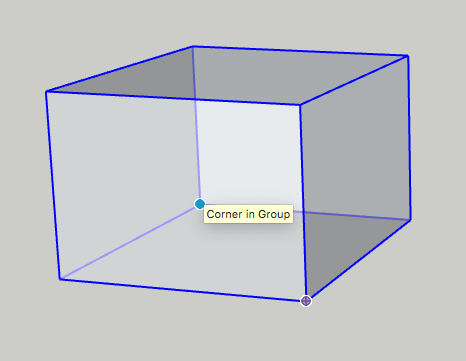
You can cycle through available grips, Object Center, Context Edge Center and Context Edge Corner by finding your first grip, then toggling through them using Command on Mac or Alt on Windows.
Folding geometry along an axis
SketchUp geometry is so flexible, you can fold it like paper. Follow these steps:
- With the Select tool (), select the geometry you want to fold.
- Select the Rotate tool ().
- With the Rotate tool’s protractor-shaped cursor, click and drag from one endpoint on the fold line to the other endpoint. Release the mouse button when you’re done. In this example, the line that bisects the polygon is the fold line.
- Click at the starting point of the rotation. In the figure, the circular arrows cursor is where the rotation begins.
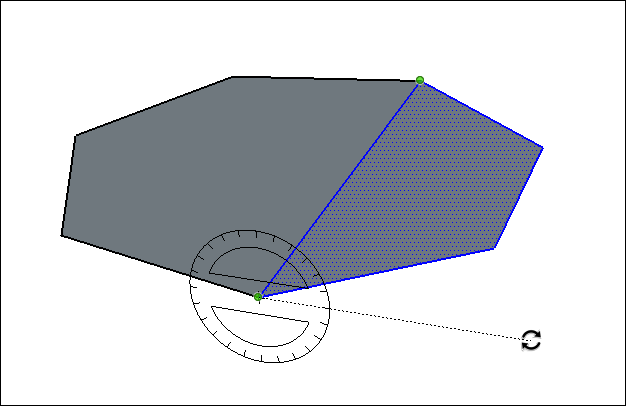
- Move the mouse to rotate. If angle snaps are active under preferences, movements close to the protractor result in angle snaps, whereas those farther away allow free rotation. Also, as you move the cursor, notice that the angle degrees of rotation appear in the Measurements box.
- Click at the ending point to complete the rotation. The following figure shows the rotation’s ending point and the dynamic preview of the folded polygon.
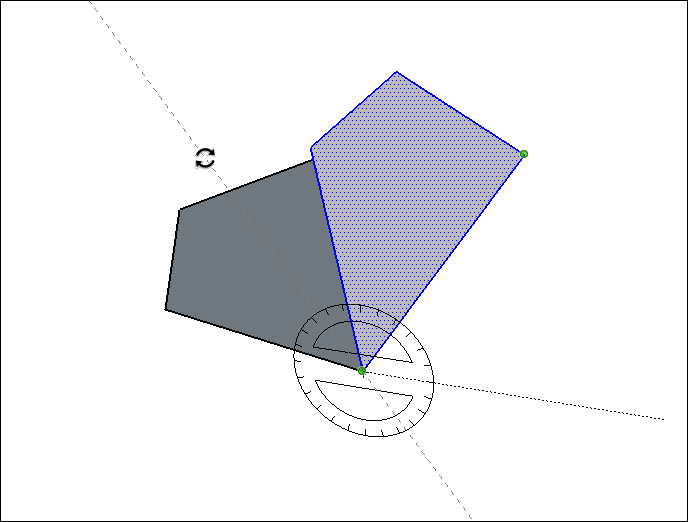
- (Optional) Type a precise angular rotation or slope value and then press Enter. See the earlier table for details about how to specify each value. Negative values fold the geometry in a counter-clockwise direction.
SketchUp Mirror
SketchUp Mirror is a process through which you can reflect any object to the opposite side of it for different types of purposes. There are a number of ways through which you can mirror any object or component in this software. You can also use Mirror extension for doing this work for your components, and you can download it from the Extension Warehouse of this software. For doing a mirror of any object or for making the mirrored object of any component, you should understand some of the features and parameters of different tools as well as the methodology of this software. So let me explain to you some of the ways in a very exciting manner through which you can do this.
How to use the Mirror tool in SketchUp?
There is no specific tool with the name Mirror tool in SketchUp, but we can do a mirror of objects through several ways. You can also make a copy of any object and then mirror it. You can also have a Mirror extension from the Extension warehouse and use that as a mirror tool. So let us find what these ways are?
3D animation, modelling, simulation, game development & others
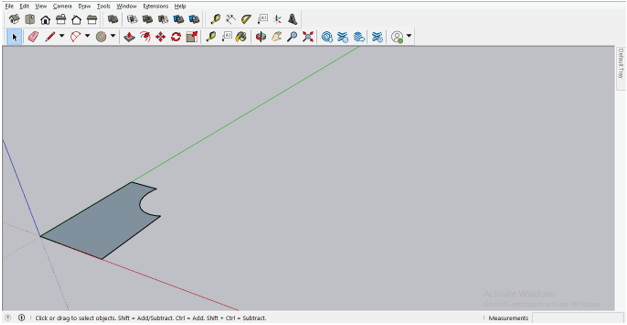
First of all, I will create an object like this which we will mirror in different ways, and I have been drawn this shape by using Rectangle as well as Circle tool of the tool panel.
Now I will add some height to this shape with the help of the Push/Pull tool. I am not using standard dimensions for creating this object.
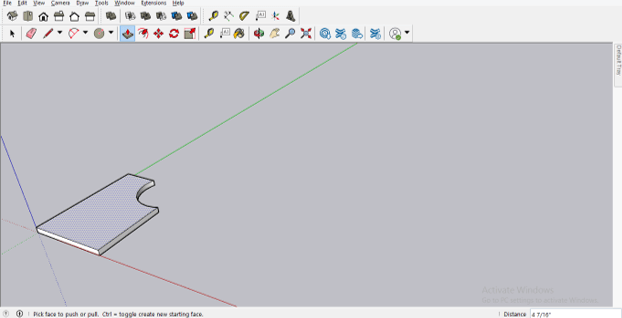
I will make a cylindrical shape here, also like this by using the push/pull tool again on a circular surface.
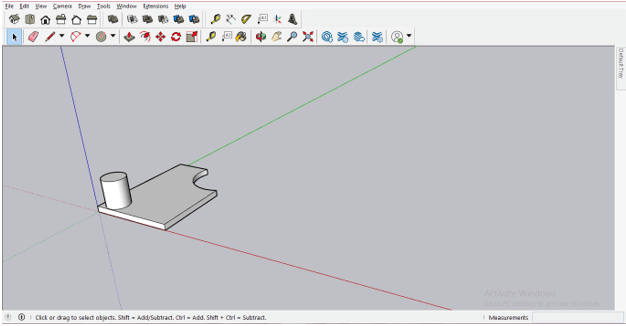
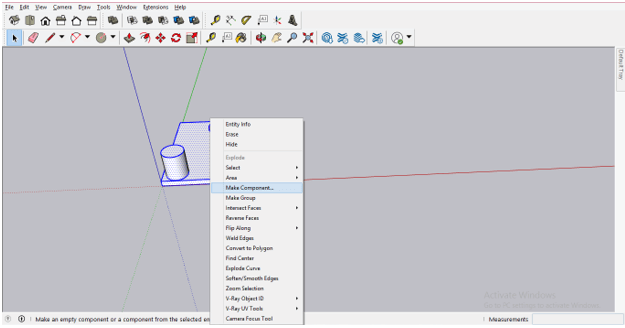
Now I will make this selected object as a component and, for that, select the whole object and then make right-click. Click on the Make Component option of the drop-down list.
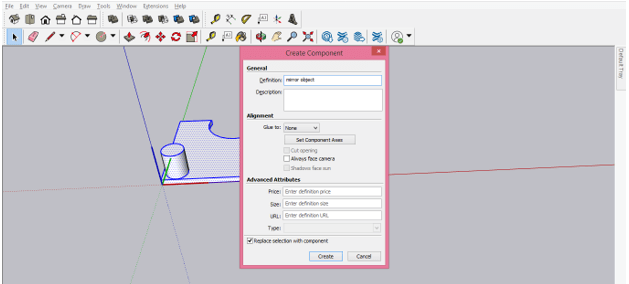
Once you click on this option, it will ask you to name your component, and I will name it as a mirror object, then click on Create button of this dialog box.
Now select this object and again make right-click. Now this time, go to the Flip Along with the option of scroll down list.
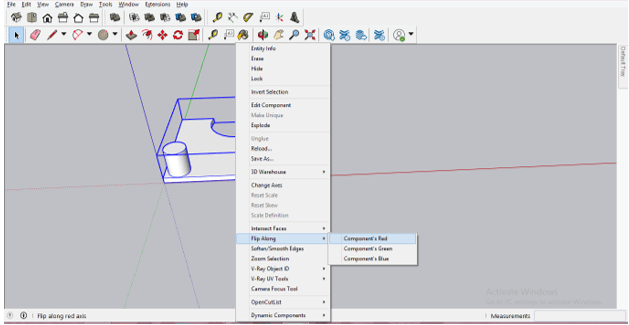
Here in this option, you will find Component’s Red, Component’s Green, and Component’s Blue options. That means if you want to mirror this object along the Red axis, then go with the Component’s Red option; for mirroring along with the Green axis, go with Component’s Green option, and so on.
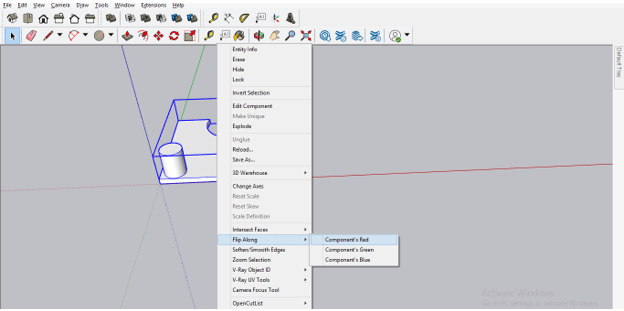
Now I will first select the component and then click on Component’s Red option.
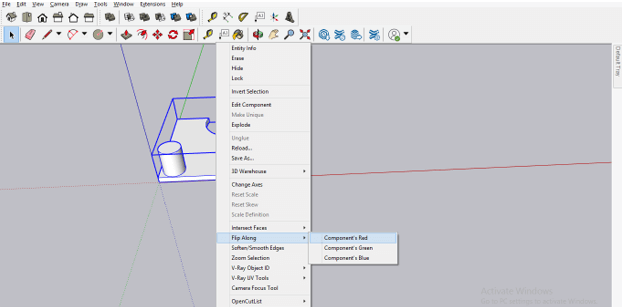
And it will flip like this along with the red axis.
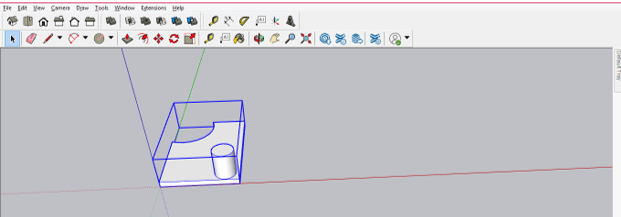
On the other hand, if you go with Component’s Blue option of Flip along to mirror this component from other side.
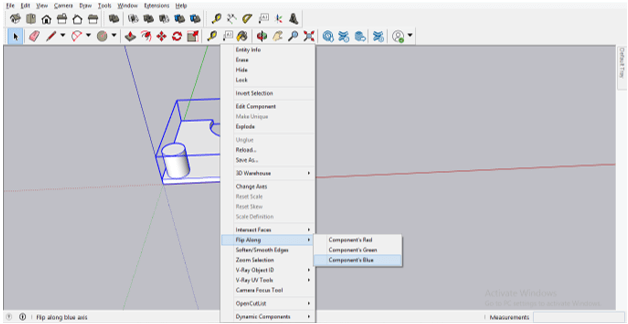
Then it will mirror like this. So it totally depends upon you how you want to mirror your component, and according to your requirement, you can choose anyone of the three options for your component.
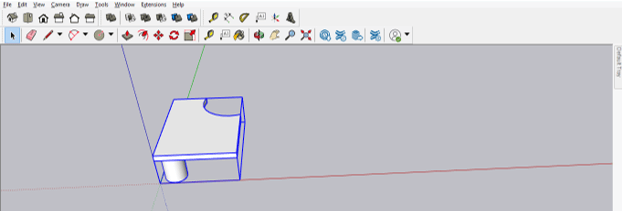
The second way through which you can mirror any object is through the scale tool of SketchUp. So take the scale tool from the tool panel, which is the top of the working screen of this software.
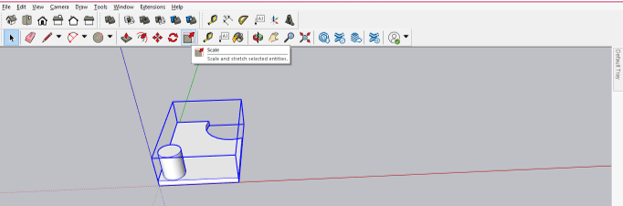
Now click on one of the red anchor points of the scale box of scale tool, which is around this component.
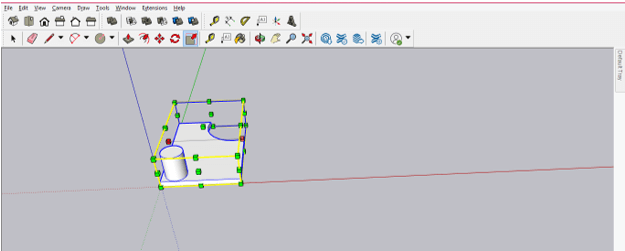
And drag it in the opposite direction of the chosen achorn point.
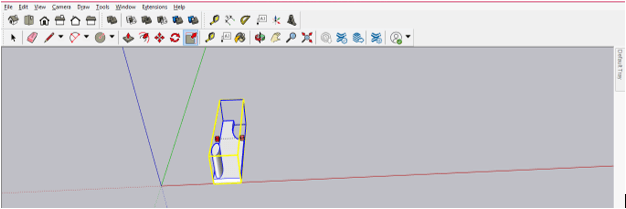
And once you reach the same size of this component in other direction, it will automatically snap there, and this was, you can do a mirror of this component. You can increase or decrease the size of the component as per your choice during doing this.
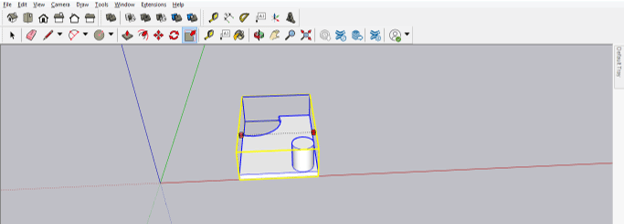
Now, if you hold a red anchor point from this direction and start dragging it in the opposite direction.
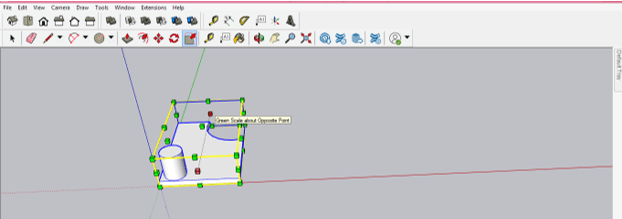
Then you can mirror it from this side like this.
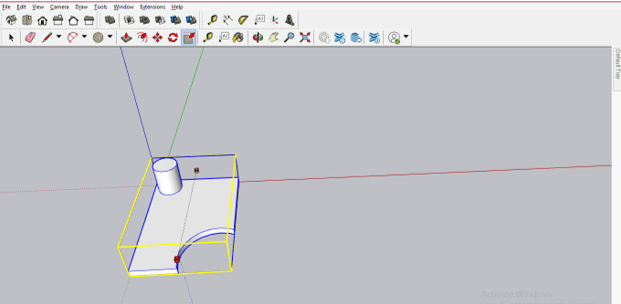
You can not only mirror components or object from lengthwise or widthwise direction by using the scale tool but also from diagonals, and for that, select diagonal red anchor points of the scale box and then start dragging diagonally.
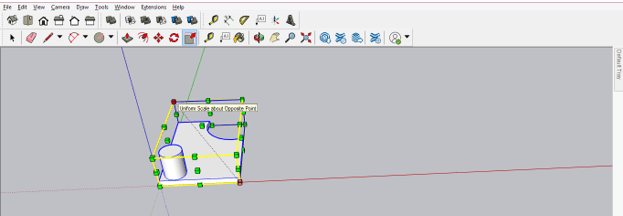
And it will mirror diagonally like this.
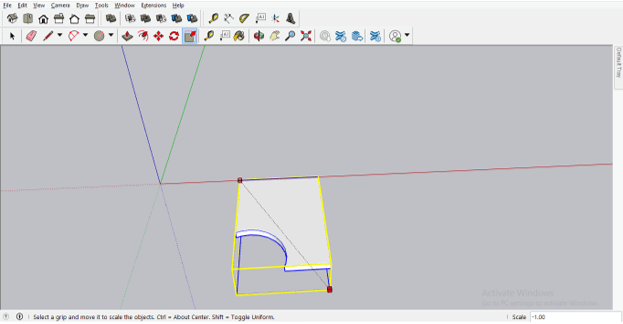
Let us make a copy of this component, and for making a copy, I will select this component first with the select tool and then take the move tool from the tool panel. Now I will move it by holding the Ctrl button on the keyboard, and it will make a copy like this.
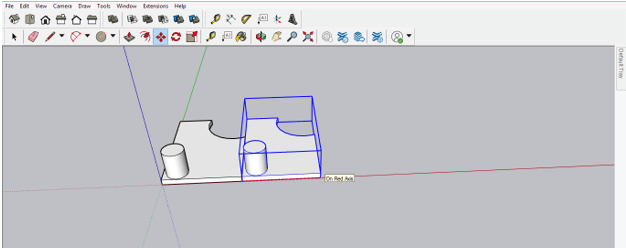
Now let us mirror it in the opposite direction with the help of the Scale tool of the tool panel. Do the same for mirror it as we did in previous steps using the scale tool.
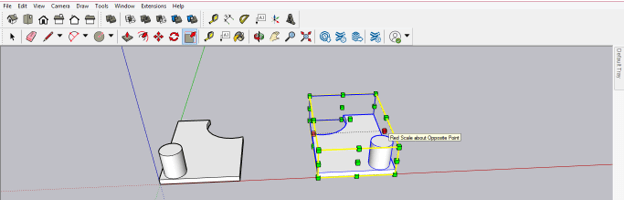
There is one advantage for making a copy of source component and then mirror it by using the scale tool, that although it is a copy of component object so when you are making any changes in anyone of them then the change will apply to both object automatically. For example, if I go to the editable mode of the first component and decrease the size of the cylindrical part of this component with the help of the Push/Pull tool, then you can see the change is also applied to the copied component.
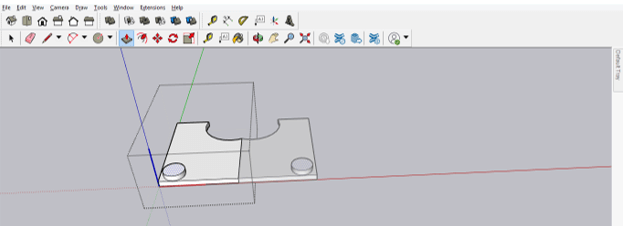
So you can use this technique in your designing to speed up your work. Now, if you want, you can install the Mirror extension and use that as a mirror tool. You can download a mirror extension from the Extension Warehouse of this software, and you can find the Extension Warehouse option in the scroll-down list of the Window menu. So go to the Window menu and click on the Extension Warehouse option of the list.
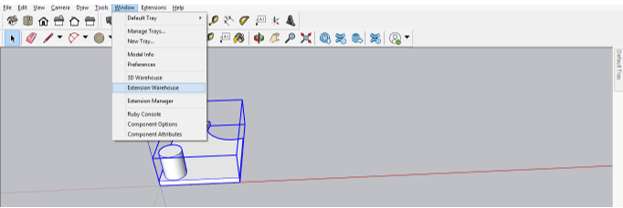
Now search for Mirror in the search box of this open dialog box of Extension Warehouse.
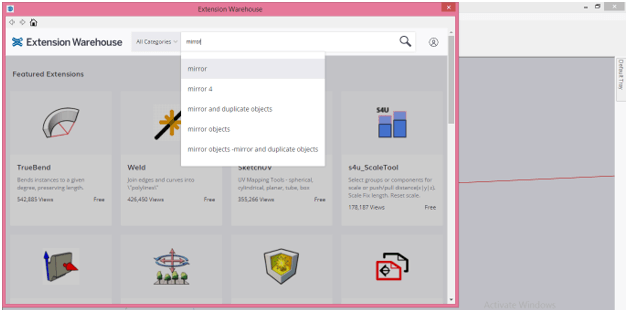
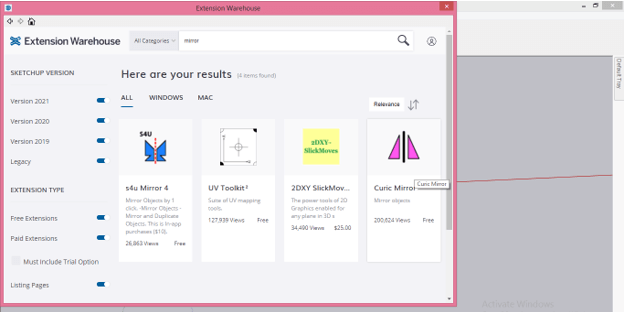
Once you search it, you will have the result of mirror extensions, and you can download anyone from the list as per your choice.
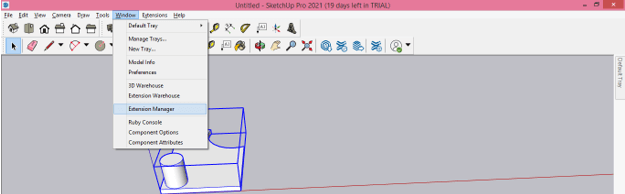
And you can enable the downloaded Mirror extension from the Extension Manager of this software. So for the Extension manager, go to the Window menu again and this time, click on the Extension Manager option of the drop-down list of this menu.
Conclusion
I am sure that the Mirror tool will take no more an unknown word for you in context of SketchUp and you can do a mirror of objects by the several ways using different options and tools of this software. You just have to understand all techniques properly, and after that, you can do a mirror of any object very easily.
Recommended Articles
This is a guide to SketchUp Mirror. Here we discuss the Introduction, How to use Mirror tool in SketchUp? Several ways using different options and tools. You may also have a look at the following articles to learn more –
Вопрос: Как отразить в SketchUp?
Чтобы перевернуть геометрию, выполните следующие действия:
- С помощью инструмента «Выбор» ( ) выберите геометрию, которую нужно отразить.
- Контекстно щелкните свой выбор и выберите «Перевернуть».
- В подменю выберите ось.
Есть ли в SketchUp инструмент «Зеркало»?
1 Ответ. Зеркальное отражение не является стандартным инструментом в SketchUp, но существует несколько способов зеркального отражения объектов с использованием различных методов. … Мы можем выбрать объект, который хотим отразить, щелкнуть по нему правой кнопкой мыши и выбрать «Отразить вдоль»: это даст нам возможность выбрать, какую плоскость (красную, зеленую или синюю) объекта использовать в качестве плоскости отражения.
Как вы используете инструмент поворота в SketchUp?
Основной способ использования поворота в SketchUp
- Выберите все, что вы хотите повернуть.
- Активируйте инструмент «Повернуть». Сочетание клавиш по умолчанию для поворота — Q, если вам интересно.
- Щелкните один раз, чтобы установить ось вращения. …
- Щелкните еще раз, чтобы начать вращение. …
- Двигайте мышью; затем нажмите еще раз, чтобы закончить вращение.
Как отразить изображение в фотошопе?
Как отразить изображение в фотошопе
- Перевернуть изображение без слоев довольно просто. …
- Выберите слой изображения, который вы хотите отразить, и нажмите «Правка» -> «Трансформировать» -> «Отразить по горизонтали/Отразить по вертикали».
- Нажмите «Правка» -> «Свободное преобразование», а затем щелкните правой кнопкой мыши внутри поля преобразования, которое появляется вокруг изображения.
Как добавить плагины в SketchUp?
Установка расширений вручную в настройках SketchUp
- В SketchUp выберите «Окно» > «Настройки» (Microsoft Windows) или «SketchUp» > «Настройки» (Mac OS X).
- В появившемся диалоговом окне выберите «Расширения» на боковой панели слева.
- На панели «Расширения» нажмите кнопку «Установить расширение».
Как вырезать в SketchUp?
Чтобы выполнить обрезку, выполните следующие действия:
- Выберите инструмент обрезки ( ). Совет. Пока вы не наведете указатель мыши на сплошную группу или компонент, вы увидите курсор в виде стрелки с кружком и косой чертой. …
- Нажмите, чтобы выбрать группу резки или компонент. …
- Щелкните группу или компонент, который вы хотите вырезать.
Как сделать эффект стекла в Sketchup?
Прозрачность стекла и воды задается с помощью меню «Материал SketchUp». Перейдите на вкладку «Правка» и выберите Picker HLS (рис. 27.25).
.
Стекло
- Отражающее стекло: от 30 до 49.
- В основном отражающие: от 50 до 75.
- Слегка отражающий: от 76 до 90.
- В основном прозрачный: от 91 до 96.
- Прозрачный: от 96 до 100.
Как повернуть на 90 градусов в Sketchup?
С помощью инструмента «Выбор» (пробел) выберите объект, который вы хотите повернуть. Активируйте инструмент «Поворот», нажав (Q) на клавиатуре. Щелкните точку, из которой вы хотите повернуться, но на этот раз, удерживая нажатой кнопку мыши, перетащите ее наружу, перпендикулярно плоскости, на которой вы хотите повернуться.
Как переключаться между осями в Sketchup?
Чтобы переместить и повернуть оси относительно их текущего положения, выполните следующие действия:
4 WAYS TO MIRROR AND FLIP OBJECTS in SketchUp
In this video, learn 4 different ways to mirror and flip different objects in your SketchUp models!
Do you like these SketchUp tutorials and videos?
If so, please consider supporting me on Patreon (click here to support) or by visiting my Support the Show Page!
About Justin Geis
Hi, I’m Justin Geis, and I’m the founder of The SketchUp Essentials. I started using SketchUp as part of my work as a general contractor in 2008. I quickly realized the power of the software and started using it for personal projects. I started The SketchUp Essentials as a place to share easy to follow SketchUp tutorials and tips to help everyone harness the power of 3D Modeling in their lives. When not working with SketchUp, I enjoy playing soccer and spending time with my wife and our two dogs.
About The Author
Justin Geis
Hi, I’m Justin Geis, and I’m the founder of The SketchUp Essentials. I started using SketchUp as part of my work as a general contractor in 2008. I quickly realized the power of the software and started using it for personal projects. I started The SketchUp Essentials as a place to share easy to follow SketchUp tutorials and tips to help everyone harness the power of 3D Modeling in their lives. When not working with SketchUp, I enjoy playing soccer and spending time with my wife and our two dogs.