Visual Studio 2022 setup for C# (theme, settings, extensions)
Visual Studio is the de facto IDE for C#. You will spend countless hours inside Visual Studio. You are better off spending some time to customize it to boost your productivity.
My Visual Studio setup is heavily inspired by De-Cruft Visual Studio. It aims to leave more space to the text editor by removing unneeded menus and bars.
These are the theme, settings and extensions I use to be more productive with Visual Studio.
1. Theme and Layout
- Color theme: Dark
- Text Editor theme: Solarized Dark
- Font: FiraCode 14pt
- Zoom: 110%
- Windows:
- Left
- Test Explorer
- Source Control Explorer
- Properties
- Solution Explorer
- Git Changes
- Team Explorer
- Output
- Error List
- C# Interactive: A C# REPL, so you don’t have to create a Console project to try things out
2. Settings
To change your Visual Studio settings, go to “Tools” menu and then to “Options”.
On the left pane, you will find Visual Studio settings groupped by features, languages and extensions.
In “Text Editor”, unselect Enable mouse click to perform Go to Definition, Selection Margin and Indicator margin.
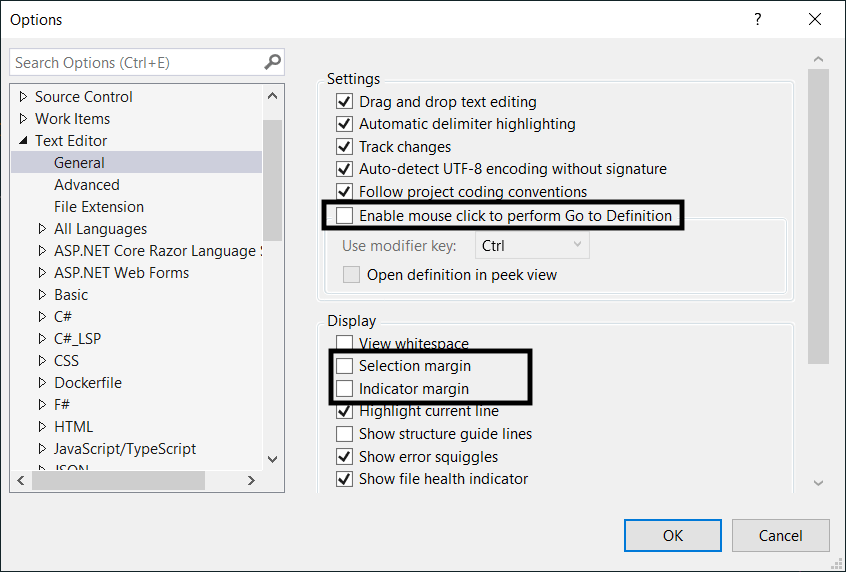
Text Editor — General settings
Next, uncheck Disable CodeLens. Only activate Show Test Status and Show C# References.
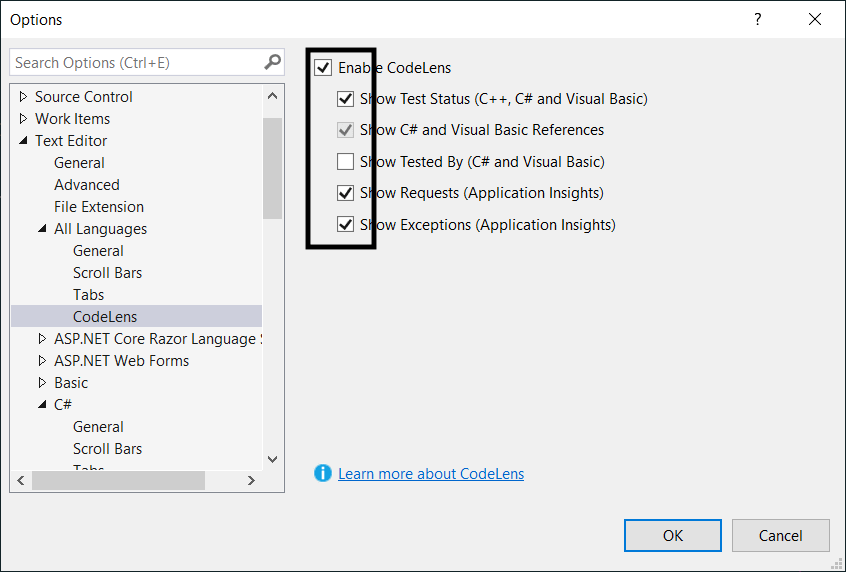
Text Editor — All Languages — CodeLens settings
Next, in C# specific settings, enable Line numbers. And, hide Navigation Bar and Code Outlining.
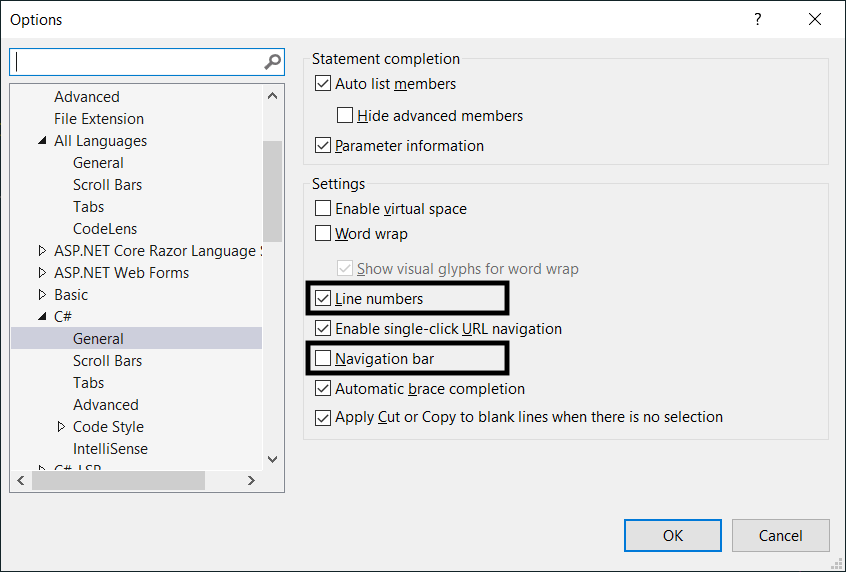
C# — General settings
Go down to Advanced settings to Add missing using directives on paste. Yeap, Visual Studio can add missing using staments when you paste some code. That’s a time saver!
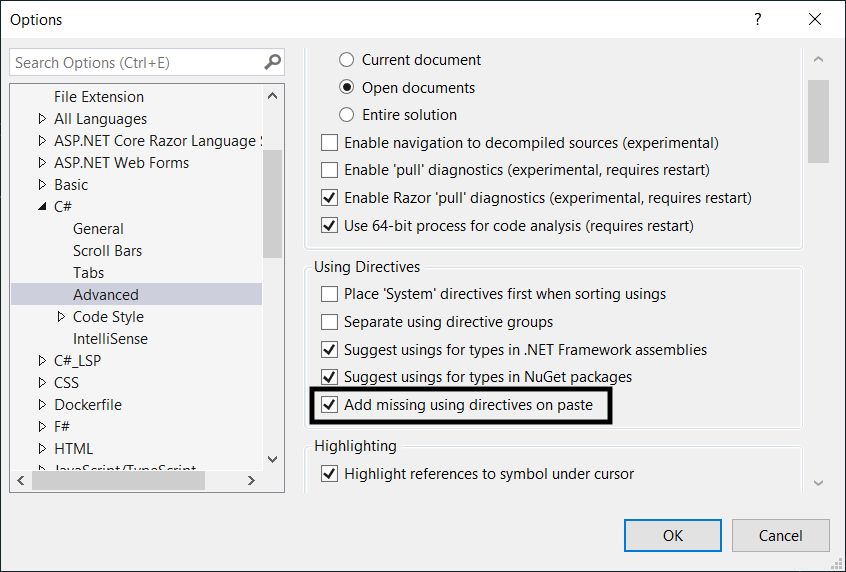
C# — Advanced settings
After installing “Productivity Power Tools” extension, unselect Compress blank lines and Compress lines that do not have any alphanumeric characters. Code looks weird compressed.
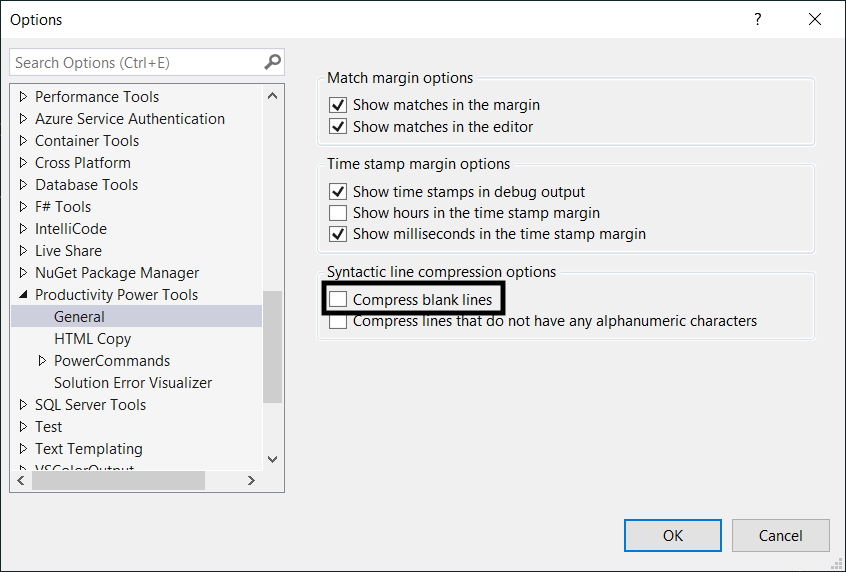
Productivity Power Tools settings
Speaking of extensions, after installing “VSVim” extension, use Handle all with Visual Studio. This way, we have the best of both worlds. And, we still have Control + C and Control + V .
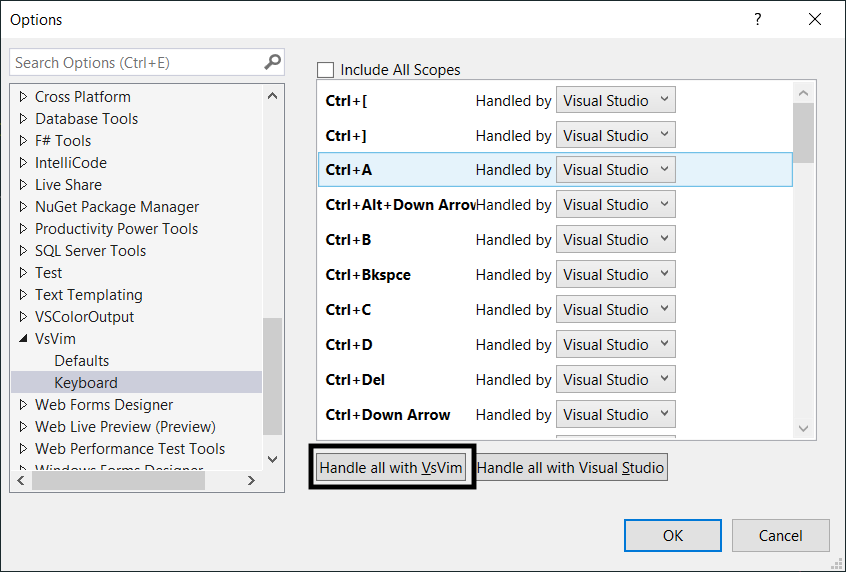
VsVim settings
For shortcuts, add Ctrl+Shift+w to easily close all documents from the keyboard.
3. Extensions
-
It enables Vim keybindings in the text editor
- Editor Guidelines: Add a Solarized Magenta guideline at column 120
- Fixed Mixed Tabs
- Custom Document Well
- Match Margin
- Remove Navigation Outline, Server Explorer, Toolbox, Git changes, and Properties. Only keep Solution Explorer.
- Disable CodeLens.
- Use Cascadia Mono, 14pt.
- Change Output and Developer Powershell font to Consolas 14pt.
- Use 120% as default zoom level.
- Optionally install the GitHub theme.
- Optionally install the MarkdownEditor extension to present using markdown files.
- with Debug|Start Debugging from the menu, or
- with F5 from any window in Visual Studio or
- by starting the exe file generated by the compiler.
- For the Text property, you can enter a text with the keyboard. For a button this text is the inscription on the button (e.g. „OK“), and for a form the title line (e.g. „My first C++ program“).
- For the BackColor property (e.g. from a button) you can select the background color via a pull-down menu.
- If you click the right column of the Font property and then the „…“ icon, you can select the font of the Text property.
- You design the user interface by placing controls from the Toolbox on the form (drag and drop) and adjusting their properties in the Properties window or the layout with the mouse (visual programming).
- You write in C++ the instructions that should be done in response to user input (non-visual programming).
- You start the program and test whether it really behaves as it should.
- The functions, classes, etc. of the application logic are written in standard C++ and are contained in a header file that is added to the project.
- The instructions for the user interface, on the other hand, are written primarily in C++/CLI and are often included in the form class in Form1..
- The functions of the header file are called when clicking a button.
- A multiline TextBox (see Section 2.3.2 of my book) to display the results.
- A single-line TextBox for entering data
- One or more buttons (or menu options, etc.) to start the instructions
- If this function uses user input, you read it in via a TextBox. In this simple tutorial, it will be a number that is read from the in_TextBox.
- If a parameter of the called function does not have type String (the type of the property in_textBox->Text), the string must be converted to the type of the parameter. This is possible with one of the Convert:: functions.
- The results are to be displayed in the out_textBox. This can be done with the function out_textBox->AppendText. The string that AppendText expects can be created with String::Format. In the first argument (a string) you specify <0>for the first value after the string, <1>for the second and so on.
4. Presentation mode
Fire a new instance from Visual Studio Developers Tools command prompt, using
It will open a separate and clean instance with no configurations or extensions. Any changes made to this instance won’t affect the “normal” instance next time you open Visual Studio.
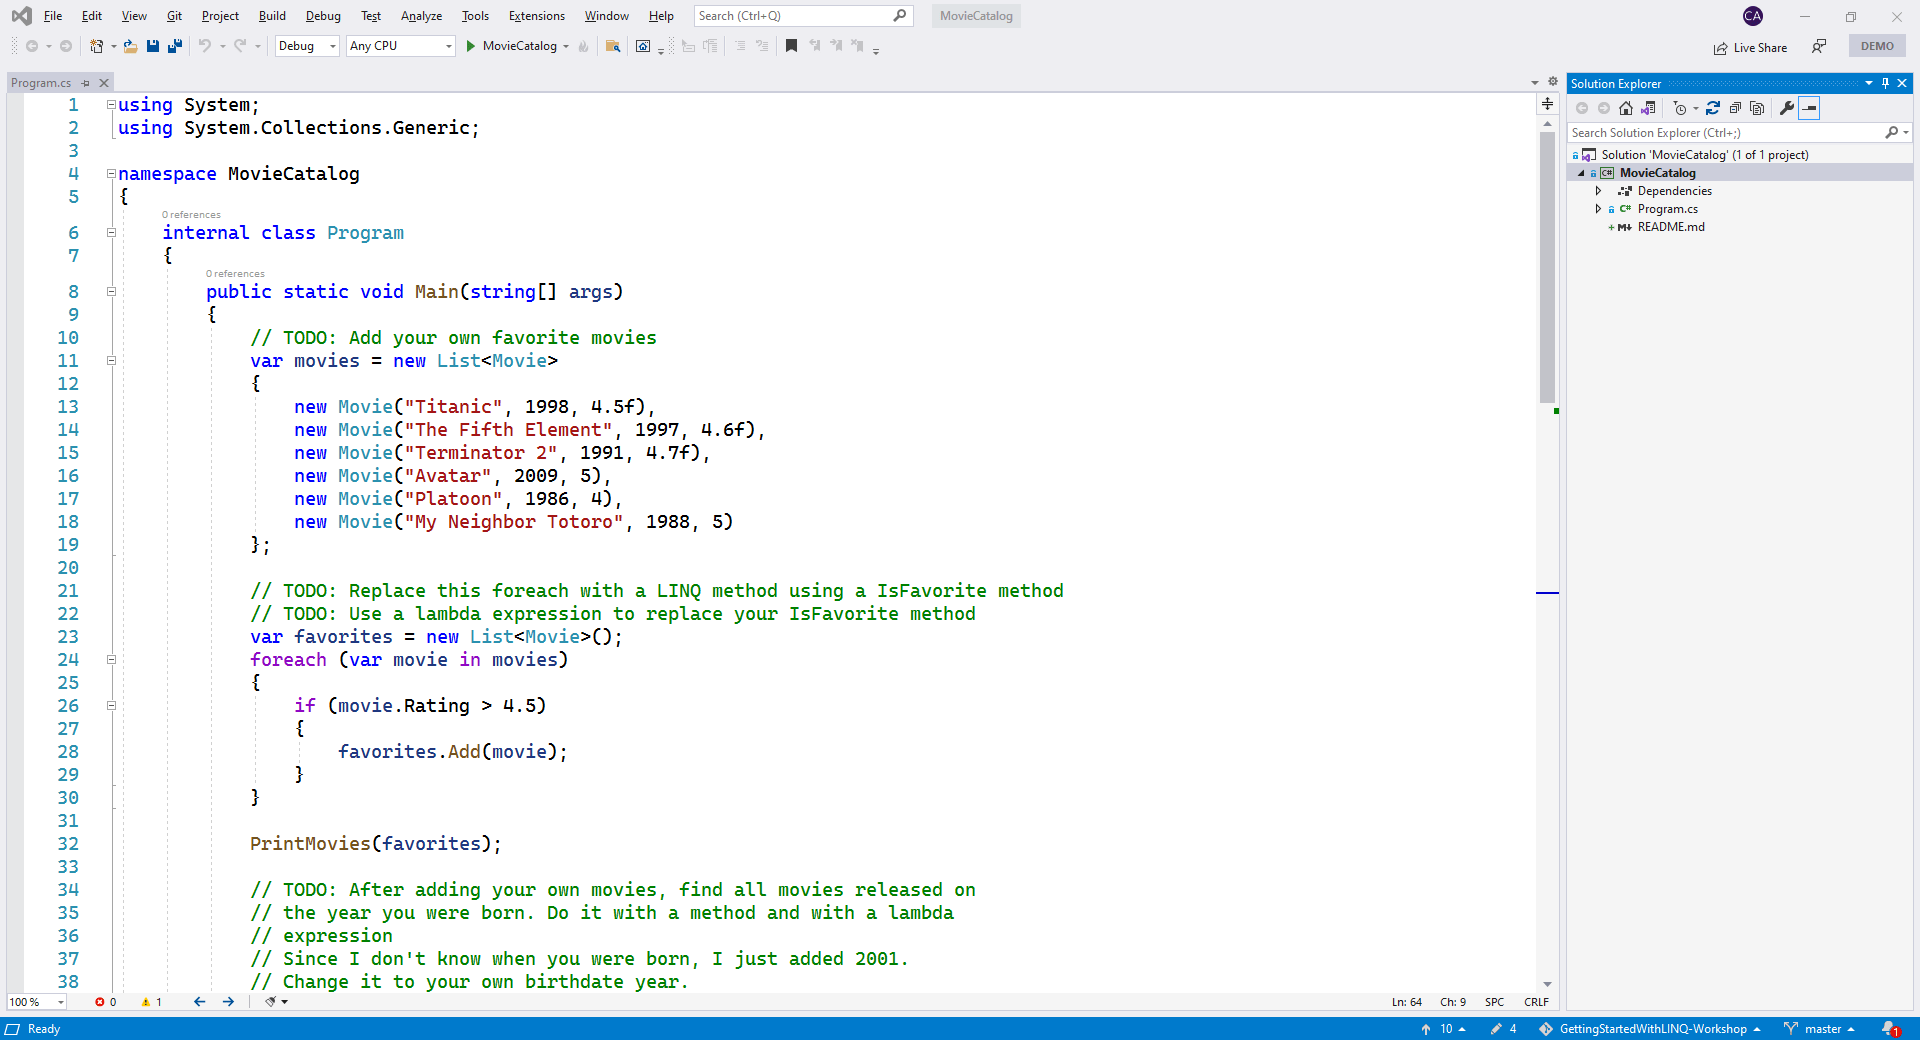
My Visual Studio in Presentation mode opened with a sample Console project
To make Visual Studio work in Presentation mode:
Voilà! That’s how I use Visual Studio 2019 for C# coding. If you’re wondering what’s Vim and why you should learn it, check my post Learning Vim for Fun and Profit.
For more productivity tools and tricks, check these programs that saved me 100 hours and how I used a Visual Studio extension and a Git feature to get rid of two recurrent review comments.
Как пользоваться визуал студио 2022 в с
Чтобы облегчить написание, а также тестирование и отладку программного кода нередко используют специальные среды разработки, в частности, Visual Studio. Рассмотрим создание приложений на C# с помощью бесплатной и полнофункциональной среды Visual Studio Community 2022, которую можно загрузить по следующему адресу: Microsoft Visual Studio 2022
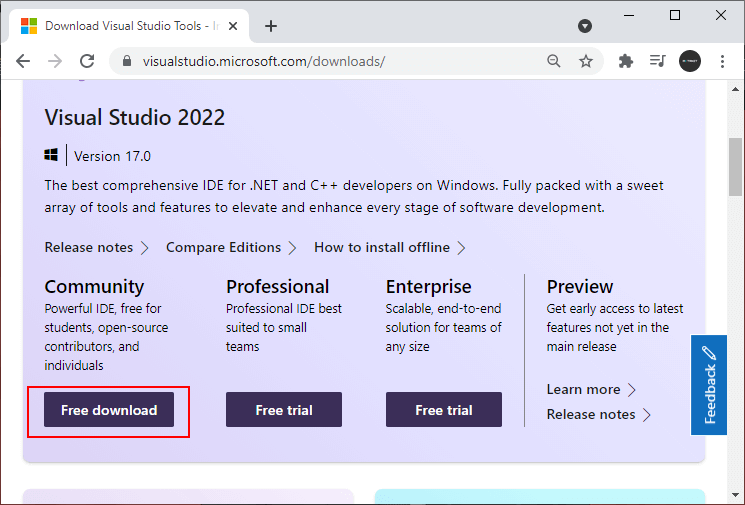
После загрузки запустим программу установщика. В открывшемся окне нам будет предложено выбрать те компоненты, которые мы хотим установить вместе Visual Studio. Стоит отметить, что Visual Studio — очень функциональная среда разработки и позволяет разрабатывать приложения с помощью множества языков и платформ. В нашем случае нам будет интересовать прежде всего C# и .NET.
Чтобы добавить в Visual Studio поддержку проектов для C# и .NET 7, в программе установки среди рабочих нагрузок можно выбрать только пункт ASP.NET и разработка веб-приложений . Можно выбрать и больше опций или вообще все опции, однако стоит учитывать свободный размер на жестком диске — чем больше опций будет выбрано, соответственно тем больше места на диске будет занято.
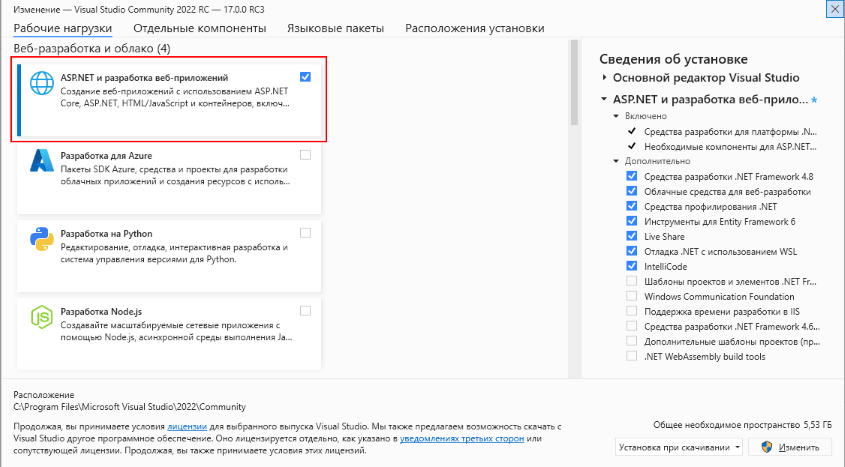
И при инсталляции Visual Studio на ваш компьютер будут установлены все необходимые инструменты для разработки программ, в том числе фреймворк .NET 7.
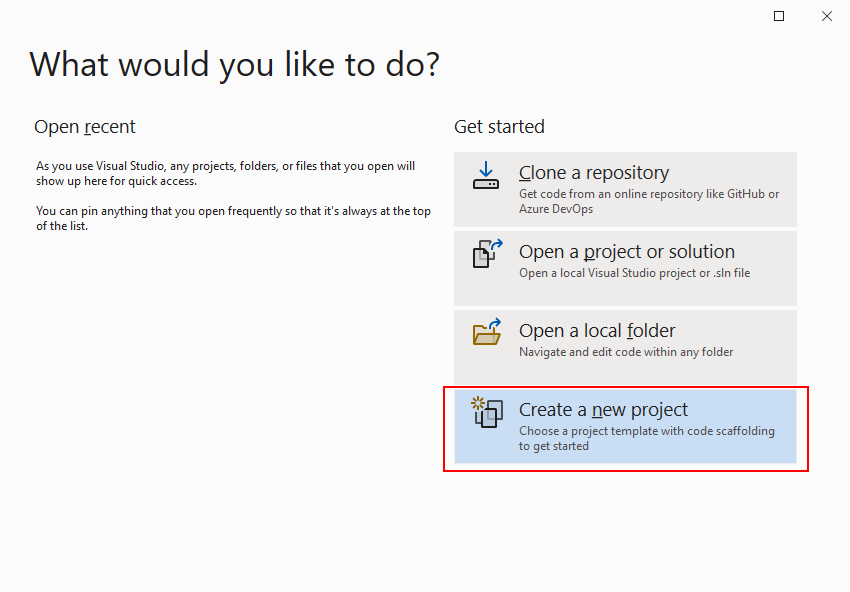
После завершения установки создадим первую программу. Она будет простенькой. Вначале откроем Visual Studio. На стартовом экране выберем Create a new project (Создать новый проект)
На следующем окне в качестве типа проекта выберем Console App , то есть мы будем создавать консольное приложение на языке C#
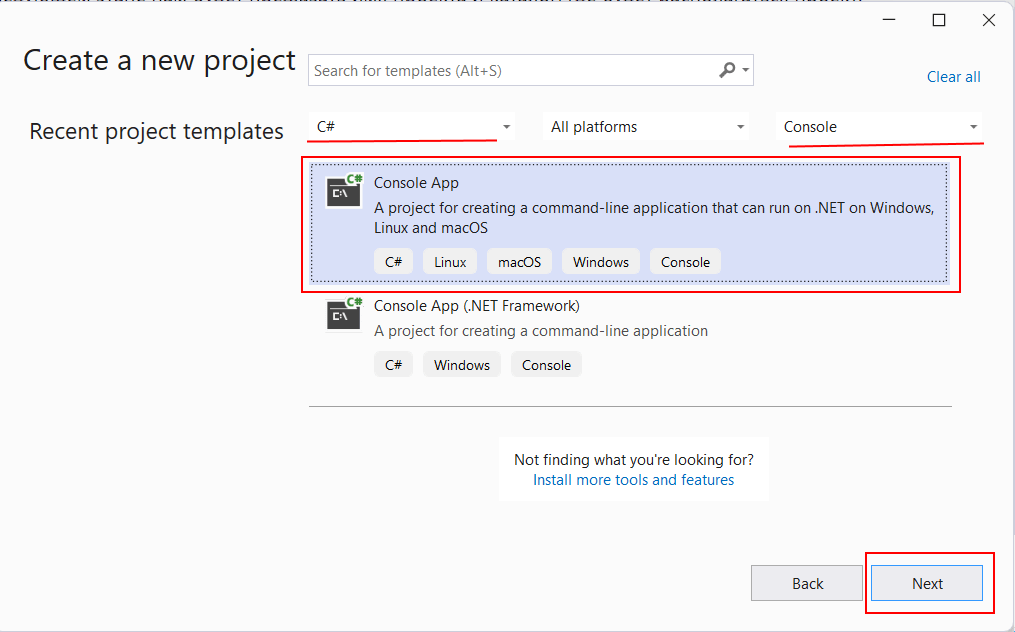
Чтобы проще было найти нужный тип проекта, в поле языков можно выбрать C# , а в поле типа проектов — Console .
Далее на следующем этапе нам будет предложено указать имя проекта и каталог, где будет располагаться проект.
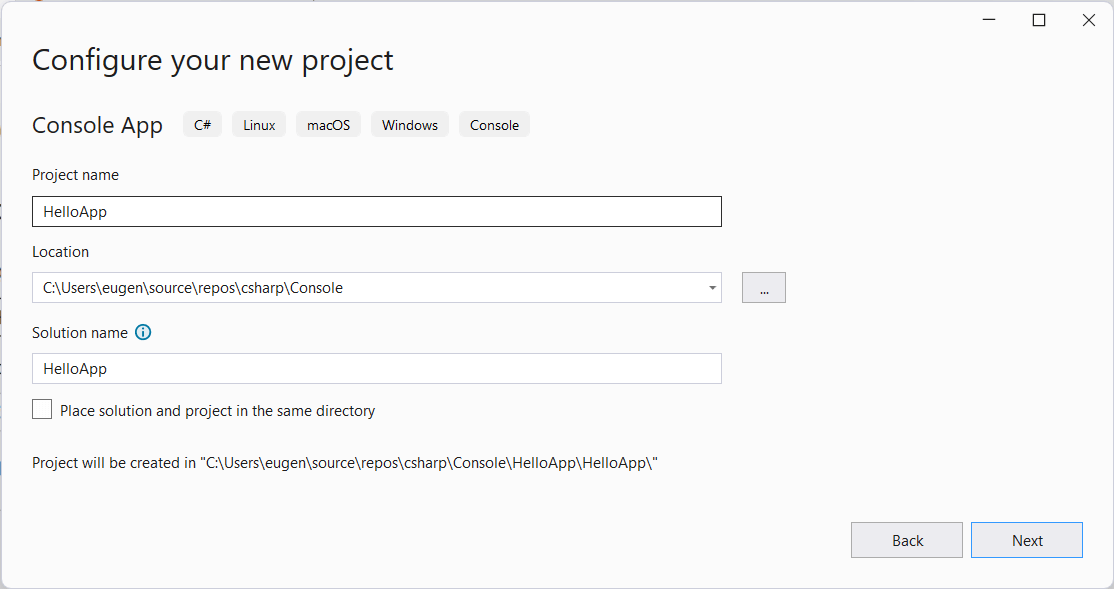
В поле Project Name дадим проекту какое-либо название. В моем случае это HelloApp .
На следующем окне Visual Studio предложит нам выбрать версию .NET, которая будет использоваться для проекта. Выберем последнюю на данный момент верси. — .NET 7.0:
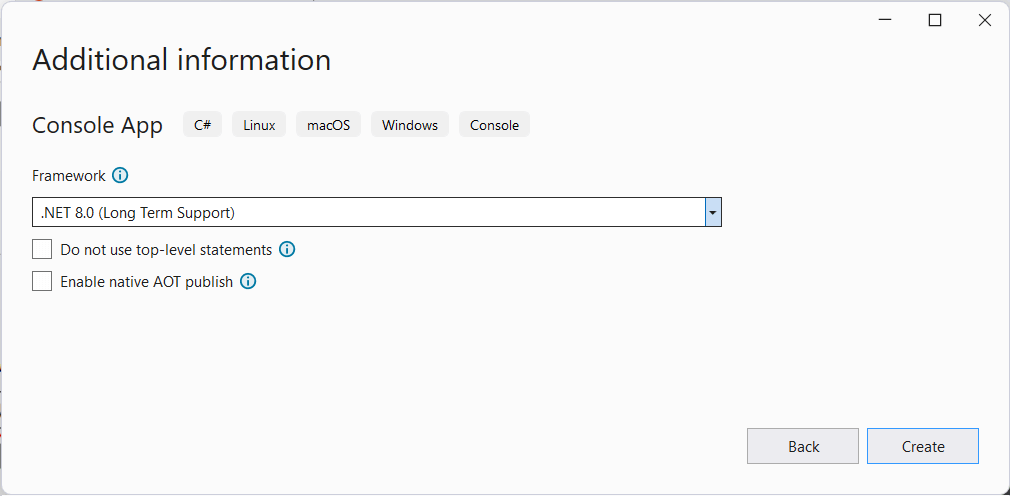
Нажмен на кнопку Create (Создать) для создания проекта, и после этого Visual Studio создаст и откроет нам проект:
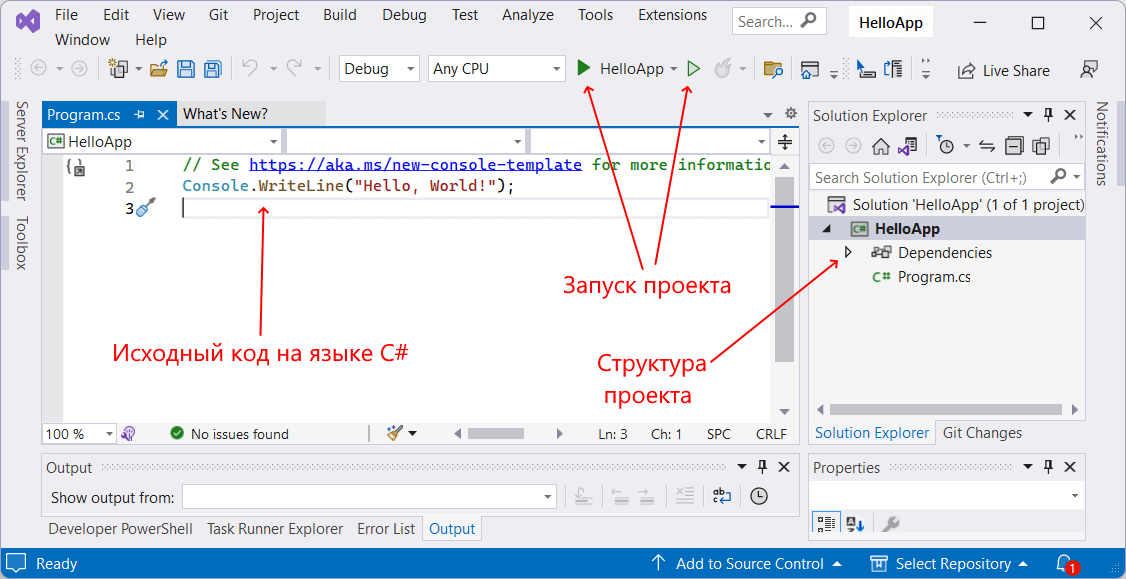
В большом поле в центре, которое по сути представляет текстовый редактор, находится сгенерированный по умолчанию код C#. Впоследствии мы изменим его на свой.
Справа находится окно Solution Explorer, в котором можно увидеть структуру нашего проекта. В данном случае у нас сгенерированная по умолчанию структура: узел Dependencies — это узел содержит сборки dll, которые добавлены в проект по умолчанию. Эти сборки как раз содержат классы библиотеки .NET, которые будет использовать C#. Однако не всегда все сборки нужны. Ненужные потом можно удалить, в то же время если понадобится добавить какую-нибудь нужную библиотеку, то именно в этот узел она будет добавляться.
Далее идет непосредственно сам файл кода программы Program.cs , который по умолчанию открыт в центральном окне и который имеет всего две строки:
Первая строка предваряется символами // и представляет комментарии — пояснения к коду.
Вторая строка собственно представляет собой код программы: Console.WriteLine(«Hello World!»); . Эта строка выводит на консоль строку «Hello World!».
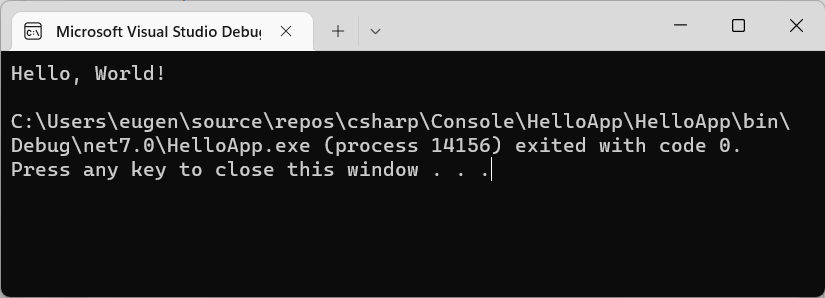
Несмотря на то, что программа содержит только одну строку кода, это уже некоторая программа, которую мы можем запустить. Запустить проект мы можем с помощью клавиши F5 или с панели инструментов, нажав на зеленую стрелку. И если вы все сделали правильно, то при запуске приложения на консоль будет выведена строка «Hello World!».
Теперь изменим весь этот код на следующий:
По сравнению с автоматически сгенерированным кодом я внес несколько изменений. Теперь первой строкой выводится приглашение к вводу.
Метод Console.Write() выводит на консоль некоторую строку. В данном случае это строка «Введите свое имя: «.
На второй строке определяется строковая переменная name, в которую пользователь вводит информацию с консоли:
Ключевое слово var указывает на определение переменной. В данном случае переменная называется name . И ей присваивается результат метода Console.ReadLine() , который позволяет считать с консоли введенную строку. То есть мы введем в консоли строку (точнее имя), и эта строка окажется в переменой name .
Затем введенное имя выводится на консоль:
Чтобы ввести значение переменной name внутрь выводимой на консоль строки, применяются фигурные скобки <>. То есть при выводе строки на консоль выражение
будет заменяться на значение переменной name — введенное имя. Однако чтобы можно было вводить таким образом значения переменных внутрь строки, перед строкой указывается знак доллара $.
Теперь протестируем проект, запустив его на выполнение, также нажав на F5 или зеленую стрелочку.
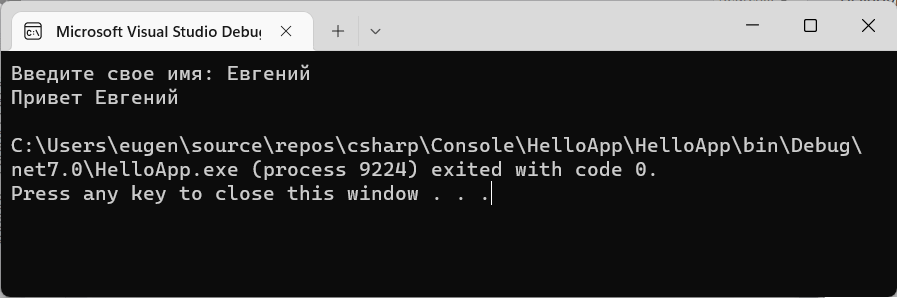
Скомпилированное приложение можно найти в папке проекта в каталоге bin\Debug\net7.0 . Оно будет называться по имени проекта и иметь расширение exe. И затем этот файл можно будет запускать без Visual Studio, а также переносить его на другие компьютеры, где установлен .NET 7.
Создание Windows Forms приложений на C++: Как начать работу в Microsoft Visual Studio 2022
Windows Forms — это технология, которая позволяет создавать графические приложения для операционной системы Windows. Она является частью .NET Framework и позволяет разрабатывать приложения на различных языках программирования, в том числе на C++.
Microsoft Visual Studio 2022 — это интегрированная среда разработки (IDE), которая позволяет разрабатывать различные приложения для Windows, включая Windows Forms приложения на C++.
Шаг 1: Установка Microsoft Visual Studio 2022
Первым шагом для создания Windows Forms приложения на C++ является установка Microsoft Visual Studio 2022. Вы можете скачать ее с официального сайта Microsoft https://visualstudio.microsoft.com
Шаг 2: Создание нового проекта
После установки Microsoft Visual Studio 2022 мы можем создать новый проект. Для этого нужно выбрать пункт меню "Файл" -> "Создать" -> "Проект", в открывшемся окне выбрать "Windows Desktop" в категории "Типы проектов", а затем "С++/CLI" в категории "Языки". Затем выберите "Приложение Windows Forms (.NET Framework)" и нажмите "Создать".
Шаг 3: Работа с формой
После создания проекта мы можем начать работу с формой. По умолчанию в проекте уже создана форма "Form1". Мы можем добавлять элементы управления (кнопки, текстовые поля, таблицы и т.д.) на форму, перемещать их, изменять свойства.
Шаг 4: Написание кода
Для написания кода мы можем использовать язык C++. В Visual Studio 2022 есть встроенный редактор кода, который позволяет автодополнение, форматирование и отладку кода.
Шаг 5: Сборка и запуск приложения
После написания кода мы можем собрать и запустить приложение. Для этого нужно нажать кнопку "Сборка" в меню Visual Studio 2022, а затем нажать "Запуск без отладки" или "Отладка".
Вывод
Создание Windows Forms приложений на C++ в Microsoft Visual Studio 2022 может показаться сложным на первый взгляд, но со временем вы освоите эту технологию и сможете легко создавать графические приложения для операционной системы Windows.
C++ Winforms Tutorial

Windows Forms Projects with C++ in Visual Studio 2022
In Visual Studio up to version 2010, Templates for Windows Forms projects are pre-installed, but not as of Visual Studio 2012. For these newer versions of Visual Studio you have to install an extension.
This tutorial is for Visual Studio 2022, but applies essentially the same to other versions of Visual Studio (2019, 2017, 2015 and earlier).
Installing the extension for Windows Forms projects with C++
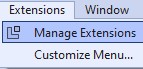
This extension is installed in Visual Studio 2022 under Extensions|Manage Extensions
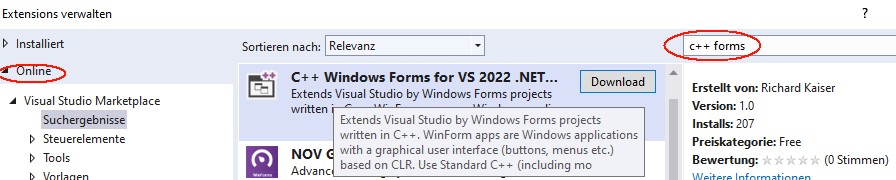
After clicking Download at “C++ Windows Forms for Visual Studio 2022 .NET Framework”
and closing Visual Studio you get the message
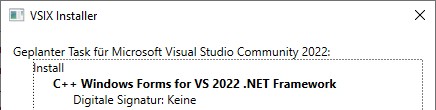

Click Modify to install the extension.
After the next start of Visual Studio under File|New|Project you will find the CppCLR_WinformsProject template:

With this template you can create Windows Forms projects written in C++. Such a project creates a Windows application with a graphical user interface (buttons, menus, etc.), for example:

Standard C++ (including almost all extensions of C++11, C++14, C++17) is used as programming language for the business logic. Only for accessing Windows controls C++/CLI is necessary. This is a simple C++ dialect for the .NET Framework.
The book „C++ mit Visual Studio 2019 und Windows Forms-Anwendungen“
The following is a brief excerpt from my book (in German)
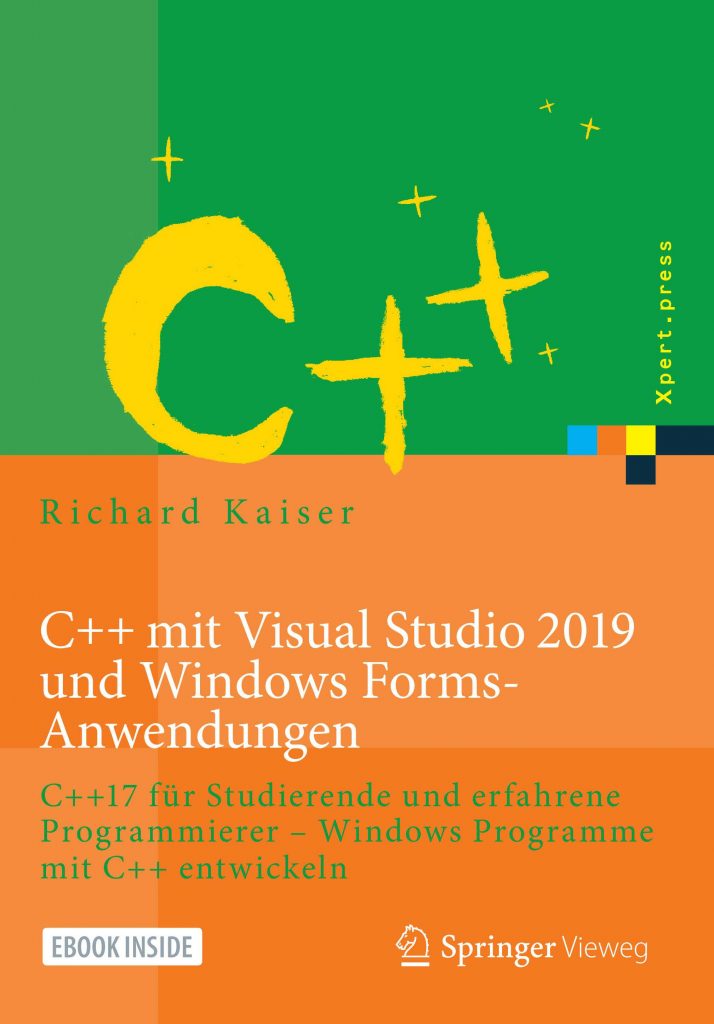
which is still up to date with Visual Studio 2022. All examples and projects can be created and compiled in Visual Studio 2022 as in Visual Studio 2019.
Installing Visual Studio for Windows Forms Projects
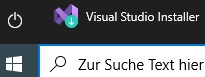
In order to create Windows Forms projects in Visual Studio, particular components must be installed during the installation of Visual Studio. If this was forgotten during the installation, start the Visual Studio Installer either under Windows|Start
or in Visual Studio under File|New|Project|Create new project (at the end of the project list)
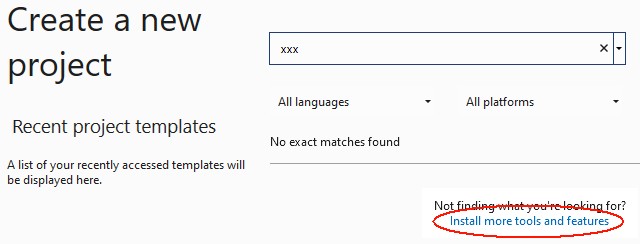
In the installer, check .NET desktop development, desktop development with C++ and C++/CLI support:

Create a Windows Forms project
After restarting Visual Studio, Windows Forms projects are available under Create New Project or File|New|Project:
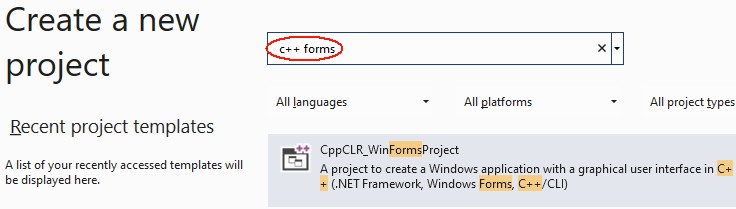
Click the Next button. Then you will be prompted to enter the name of the project and a directory:

After clicking the Create button, Visual Studio looks something like this:
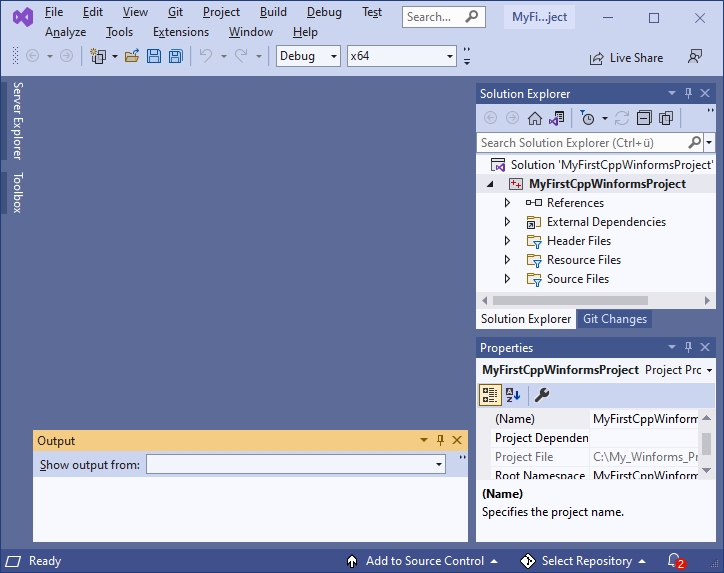
If you now click on Form1.h in the Solution Explorer, the form is displayed:
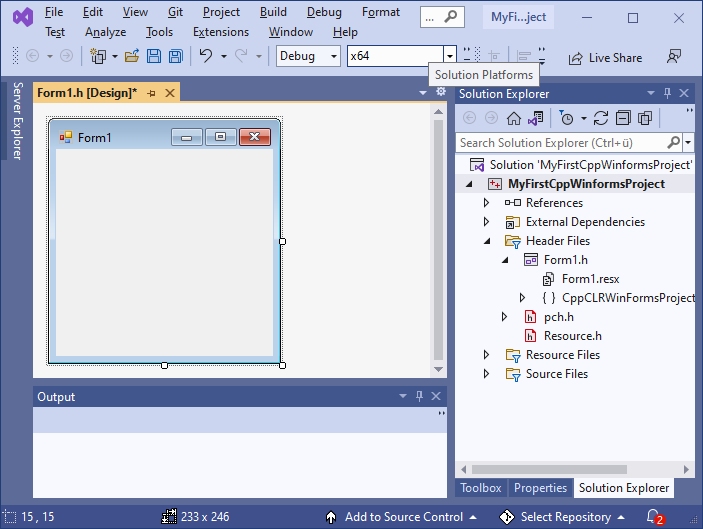
Normally, everything is done and you can continue with the next section. However, if you get something like this

you have clicked Form1.h too fast. Close this window

and click again on Form1.h in the Solution Explorer.
Visual Programming: A first small program
Now, before we get started with our first little program, let’s rearrange Visual Studio a bit to make it easier to use.
After installing Visual Studio, the Toolbox is offered at the left margin.
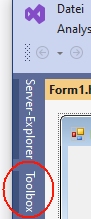
To prevent the toolbox from covering the form, drag the toolbox to the frame with the Solution Explorer (press the left mouse button on the title bar of the toolbox, then move to the title bar of the Solution Explorer with the mouse button pressed and release the mouse button).
Drag the properties window analogously to the Solution Explorer.
Since we initially only need the Toolbox, Solution Explorer and Properties window, you can close all other windows here (e.g. Git Explorer, etc.). Then the right frame looks something like this:
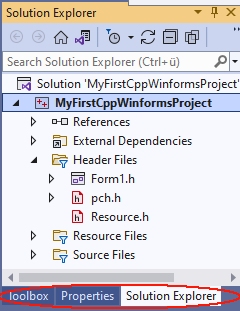
With the Windows Forms project from Section 1.4, Visual Studio then looks like this:
Next, we will now write a first small program.
The form (here Form1) is the starting point for all Windows Forms applications. It corresponds to the window that is displayed when the program is started:
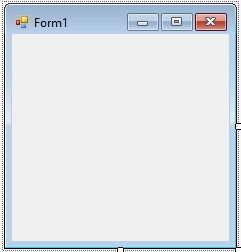
Controls from the Toolbox can be placed on a form. The Toolbox contains essentially all the controls commonly used in Windows. They are located in various groups (e.g. General Controls, Containers, etc.), which can be expanded and collapsed. Most of these controls (such as a button) are displayed on the form while the program is running. If you stop with the mouse pointer briefly on a line of the toolbox, a small hint appears with a short description:
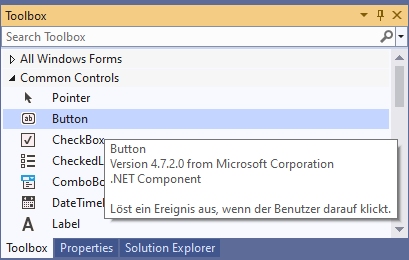
To place an element from the toolbox on the form, simply drag it from the toolbox onto the form. Or click on it in the toolbox first and then click on the position in the form where you want the upper left corner to be.
Example: After placing a Label (line seven in Common Controls, with the capital A), a TextBox (fourth line from the bottom, labelled ab) and a Button (second line labelled ab) on the form, it looks something like this:
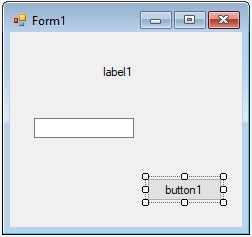
By playing around like this, you have already created a real Windows program – not a particularly useful one, but still. You can start it as follows:
This program already has many features that you would expect from a Windows program: You can move it with the mouse, resize and close it.
Do not forget to close your program before you continue editing it. As long as the program is still running, you cannot restart the compiler or modify the form.
This way of programming is called visual programming. While conventional programming means developing a program solely by writing instructions (text) in a programming language, visual programming means composing it wholly or in part from out-of-the-box graphical controls.
With Visual Studio, the user interface of a Windows Forms program can be designed visually. This allows you to see how the program will look later at runtime as soon as you design it. The instructions that are to take place as a response to user input (mouse clicks, etc.), on the other hand, are written conventionally in a programming language (e.g. C++).
The Properties Window
The control that was clicked last on a form (or in the pull-down menu of the Properties window) is called the currently selected control. You can identify it by the small squares on its edges, the so-called drag handles. You can drag them with the mouse to change to resize the control. A form becomes the currently selected control by clicking on a free position in the form.
Example: In the last example, button1 is the currently selected control.
In the Properties window (context menu of the control on the form, or View|Properties window – do not confuse with View|Property pages).
the properties of the currently selected control are displayed. The left column contains the names and the right column contains the values of the properties. With F1 you get a description of the property.
The value of a property can be changed via the right column. For some properties, you can type the new value using the keyboard. For others, after clicking on the right column, a small triangle is displayed for a pull-down menu, through which a value can be selected. Or an icon with three dots „…“ is displayed, which can be used to enter values.
A control on the form is not only adjusted to its properties in the Properties panel, but also vice versa: if you resize it by dragging the drag handles on the form, the values of the corresponding properties (Location and Size in the Layout section) in the Properties panel are automatically updated.
First steps in C++
Next, the program from Section 1.5 is to be extended so that instructions are executed in response to user input (e.g., a button click).
Windows programs can receive user input in the form of mouse clicks or keyboard input. All inputs are received centrally by Windows and passed on to the program. This triggers a so-called event in the program.
Such an event can be assigned a function that is called when the event occurs. This function is also called an event handler.
For the time being, our program should only react to the clicking of a button. The easiest way to get the function called for this event is to double-click on the button in the form. The cursor is then placed at the beginning of the function. This causes Visual Studio to generate the following function and display it in the editor:
Between the curly brackets „<“ and „>“ you then write the statements to be executed when the Click event occurs.
Essentially all instructions of C++ are possible here. In the context of this simple tutorial, only some elementary instructions are to be introduced, which is necessary for the basic understanding of Visual Studio. If terms like „variables“ etc. are new to you, read on anyway – from the context you will surely get an intuitive idea which is sufficient for the time being.
A frequently used instruction in programming is the assignment (with the operator „=“), which is used to assign a value to a variable. Initially, only those properties of controls that are also displayed in the properties window are to be used as variables. These variables can then be assigned the values that are also offered in the properties window in the right column of the properties.
For the BackColor property, the allowed values are offered after the pull-down menu is expanded:
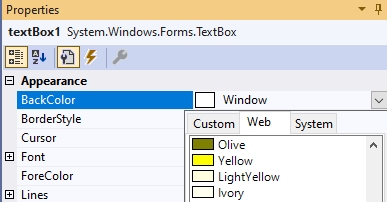
These values can be used in the program by specifying them after Color::. If you now write the statement
between the curly brackets
the BackColor property of textBox1 gets the value Color::Yellow, which stands for the color yellow, when button1 is clicked during the execution of the program. If you now start the program with F5 and then click button1, the TextBox actually gets the background color yellow.
Even if this program is not yet much more useful than the first one, you have seen how Visual Studio is used to develop applications for Windows. This development process always consists of the following activities:
The period of program development (activities 1. and 2.) is called design time. In contrast, the time during which a program runs is called the runtime of a program.
A simple Winforms application
Next, a simple Winforms application is to be created based on the previous explanations. It contains a button and TextBoxes for input and output:

However, you do not have to create this project yourself. If you install the Visual Studio extension

a project template with exactly this project is available in Visual Studio:
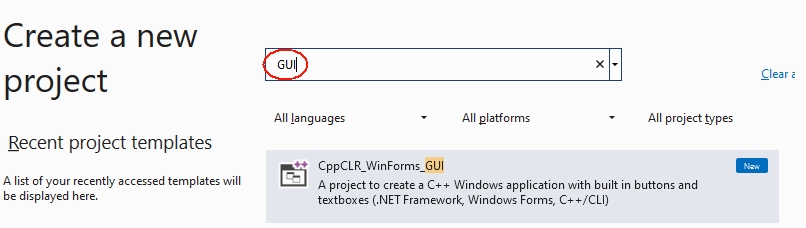
You can use this project as a basis for many applications by adding more controls and functions.
The main purpose of this project is to show how the application logic is separated from the user interface:
The following is a simplified version of chapter 2.11 from my book „C++ mit Visual Studio 2019 und Windows Forms-Anwendungen“. There I recommend such a project for the solutions of the exercises. In the header file of such a project you can include the solutions of several exercises or distribute them to different header files. For each subtask you can put a button (or menu options) on the form. This way you don’t have to create a new project for each subtask.
Of course, outsourcing your own instructions to an extra file (as in 3.) and accessing the controls via function parameters is somewhat cumbersome: however, it leads to clearer programs than if all instructions are located in the form file within the Form1 class. This saves many programming errors that lead to obscure error messages, and makes it easier to search for errors.
1. Create the project
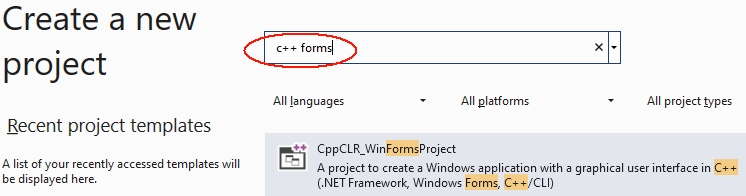
Create a new project with File|New|Project|CppCLR_WinformsProject (see section 1.1).
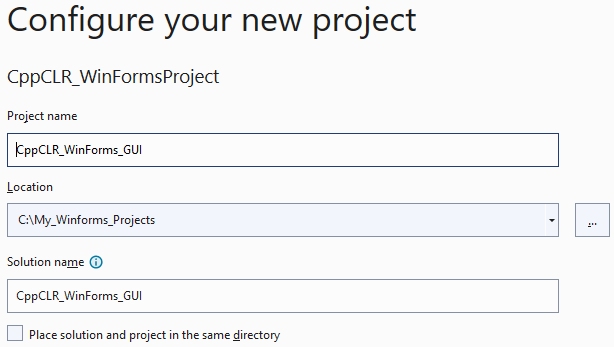
The following examples assume a project named CppCLR_Winforms_GUI.
2. Design the user interface (the form)
The form is then designed to contain all the controls needed to input and output information and start actions. This is done by dragging appropriate controls from the toolbox onto the form.
For many projects (e.g. the exercises from my book) the following controls are sufficient:
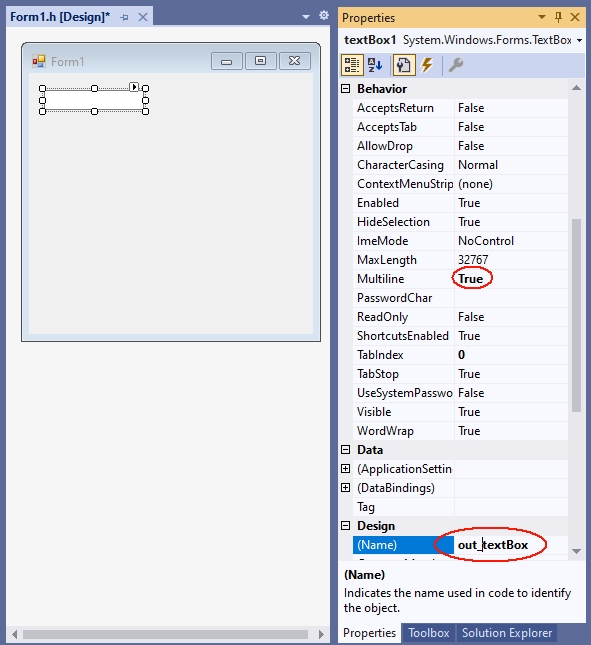
A TextBox becomes multiline TextBox by the value true of the MultiLine property. The TextBox for output is to be named out_textBox:
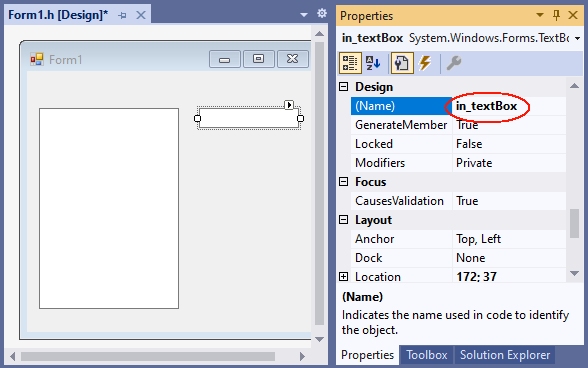
The TextBox for entering data will be named in_textBox:
Since the function plus_1 is called when the button is clicked, it is given the caption „plus 1“ and the name button_plus1:
3. A header file for the application logic
The functions, declarations, classes etc. of the so-called application logic are placed in a separate header file, which is added to the project with Project|Add new element|Visual C++|Code as header file(.h) with the name Header1.h. In practice, however, you should group functions and classes that belong together conceptually in a header file, and then give the header file a more meaningful name than Header.h.
The application logic is then included in the header file. These are mostly functions, classes, etc. written in C++. In our first example, this should be a function with the name plus_1, which returns the value of the argument increased by 1:
In a C++ Windows Forms project, the application logic consists primarily of functions, classes, etc. written in C++, without C++/CLI language elements. In our first example, this should be a function named plus_1, which returns the value of the argument incremented by 1:
Diese Datei wird dann vor dem namespace des Projekts mit einer #include-Anweisung in die Formulardatei (z.B. Form1.h) aufgenommen:
This file is then included in the form file (e.g. Form1.h) before the namespace of the project with an #include statement:
4. Calling the functions
By double-clicking the button on the form, Visual Studio creates the function (the event handler) that will be called when the button is clicked when the program is running:
In this event handler you then call the corresponding function. In this simple tutorial this is the function plus_1 from the file Header.h.
If you enter a number in the input field after starting this program with F5 and then click on the button, the value incremented by 1 is displayed in the output text box:
For each further function whose result is to be displayed, a button is placed on the form and given a suitable name (Name property) and a suitable label (Text property). This function is then called in the associated event handler.
With this all relevant parts of the . CppCLR_Winforms_GUI are presented. You can enhance it as you like with additional controls (buttons, menus, etc.). See chapter 2 of my book for more information.
5. GUI and application logic not so strictly separated
In the version created under 1. to 4. the application logic is strictly separated from the user interface: The access to the user interface with C++/CLI is exclusively done in Form1.h. In Header1.h, however, only standard C++ is used. This has in particular the advantage that one can use this header also in other platforms (e.g. console applications, Qt, Mac).
However, in the early stages of a project, when there is still a lot of experimenting going on, it can be a bit cumbersome if you have to change the calls in another file every time you change a parameter list. And for applications that are not intended to be used for other platforms at all, this strict separation doesn’t help much. This often applies to exercise tasks as well.
This jumping back and forth between different files can be avoided by relaxing the strict separation between the application logic and the user interface by including access to the controls in the header file as well.
Accessing controls in a header file is enabled by inserting
into the header file at the beginning. Then you can also use the types of the controls in the header file (e.g. as parameters) and include the statements that were in the buttonClick function in Form1.h under 4.
This procedure is implemented in the Header2.h file:
Here you pass a parameter for the control to the function. Please note that you must specify a ^ after the name of a .NET type (e.g. TextBox, Button). In the function you then address the control under the name of the parameter.
This function can be called when a button is clicked:
6. Analogy to console applications
Comparing of this Windows Forms project with a corresponding console application shows the analogy of the two types of projects. This analogy shows how to convert a console application into a forms application: If you have a console program like
Excerpt from the preface to my book „C++ mit Visual Studio 2019 und Windows Forms-Anwendungen“
The preface to my book (in German)
teaches C++ with Windows Forms applications in more detail.
Preface
The starting point for this book was the desire for a C++ textbook in which programs for a graphical user interface (Windows) are developed from the beginning, and not console applications as is usually the case. Programs in which inputs and outputs are done via a console are like stone-aged DOS programs for many beginners and discourage them from wanting to deal with C++ at all.
Windows Forms applications are an ideal framework for C++ programs with an attractive user interface: access to Windows controls (Buttons, TextBoxes etc.) is easy. The difference to a standard C++ program is mostly only that inputs and outputs are done via a Windows control (mostly a TextBox)
while in standard C++ the console is used with cout:
But not only students can benefit from C++ with a graphical user interface. With Windows Forms projects, existing C or C++ programs can be enhanced with a graphical user interface without much effort. And those who know C or C++ and do not want to learn a new language for a GUI can make their existing programs more beautiful and easier to use with simple means.
C++ has developed rapidly in recent years: The innovations of C++11, C++14, C++17 and C++20 have brought many improvements and new possibilities. Much of what was good and recommended in 2010 can be made better and safer today.
As a book author and trainer who has accompanied this whole evolution, you notice this particularly clearly: many things that have been written in the past should be done differently today. True, it would still be compiled. But it is no longer modern C++, which corresponds to the current state of the art and uses all the advantages.
This book introduces C++ at the Visual Studio 2019 level in May 2020. This is the scope of C++17.
- Left