Implementing your Character
How to implement your First Person Shooter character.
In order to understand and use the content on this page, make sure you are familiar with the following topics:

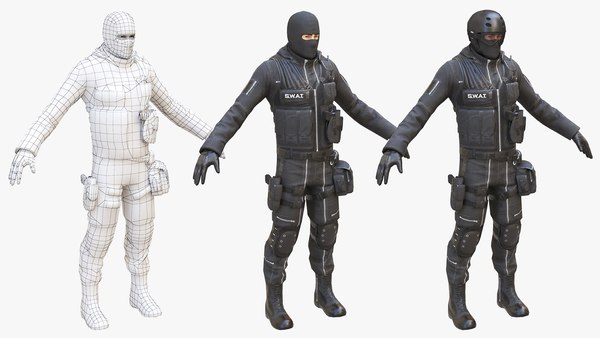
This is what you’ll see at the end of this section.
Goals
The purpose of this section is to show you how to implement your First Person Shooter character.
Objectives
By the end of this tutorial section, you will be able to:
Make a New Character
Set Up Axis Mapping
Implement Character Movement Functions
Implement Mouse Camera Control
Implement Character Jumping
Add a Mesh to Your Character
Change the Camera View
Add a First Person Mesh to Your Character
Steps
2.1 — Making a New Character
2.2 — Setting up Axis Mapping
2.3 — Implementing Character Movement Functions
2.4 — Implementing Mouse Camera Control
2.5 — Implementing Character Jumping
2.6 — Adding a Mesh to Your Character
2.7 — Changing the Camera View
2.8 — Add a First Person Mesh to Your Character
2.1 — Making a New Character
During this step, you are going to make a new character in the Unreal Engine (UE) using the engine’s Character base class. The Character class (derived from the Pawn class) has built-in functionality for bipedal movement such as walking, running, and jumping.
Adding a Character Class
Although you can manually add .h and .cpp files to your Visual Studio (VS) solution, it is good practice to use the C++ Class Wizard to add new classes to your project.
By using the C++ Class Wizard, the engine creates header and source templates that set-up UE specific macros for you.
Launch your FPSproject in UE (if you have not already done so).
Click the Tools in the Main menu panel, select New C++ Class. .

The Choose Parent Class window appears. Select Character as the parent class, and click Next.

Click for full image.
Name the new class FPSCharacter then click Create Class.

Click for full image.
Verifying the Character Class
In the Solution Explorer of VS, expand FPSProject > Source > FPSProject.

Click the FPSCharacter.cpp to open the implementation file for your FPSCharacter class.
Add the following code in the void AFPSCharacter::BeginPlay() function (under Super::BeginPlay(); ). With the help of this, you will verify that FPSCharacter class is being used:
FPSCharacter.cpp should now look like the following:
Save the FPSCharacter.cpp file in Visual Studio.
Navigate to the Solution Explorer and select FPSProject.
Up until now, you have been compiling your project using the editor’s Build button. During this step, you are going to gain experience compiling code using Visual Studio’s build feature. To compile your code from inside Visual Studio, right-click on FPSProject and select Build to compile your project.
To compile your code using the VS, right-click on FPSProject in Solution Explorer and select Build to compile your project.

Before doing this step, make sure disable Enable Live Coding in the Unreal Engine.

If you are using the default setup of VS, you should have a dialogue box near the bottom of the program (likely below where you’ve been editing code). When you click Build, some dialogue should appear in that box while it processes, and it should then hopefully say it was built successfully. If the build failed, don’t stress! Just retrace your steps and make sure your code matches what you’ve listed here and in Setting up your Project .
After the build finishes, open Unreal Editor to verify that your newly compiled FPSCharacter class is visible in the Content Browser.

Extending your C++ FPS Character Class to Blueprints
Now is a good time to extend the C++ FPS Character class to Blueprints (like you did with the FPSProject Game Mode in the Setting up your Project . Please feel free to go to C++ and Blueprints reference page to learn more about extending C++ classes to Blueprints.
Right-click the FPSCharacter class in Content Browser to open the Action menu.
Click the Create Blueprint class based on FPSCharacter to open the Add Blueprint Class dialog menu.

Name your new Blueprint Class BP_FPSCharacter and choose the Blueprints folder before clicking the Create Blueprint Class button.

Click for full image.
You should have a newly created BP_FPSCharacter Blueprint Class located inside of the Blueprints folder.

Click for full image.
Make sure to Save your BP_FPSCharacter Blueprint before closing the Blueprint Editor.

Setting the Default Pawn Class
Now that you have successfully extended your newly modified Game Mode to Blueprints, you will need to set your project to use BP_FPSCharacter as the default Pawn in this step.
Click the Edit in the Main menu panel, select Project Settings.

Under the Project heading on the left side of the Project Settings tab, click on Maps & Modes.
Expand the Selected GameMode section, and select BP_FPSCharacter in the Default Pawn Class dropdown menu.

Click for full image.
Close the Project Settings menu.
Click the Play button in the Level Editor Toolbar. «We are using FPSCharacter.» should now be displayed in red text below «Hello World, this is FPSGameMode!» for five seconds in the upper left corner of the viewport.

If you are unable to move, you are using FPSCharacter as your Pawn correctly! Your new Character doesn’t have any movement controls yet, so you will not be able to move around in the level.
Before going to the next step, press the Shift + Escape or click Stop in the Level Editor Toolbar to exit PIE mode.
2.2 — Setting up Axis Mapping
In general, Axis Mappings enable mapping keyboard, mouse, and controller inputs to a «friendly name» that can later be bound to game behavior (such as movement). Axis Mappings are continuously polled, allowing for seamless movement transitions and smooth game behavior. Hardware axis (such as controller joysticks) provide degrees of input, rather than discrete input (for example, 1 pressed vs. 0 not pressed). While controller joystick input methods are effective at providing scalable movement input, Axis Mappings can also map common movement keys (like WASD or arrow keys) to continuously-polled game behavior.
If you want to learn more about Player Input before moving forward with this step, please refer to the Player Input and Pawns tutorial. During this step, you are going to get your new Character to move around the map by setting up the input axis mappings for the WASD keys.
MoveForward Axis Mapping
Click the Edit in the Main menu panel, select Project Settings.
Under the Engine heading on the left side of the Project Settings tab, click Input.
Under the Bindings section, click the plus sign next to Axis Mappings.
Click the arrow to the left of Axis Mappings.
Type MoveForward into the text field that appears.
In the dropdown menu, select W from the Keyboard dropdown list.
Your input settings should now look like the following:

Click for full image.
Click the plus sign next to MoveForward.
In the second dropdown menu, select S from the Keyboard dropdown list.
Type -1.0 in the Scale field next to S.
Your input settings should now look like the following:

Click for full image.
MoveRight Axis Mapping
Under the Bindings section, click the plus sign next to Axis Mappings.
Type MoveRight into the text field that appears.
In the dropdown menu, select D from the Keyboard dropdown list.
Your input settings should now look like the following:

Click for full image.
Click on the plus sign next to MoveRight.
In the second dropdown menu, select A from the Keyboard dropdown list.
Type -1.0 in the Scale field next to A.
Your input settings should now look like the following:

Click for full image.
Now that you have set your Movement Axis Mappings, go ahead and close the Project Settings menu.
2.3 — Implementing Character Movement Functions
In this step, you are going to set-up our Player Input Component and implement the following functions in the FPSCharacter class:
Movement Function Interfaces
Now that you have set-up Axis mappings for your FPSCharacter, you can switch to your project in VS.
In FPSCharacter.h , add the following function declarations below SetupPlayerInputComponent , under public access specifier:
The UFUNCTION macro (located above each of these functions) makes the engine aware of these functions so that they can be included in serialization and other engine functionality.
FPSCharacter.h should now look like the following:
Movement Function Implementations
In a typical FPS control scheme, the character’s movement axes are relative to the camera. «Forward» movement means «the direction that the camera is pointing» and «right» means «to the right of the direction that the camera is pointing». You are going to use the PlayerController to get the character’s control rotation. Also, your MoveForward function will ignore the pitch component of the control rotation and restrict your input to the XY plane so as to guarantee that your character will move along the ground while you are looking up or down.
In FPSCharacter.cpp , add the following lines to the SetupPlayerInputComponent function under Super::SetupPlayerInputComponent(PlayerInputComponent); .
An InputComponent is a component that defines how to handle input data. An InputComponent can be attached to an actor that wants to receive input.
Below SetupPlayerInputComponent function definition, add the following MoveForward function definition in FPSCharacter.cpp .
Below MoveForward function definition, add the following MoveRight function definition in FPSCharacter.cpp .
FPSCharacter.cpp should now look like the following:
Testing Character Movement
It is now time to compile and test your newly implemented character movement functions.
Save the FPSCharacter header .h and implementation .cpp files in VS.
Navigate to the Solution Explorer and select FPSProject.
Right-click on FPSProject and select Build to compile your project.
After the build finishes, open your FPSProject in the Unreal Editor.
Click the Play button in the Level Editor Toolbar. You can now move forward, backward, left, and right using WASD keys.
Before going to the next step, press the Shift + Escape or click Stop in the Level Editor Toolbar to exit PIE mode.
2.4 — Implementing Mouse Camera Control
During this step, you are going to add the ability for your character to look around and steer with the mouse.
Turn Axis Mapping
Click the Edit in the Main menu panel, select Project Settings.
Under the Engine heading on the left side of the Project Settings tab, click Input.
Under the Bindings section, click the plus sign next to Axis Mappings.
Click the arrow to the left of Axis Mappings.
Type Turn into the text field that appears.
In the dropdown menu, select Mouse X from the Mouse dropdown list.
Your input settings should now look like the following:

Click for full image.
Look-up Axis Mapping
Under the Bindings section, click the plus sign next to Axis Mappings.
Type LookUp into the text field that appears.
In the dropdown menu, select Mouse Y from the Mouse dropdown list.
Type -1.0 in the Scale field next to Mouse Y.
Your input settings should now look like the following:

Click for full image.
Close the Project Settings menu.
Implementing Input Handling
Now it is time to add code to handle mouse input for turning and looking up. The Character base class defines the two necessary functions for us, namely:
If you want to perform additional processing, such as adding support for sensitivity or axis inversion, you could provide your own functions to adjust the input values before passing them to function. In this case however, you will bind your inputs directly to the AddControllerYawInput and AddControllerPitchInput functions.
Add the following lines to the SetupPlayerInputComponent function in FPSCharacter.cpp .
The SetupPlayerInputComponent function should now look like the following:
Testing Mouse Camera Control
Save the FPSCharacter implementation file in VS.
Navigate to the Solution Explorer and select FPSProject.
Right-click on FPSProject and select Build to compile your project.
After the build finishes, open your FPSProject in the Unreal Editor.
Click the Play button in the Level Editor Toolbar. You can now control the camera with your mouse.
Before going to the next step, press the Shift + Escape or click Stop in the Level Editor Toolbar to exit PIE mode.
2.5 — Implementing Character Jumping
In general, Action Mappings deals with inputs for discrete events, they allow you to map inputs to a «friendly name» that can later be bound to event-driven behavior. The end effect is pressing and/or releasing a key, mouse button, or keypad button directly triggers game behavior. During this step, you are going to add the ability for your character to jump by setting up the input action mapping for the space bar.
Jump Action Mapping
Click the Edit in the Main menu panel, select Project Settings.
Under the Engine heading on the left side of the Project Settings tab, click Input.
Under the Bindings section, click the plus sign next to Action Mappings.
Click the arrow to the left of Action Mappings.
Type Jump into the text field that appears.
In the dropdown menu, select Space Bar from the Keyboard dropdown list.
Your input settings should now look like the following:

Click for full image.
Close the Project Settings menu.
Implement Input Handling
If you look inside the header file .h for the ACharacter base class, you will notice that there is built-in support for character jumping. Character jumping is tied to the bPressedJump variable, so all you need to do is set that boolean to true when the jump action is pressed, and false when the jump action is released. You will need to add the following two functions to accomplish this:
Go back to Visual Studio to add code to your FPSCharacter class.
In FPSCharacter.h , add the following function declarations, under public access specifier:
FPSCharacter.h should now look like the following:
In FPSCharacter.cpp , add the following function definitions to the bottom of the page:
Add the following lines to the SetupPlayerInputComponent function to bind your Jump action to the newly written functions:
FPSCharacter.cpp should now look like the following:
Testing Character Jumping
It is now time to compile and test your newly implemented character movement functions.
Save the FPSCharacter header .h and implementation .cpp files in VS.
Navigate to the Solution Explorer and select FPSProject.
Right-click on FPSProject and select Build to compile your project.
After the build finishes, open your FPSProject in the Unreal Editor.
Click the Play button in the Level Editor Toolbar. You can now move forward, backward, left, and right using WASD keys.
Before going to the next step, press the Shift + Escape or click Stop in the Level Editor Toolbar to exit PIE mode.
2.6 — Adding a Mesh to your Character
Download and extract the sample mesh from the following link:
During this step, you will give the character a skeletal mesh. The Character class creates a SkeletalMeshComponent object for you by default, so all it needs to know is which SkeletalMesh asset to use.
Importing a Skeletal Mesh
Navigate to the Content Browser and open Content folder.
Right-click inside the file window of the Content Browser to open the Import Asset dialog window.

Click ‘Import to /Game. ‘ to open the Import dialog window.
Locate and select the GenericMale.fbx mesh file in folder, where you have downloaded this file.
Click Open to begin importing the mesh to your project.
In the Content Browser, the FBX Import Options dialog windows appears. Click Import All to add your mesh to the Project.

Click the File in the Main menu panel to save your imported mesh.

Setting up a Third Person Mesh
Double-click the BP_FPSCharacter Blueprint Class icon in Content > Blueprints to open it in the Blueprint Editor.
If you see a note about this Blueprint being a data only blueprint, click Open Full Blueprint Editor.
Click the Mesh component in the Components tab.

Navigate to the Details panel and scroll to the Mesh (right-side of screen, or under Window > Details).
Open dropdown window under the Skeletal Mesh and select the GenericMale skeletal mesh.

Scroll to the Transform section in the Details panel and align the SkeletalMeshComponent to the CapsuleComponent by setting its Location options to X = -5.0; Y = 0.0; Z = -88.0.

Click the Viewport in the Blueprint Editor to preview the Skeletal Mesh. It should look like the following:

Verify that the skeletal mesh is inside the CapsuleComponent and that the mesh is facing the same direction as the ArrowComponent . Properly orienting the skeletal mesh component will ensure that your character moves through the world in the right way.
Make sure to Compile and Save the BP_FPSCharacter Blueprint before closing the Blueprint Editor.
Verifying the New Mesh in PIE Mode
It is now time to view your newly added mesh in-editor.
Click the Play button in the Level Editor Toolbar. You should be able to see your character’s shadow as you move around.

If you want to see your character’s mesh inside the editor’s Viewport, press the F8 key to eject yourself from your pawn. After pressing the F8 key, you’ll be able to move your camera freely through the Level. To move your camera, hold the left mouse button down while moving the mouse at the same time.

Press the Shift + Escape or click Stop in the Level Editor Toolbar to exit PIE mode.
2.7 — Changing the Camera View
At the end of the previous step, the default camera was positioned inside the mesh’s neck. During this step, you’re going to set-up an FPS camera that you can use to adjust the camera’s properties (such as location and field of view). Before you get started, you need to expand your list of included files in FPSCharacter.h . This will allow your code to access more camera-related functions, and will ultimately allow you to manipulate your camera placement.
Open your Visual Studio project, and navigate to FPSCharacter.h .
Include the following header files to FPSCharacter.h .
Attaching a Camera Component
Open FPSCharacter.h to add the following code, under public access specifier:
FPSCharacter.h should now look like the following:
Open FPSCharacter.cpp and add the following code to the constructor below PrimaryActorTick.bCanEverTick = true: .
This code creates a UCameraComponent and attaches it to the character’s CapsuleComponent .
Add the following code underneath the block that you just wrote in the constructor:
This code adjusts the camera’s position to be slightly above the character’s eye position while allowing the pawn to control the camera’s rotation.
SetRelativeLocation sets the default for the component. However, the previous value will still be set in the Editor. To correct this, open the Blueprint Editor. Click the FPSCameraComponent and in the Details panel locate the Transform > Location value. Click the Reset to Default icon next to that value.
FPSCharacter.cpp should now look like the following:
Testing the New Camera
It is now time to compile and test your newly implemented camera code.
Save the FPSCharacter header .h and implementation .cpp files in VS.
Navigate to the Solution Explorer and select FPSProject.
Right-click on FPSProject and select Build to compile your project.
After the build finishes, open your FPSProject in the Unreal Editor.
Click the Play button in the Level Editor Toolbar.
The camera should now be slightly above your character’s head.
You can also verify your newly added camera component by opening the BP_FPSCharacter in the Viewport.

If you open BP_FPSCharacter in the COntent Browser and navigate to Viewport your character should look like the following:

2.8 — Add a First Person Mesh to your Character
A common approach for building FPS games is to use two separate character meshes where one is the full-body mesh and the other is the «weapon and hands» mesh. The full-body mesh is used to see the character from a third-person perspective; however, it is hidden when the player is viewing the game in first-person perspective. The «weapon and hands» mesh is typically attached to the camera and is only visible to the player when they are viewing the map in first-person perspective. During this step, you are going to add a first person mesh to your character.
Adding the First Person Character Mesh
Switch back to Visual Studio and open FPSCharacter.h to add the following code under public :
Open FPSCharacter.cpp , go to the constructor, and add the following code to create and configure the first person mesh:
SetOnlyOwnerSee indicates that this mesh is only visible to the PlayerController that has possessed this Character. This code is also attaching the mesh to the camera and disabling some environmental shadowing. Allowing the arms to cast shadows would destroy the illusion of having a single mesh for the first person character.
Finally, add the following code to the constructor in PSCharacter.cpp to hide the existing third-person mesh from the owning character:
Save the FPSCharacter header .h and implementation .cpp files in Visual Studio.
Navigate to the Solution Explorer and select FPSProject.
Right-click on FPSProject and select Build to compile your project.
After the build finishes, open your FPSProject in the Unreal Editor.
Click the Play button in the Level Editor Toolbar. Now you should not see shadow from your character in PIE mode. It should look like the following:

At this point, your character mesh should not be visible inside the Editor.
If you still see your mesh and its shadow cast, close and restart the Editor.
Building the Mesh Blueprint
Before continuing, download and extract the sample mesh from the following link:
Navigate to the Content Browser and open the Content folder.
Right-click inside the file window of the Content Browser to open the Import Asset dialog window.
Click Import to /Game. to open the Import dialog window.

Locate and select the HeroFPP.fbx mesh file, where you have downloaded this file.
Click Open to begin importing the mesh to your project.
In the Content Browser, the FBX Import Options dialog windows appears.
In the FBX Import Options dialog window from dropdown menu under Sceleton section select Clear, then click Import All.

Close the following Message Log window.

This mesh still shows the first person mesh set-up and it will work with the animations you’ll set-up in a later section.
Click the File in the Main menu panel to save your imported mesh.
Navigate to the Blueprints folder in the Content Browser.
Double-click the BP_FPSCharacter icon to open it in the Blueprint Editor.
In Blueprint Editor navigate to the Components tab and select the new FPSMesh component. You may need to open the Full Blueprint Editor first.

The FPSMesh component is a child of the FPSCameraComponent, which means that it will always be attached to the camera.
Navigate to the Details panel and scroll to the Mesh section, click the dropdown menu under Skeletal Mesh. In dropdown menu, select the HeroFPP skeletal mesh to add the arms to the Viewport.

The added HeroFPP skeletal mesh should look like the following inside the Viewport.

Adjust the Transform option of added mesh. Set Location to and Rotation to .

This settings transform HeroFPP skeletal mesh to be in front of the camera.

Make sure to Compile and Save the BP_FPSCharacter Blueprint before closing the Blueprint Editor.
Viewing the New Mesh In-Game
Click the Play button in the Level Editor Toolbar to view the new mesh in-game.
Press the Shift + Escape or click Stop in the Level Editor Toolbar to exit PIE mode.
Finished Section Code
Congratulations! You’ve learned how to:
✓ Make a New Character
✓ Set-up Axis Mapping
✓ Implement Character Movement Functions
✓ Implement Mouse Camera Control
✓ Implement Character Jumping
✓ Add a Mesh to your Character
✓ Change the Camera View
✓ Add a First Person Mesh to your Character
You’re now ready to learn how to implement projectiles in the next section.
Как добавить персонажа в Unreal Engine 5
Прежде всего, необходимо создать 3D-модель персонажа внешними инструментами, такими как Blender, Maya или 3ds Max. Важно учесть, что модель должна быть оптимизирована для использования в игровом движке, поэтому рекомендуется использовать низкополигональные модели с адекватным разбиением геометрии.
Хочешь научиться создавать 3D персонажей? Запишись на наш курс «3D-моделирование в Blender для новичков».
Как добавить персонажа в unreal engine 5
Unreal Engine 5 с нуля / Урок #5 — Добавление персонажа, смотреть Unreal Engine 5 с нуля / Урок #5 — Добавление персонажа, смотреть Unreal Engine 5 с нуля / Урок #5 — Добавление персонажа бесплатно, скачать Unreal Engine 5 с нуля / Урок #5 — Добавление персонажа, смотреть Unreal Engine 5 с нуля / Урок #5 — Добавление персонажа в высоком качестве, Unreal Engine 5 с нуля / Урок #5 — Добавление персонажа видео
Ваша жалоба обязательно будет рассмотрена. Если мы обнаружим нарушение правил сообщества, то примем меры. В случае серьезных или неоднократных нарушений, аккаунт пользователя может быть заблокирован.
Создание персонажа в новом мире UE5
3) В настройках Game Mode в Default Pawn Class ставим своего персонажа(Character).
4) В настройках мира World Settings ставим свой Game Mode.
5) Заходим в BP свеого персонажа и в настройках Меша ставим свою модельку Static Mesh. Поворачиваем ее как надо.
6) Сделаем движение. Заходим в Event Graph (событийный граф (код))
Добавляем Move forward/backward и Move left/right

7) добавим поворот для мыши


дописываем движение мыши

7) Сделаем КамераБум — это SpringArm ее кладем в Меш и в камерабум кладем Камеру

Тестим и он ходит, но камера вверх и вниз не ходит. Для этого ставим в настройках SpringArm

Делаем прыжок для юзера и увеличим длину Камерабума

Далее добавим Bp class — Actor и назовем его BP_SpeedBooster
Заходим в него и добавляем компонент Static mesh и потом в настройках справа ставим сам меш.

Создадим переменную SpeedAmount тип Float. Переходим в Event Graph
В настройках Меша создадим событие On Component Begin Overlap (когда что-то или кто-то начнет пересекаться с нашей коллизией)
Если прочитать то get
Если записать то set
Ставим SpeedAmount значение 200 (перед этим компилируем).

Чтобы событие выполнялось постоянно нужно писать его через событие Tick(выолняется кажд колво сек), заходим в БП персонажа
Хотим выводить событие (значение скорости) на экран:

Чтобы коллизии пересекались заходим в наш шар и в настройках стат меша — коллизион — колиз пресетс — Overlap All
Тестим и работает. Сделаем чтобы шар исчезал после подбора.

ООП выражается что добавление скорости сделано в БП Бустера, в персонаже этого кода нет.