How To Upgrade Ubuntu 18.04 to 20.04 LTS using command line

Ubuntu 20.04.2.0 LTS (Focal Fossa) is the current latest stable version the Ubuntu OS. LTS stands for long-term support, which means five years, until April 2025, of free security and maintenance updates, guaranteed.
In this article we will show you an easy and fast way on how to upgrade your Virtual or Dedicated server from Ubuntu Linux 18.04 LTS or 19.10 to Ubuntu 20.04 LTS using the apt / apt-get command.
Step 1 — Make a Backup
Using Acronis Cloud Backup you can easily backup your entire Ubuntu server or choose specific files/folders which you do not wish to lose in case something goes wrong.
If you wish to use any other backup software you are free to do so, just make sure your data are placed in an offsite/off-server repository. With Acronis Backup, your data will be hosted in Acronis’ cloud datacenter and can be easily restored/recovered to a new server.
Step 2 — Upgrade all installed packages on Ubuntu 18.04 LTS
Once you have completed your existing Ubuntu server’s backup process, you can begin with the OS upgrade.
Using a root-privileges account type the following commands:
sudo apt update
sudo apt list —upgradable
sudo apt upgrade
and then type ‘Y’ to continue when prompted
Upon completion, reboot your server by issuing the following command:
sudo reboot
Step 3 — Remove unused old kernels from Ubuntu 18.04
Run the following command:
sudo apt —purge autoremove
At this point you need to install the Update Manager on server as it may or man not installed on your server.
Do so by executing the following command:
sudo apt install update-manager-core
Step 4 — Upgrade Ubuntu Linux to latest 20.04 LTS
Execute the following command:
sudo do-release-upgrade
You might notice the following message appearing after you issue the above command:
In that case, re-execute the command with the -d option appended in order to get the latest supported release forcefully:
sudo do-release-upgrade -d
No valid mirror found warning:
Just say Yes (y) to use the official Ubuntu repo.
You are almost done. Once prompted with the following message press ‘y’ to finish the Upgrade and get your server rebooted.
Step 5 — Ubuntu OS Upgrade Verification
Check your Distro version by running the following command:
lsb_release -a
Verify Linux kernel version and other log files too:
tail -f /var/log/my-app.log
uname -mrs
Congrats! Your Ubuntu server has now been successfully upgraded to Ubuntu 20.0.4 LTS!
Not comfortable with Linux Systems administration? Let us do it for you!
NetShop ISP’s experienced Linux system admins can help you with full server management, whether it’s a virtual or a dedicated server. From Operating System installations, troubleshooting and OS distro upgrades, we can take care the whole aspect of your linux machine’s administration.
Browse our VPS Plans and Dedicated Servers to find the server that satisfies your needs and budgets and get started!
Update a Single Package With apt Command in Ubuntu and Debian
How do you update your Ubuntu system in the command line? You use the apt update (to refresh the package cache) and apt upgrade commands.
It updates all the installed apt packages that can be upgraded at once. This includes the Linux kernel version, too.
This seems like a good thing, especially for desktop users. That may not be the case for Ubuntu server users where you have crucial web services running.
If you want to be selective about the updates and only want to upgrade a single package, use this command:
Let’s see it in a bit more detail.
Upgrade single package using apt command
The first step is to update the local package repository cache so that your system knows about the availability of new package versions.
This is optional. Check if the package you want to upgrade is in the list of upgradable packages.
If the desired package has a new version available, you can choose to upgrade only this single package with this command:
If you run the apt install command on an already installed package, it will be upgraded to the next available version.
But if the package is not installed already, the apt command will also install it.
This is why the —only-upgrade part is necessary. With that option, the apt command will only upgrade an already installed package. It will not install the package if it is not already installed.
Not the best-suited example for Ubuntu server users, but you can still see how I upgraded only one of the seven upgradable packages in the below screenshot.
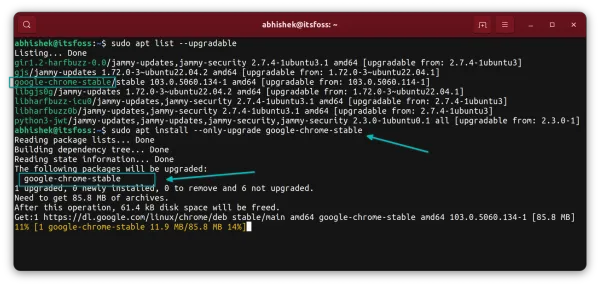
Update only a single package in Ubuntu
Upgrade selected packages only
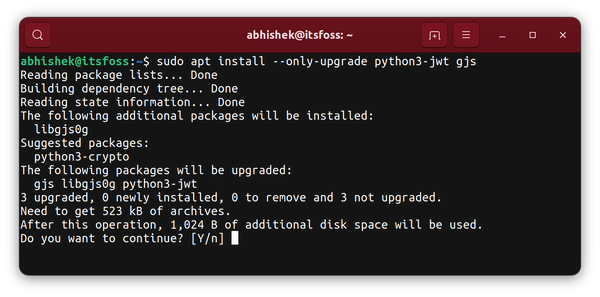
If you want to upgrade a selected few packages, you don’t have to update them one by one. Just provide the package names with the command mentioned earlier.
Here’s an example.
Conclusion
When you are faced with a situation where you have to upgrade selected packages, you can use the apt install command with –only-upgrade option.
Poopcode
Code snippets | Coding interview questions with solutions | JavaScript tutorials | Python tutorials
Update all packages in Ubuntu
Updating packages in Ubuntu is sometimes needed to upgrade your Ubuntu to latest version and apply security updates. We can also upgrade all packages in the system to make sure we use the latest version of all packages. Steps below.
Update repositories
sudo apt update updates the Ubuntu repositories so that your system checks against the repositories and lists our newer versions if available.
View packages
To view the list of packages that can be updated use apt list –upgradable. This is an optional step.
Upgrade packages
To upgrade all these packages at once use sudo apt upgrade. This will ask for your confirmation by showing the memory to be used for new packages. Press Y and Press Enter.
How to Update Packages via Ubuntu Command Line
Like other operating systems, Ubuntu offers regular updates to rectify bugs and implement minor adjustments or modifications. These updates are accessible via the terminal, where you can display a list of packages eligible for an upgrade. This list encompasses all the newer packages available, enabling you to upgrade either one package at a time or multiple packages simultaneously.
Table of Contents
Conducting Update Checks in Ubuntu
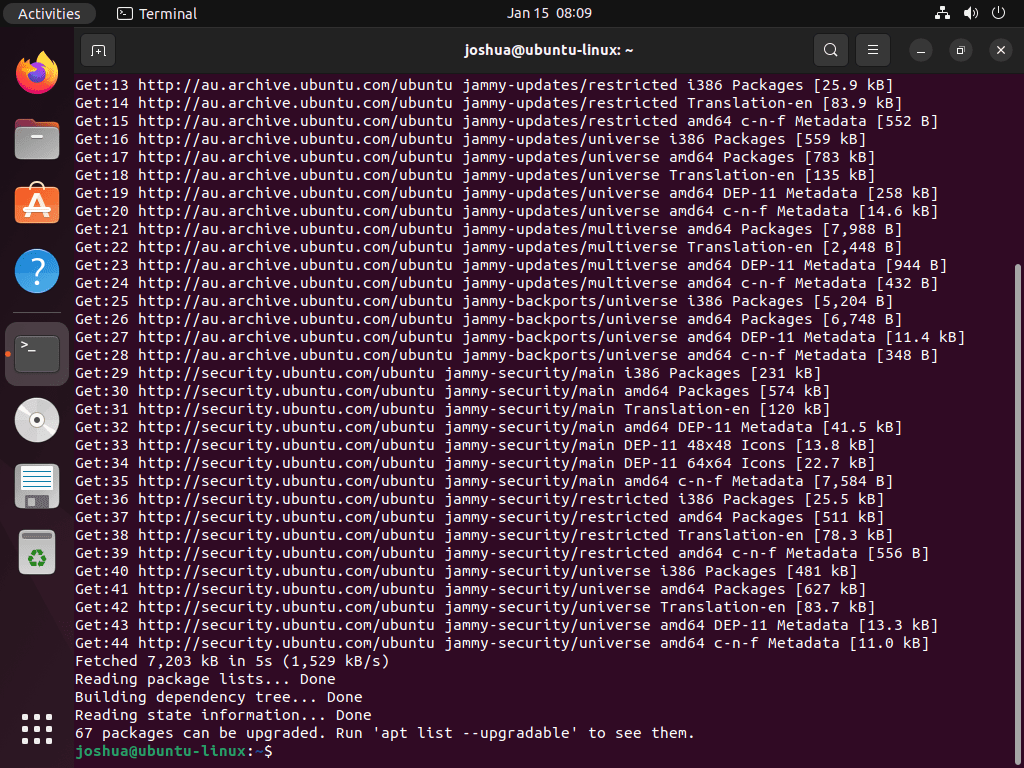
To check for updates in Ubuntu, you can utilize the apt-get update command. When executed in the terminal, this command allows users to query repositories for available updates swiftly. This ensures that users can avail themselves of any bug fixes, security patches, and other enhancements as soon as they are released, thereby keeping their system secure and up-to-date.
Here’s the syntax of the command:
It’s crucial to execute this command with sudo as it necessitates administrative privileges. Alternatively, you can use the following newer version of the APT command to update the package list on Ubuntu Linux:
Executing Package Upgrades in Ubuntu
After running an update on your Ubuntu terminal, the next step is to proceed with the upgrade. You can run the standard upgrade commands with apt or apt-get or upgrade packages individually.
Here’s how you can upgrade all the packages:
Or using the new method:
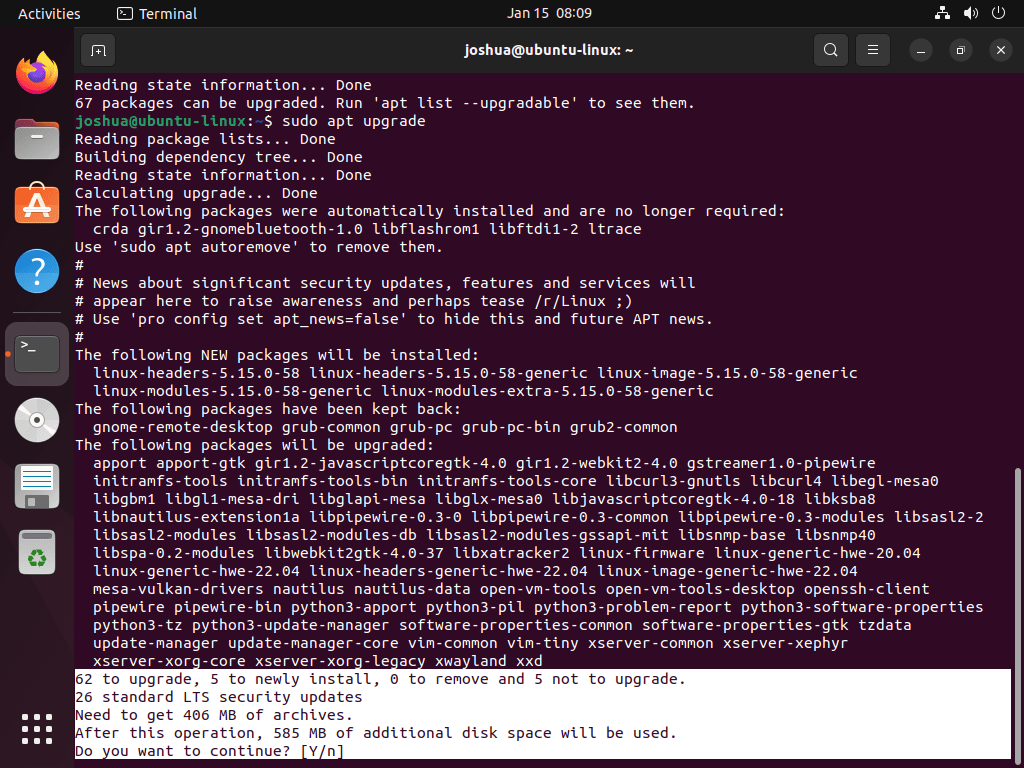
This command upgrades all the packages that have updates available. It’s a good practice to run these commands regularly to ensure that your system runs the latest and most stable software versions.
Performing Upgrades on Specific Ubuntu Packages
If you need to review some upgrades on certain packages but immediately require an upgrade on a specific package, you can run the following command:
Or with the new method:
Enumerating Upgradeable Packages in Ubuntu
In Ubuntu, there are several ways to display a list of packages that are eligible for an upgrade. One such method involves using the apt command coupled with the list —upgradable option. Here’s how you can execute this:
Executing these commands will first update the package list from the repositories. Following this, it will list all the packages that have updates available. If you prefer a different approach, you can use the following command to list all upgradable packages:
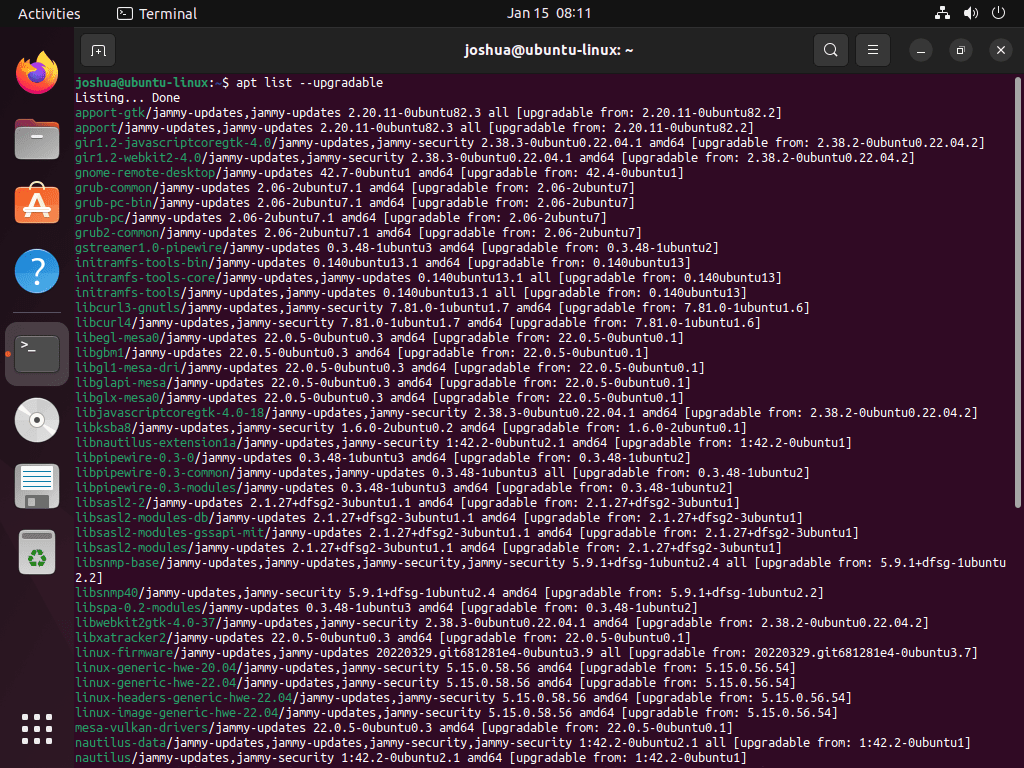
For those who prefer a graphical user interface, you can use the package manager GUI, such as Ubuntu Software, to check for updates and upgrade packages.
It’s important to note that upgradable packages are those that have a new version available in the repositories.
Utilizing the apt-show-versions Command in Ubuntu
Another method to list upgradeable packages is by using the apt-show-versions command. Here’s how you can use it:

This command will display all upgradeable packages. However, if the command does not execute successfully, you may need to install the apt-show-versions package. You can do this by running the following command in the terminal:
Once the apt-show-versions package is installed, you can re-run the apt-show-versions -u command to list all the upgradeable packages.
Implementing Full Upgrade or Dist-upgrade Command in Ubuntu
The apt-get dist-upgrade and apt full-upgrade commands are used to upgrade all packages on Ubuntu. They upgrade the packages to their latest version available in the repositories, including upgrading packages with new dependencies or packages that may be removed.
Here’s how you can do it:
Or using the newer method with full-upgrade command:
It’s important to note that running the upgrade command may require a system reboot, significantly if the kernel is upgraded. It’s also a good practice to run these commands regularly to ensure that your system runs the latest and most stable software versions.
You can also use the package manager GUI, like Ubuntu Software, to check for updates and upgrade packages.
Final Thoughts and Recap
In this guide, we’ve explored the process of updating packages on Ubuntu via the command line. We’ve covered how to check for updates, upgrade all packages, upgrade specific packages, list upgradeable packages, and perform a full upgrade. Each step was explained in detail, ensuring you clearly understand what each command does and why it’s important.
Keeping your Ubuntu system up-to-date is crucial for maintaining system security, stability, and performance. Regularly updating your packages ensures you’re protected from known security threats, and your system runs the most stable and reliable software versions. It’s recommended to run these commands regularly to keep your system up-to-date. Remember, a well-maintained system is a reliable and secure system.