Blender: Мастерим виртуальную моду одежды — шаг за шагом руководство
Blender — это программа для трехмерного моделирования и анимации с открытым исходным кодом, которая позволяет создавать впечатляющую виртуальную моду одежды. В этом шаг за шагом руководстве мы рассмотрим основные этапы создания одежды в Blender.
Шаг 1: Создание базовой модели
Первым шагом является создание базовой модели для одежды. В Blender вы можете создать базовую модель с нуля с помощью инструментов скульптуры или использовать готовую модель, импортированную из других приложений. Выбор метода зависит от ваших предпочтений.
Шаг 2: Раскройте UV-развертку
Прежде чем приступить к созданию одежды, необходимо раскроить UV-развертку базовой модели. UV-развертка — это процесс преобразования поверхности модели в двумерную плоскость, где все ее части разложены в виде текстурных координат. В Blender вы можете использовать различные инструменты для раскроя UV-развертки, такие как Smart UV Project или Unwrap.
Шаг 3: Создание модели одежды
Теперь, когда у вас есть UV-развертка базовой модели, вы можете приступить к созданию модели одежды. В Blender вы можете использовать инструменты моделирования, такие как Extrude, Loop Cut или Bridge, чтобы создать новую геометрию для одежды. Выбор инструментов и методов зависит от требуемого стиля одежды.
Шаг 4: Применение материалов и текстур
После создания модели одежды вы можете добавить материалы и текстуры, чтобы придать ей реалистичный вид. В Blender вы можете использовать встроенные материалы и текстуры или создать свои собственные с помощью инструментов, таких как Node Editor. Добавление деталей, таких как швы, пуговицы или вышивка, также может придать вашей одежде дополнительный реализм.
Шаг 5: Анимация и симуляция
После завершения моделирования и добавления материалов вы можете приступить к созданию анимации и симуляции вашей одежды. Blender предлагает широкий спектр инструментов для анимации, таких как Armature или Shape Keys, которые позволяют создавать реалистические движения одежды. Вы также можете использовать инструменты симуляции, такие как Cloth или Hair, чтобы добавить физическую реалистичность в вашей одежде.
Шаг 6: Рендеринг и постобработка
Последний шаг в создании виртуальной моды одежды в Blender — это рендеринг и постобработка. В Blender вы можете использовать различные движки рендеринга, такие как Blender Internal или Cycles, чтобы создать фотореалистичное изображение вашей модели одежды. Вы также можете добавить постобработку с помощью инструментов Compositor, чтобы улучшить визуальное качество изображения и создать эффекты.
Благодаря своим мощным инструментам и гибкости, Blender является отличным выбором для создания виртуальной моды одежды. Следуя этому шаг за шагом руководству, вы можете мастерить свои навыки в Blender и создавать удивительные модели одежды.
Как сделать одежду в блендере
Автор: Larissa Mori
В этом уроке мы рассмотрим, как создать одежду для анимированного персонажа в Blender.
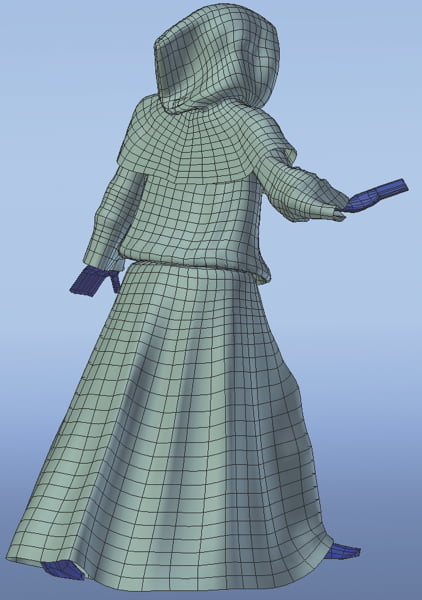
Настройка сцены
Настроенная сцена содержит тело, анимированное при помощи костей с весами. Ваш объект одежды привязан к телу в нужных местах, путём создания групп вершин, использованных в разделе Pinning модификатора Cloth. Объект одежды также содержит модификатор Armature. Места, которые приколоты при помощи групп вершин должны быть также иметь карту весов для костей, к которым они приколоты, в противном случае, они будут привязаны к мировому пространству.
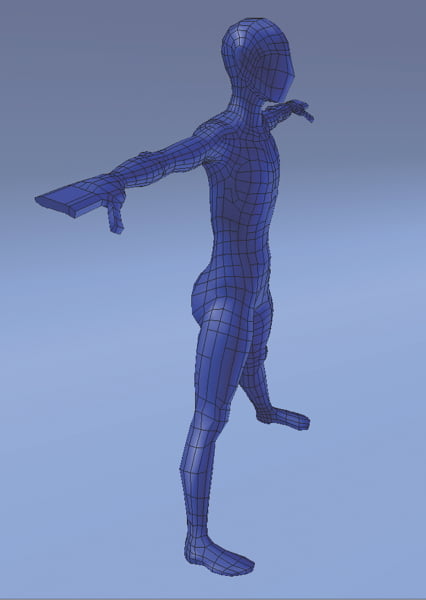
Объект коллизии (взаимодействия)
Объект коллизии нужен только для приблизительной симуляции взаимодействия с телом. Он не будет иметь деталей лица, пальцев или всего, что напрямую взаимодействует с одеждой — в противном случае симуляция займёт длительное время. Для рендеринга нужно останется включить только высоко-детализированную версию тела, которая будет видна.
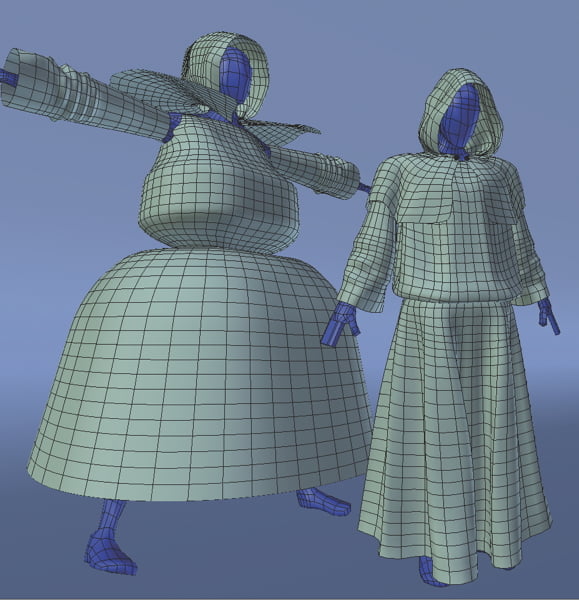
Набросим одежду
Большую часть тестов можно сделать на этапе моделирования, чтобы предусмотреть, что произойдёт, когда одежда будет одета на тело. Представьте, что одежда висит в воздухе каким-то неизвестным способом, чтобы получился эффект, когда она опадёт и будет наброшена на всё тело. Например, решением для подмышек будет виртуально их удалить. Они не будут принимать участия при коллизии с объектом, поскольку они зафиксированы, а также покрыты воротом плаща.
Карта вершин
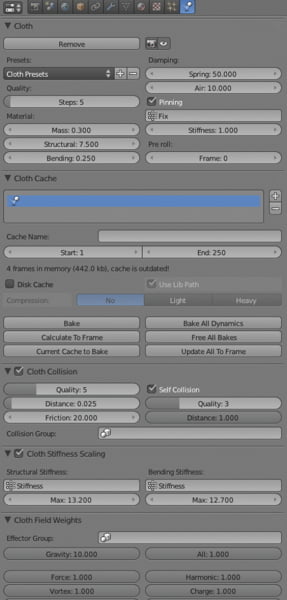
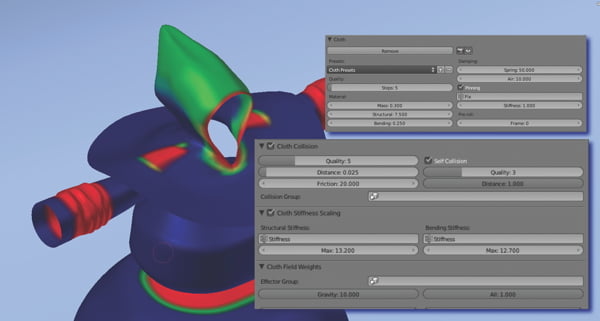
Карта вершин служит не только для покраски весов или закрепления частей ткани, она также может быть использования для раскраски участков ткани, которые должны быть более упругими и/или держать форму. Этим можно управлять на вкладке Cloth Stiffness Scaling. Там, где значение веса 0%, будут использованы настройки Structural или Bending. Там, где 1-100% будут использованы значения Structural Stiffness и Bending Stiffness в зависимости от значения веса.
Симуляция и запекание
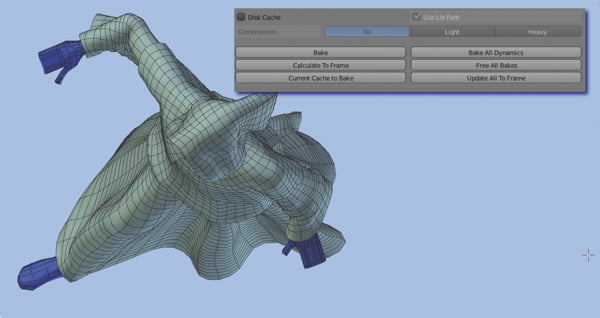
Убедитесь, что объект одежды и объект коллизии находятся на одном слое. После этого можете проиграть анимацию, чтобы просчитать симуляцию ткани. В зависимости от ваших объектов и компьютера, это может занять какое-то время. Причиной такого испытания для вашего терпения и системы, может послужить количество полигонов, которое участвует в симуляции. Когда симуляция завершится, вы можете использовать Current Cache to Bake, который сохранит её при сохранении файла.
Последний штрих
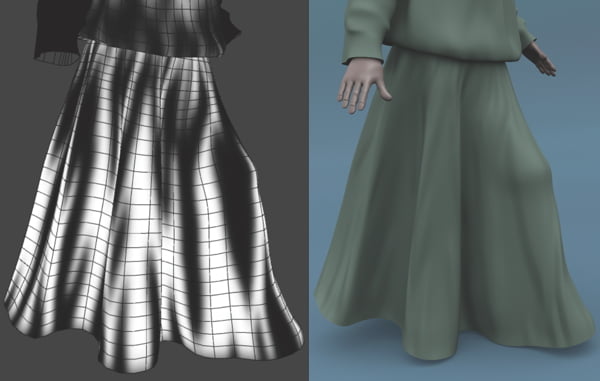
После того как у вас будет запечённая симуляция, вы можете добавить больше модификаторов в стек, после модификатора ткани, например, модификаторы Subdivision Surface или Displacement. Если вы попробуете сделать это или попробуете отредактировать ваш объект до запекания, вам придётся проигрывать симуляцию заново. Вы также можете нарисовать карты Bump или даже использовать карты дисплейсмента в качестве финального штриха, чтобы добавить больше деталей, таких как складки или швы.
Примечание
Следуя своему опыту, считаю, что лучше использовать четырёхугольные полигоны для того чтобы симуляция ткани протекала качественнее. Модификаторы можно добавить после того как симуляция будет запечена для более сглаженного рендеринга или дисплейсмента.
Ткань в Blender может быть очень подвижной и непослушной. После большого количества экспериментов здесь, некоторые ключевые настройки помогут обуздать ткань при анимации. Остальные значения можно оставить как в прессете Cotton по умолчанию.
Мы использовали следующие настройки: Gravity: 10.000; Collision Distance: .010-.020; Collision Quality: 5; Self Collision Quality: 3; Structural: 7.5; Bending: .250; Spring 50.000; Air: 10.000; Structural Stiffness: 12.000; и Bending Stiffness: 13.000.
Blender Cloth Simulation Tutorial [2022]
This Blender Cloth Simulation Tutorial explains how to simulate cloth inside Blender. We will cover pinning, hooking and baking cloth simulations.
In our previous Blender article, we introduced the Cloth Brushes that are found in the Sculpting section of Blender. Then we concluded that these brushes in no way replace the regular Cloth Simulation, but instead accommodate it. So today let’s look closer at the traditional Cloth Simulation in Blender, how it works and how to handle it.
How to Simulate Cloth in Blender
For starters, let’s see how this Blender Cloth Simulation is done. Of course, we need an object for this to work – it can be any object, so I will try this on the default Cube. Select an object and proceed either to the Modifier Properties, where you can add a Cloth Physics.

Or to the Physics Properties, where the same thing can be done. This variant can be preferable, as after adding a simulation – all the settings for it will appear in the Physics Properties and not in the Modifier Properties.
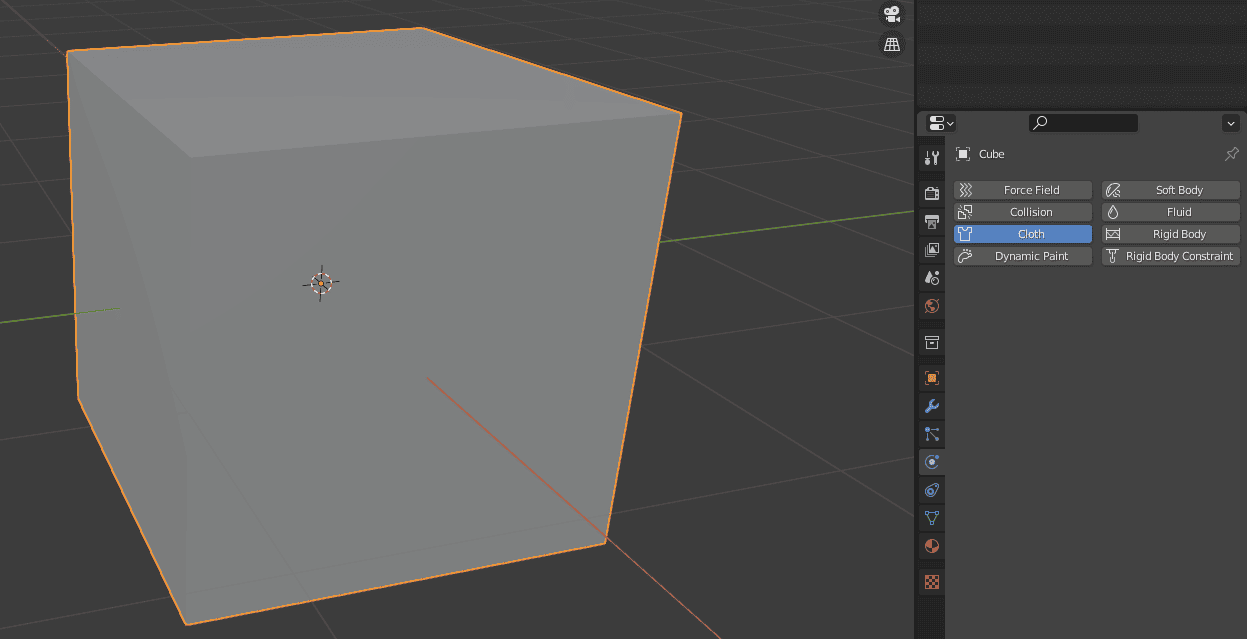
After adding Physics Simulation to an object – you will see a lot of new settings appear in the Physics Properties window.

We will return to them later. For now, let’s see what this simulation did to the scene. Press play and see what happens. Well, nothing interesting happens. The Cube just falls down with gravity and that is it.
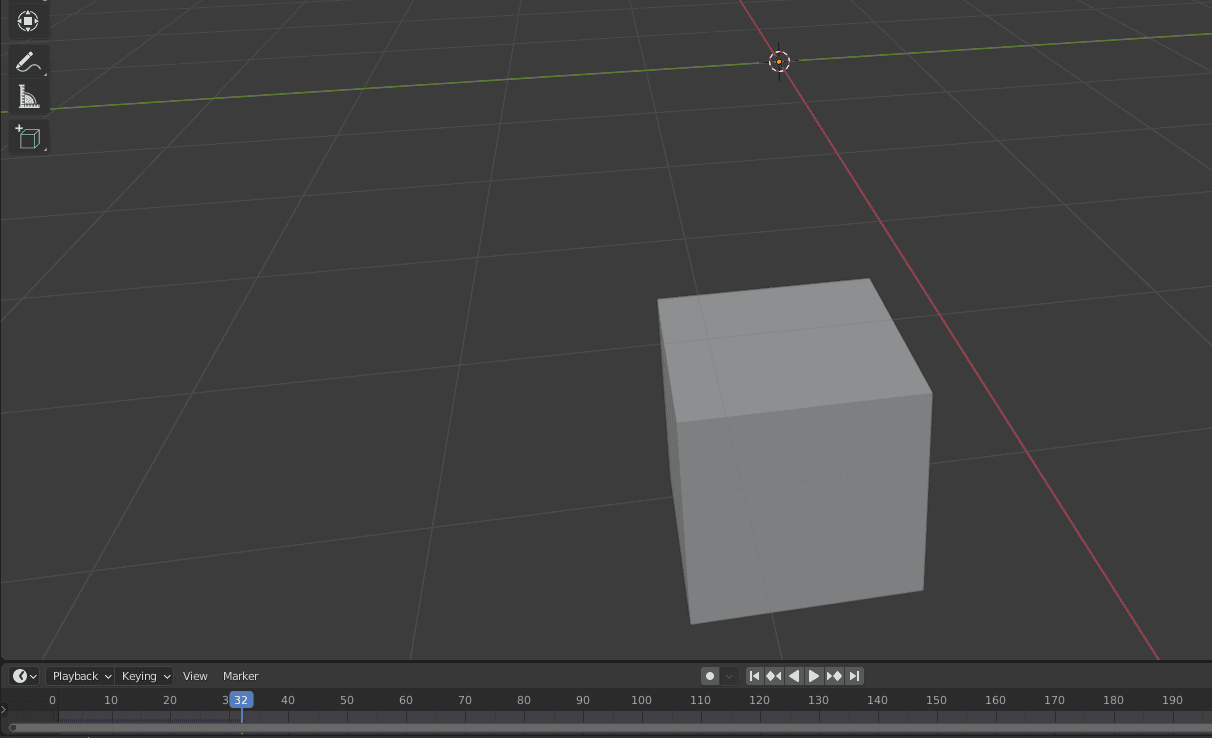
We need another object for this scene to work. An object that will catch the Cube and don’t let it fall.
Don’t forget to return to frame 0 to change the scene. Now I have added the Plane object and put it right beneath the Cube, so it would fall on it. But when I press play – Cube just goes through it and falls further anyway.
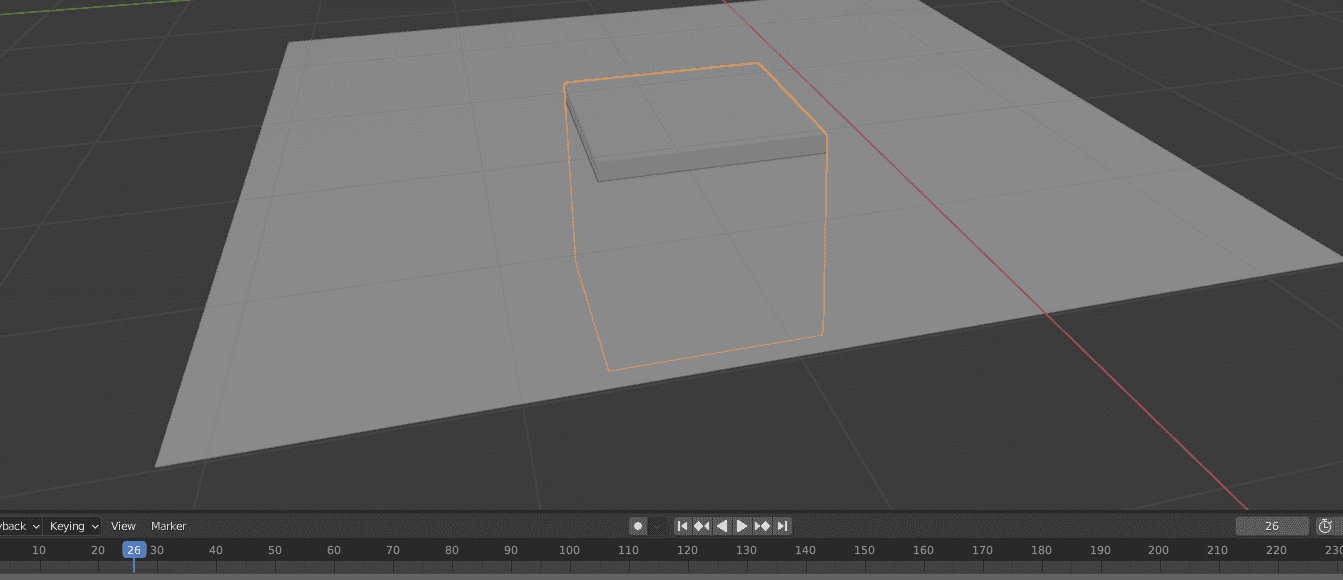
This is because we need to also add physics to the plane object, as right now it is nothing for the Cube. To do so – select the Plane and in the Physics Properties apply Collision to it.
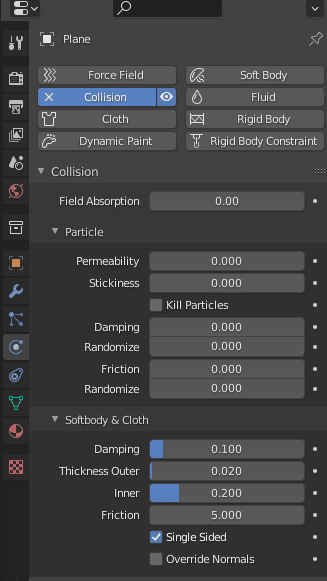
It is a simulation that makes this object collide with other objects. Nothing more and nothing less. No need to change anything further too.
Finally, Cube stops falling infinitely down and is stopped by the plane. But that is it, it just stays on the plane without any change. No Cloth Simulation is seen.
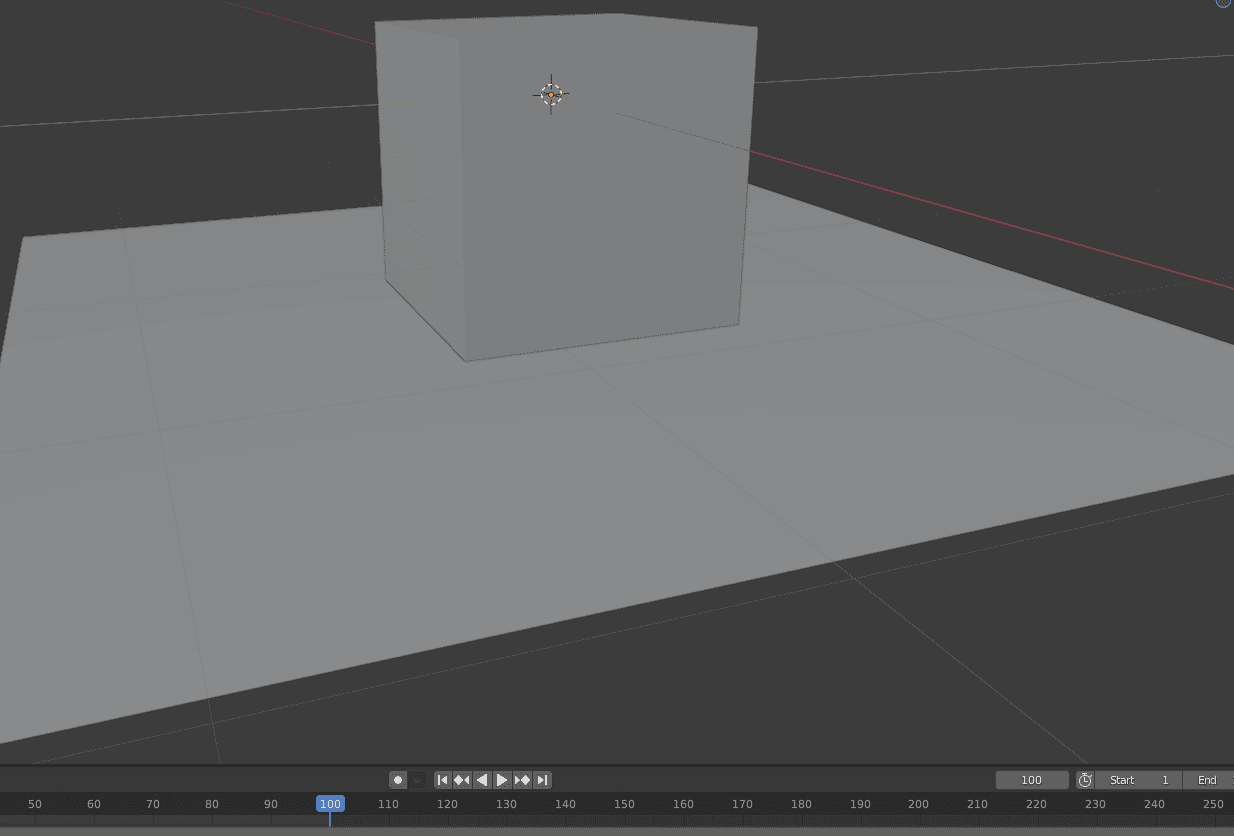
For basically any simulation to work, you see it needs quite a bit of geometry, so it could change and deform it. And this default cube only has 8 vertices and that is it. So Cloth Simulation can’t really do anything with this, it is just too few.
To make this situation better – you just need to add geometry to the used object. More geometry it has – more realistically the simulation will look. But also more time will take to first calculate this simulation and then render. So you need to have a balance here. I have just used Subdivide a few times to add some geometry to the Cube.
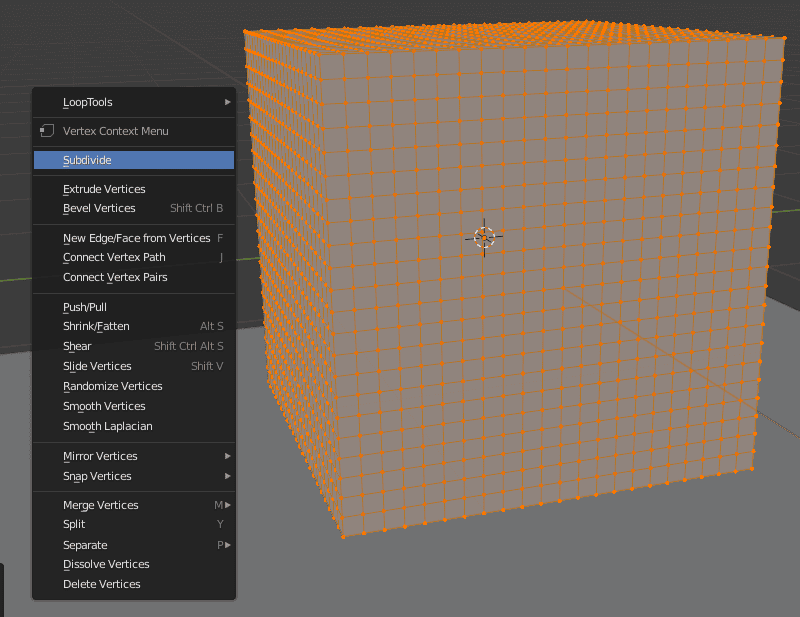
Now, when I press play – the Cube falls onto the plane and finally deforms. Looks like it is made of cloth.
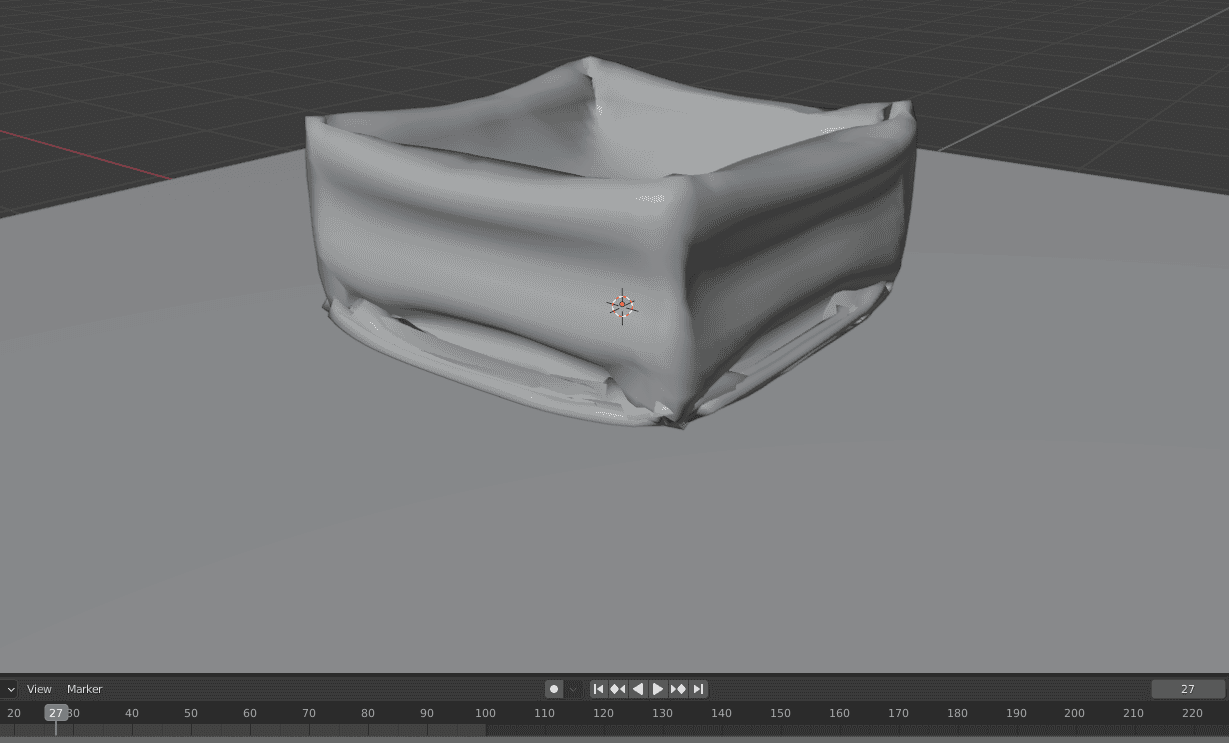
After this, you can experiment with the created scene. Try putting the Cube higher or lower and see how this affects the scene. Also rotating it even for a few degrees can change the simulation a lot.
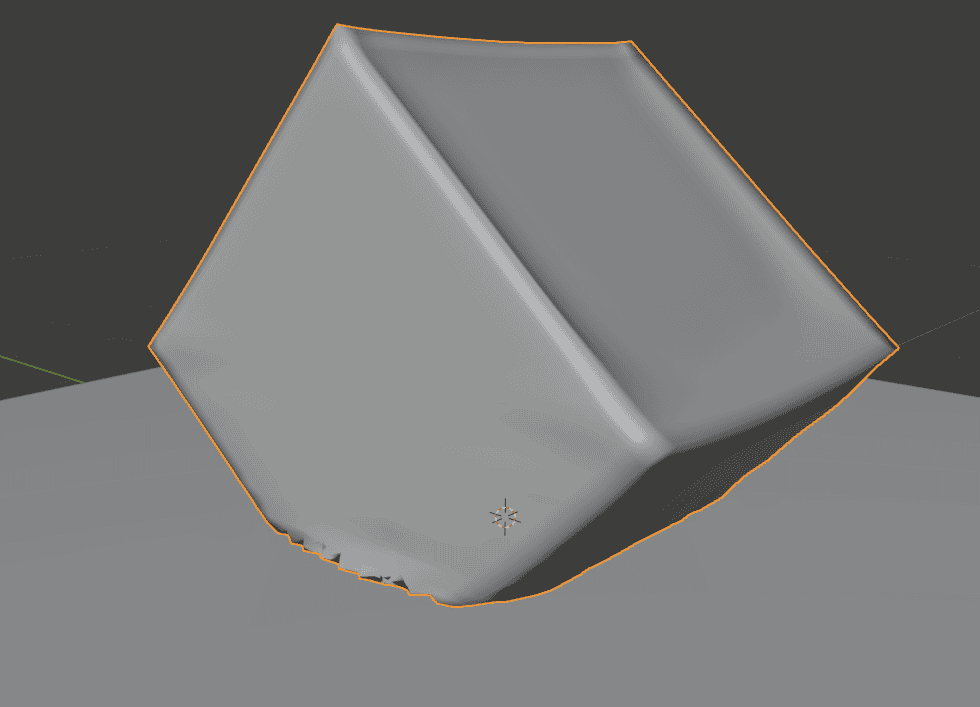
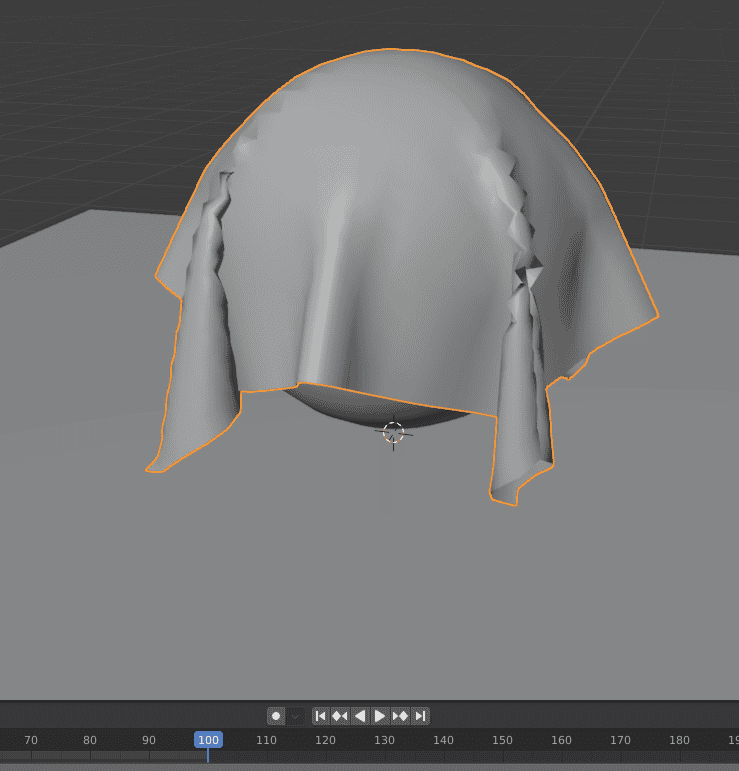
But overall, the Cube is not a great object for the simulation. How many cloth cubes did you ever see? The better object can be a sphere or a plane. The plane is great for cloth simulation, as it will behave like a piece of cloth.
Combined together with other objects that have collision simulation – it will envelop them nicely.
Blender Cloth Simulation Settings
Now it is time to talk about the settings that are found in the Physics Properties of Properties Editor. There are a lot of them and only a few of them make major changes. So I will introduce only ones that I consider important enough.
Starting from the top with the Quality Steps setting.
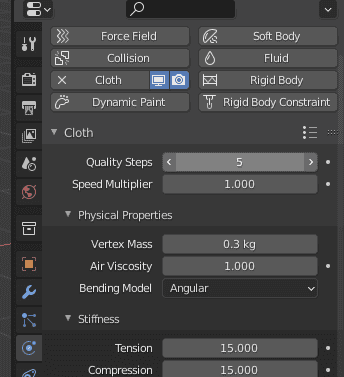
This setting literally controls the quality of the whole simulation. At the lower values, it can be really bad. Objects will intercept, bug and lag out, etc.

Quality Steps at 1
The higher you put this setting – the more realistic simulation would be calculated. Already at the value of 2, it is much better.

Quality Steps at 2
But same as with a lot of other things – it is important not to go over the top with this. Because obviously each increase in this setting also increases the power needed to calculate this simulation.
And most of the time – there is no need to go too high with it anyway. Like here we can see the same simulation at Quality Steps 5 and 10, but they don’t look very different. Instead, they are very similar and have the same problems. But Quality steps 10 is much slower.

Quality Steps at 5

Quality Steps at 10
Right below – Speed Multiplier. Pretty self-explanatory, it manages how fast it calculates the simulation. So at higher values, you can simulate the same thing on a much earlier frame. Or with lower values, it will be simulated much slower and it would be possible to catch a very detailed frame, which is not possible to catch with Speed Multiplier at 1.
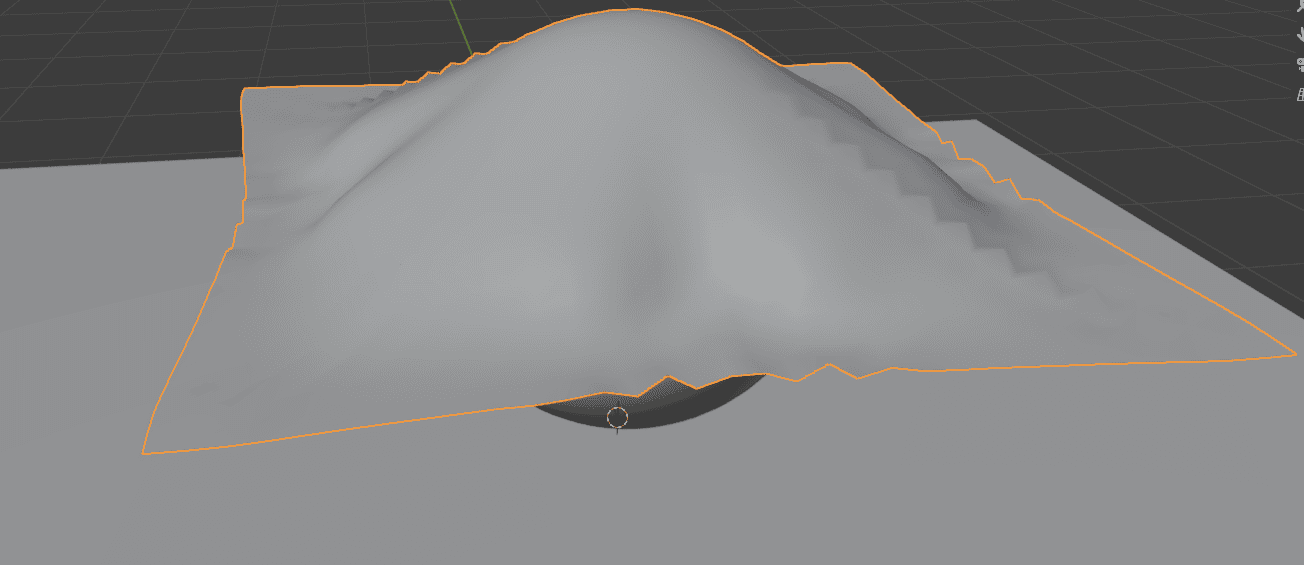
Vertex Mass changes the weight of each vertex present on the object. If you have a very low weight – the object will fall slowly and will be constricted by the air. When I make my plane very lightweight – it can’t even fully envelop the sphere, because of how light it is.
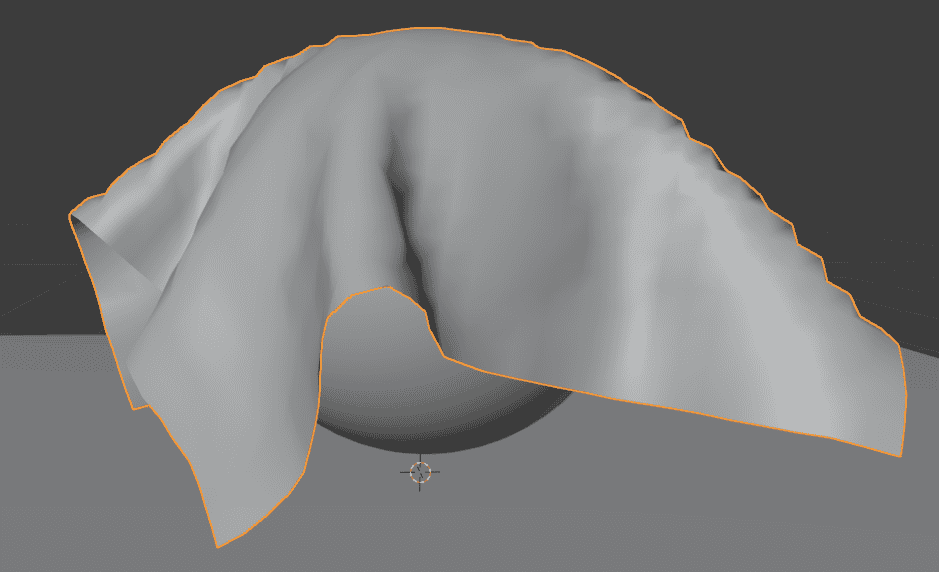
Vertex Mass is at 0.05 kg
Heavier Vertex Mass drops faster and envelops objects easier. Here you can see that my plane fell onto the sphere and did not get pushed up by the air, because of how heavy it is.
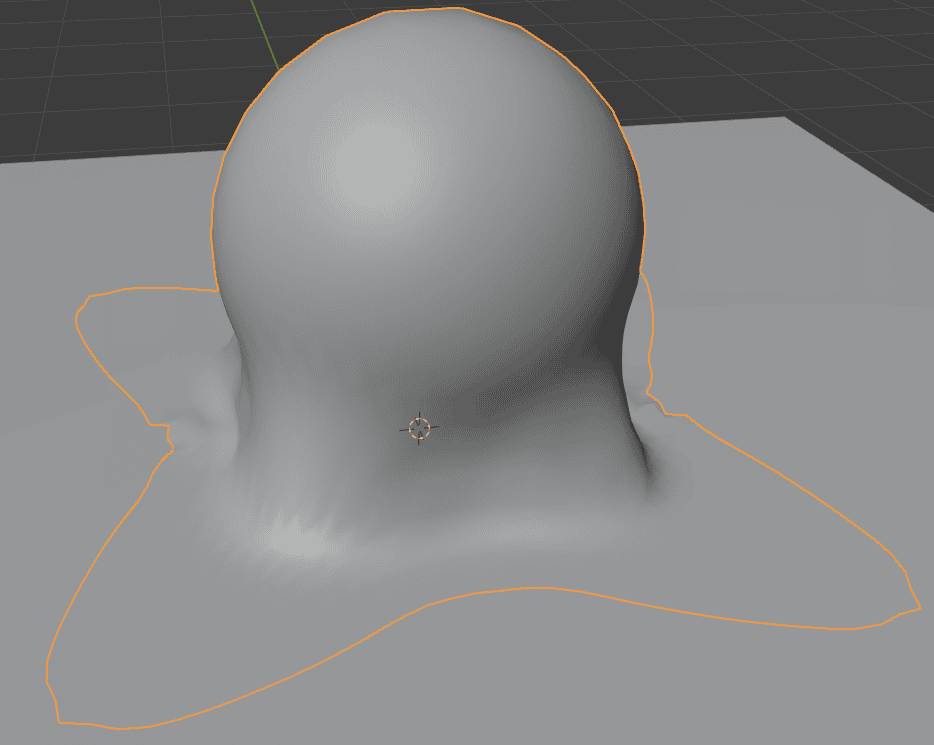
Vertex Mass is at 50 kg
Air Viscosity controls the resistance to deformation. At low Air Viscosity – the object is very easy to deform. My plane has fallen onto the sphere very fast and enveloped it with ease.
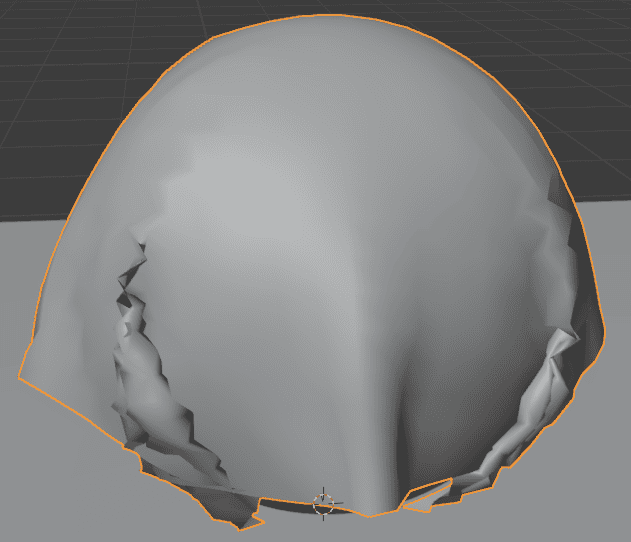
Air Viscosity at 0
But if you have high Air Viscosity – it will not deform as easily. Similar to when it was lightweight – the object falls slowly and deforms much less.
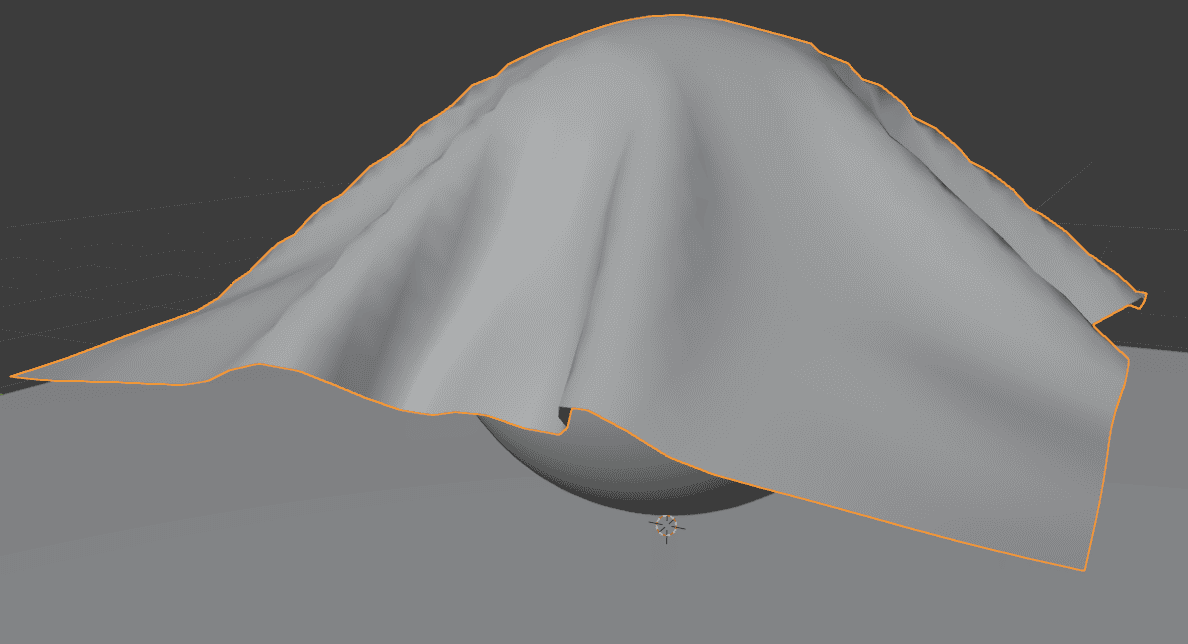
Air Viscosity at 10
Next, we have an Internal Springs setting. It does what it says – adds springs to the simulation, so it would bounce. The plane does not work well with this setting, so instead let’s use a Sphere. Here is how it looks when just simulated with the regular Cloth Simulation settings:
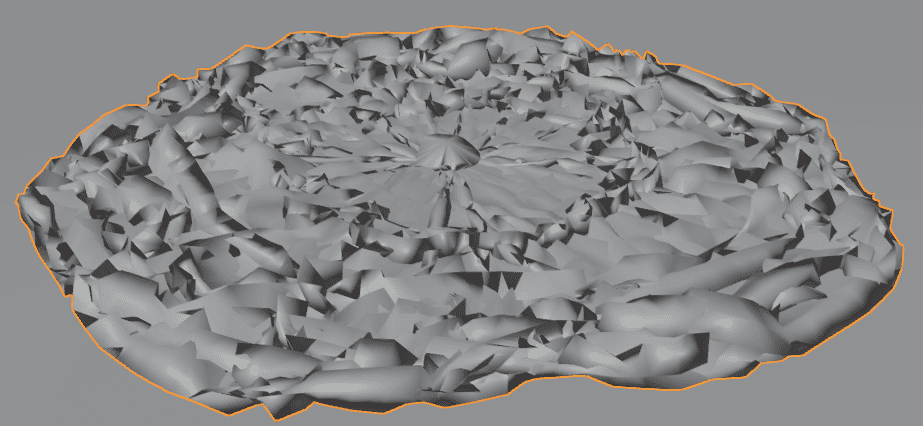
Just a deflated mess. Does not even resemble a sphere anymore. But when I add an Internal Springs setting to this – it behaves totally differently. Instead of deflating and falling flat on the floor – it behaves more like a ball.
When it hits the ground, the whole object deforms a bit, after which it jumps upwards, as if pushed with the springs. This works together with all other settings. For example, if you increase the mass of this object, it will jump absolutely in a different manner.
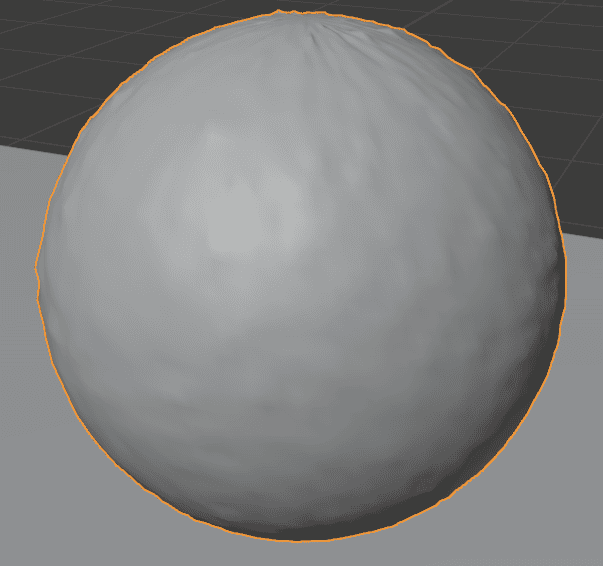
After this, we have the Pressure setting. Again, it is not very obvious on the plane, so let’s return to our old friend – subdivided default cube. If you don’t remember, here is how it looks simulated with the default Cloth settings:
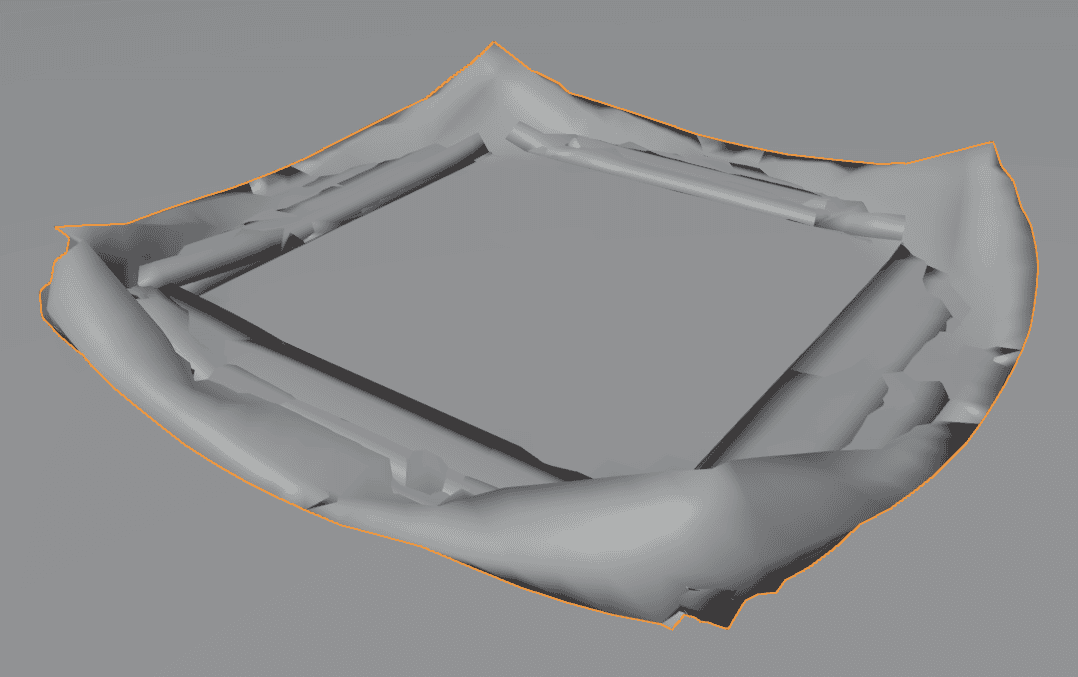
Pressure is turned off
A deflated and deformed object. But look how much everything changes, when I turn on the Pressure setting.
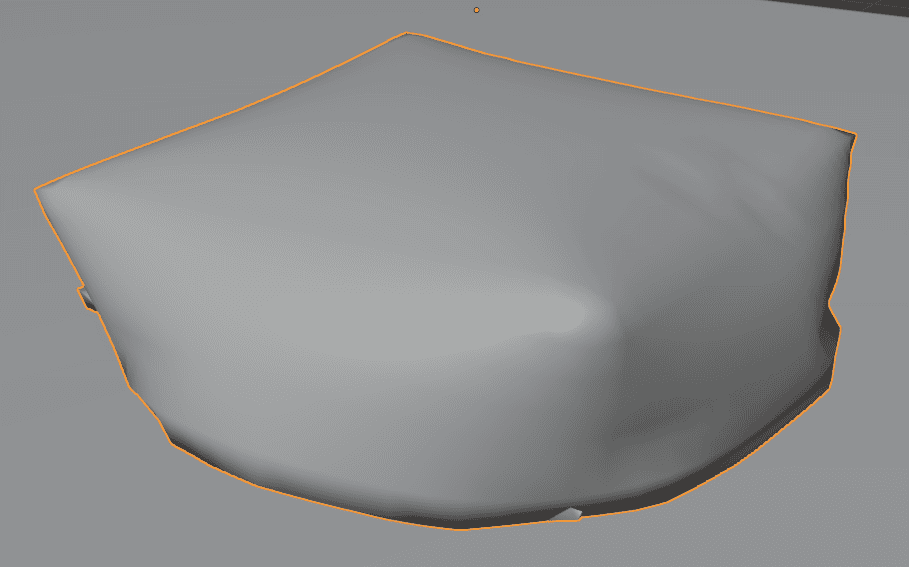
Pressure is at 0
Now a part of the cube looks inflated. And this is basically how it works. It creates pressure on the object from the inside, similar to how air creates pressure on the inflated object. By adding more pressure, we will make it look a lot more like an inflated cube:
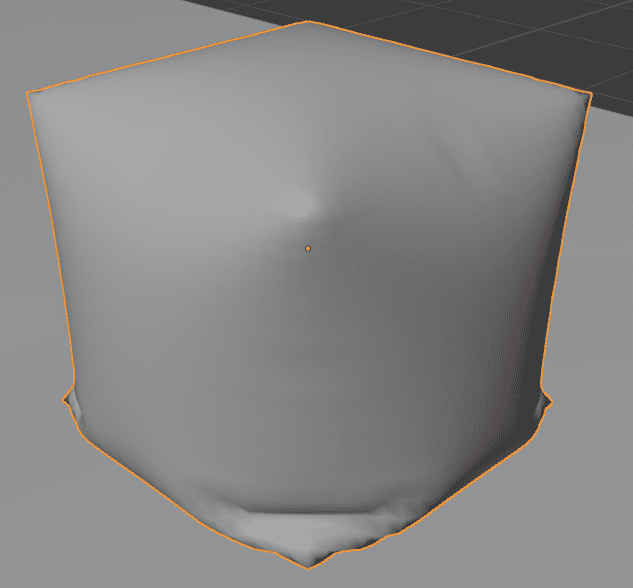
Pressure is at 5
You should have noticed yourself that on some of the examples – objects that we work with don’t look particularly well. I mean cases when they intersect with themselves and pass through their geometry. Like this:
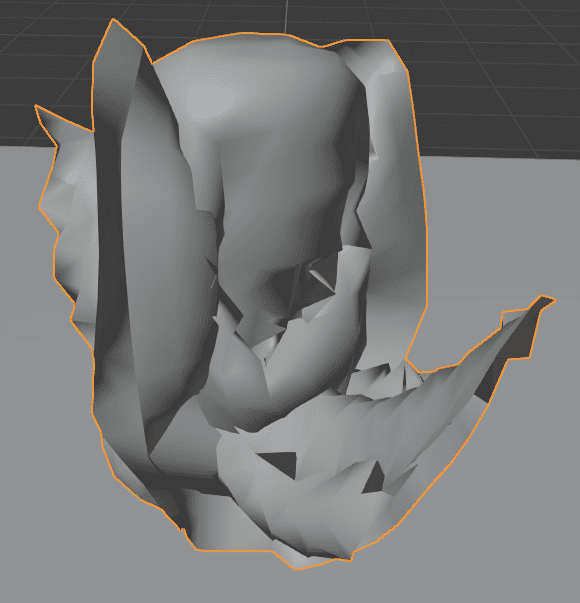
Frame 62 without Self Collision
Looks terrible and can be a big problem, depending on the scene. Gladly it is easily fixed. All you need to do is to find the Self Collision setting and turn it on. It will prolong calculation times, but the result would be much better:
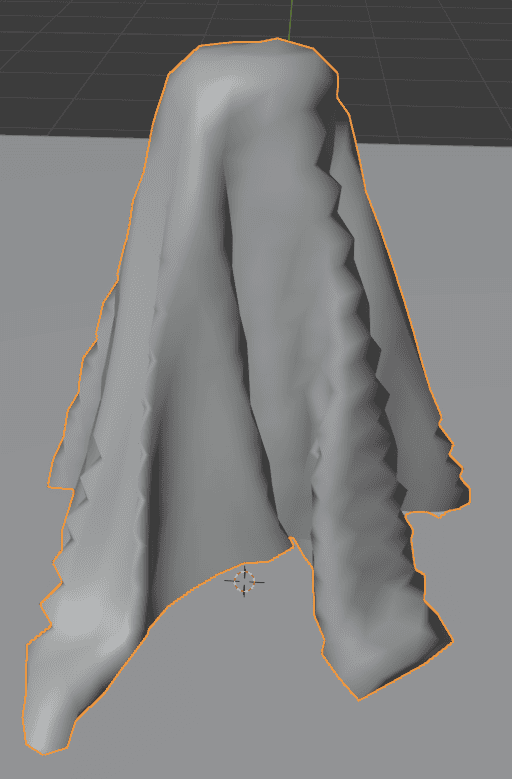
Frame 62 with Frame Collision
Pinning Parts
One thing you may want to do with the Cloth simulation is to pin it somewhere. Usually, cloth objects don’t just fall everywhere, they are often connected to something. For example, a flag is connected to a flagpole, etc.
This can be recreated in the Blender by creating pinned vertices. To do so, you need to enter the Edit mode and select vertices that you want to pin. Next, proceed to the Object Properties, create a new Vertex Group and assign selected vertices to this group.
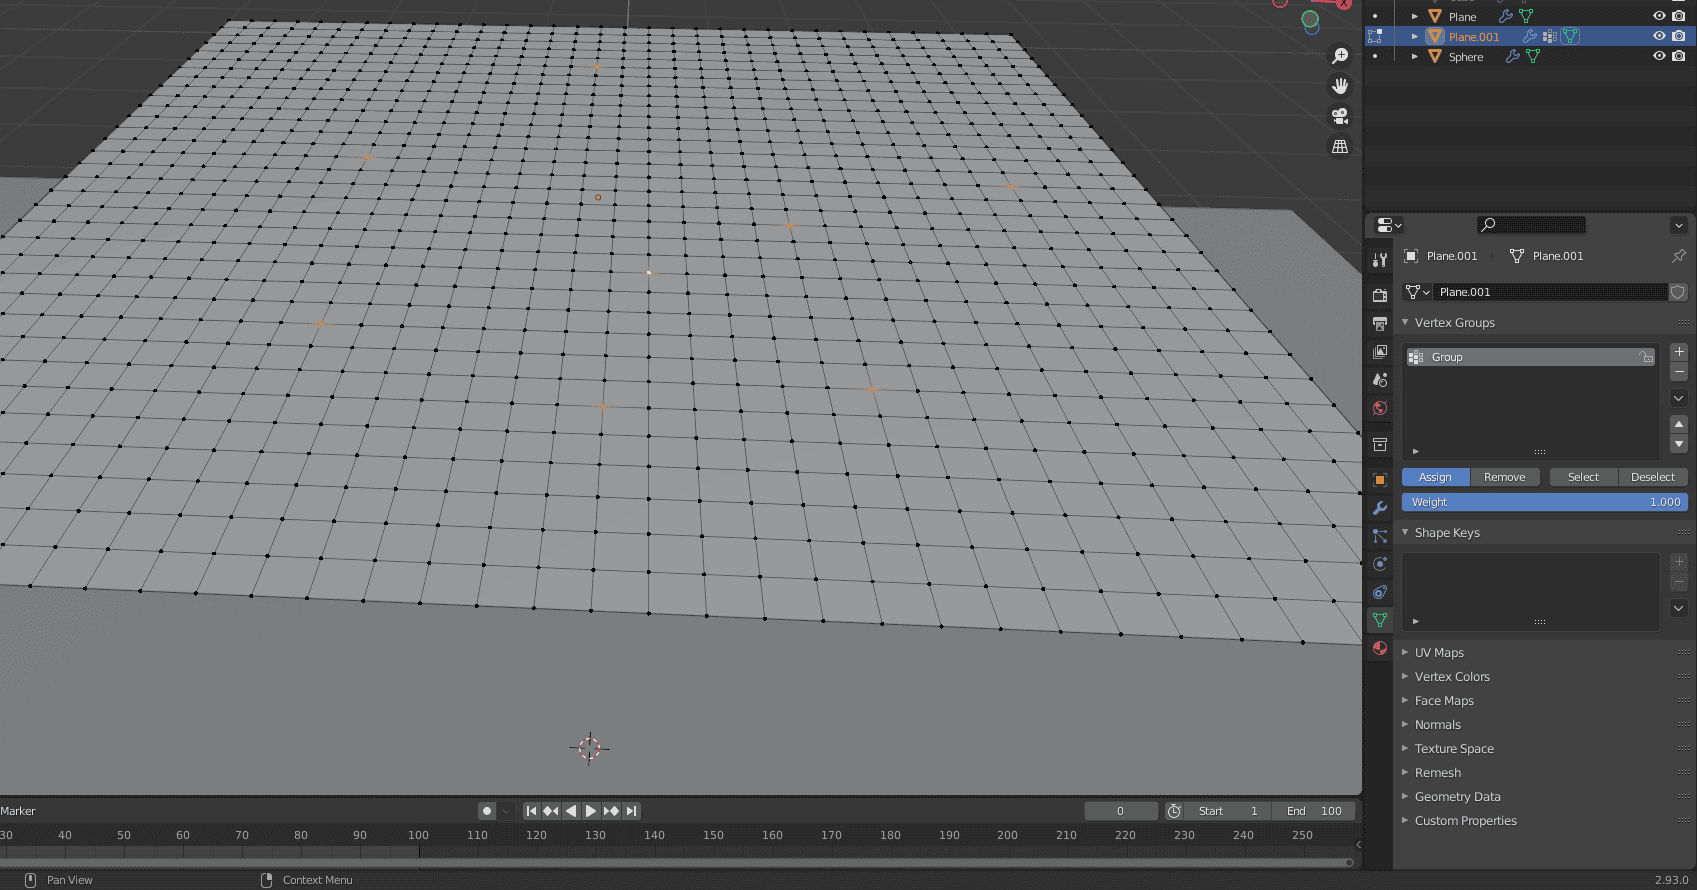
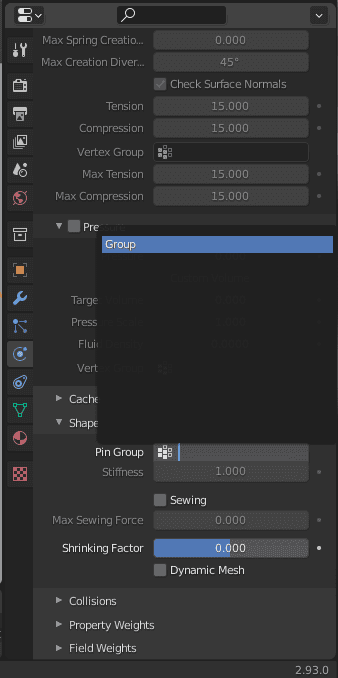
Then we go back to the Physics Properties window and here find the Pin Group option in the Shape section. Here you need to choose the vertex group that you have created.
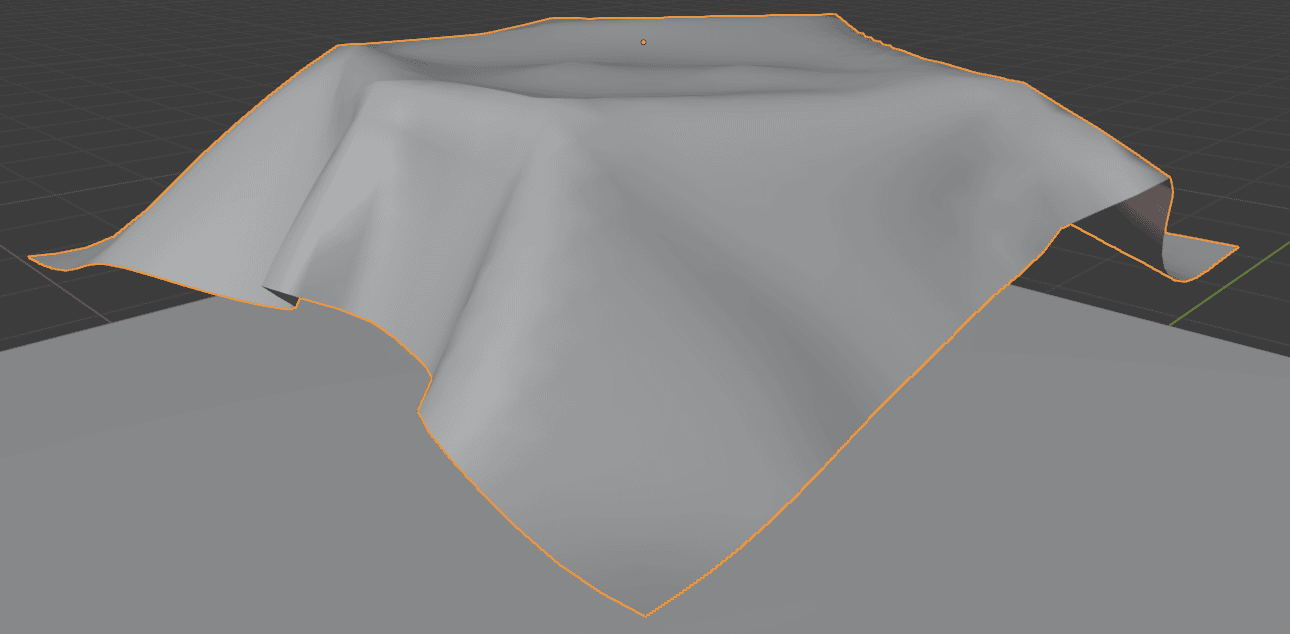
And it is done. Now when I press play – I can see how everything falls except vertices that I selected to the Pinned group.
Hooking Simulation to an Object
Leading out of the previous example, we have a more advanced trick: hooking the whole simulation to an object. For this technique, it would be better to assign a whole edge loop to a group, instead of random vertices. Delete previous selection.
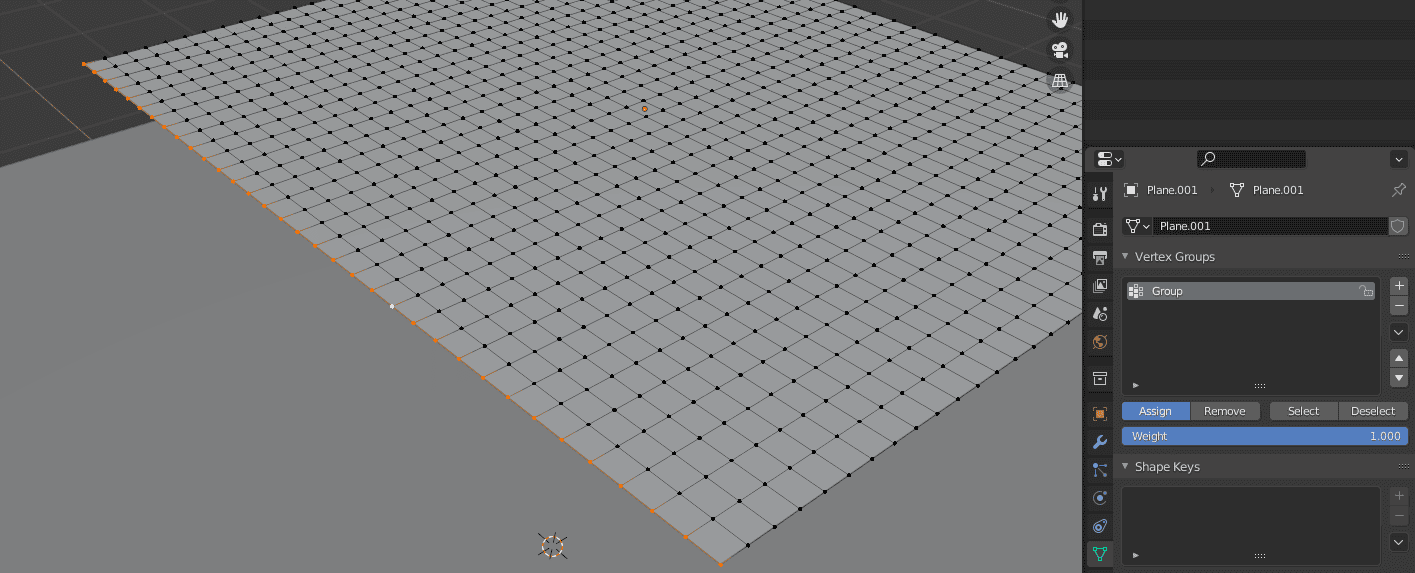
After creating a vertex group, we can select it and add a hook modifier to it. Then create an Empty object and connect it too. But instead, Blender can do all this automatically for you. With the vertices selected – go to the Vertex > Hooks > Hook to New Object.
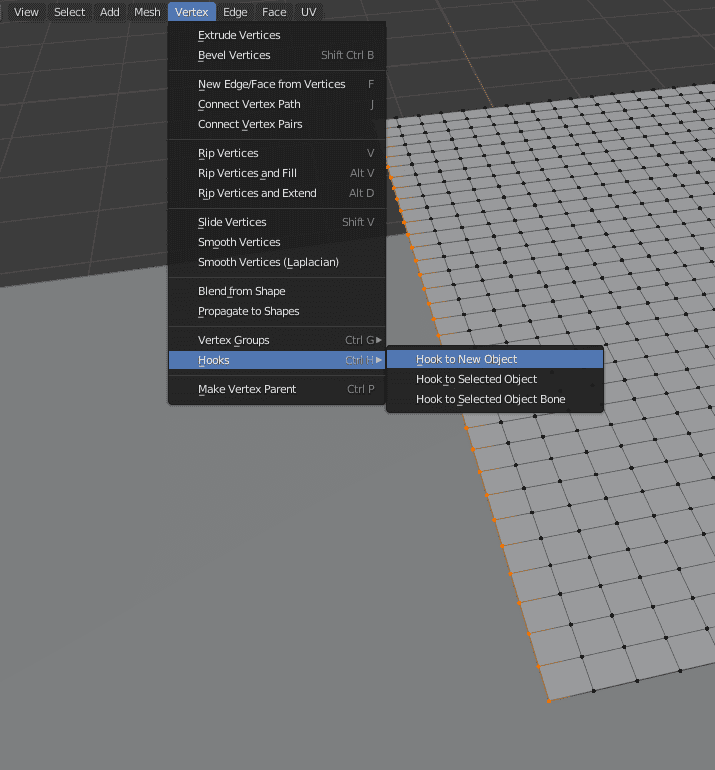
This will automatically create a modifier, an empty, and connect everything as it should. The only problem is that most probably the Hook Modifier would be at the bottom of the modifier list. For everything to work properly, you need to move it to the top.
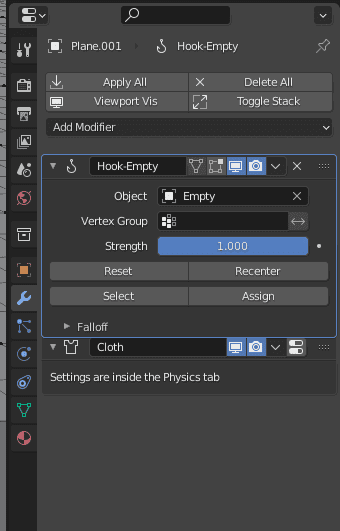
When this is done, you will see that when you move an Empty around – it also moves the vertex group that we connected to it.
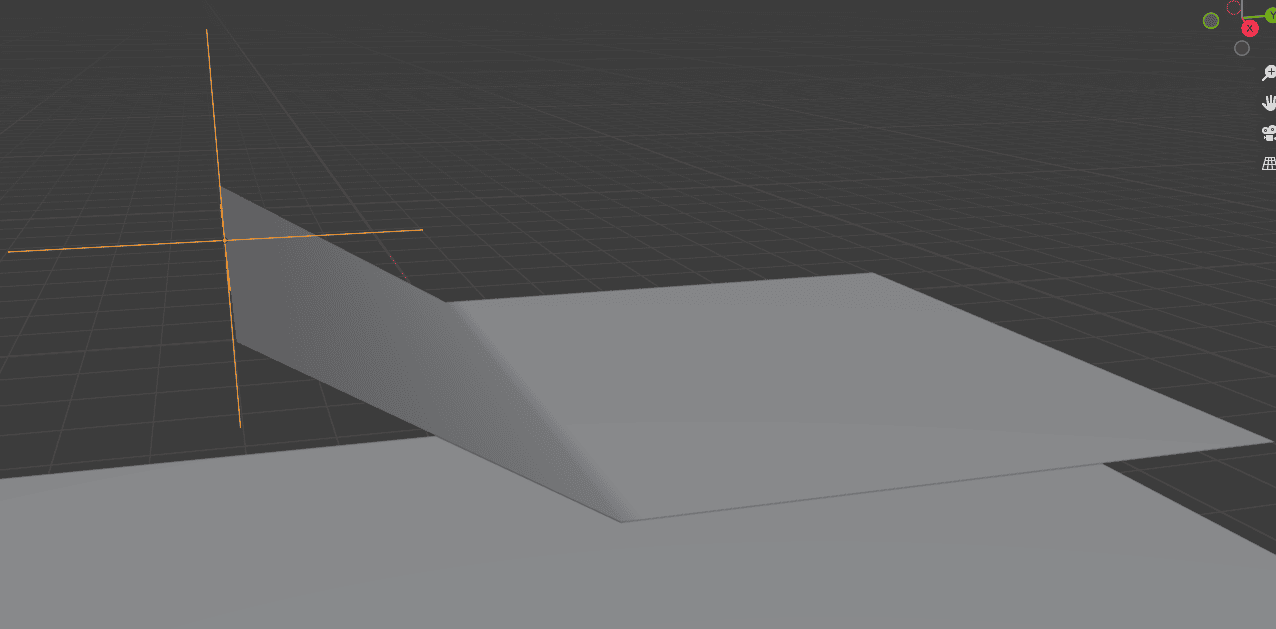
Does not seem very useful though, does it? Maybe. Until you try to move this empty, while the animation is going and calculations are made. It will affect the whole object and make it follow an empty with the cloth simulation in real-time.
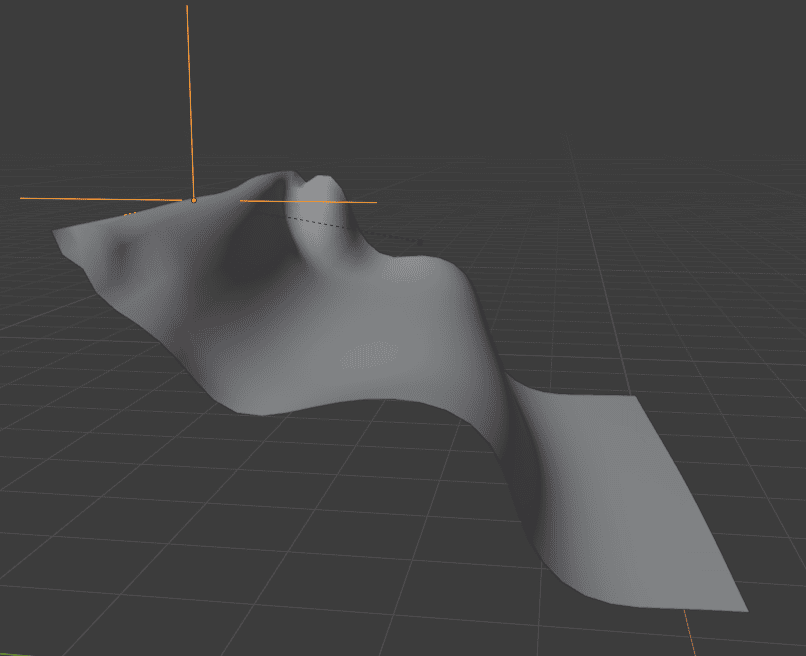
Like this, you can animate your cloth object moving from one place to another very easily. It is a very useful trick.
Baking Simulation
When you play your animation for the first time after making any changes – it will automatically calculate the whole simulation again. So each time you make any change – everything needs to be calculated one more time.
Sounds logical, but not ideal, because sometimes simulations can be complicated enough, so it would take a long time to calculate it. That is why you can always Cache your Blender Cloth Simulation, so there would be no need to calculate it each time anymore. This is done in the Cache section of the Physics Properties.
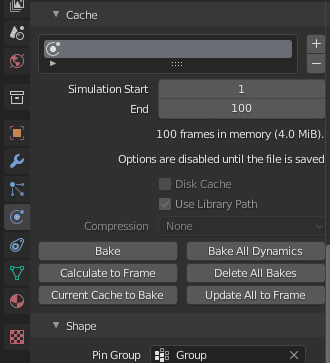
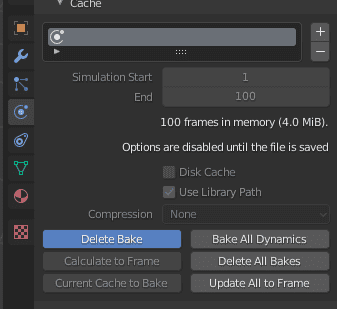
All you need to do is to select the start and end frame of your simulation and then press the Bake button. Then the progress bar will appear at the bottom of the Blender interface.

And when this is done, you will have your simulation Cached. This means that it would not be calculated anymore, no matter what you do. For example, you can see how here I have deformed this mesh a lot. I have moved and rotated it. And even changed its geometry on frame 0.
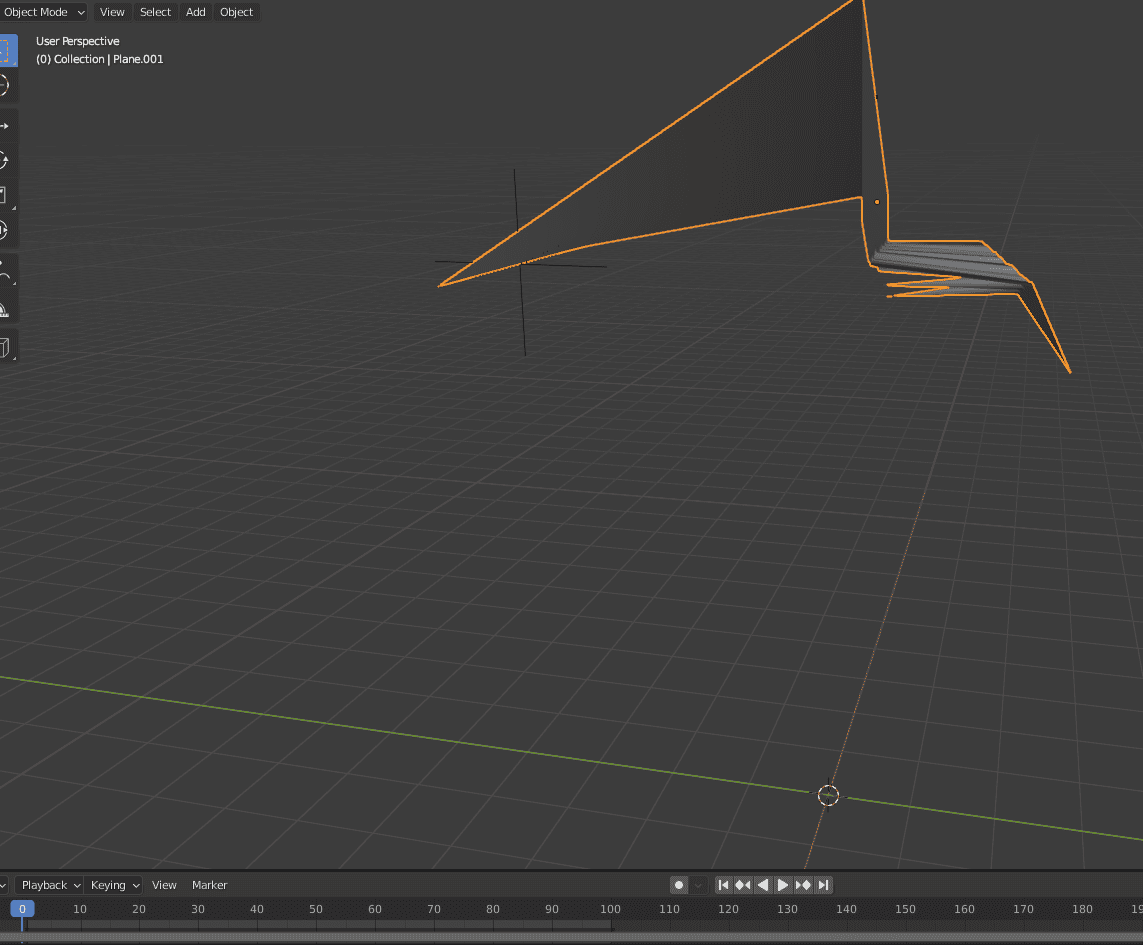
But as soon as the animation starts playing – it jumps back to the state in which it was cached. On frame 2 you can see that it is absolutely in a different position.
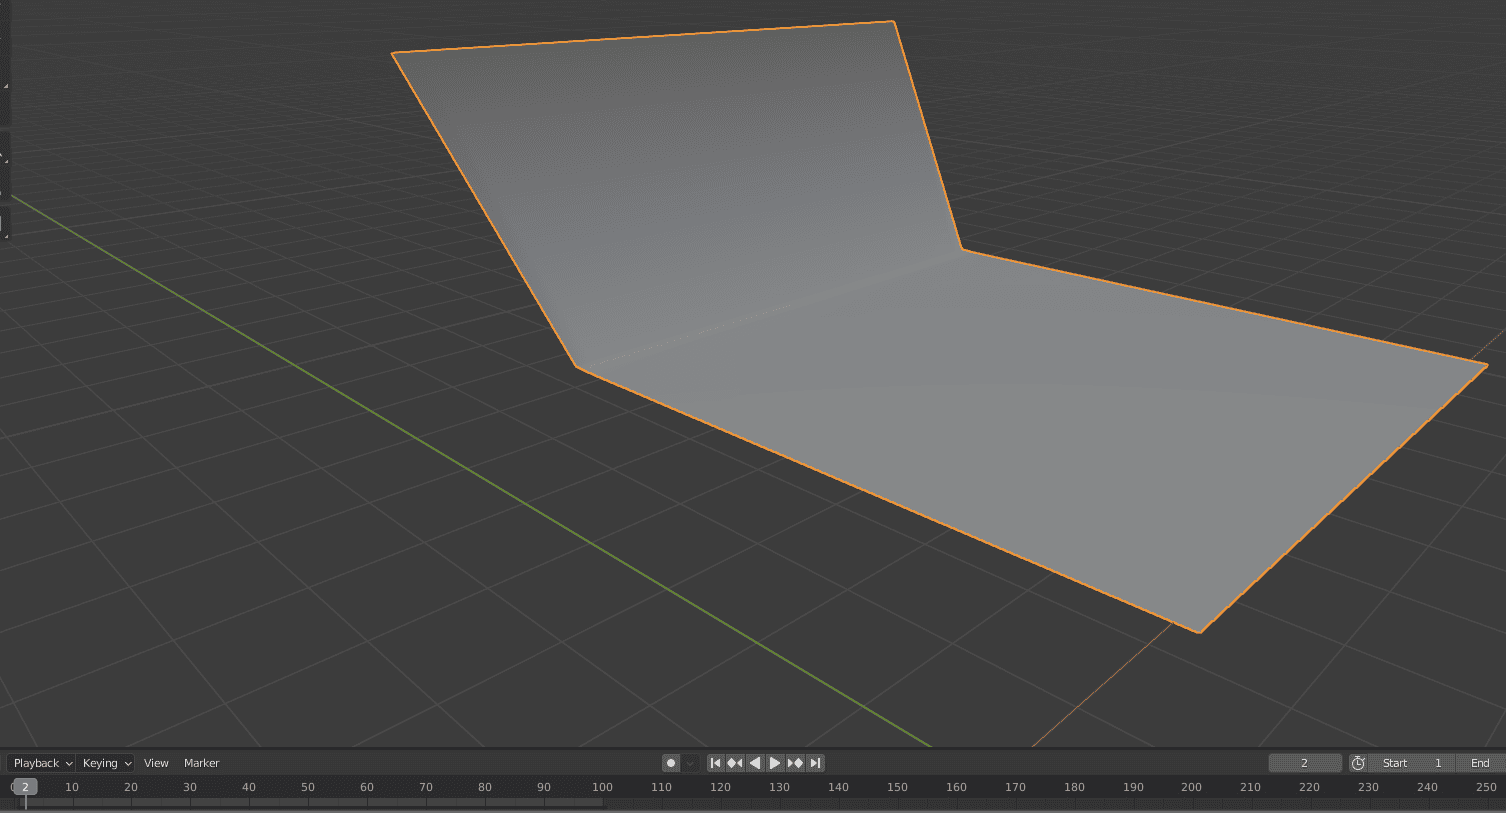
And I can’t change it out of this position, no matter what I do. The only way to change this simulation now would be to Delete the baked cache.
Conclusion – Blender Cloth Simulation Tutorial
The Blender Cloth Simulation turned out to be quite a big deal. It is a powerful tool that can help us to create a realistic fabric object. Especially combined with the Cloth Brushes.
[Introduction to Blender] Let’s make clothes with cloth simulation (Modeling – Simulation)
Have you ever heard of Cloth Simulation?
Cloth Simulation is useful when making clothes in Blender. Let’s try to make a simple shirt with this feature.
I’ll show you how to make it in two parts, as follows!
- Basics – Preparation (How cloth simulation works and up to shirt modeling)
- Modeling – Simulation (from the continuation of shirt modeling to simulation and movement)
In this article, I will show you how to model a shirt and a cushion, and how to create wrinkles using cloth simulation.
I’m using Blender version: 2.93.1
For the previous article, please see here.
![[Introduction to Blender] Let’s Make Clothes with Cross Simulation (Basics – Preparation)](https://styly.cc/wp-content/uploads/2021/10/eyecatch01-160x160.png)
Modeling a shirt
Add a new plain
First, add a new plane by pressing [Shift+A].
After that, move, rotate, and transform the plane, and bring it in front of the human body model.
Add a new Plane and move it
And here’s what I did.
- Press [G]→[Z] key to move the Z axis.
- Press [R]→[X]→90 (numeric key) to rotate 90 degrees to the X axis.
- Press [S]→[Z] key to increase the plane on Z axis.
- Press the [G] key again, then the [Z] key to fine-tune the location on the Z axis.
Use the Enter key at the end of each move to confirm.
| Rotate | [R] key |
| Move | [G] key |
| Zoom in/out | [S] key |
After pressing the [G], [R], or [S] key, press the [X], [Y], or [Z] key to edit the axis in that direction.
Creating a collar
First, use the [Tab] key to switch from object mode to edit mode.
![Click on the upper left button or press [Tab] key to switch](https://styly.cc/wp-content/uploads/2021/10/Screenshot-315.png)
Click on the upper left button or press [Tab] key to switch
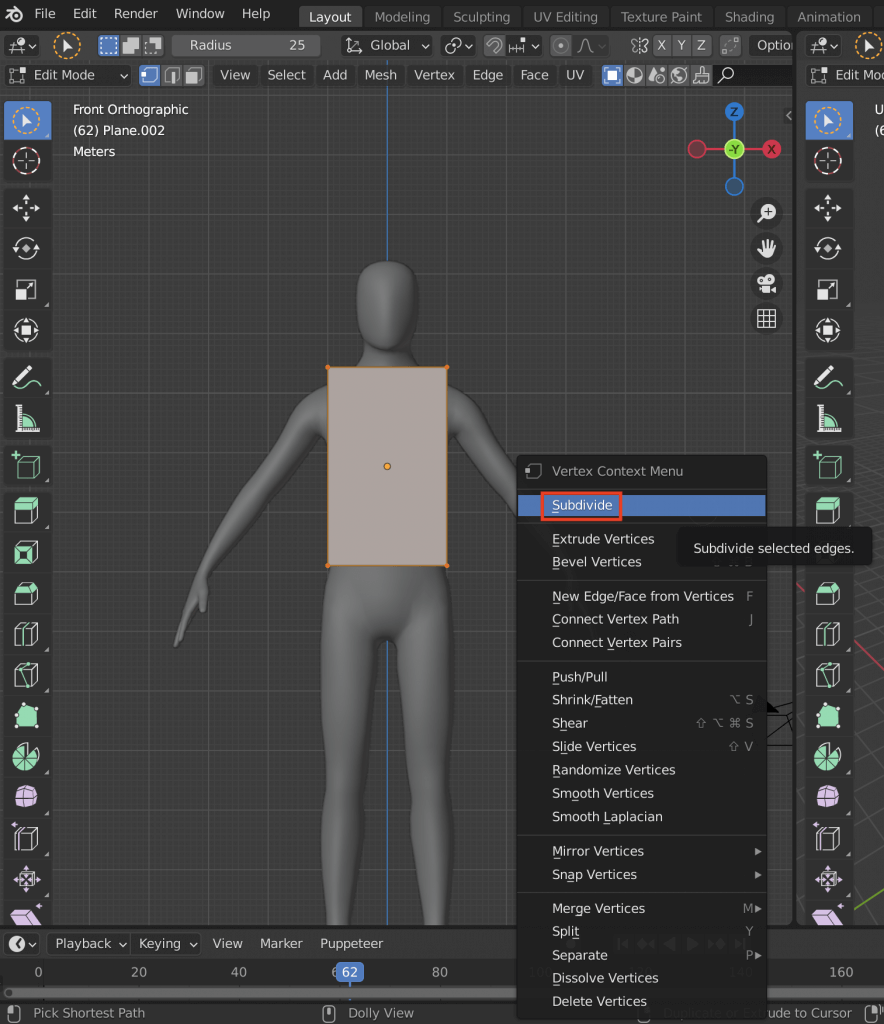
Right-click and select Subdivide.
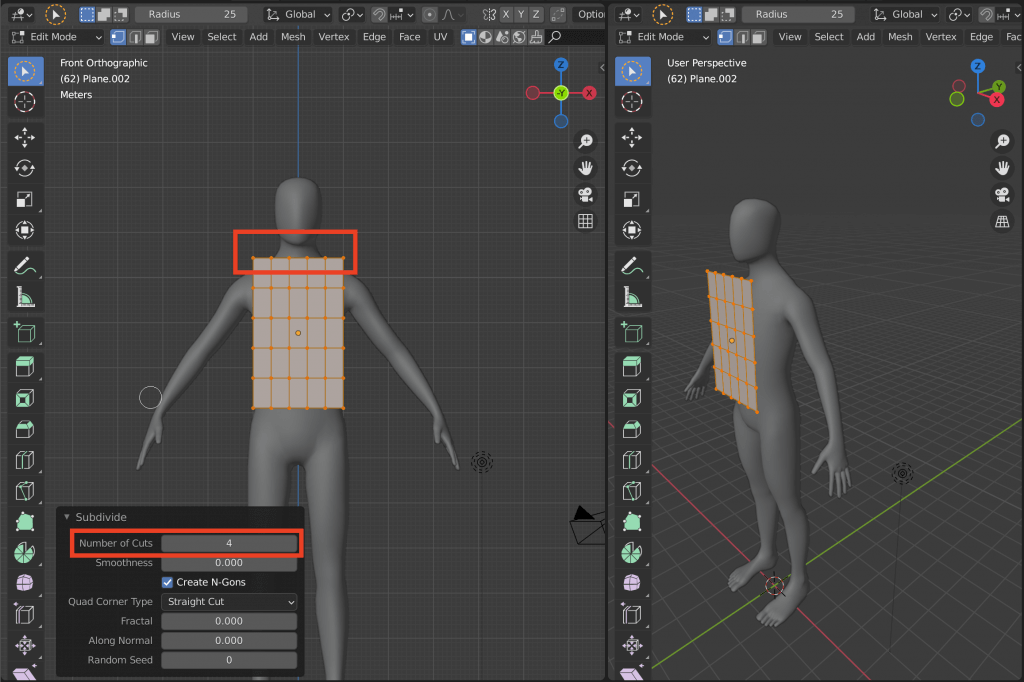
Change the value of Number of Cuts in the lower left corner.
Since you are editing the shape of the plane, it is best not to be too detailed.
Then, select only the vertex at the neck, and press [G]→[Z] to lower the point.
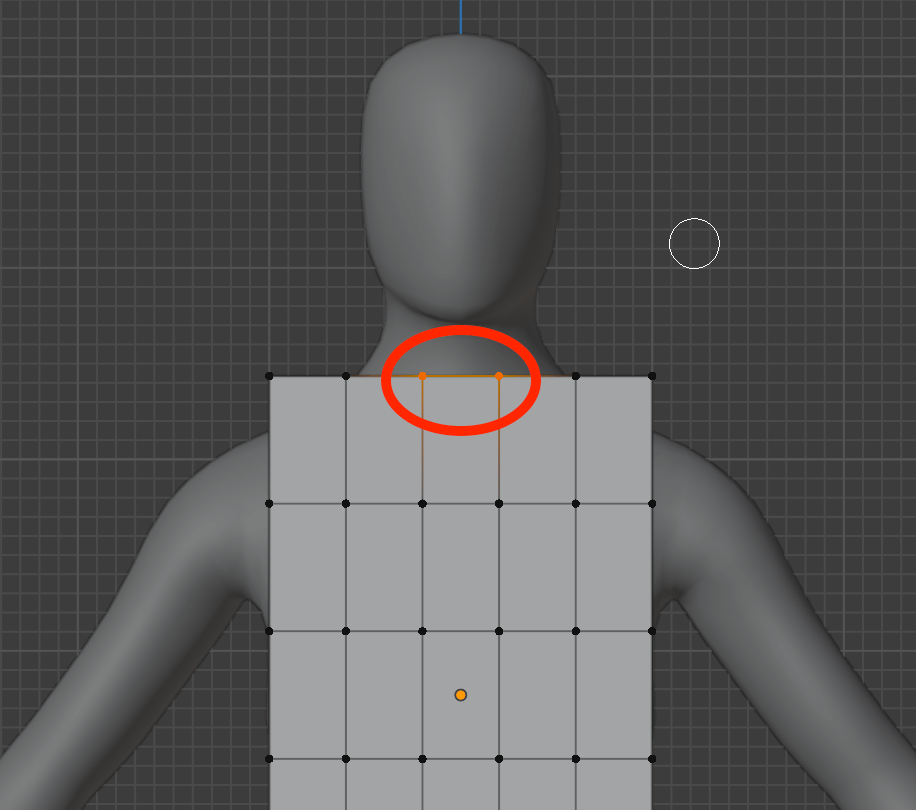
Click on a vertex to select it.
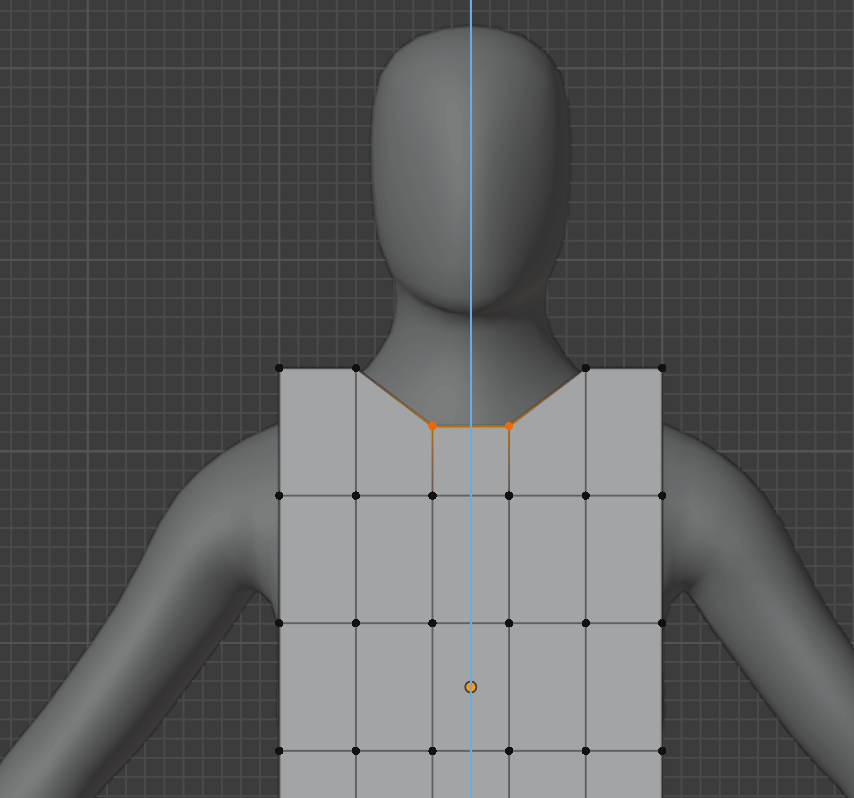
Move it down and press Enter to confirm.
After selecting the vertex that will be the shoulder part, use the [E] key (extrude) -> [Z] key (Z-axis) to extend it.
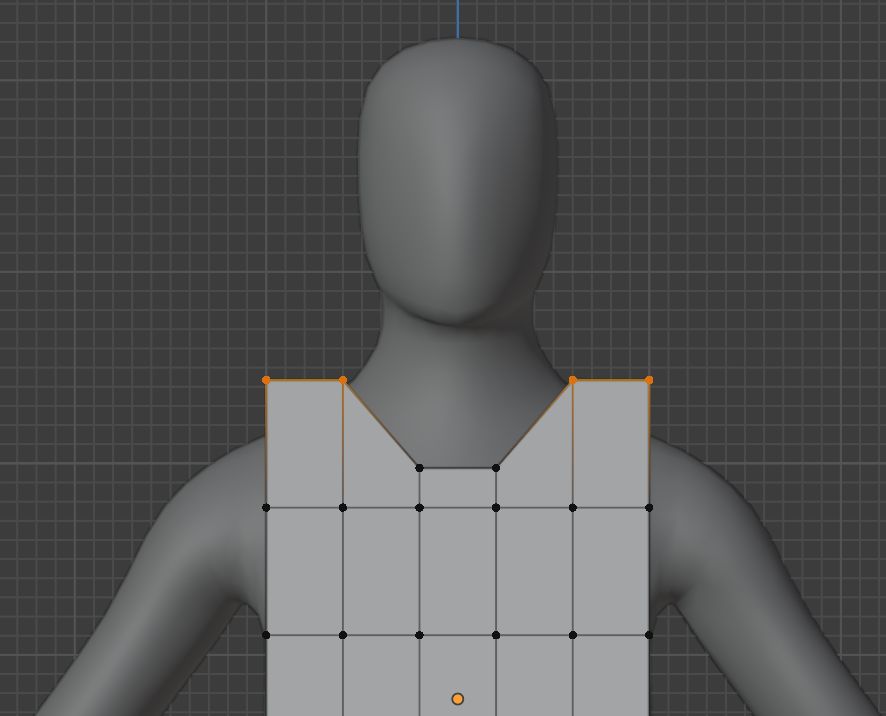
Select the vertex that will be the shoulder part
![Press [E]→[Z] key to push it out to the Z axis.](https://styly.cc/wp-content/uploads/2021/10/Screenshot-321.png)
Press [E]→[Z] key to push it out to the Z axis.
Creating a body
Create the fabric under the armpit.
After selecting the armpit vertices as shown in the screenshot below, press the E key (extrude), S key (expand), and X key (to X axis).
When the width of the body has been expanded by moving the cursor, press the Enter key to confirm.
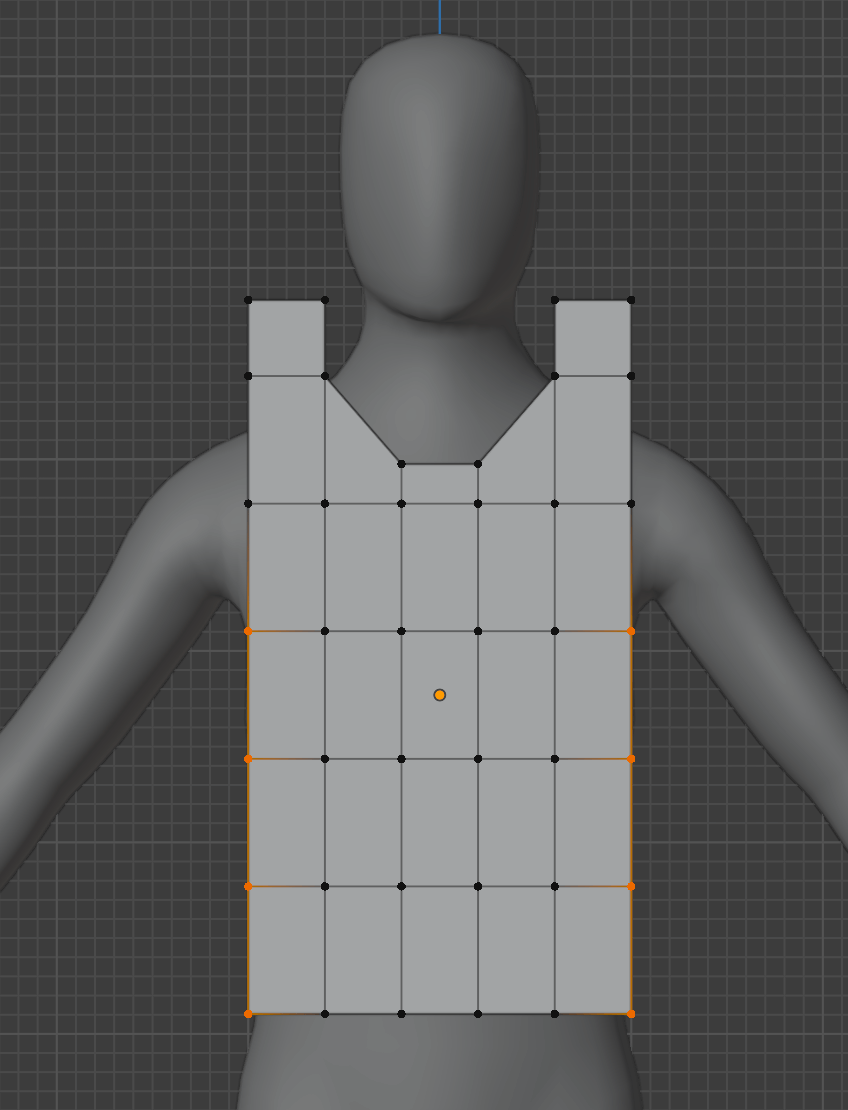
Select the vertex under the armpit.
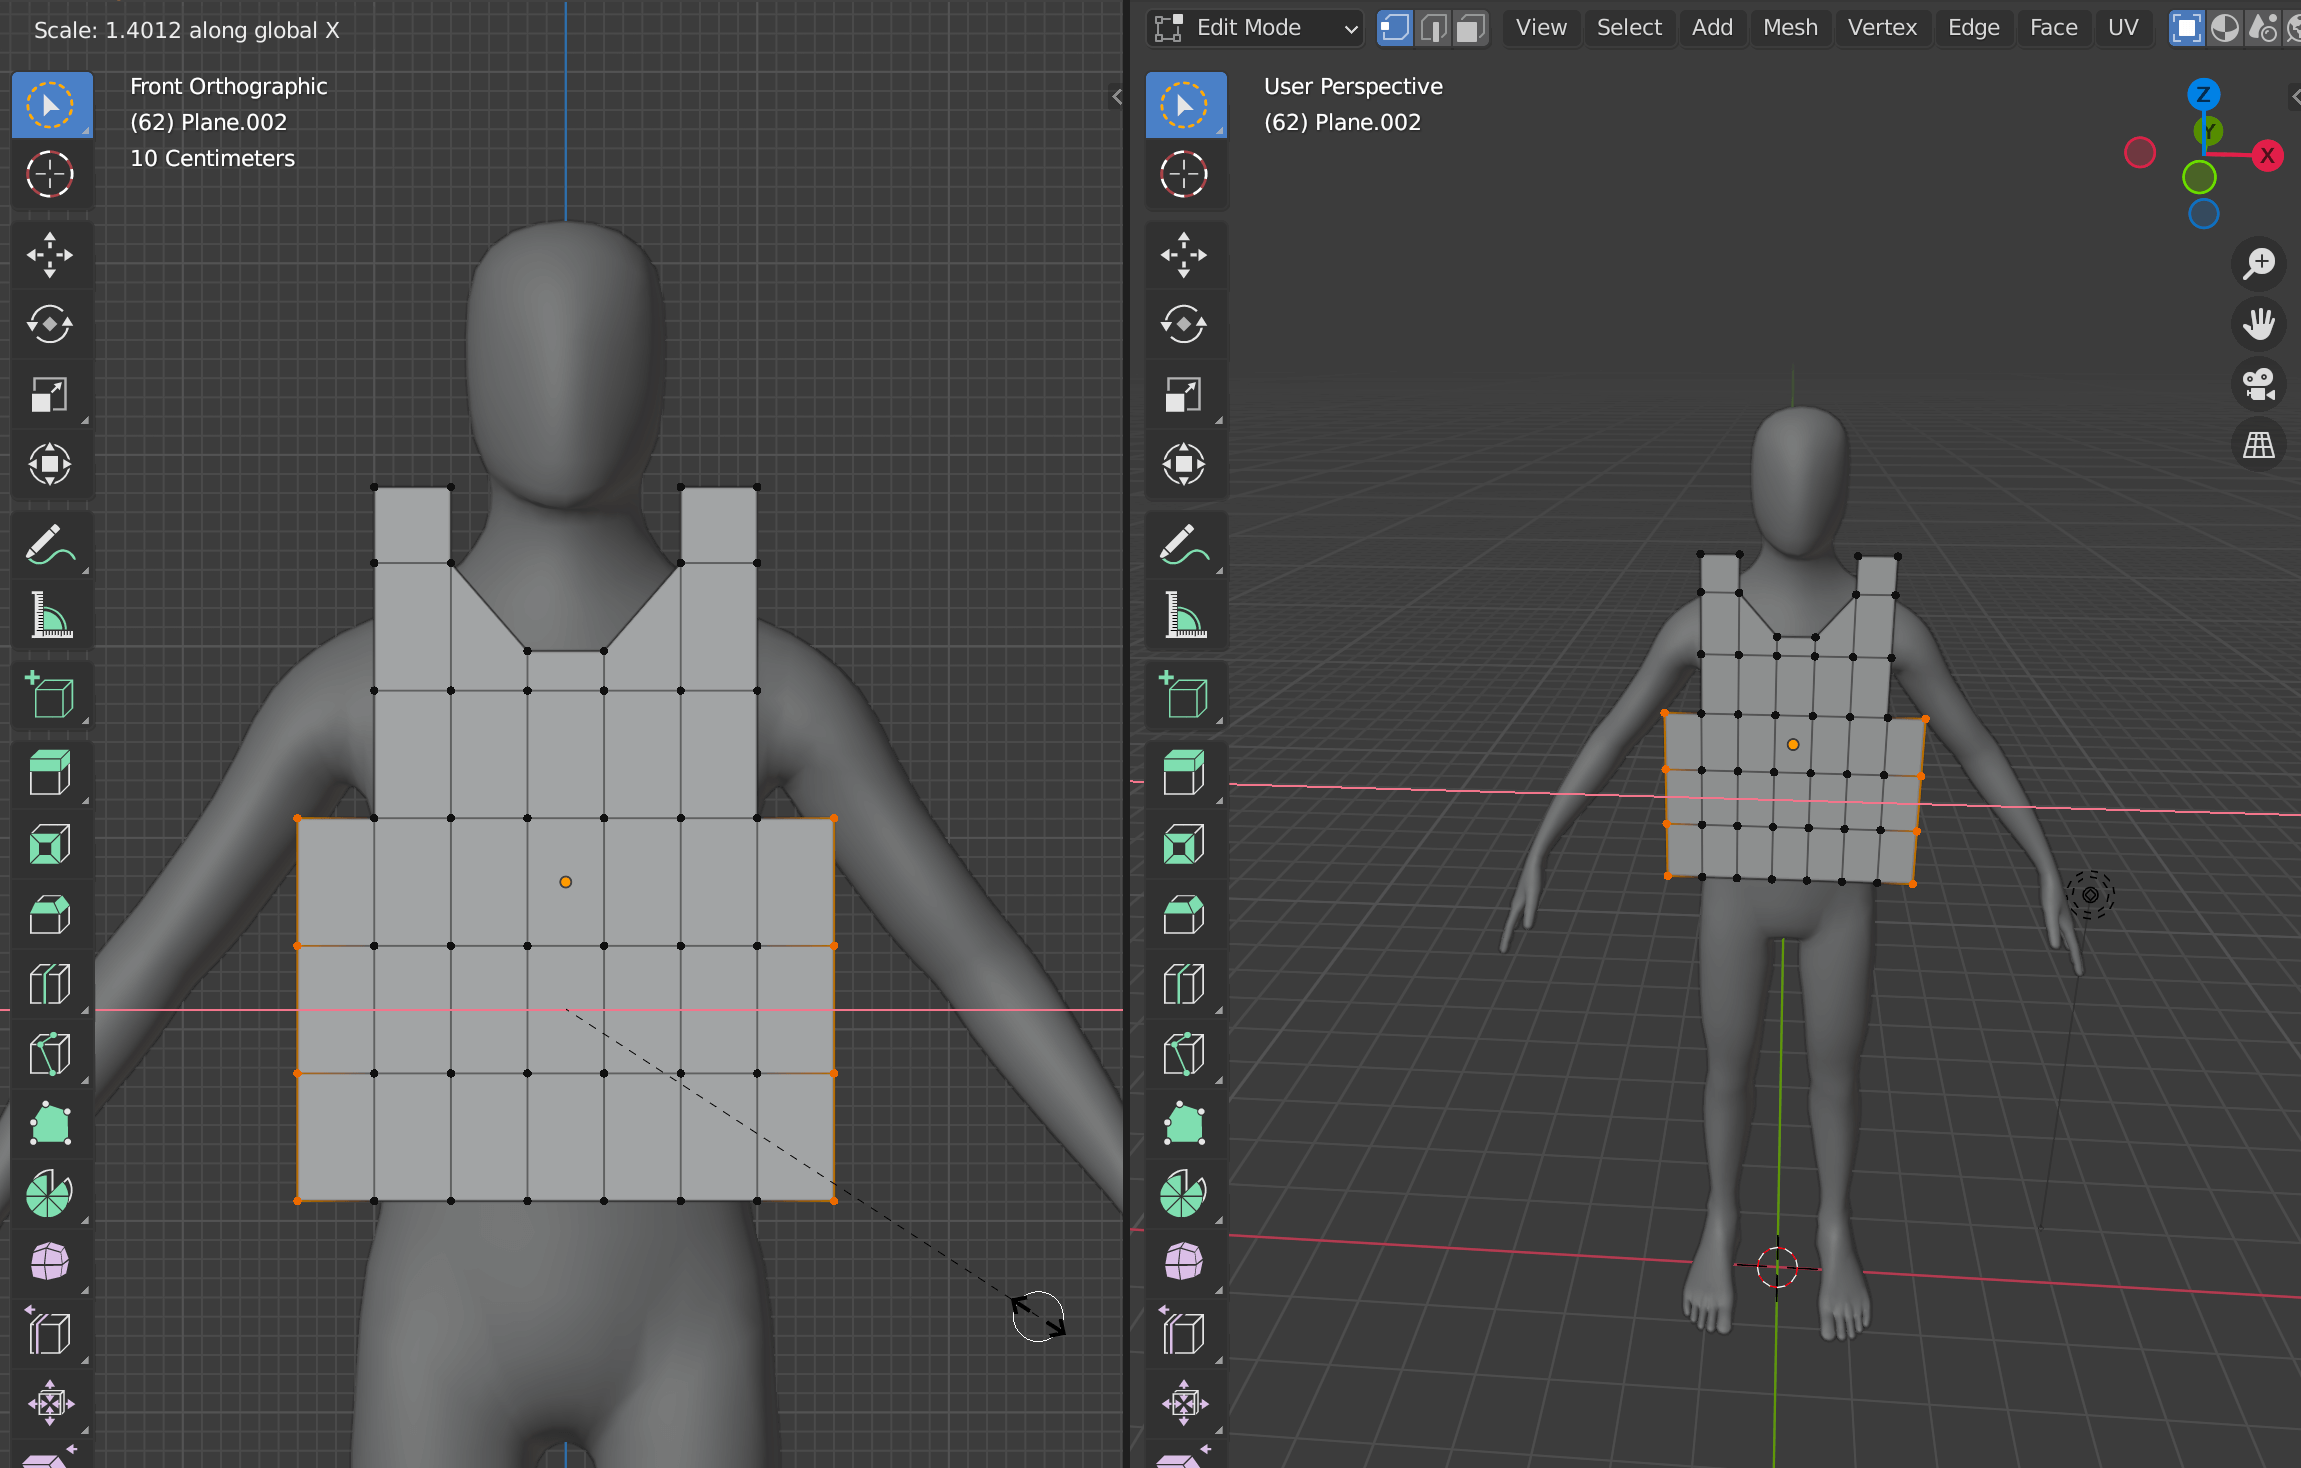
Move the cursor to widen the width, and press the Enter key to confirm.
Let’s make a smooth curve around the collar and armpits.
Add a modifier from the modifier properties (tool icon) on the right side of the screen.
After selecting the Subdivision Surface, open the Advanced tab and change the Boundary Smoooth to Keep Corners.
Switch to object mode by pressing the [Tab] key (or the top left button).
Select Apply from the v next to the Subdivision Surface to apply it.
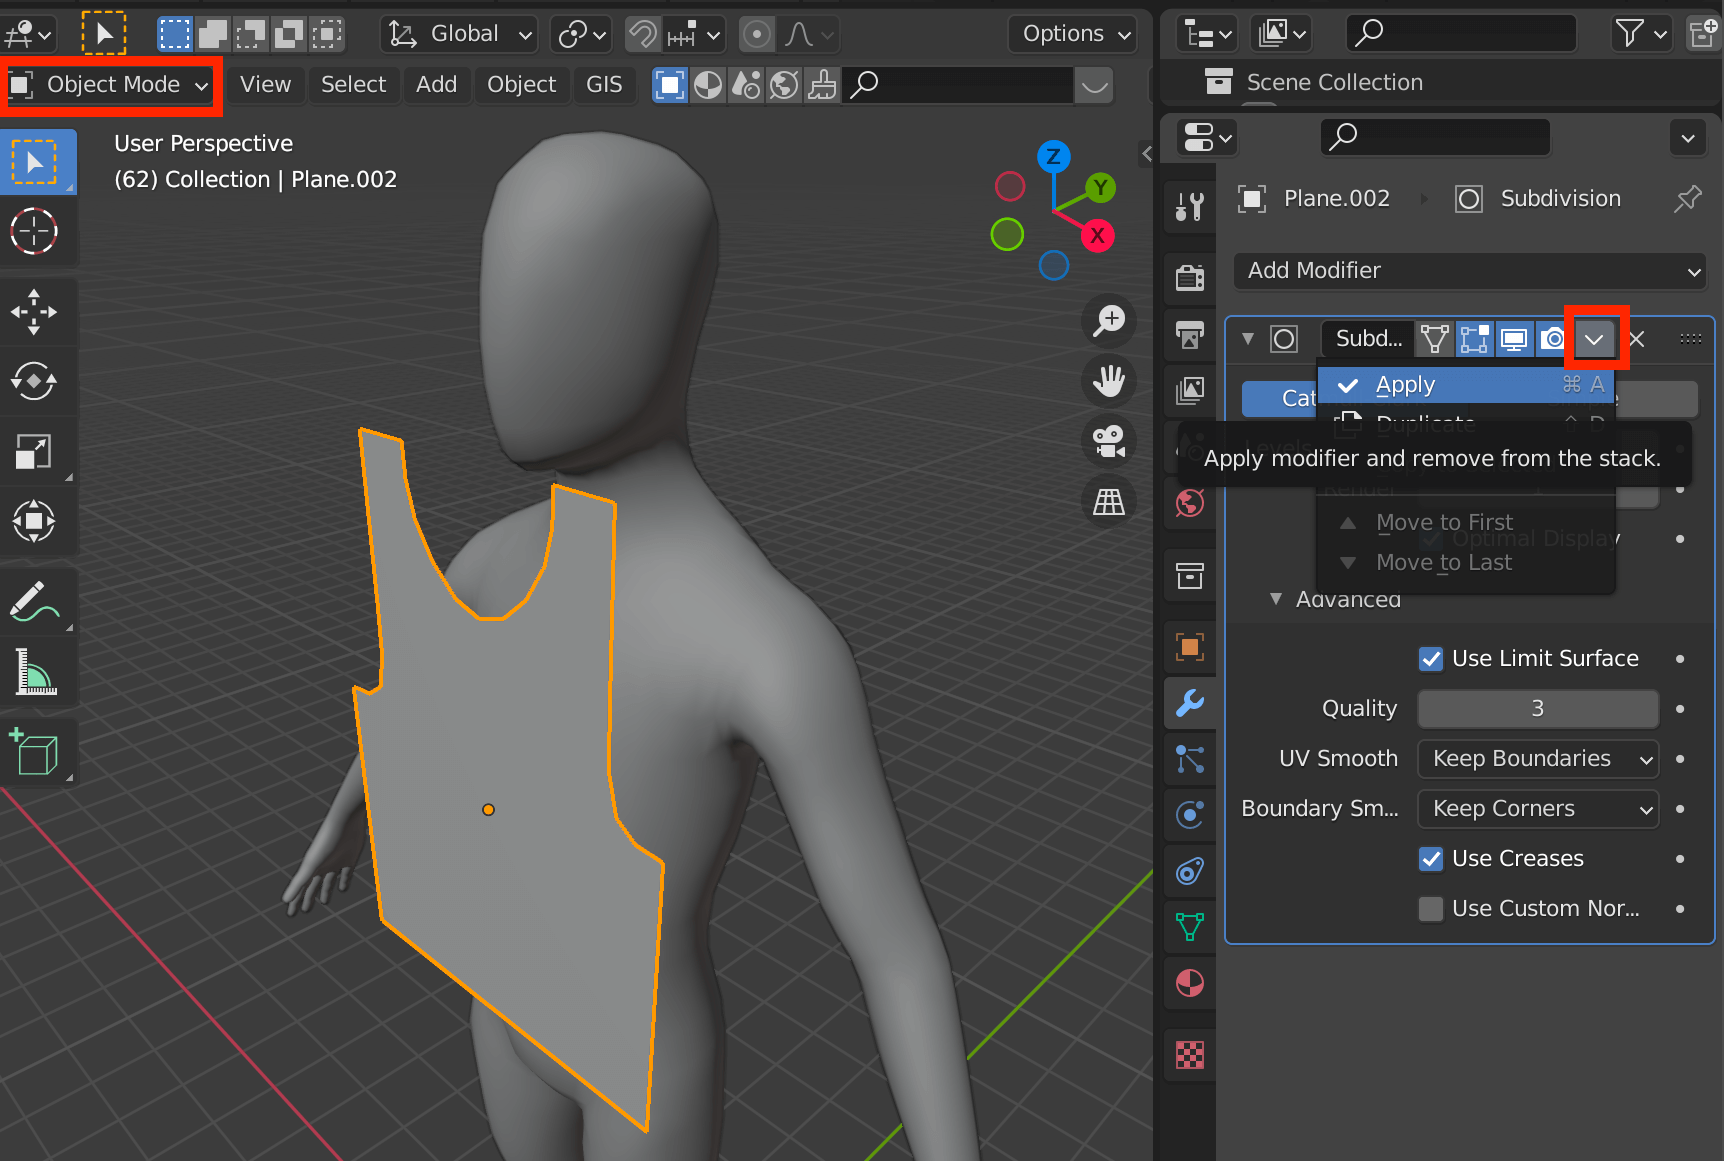
Switch to object mode and apply the Subdivision Surface
Switch to Edit mode again with the [Tab] key, make sure the Subdivision Surface is applied, then select all with the [A] key and push it out with the [E] key.
Then move the cursor to the back of the human model, adjusting its position, and place it between the human models.
The duplicate is the back of the body.
Press [E] key to push it out, adjust it with the cursor, and press Enter to confirm.
After that, select the meshes where the neck, arms, and torso will be.
You can select each mesh of the model by clicking on Select Face in the upper left corner of the screen.
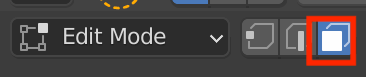
Face selection mode
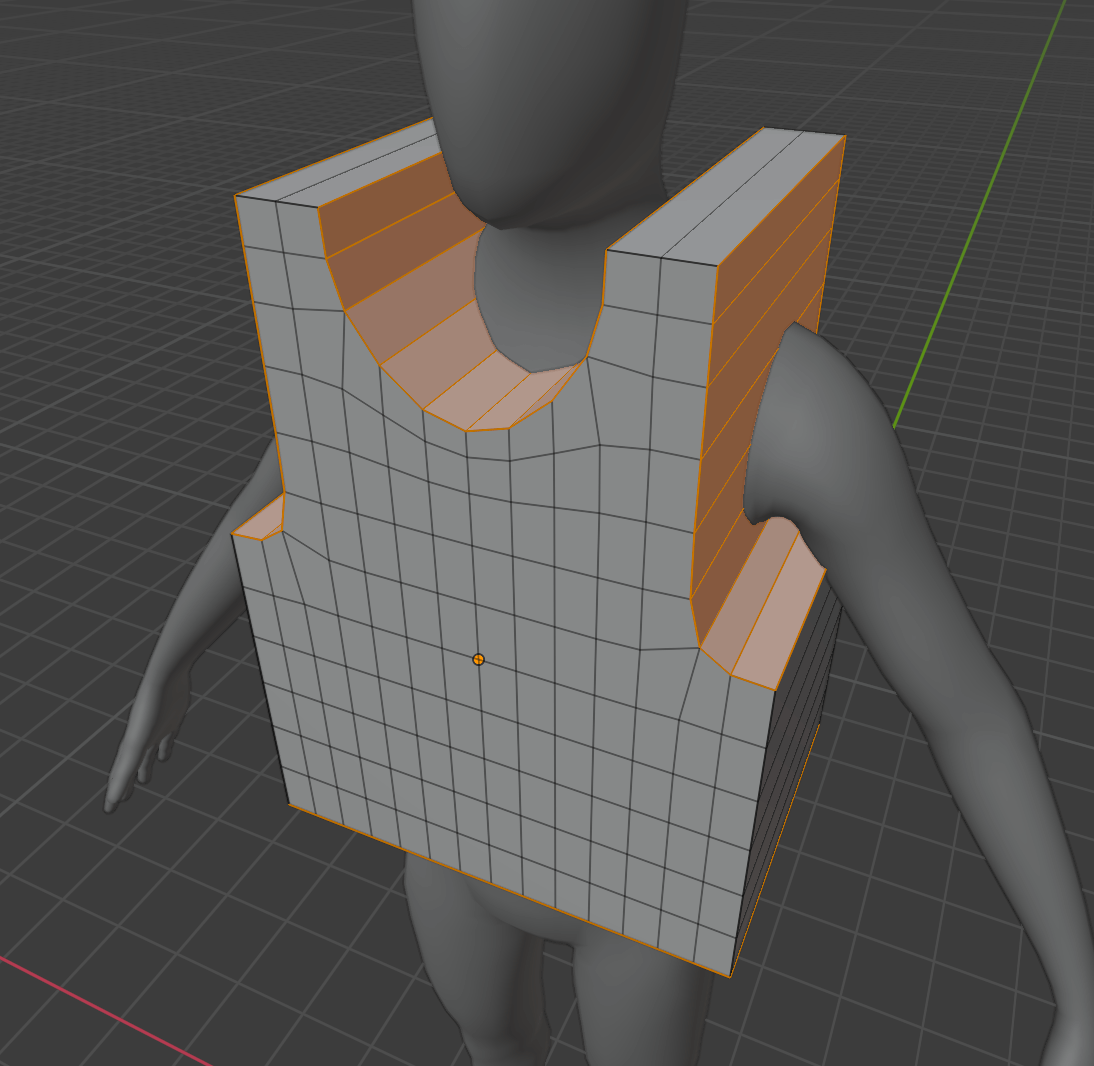
Select the area where the neck and arms will appear.
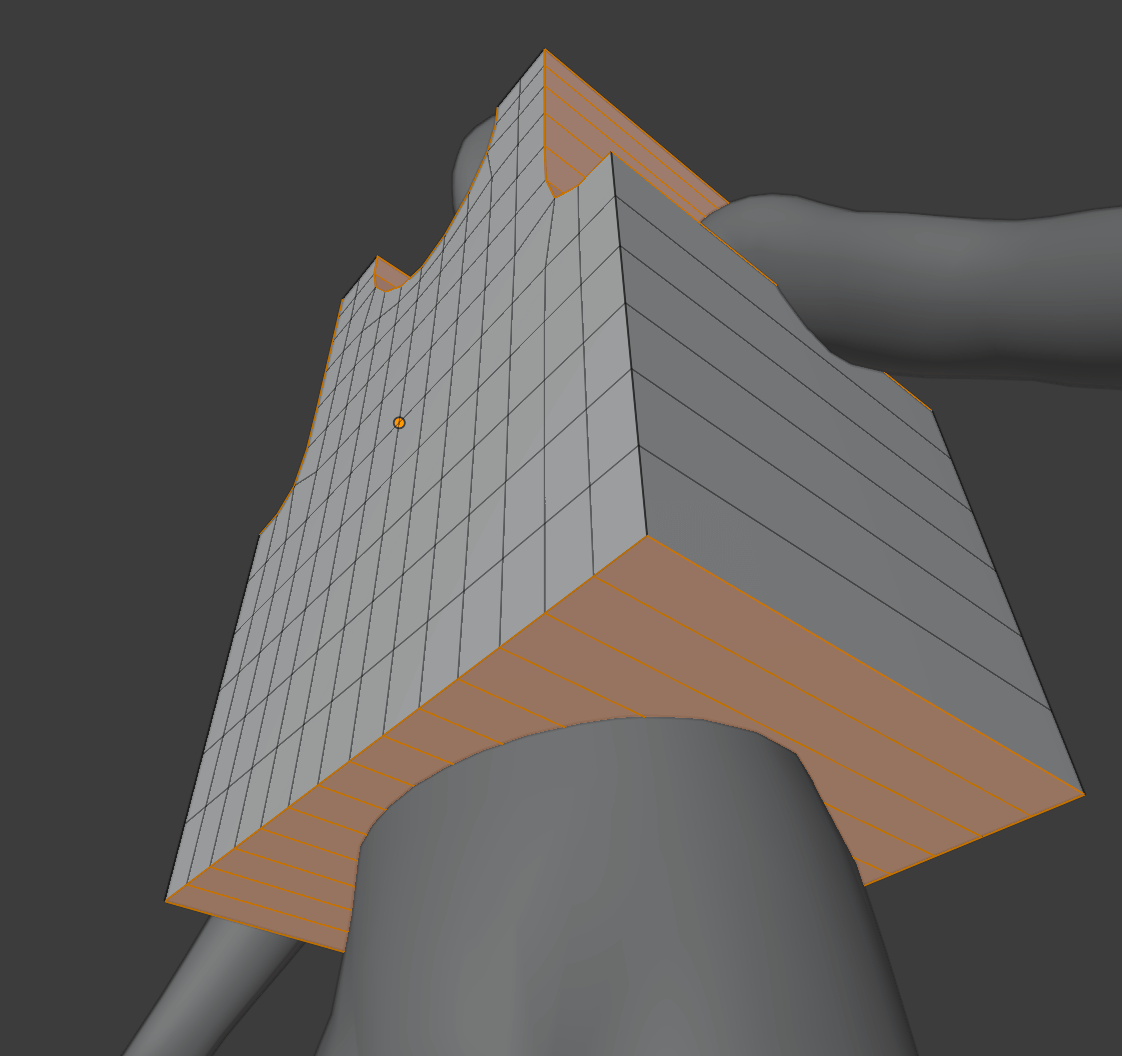
Don’t forget the bottom.
Delete them with the [X] key.
Select Faces and delete only the faces.
![Delete with [X] key](https://styly.cc/wp-content/uploads/2021/10/Screenshot-329.png)
Delete with [X] key
Then select the remaining Faces (i.e., the part of the shoulder and armpit that will be sewn together).
Click the [X] key (Delete) -> Only Faces to delete the faces only.
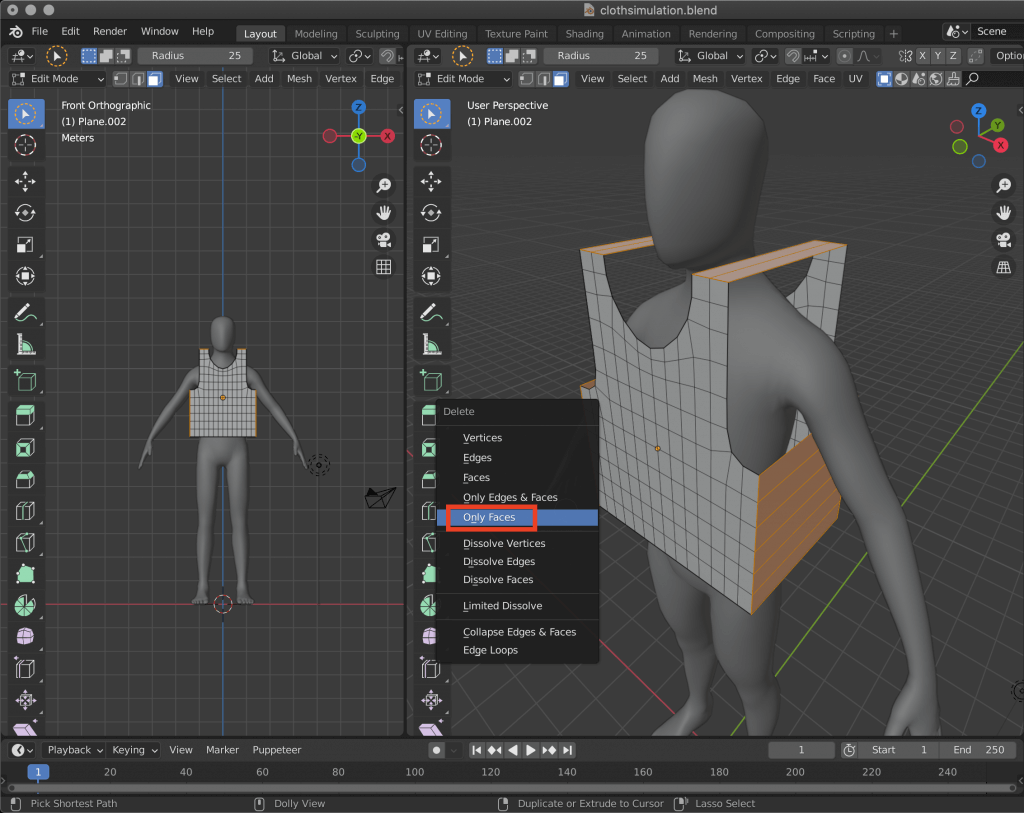
Select Only Faces
Cloth simulate.
Press [Tab] key to change to Object mode.
With the humanoid model selected, click Collision from the right side menu.
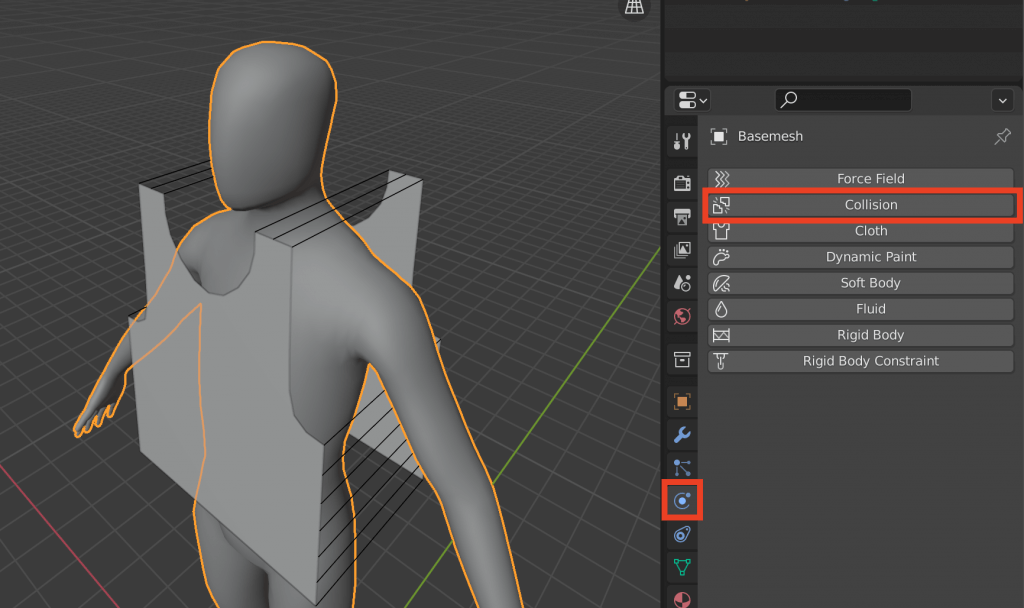
Select Collision from Physics Property
Next, select the clothing model and click on Cloth from the Physics Property menu as well.
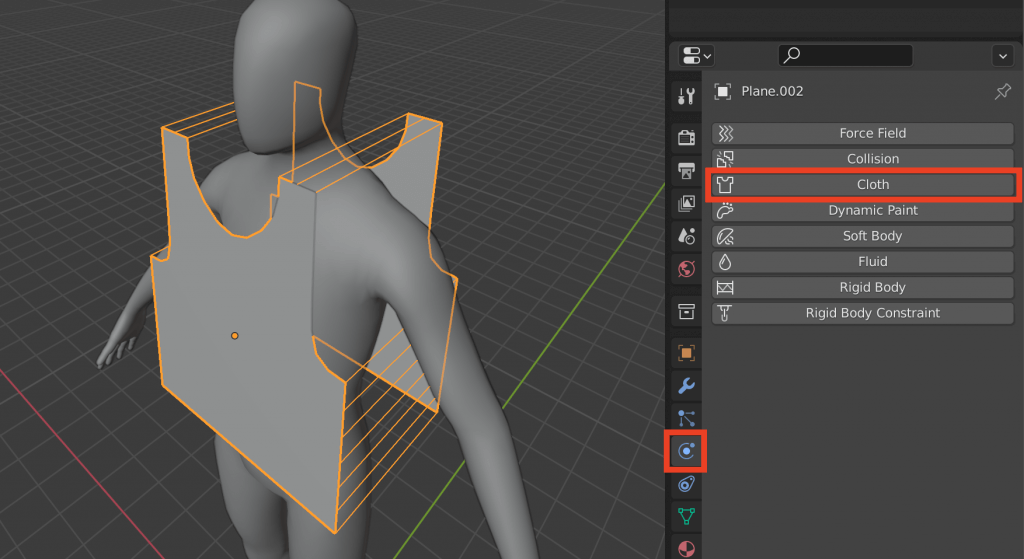
Select Cloth from Physics Property
At the bottom of the Cloth menu, you will see a Shape item, and check Sewing.
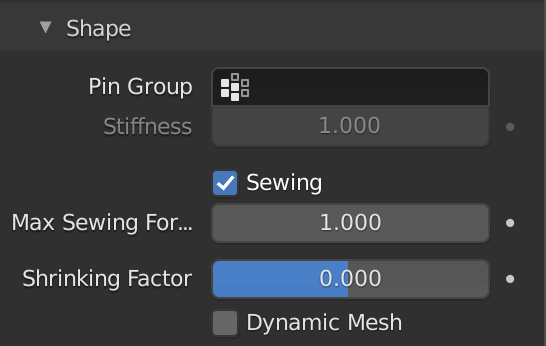
Click the Play button at the bottom of the screen to start the simulation.
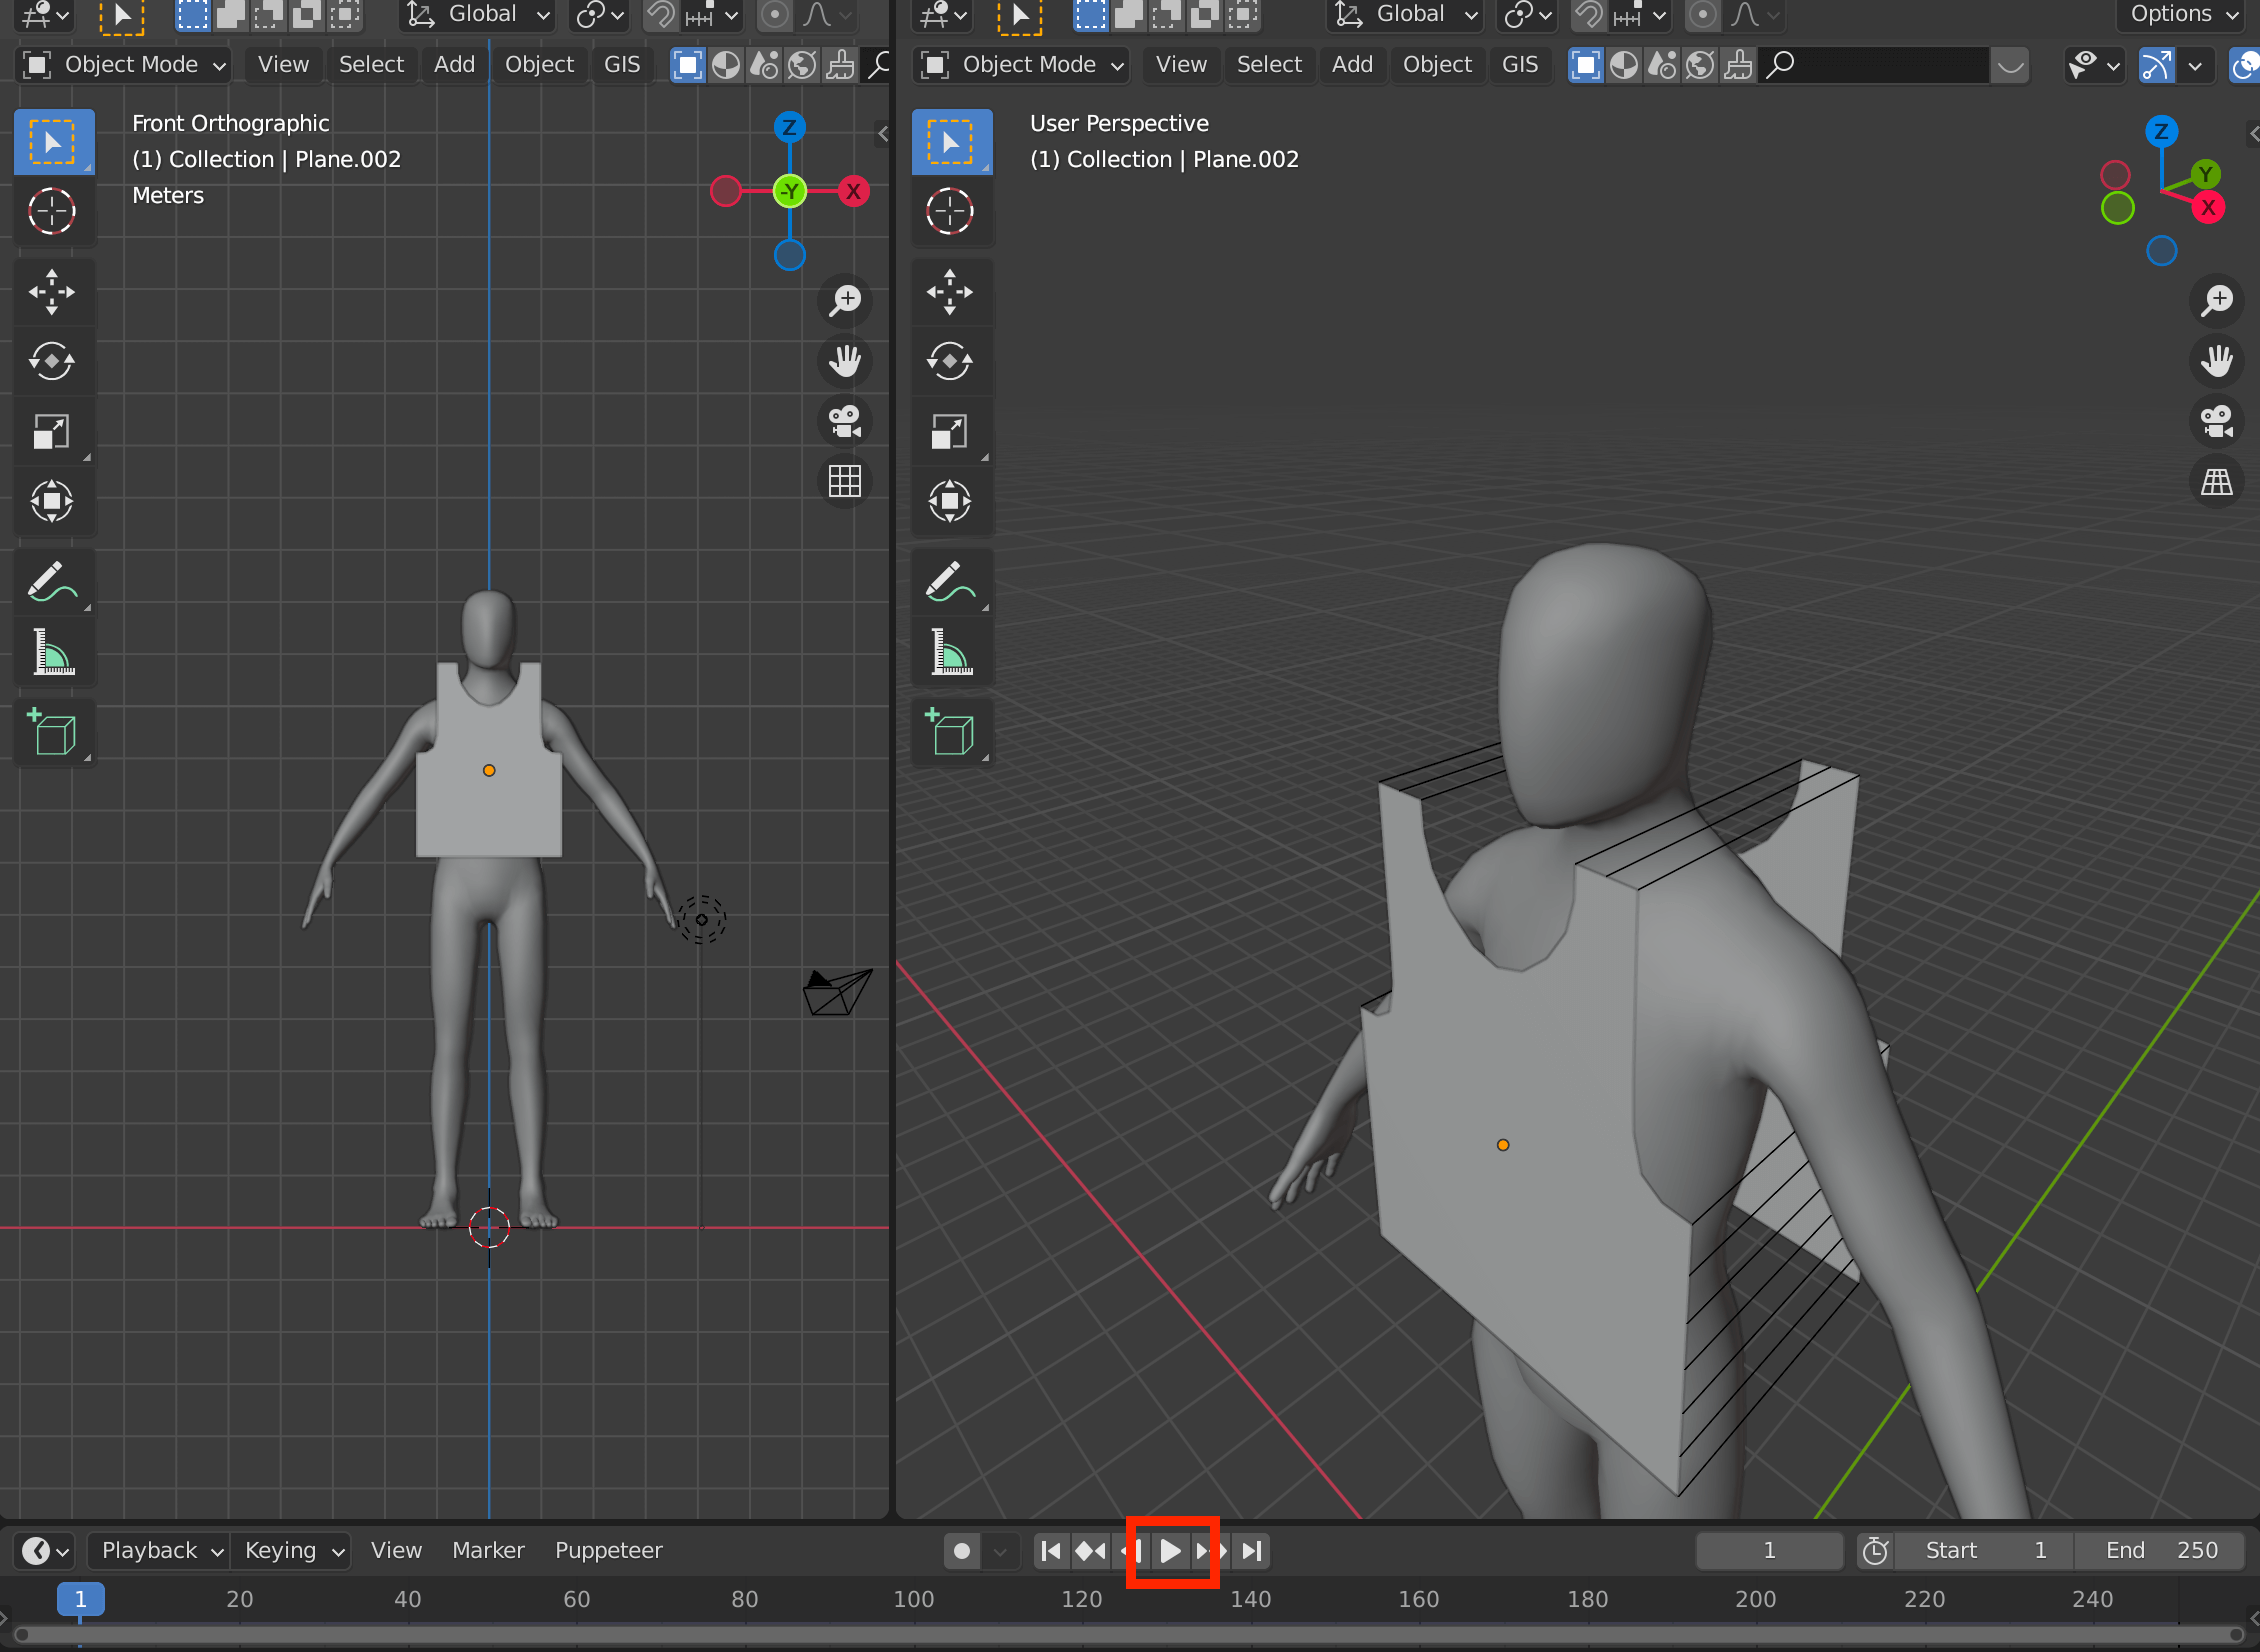
Click on the triangular play button.
If the simulation does not work
In some cases, the cloths are not sewn together and nothing happens after playback.
If the problem is caused by duplicate vertices, it is easy to solve, so try the following method.
First, switch to edit mode by pressing the [Tab] key, and then press the [Alt] key + [H] key to make sure there are no hidden ones.
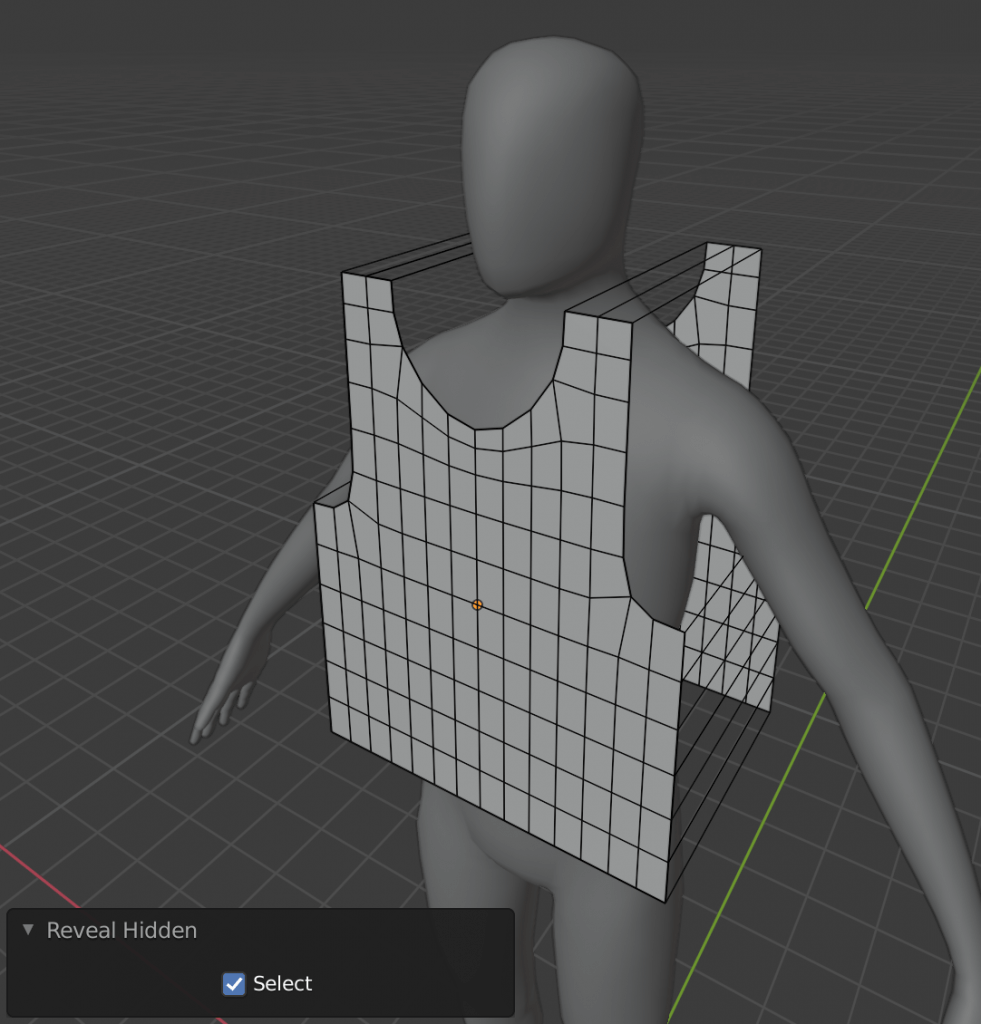
Then, select all with the [A] key.
![Select all with the [A] key](https://styly.cc/wp-content/uploads/2021/10/Screenshot-6-1024x892.png)
Select all with the [A] key
Press [M] key to Merge and select By Distance.
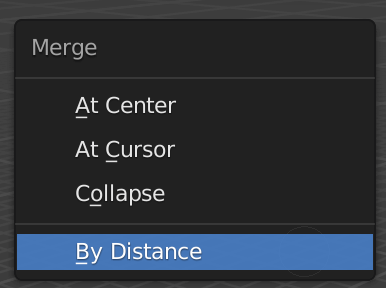

The 56 extra vertices have been removed.
Switch to Object mode with the [Tab] key and click the Play button again, and this time the simulation will be performed correctly.
The simulation is now running.
To fix the angle of the shoulders and the width of the body, stop playback and go back to frame 1, and then edit the shape of the plane.
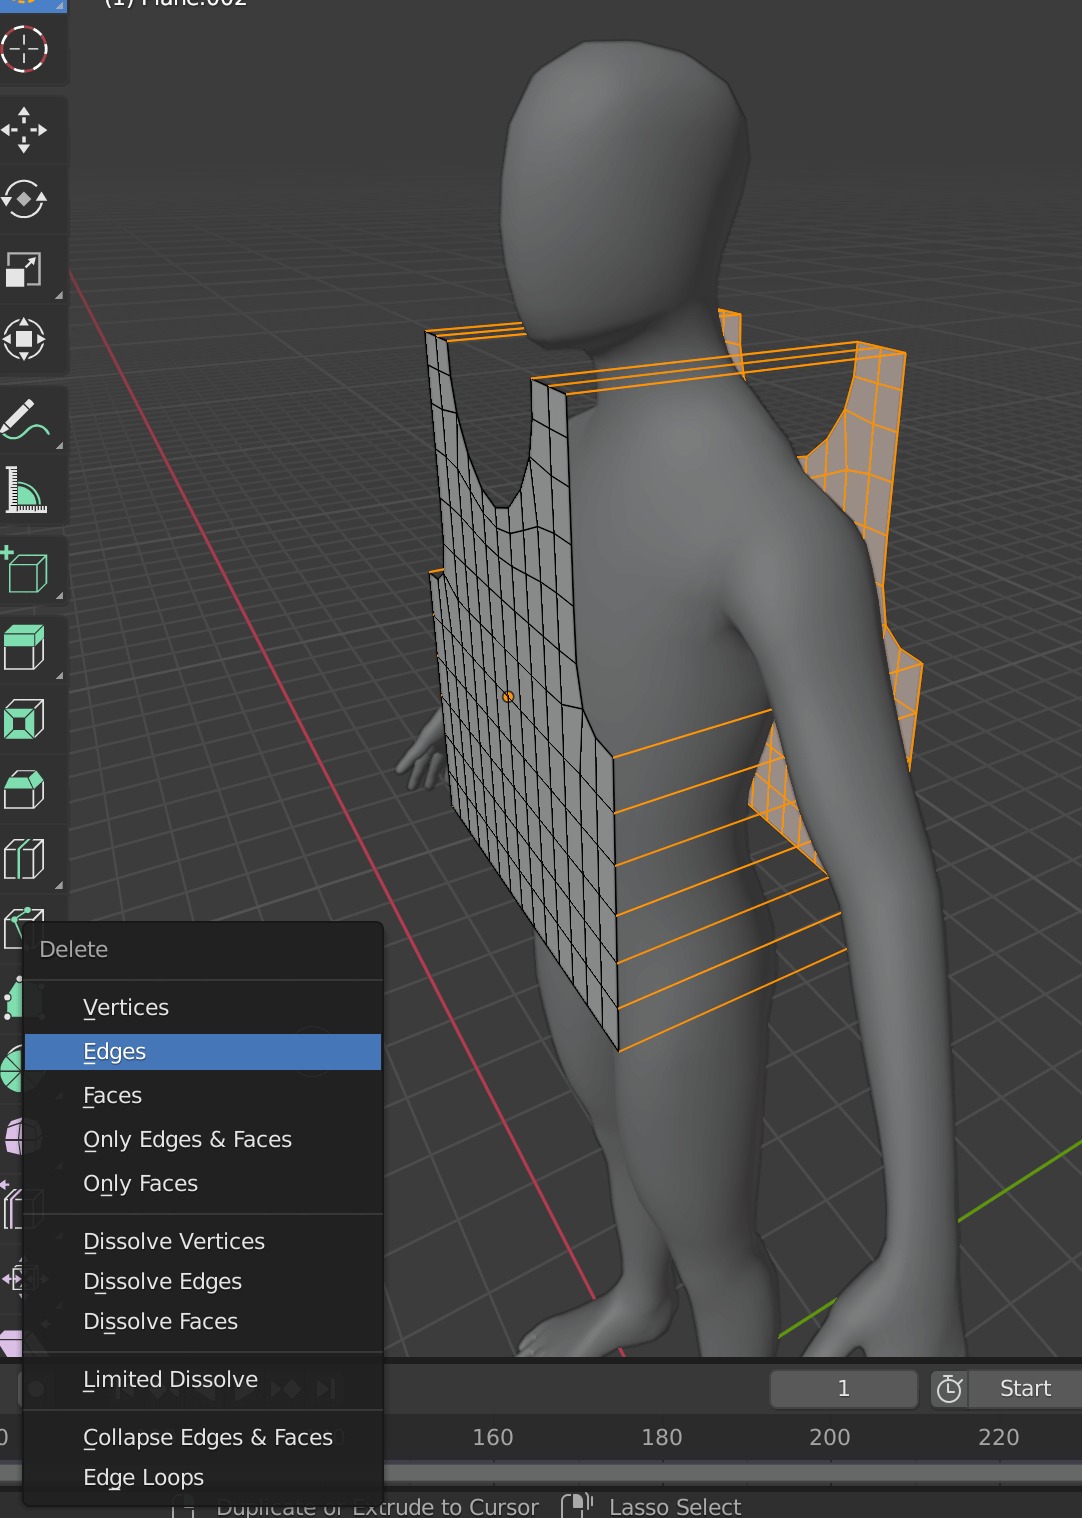
Select the edges and the back of the body and press X → Delete Edges.
Modeling a Cushion
In addition to clothes, you can easily create fabric products.
First, add a new Plane by pressing [Shift+A].
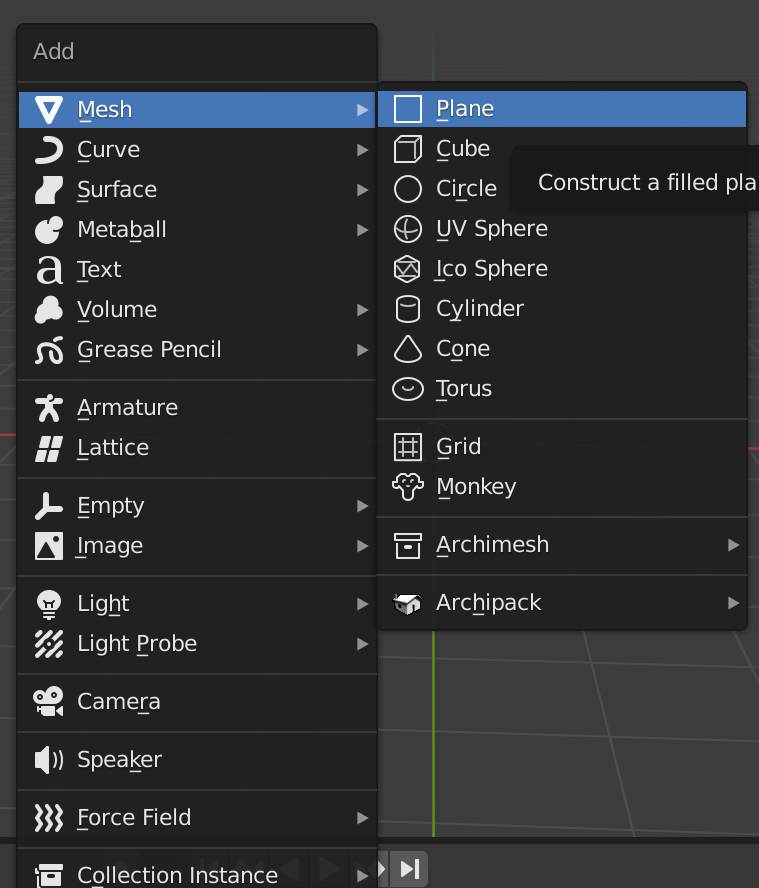
Add a new Plane
Switch to edit mode with the [Tab] key, then right-click and select Subdivide.
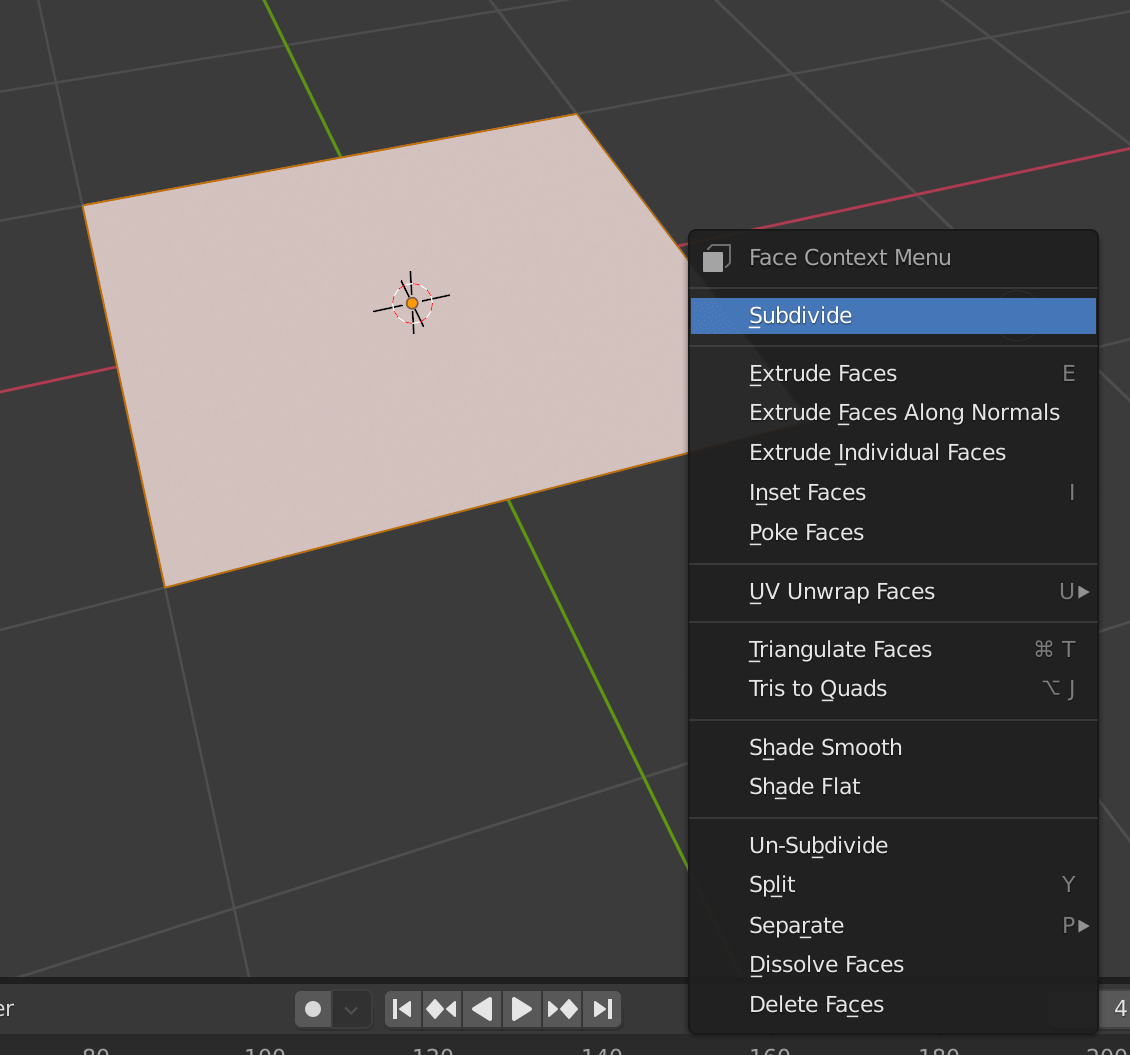
Subdividing a Plane with Subdivide
From the menu at the bottom left of the screen, set the Number of Cuts value to 10.
This is because 10 is the maximum number of values that can be processed simultaneously.
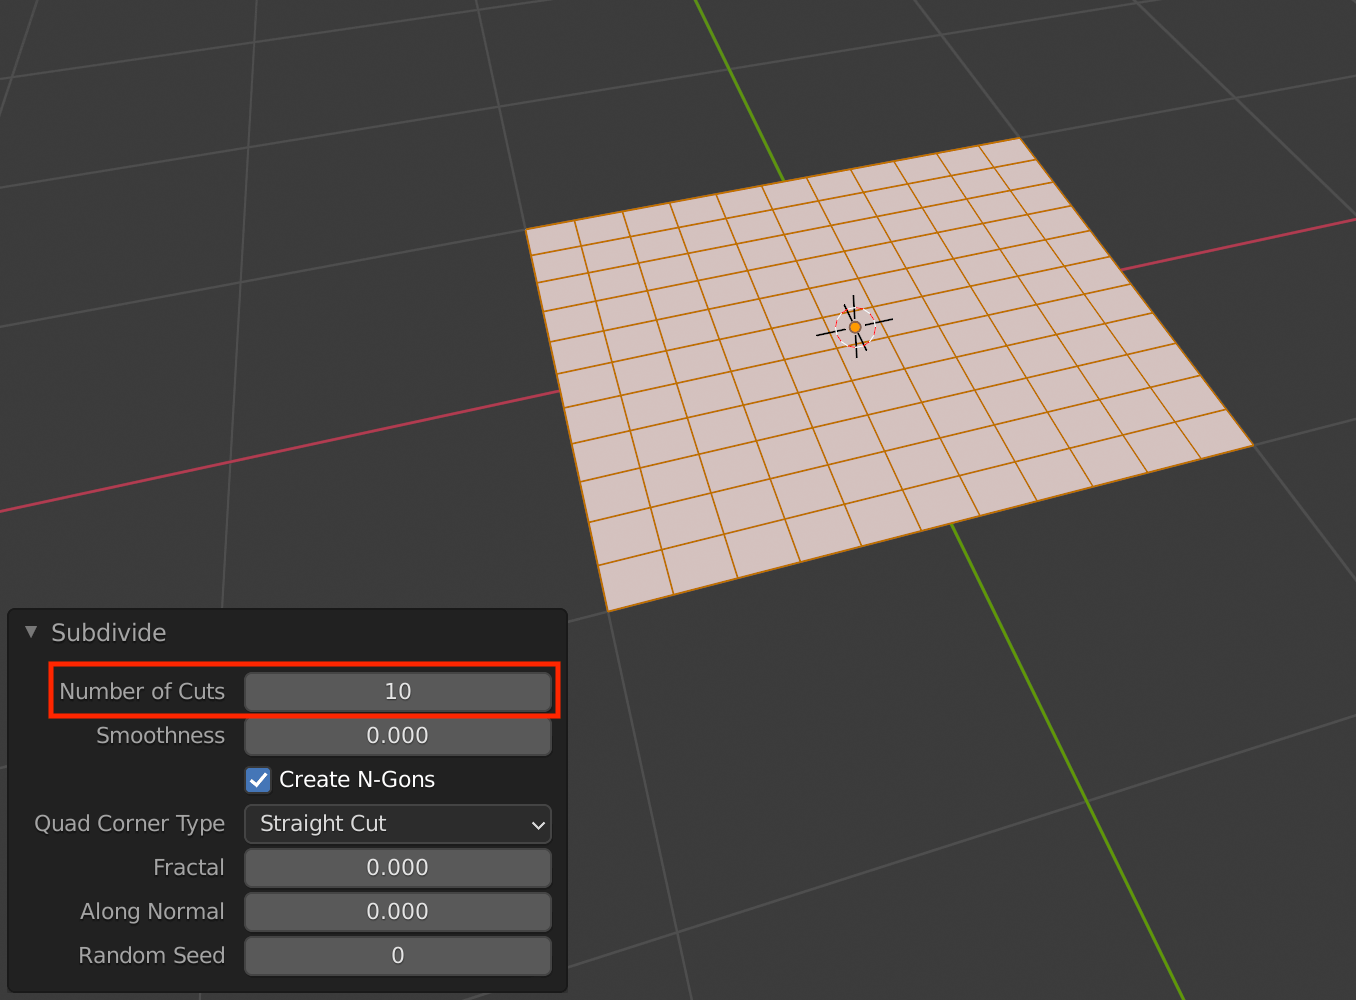
Set the Number of Cuts value to 10.
Then, click anywhere on the 3DView screen to confirm, and then press [A] to select all, and right-click to select Subdivide to further subdivide.
The finer the subdivision, the better the simulation will look, but be aware that it may take a long time to process and may force Blender to close itself.
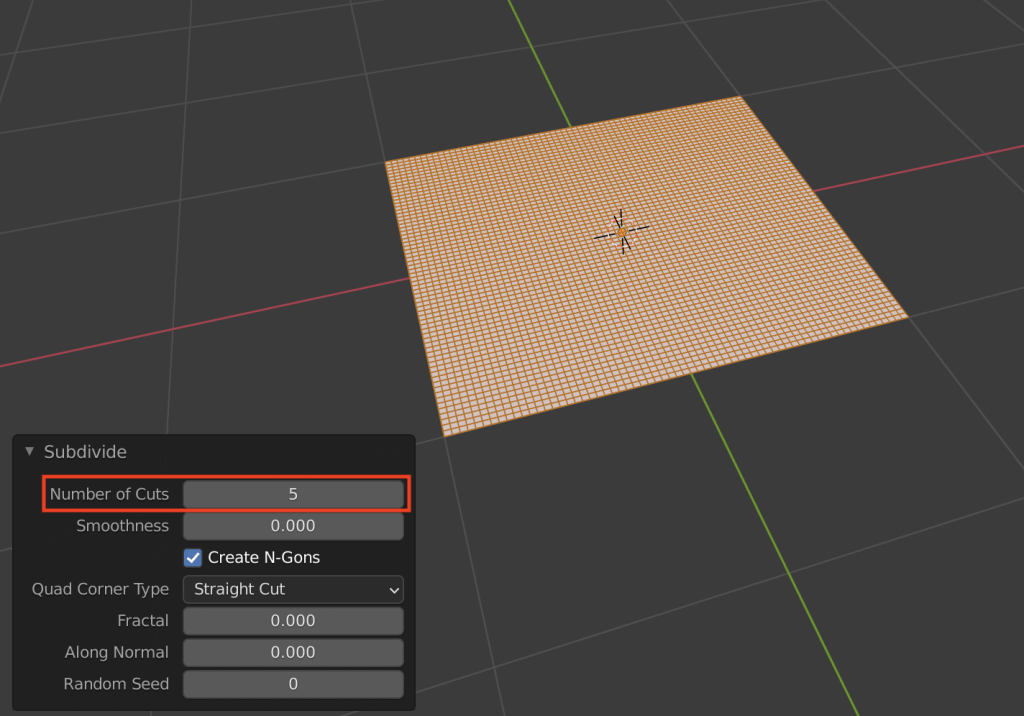
Change the value again
Then press the [E] key to push it out.
A line will appear on the Z axis (i.e., the line will be pushed in the direction of the Z axis), so move the cursor and press the Enter key to confirm.
Press the [E] key to push out and press the Enter key to confirm.
After changing the angle of the screen so that the sides are visible, hold down the [Alt] key and click.
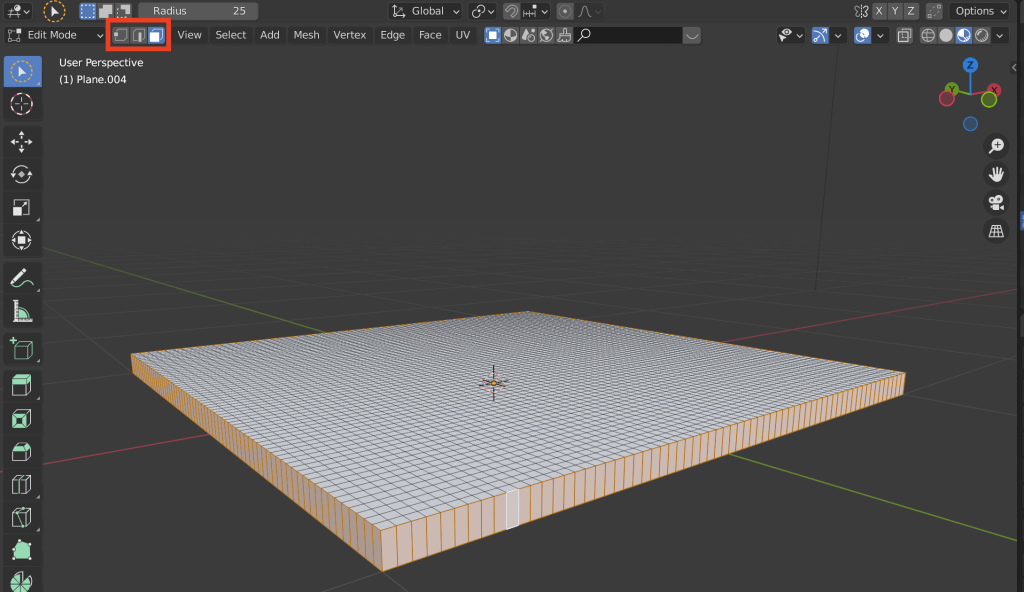
Make sure you can select the side or face from the top icon.
Select while holding down the [Alt] key
Then select [X] key -> Only Faces and delete it.
![[X] key -> Only Faces](https://styly.cc/wp-content/uploads/2021/10/Screenshot-7.png)
[X] key -> Only Faces
Cloth simulate
Press [Tab] key to switch to object mode.
Select “Cloth” from the physical properties on the right side.
![Select cloth from the physical properties while in object mode with the [Tab] key.](https://styly.cc/wp-content/uploads/2021/10/Screenshot-355-1024x614.png)
Select cloth from the physical properties while in object mode with the [Tab] key.
Then set the settings as shown below.
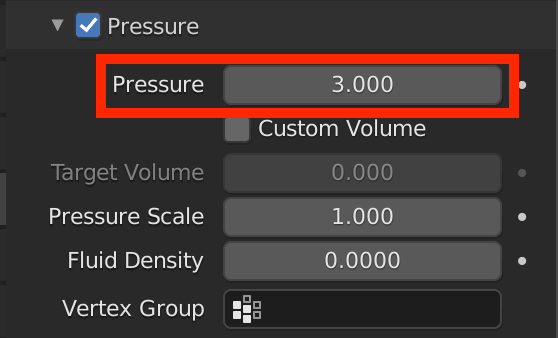
Check the Pressure checkbox and change the value to 3.
Pressure is a necessary setting when simulating objects filled with air, such as balloons, and the larger the value, the greater the air pressure.
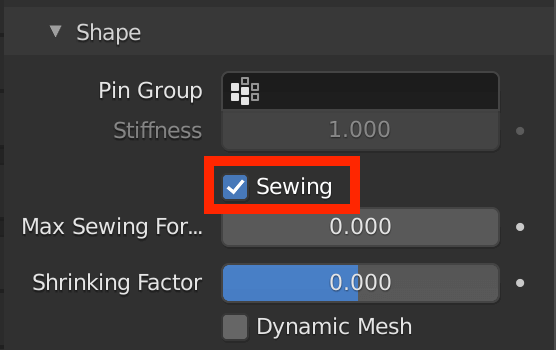
Check the Sewing checkbox under Shape.
Sewing is applied when sewing two pieces of cloth together.
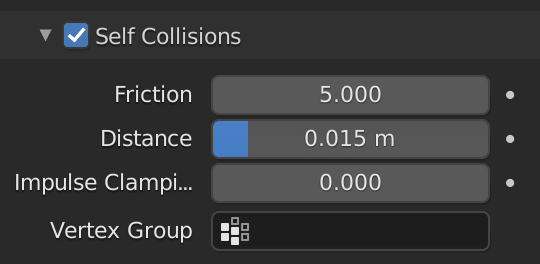
Check the Self Collisions checkbox.
If there is a non-fabric model, collisions will be applied to it, but if there is only a fabric model, as in this case, Self Collisions can be applied to prevent the model itself from being penetrated.
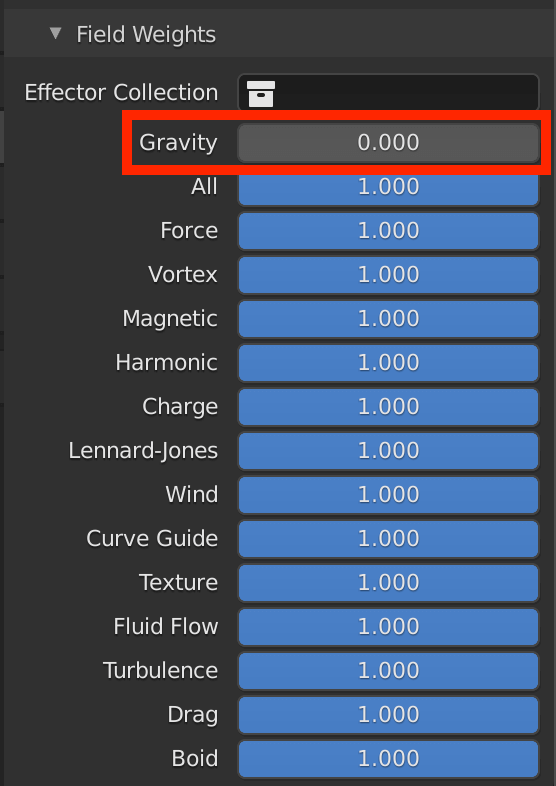
Set Gravity to 0
Gravity is the force of gravity.
If you set this to 0 to make the model weightless, there is no need to worry about it falling or flying away.
When you have completed all the settings, click the Play button.
Playback will simulate the model.
When you are done, stop playback and apply cloth simulation.
With the keyframe of the desired shape selected, click on the “v mark” from the modifier property Cloth and select Apply.
You can make the keyframe keep its shape even if you move it.
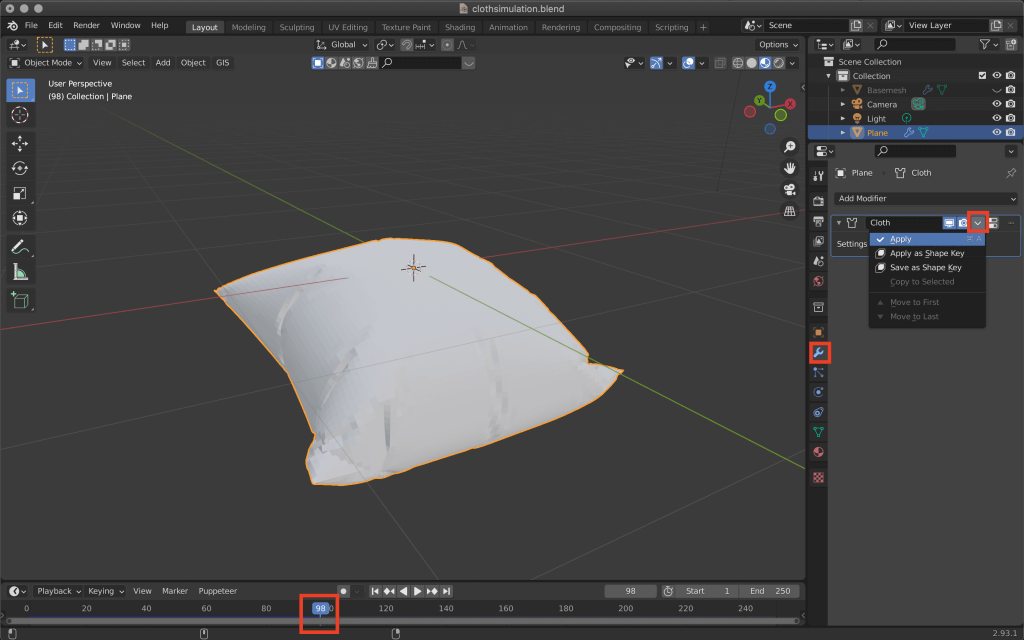
Select Apply from v and apply.
How to upload to STYLY
Let’s upload your 3D model to STYLY.
Create a STYLY account
How to create a STYLY account

How to upload 3D models to STYLY
How to upload from Unity to STYLY
You can use STYLY FORUM to solve the problem. STYLY FORUM is a place where people can discuss a service or technical issue on STYLY, or provide bug reports on STYLY.
https://en.forum.styly.cc/support/discussions
A large student who likes CG and media art. Longing in the XR world and joined NewView School. Skin, metal, fluid, etc. are searching for a taste of taste.
Based on the VR/AR production and distribution platform STYLY, you will learn the basics of Unity and PlayMaker necessary for creating VR/AR content, as well as the process of creating the compelling content being distributed on STYLY (we’ll expose you to the production techniques).