How to Make an Arrow in Illustrator


 What You’ll Be Creating
In the following tutorial, you will learn how to make an arrow in Illustrator. We’ll explore three simple methods that you can use to create arrows in Illustrator.
As well as learning how to draw an arrow in Illustrator, you can try this set of vector arrows from Envato Elements. All the arrows are fully scalable and editable. Feel free to change the size and color with just a few clicks.


What You’ll Learn in This Tutorial
- How to make an arrow in Illustrator using the Stroke panel
- How to draw an arrow in Illustrator using brushes
- How to add an arrow in Illustrator using symbols
- How to create a double-ended arrow in Illustrator
- How to use Illustrator arrow brushes
Follow along with us over on our Envato Tuts+ YouTube channel:
1. How to Add Arrows in Illustrator
Step 1
The most common technique that you can use to create an arrow in Illustrator is via the Stroke panel (Window > Stroke).
Any opened path can be easily turned into an arrow. Just select it, make sure that there’s a stroke applied, go to the Stroke panel, and focus on the Arrowheads options.
Choose from the 39 alternatives to easily stylize the start and end points of your path and add an arrow to a line in Illustrator.


Step 2
Click the Swap button from the Stroke panel to quickly swap the start and end arrowhead in Illustrator.


Step 3
Use the Scale values from the Stroke panel to adjust the size of your start and end arrowhead in Illustrator.


Step 4
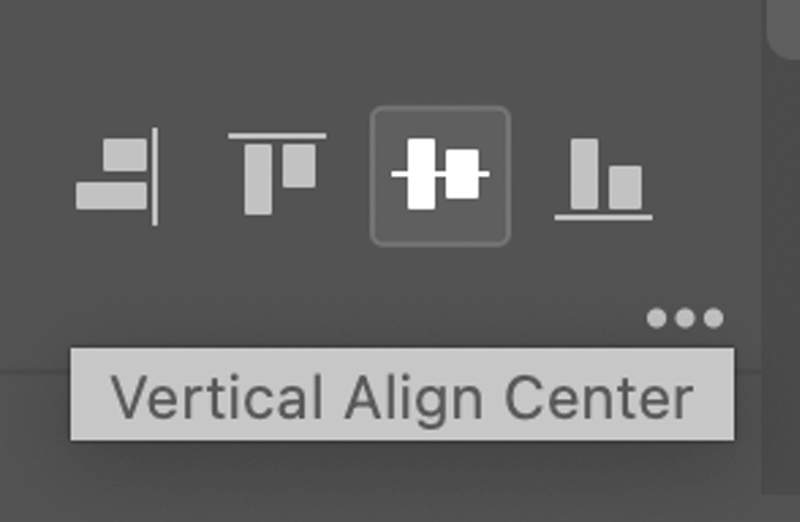
Use the Align buttons from the Stroke panel to place the arrow tip at the end of the path or to extend the arrow tip beyond the end of the path.


Step 5
Keep in mind that you can select arrow designs for both ends of a path to create a double-ended arrow in Illustrator.


Step 6
To recolor an arrow in Illustrator, all you have to do is change the stroke color.


Step 7
Besides flat colors, you can also use gradients or patterns to color an arrow in Illustrator.


2. How to Draw an Arrow in Illustrator
Step 1
The second method that you can use to add an arrow to a line in Illustrator is by using brushes. For this example, we’ll use some built-in Illustrator arrow brushes.
Go to the Brushes panel (Window > Brushes), open the fly-out menu, and go to Open Brush Library > Arrows > Arrows_Special. This will open a collection with some arrow brushes.
Make sure that your path is selected, and simply click the desired brush from the newly opened list. Alternatively, you can select the desired brush, grab the Brush tool (B) from your toolbar, and use it to create a curved arrow in Illustrator.


Step 2
To create a double-ended arrow in Illustrator using a brush, you can use Arrow 2.21 2 from the same collection of Illustrator arrow brushes.


Step 3
Keep focusing on your Arrows_Special collection of brushes and click the tiny arrow buttons from the bottom of the panel to move to the next collection of arrow brushes: Arrows_Standard.


Step 4
To change the color of an arrow brush, simply change the stroke color.
If you’re using a scatter brush, an art brush, or a pattern brush, make sure that Colorization Method is set to Tints.


Step 5
Move to the next collection of brushes and use one of the available pattern brushes whenever you wish to create a multi-colored arrow in Illustrator.
Obviously, you can create your own collection of arrow brushes or you could upload a set from Envato Elements. To upload a set, all you have to do is open the fly-out menu from the Brushes panel and go to Open Brush Library > Other Library and double-click your pack of brushes.


3. How to Add Arrows in Illustrator
The third method that you can use to create an arrow in Illustrator is via the Symbols panel (Window > Symbols).
Open the fly-out menu from the Symbols panel and go to Open Symbol Library > Arrows, which will open a collection with some arrow symbols.
Simply click and drag the desired symbol to add to your design. Scale it as you wish and double-click it whenever you need to edit it.


Congratulations!
Now you know how to draw an arrow in Illustrator. I hope you’ve enjoyed this tutorial and can apply these techniques in your future projects.
Check out Envato Elements, where you can find some great sources of inspiration to create your own set of Illustrator arrow brushes.


Popular Vector Arrows From Envato Elements
Envato Elements is an excellent resource for arrow designs. Here’s a short list of some of the most popular collections that you can find.
Arrow Head: Pattern Brushes & Vector Arrows (AI, EPS, PNG)
Don’t have the time to create your own set of arrow brushes in Illustrator? Try this impressive collection of brushes, which includes 20 pattern brushes and over 160 hand-drawn vector arrows.


30 Arrow Icons (AI, EPS, PNG, SVG)
This pack of slim and colorful arrow icons will make your design catchy and elegant. The icons come in two different styles: colored and outline.


3D Arrows Pack (EPS, PDF, PNG, SVG)
Make your design stand out with this collection of 3D arrows. These highly customizable designs can be easily adjusted to fit your needs.


Illustrator Curved Arrows (AI, EPS)
If you’re in a hurry or you simply can’t be bothered to learn how to make an arrow in illustrator, this small pack of Illustrator curved arrows might be the perfect solution.


100 Vector Arrows (AI, EPS)
Looking for playful and cartoonish arrow designs? Well, look no further, because this collection gives you 100 designs to choose from.


Want to Learn More?
We have loads of tutorials on Envato Tuts+, from beginner to intermediate level. Take a look!
How to Draw an Arrow in Adobe Illustrator

Arrows are useful for informative designs such as menus. They guide readers to find information faster and you don’t have to squeeze in the images right next to your text. Sometimes when there are limited spaces for photos, using an arrow to point at the corresponding dish was the easiest solution.
When I designed menus for the food & beverages industry over the years, I created all types of arrows for different types of menus. So if you want to draw a curvy arrow, hand-drawn style, or simply a standard arrow? You’re in the right place!
In this tutorial, I’ll show you four different ways to draw an arrow in Adobe Illustrator. You can use the line tool, shape tools, or drawing tools.
Get the tools ready and let’s get started.
Table of Contents
4 Ways to Draw an Arrow in Adobe Illustrator
You can use different tools to draw different types of arrows in Adobe Illustrator. For example, if you want to make a standard straight arrow, simply draw a line and add an arrowhead from the Stroke panel. If you want a cute hand-drawn style, use the paintbrush or pencil tool.
Note: all screenshots from this tutorial are taken from Adobe Illustrator CC Mac version. Windows or other versions can look different.
Method 1: Stroke style
This is the quickest method to make an arrow in Illustrator. Technically, you don’t have to draw it, all you need to do is to choose an arrowhead style from the Stroke options.
Step 1: Select the Line Segment Tool (\) to draw a line.

Step 2: Select the line and you’ll see the Stroke panel on the right-hand side of the document window. If not, open the Appearance panel from the overhead menu Window > Appearance, and you will see Stroke. Click on Stroke.
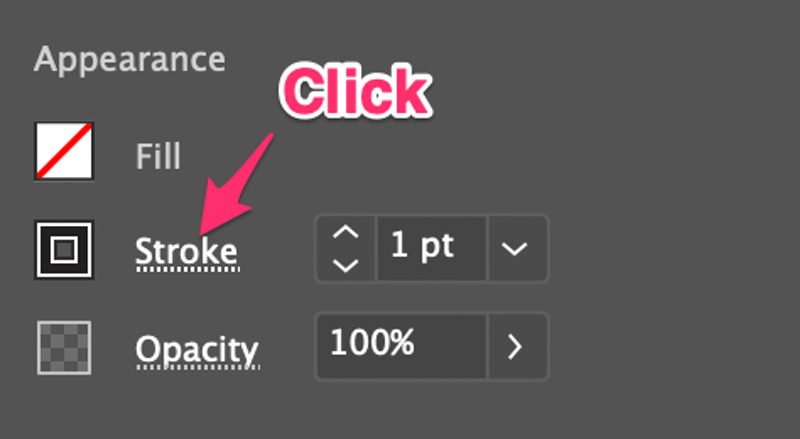
You’ll see more options such as weight, corner style, arrowheads, etc.

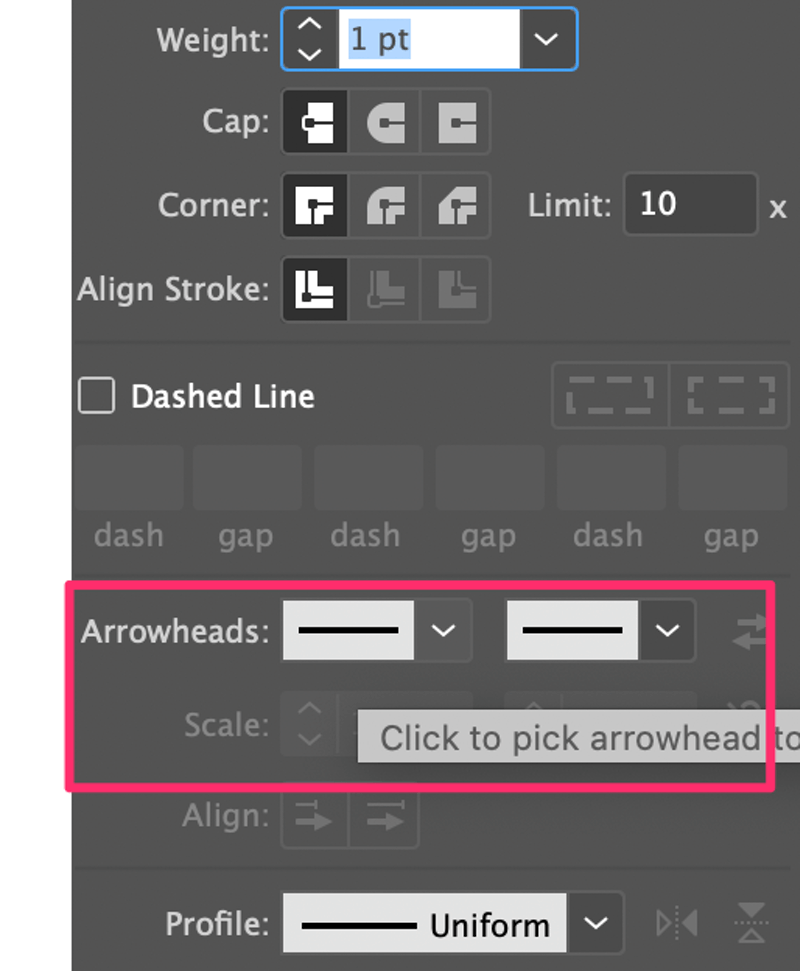
Step 3: Click on the arrowheads option to choose the arrowheads that you want. If you choose the left box, the arrowhead will be added to the left end of the line, and vice versa.
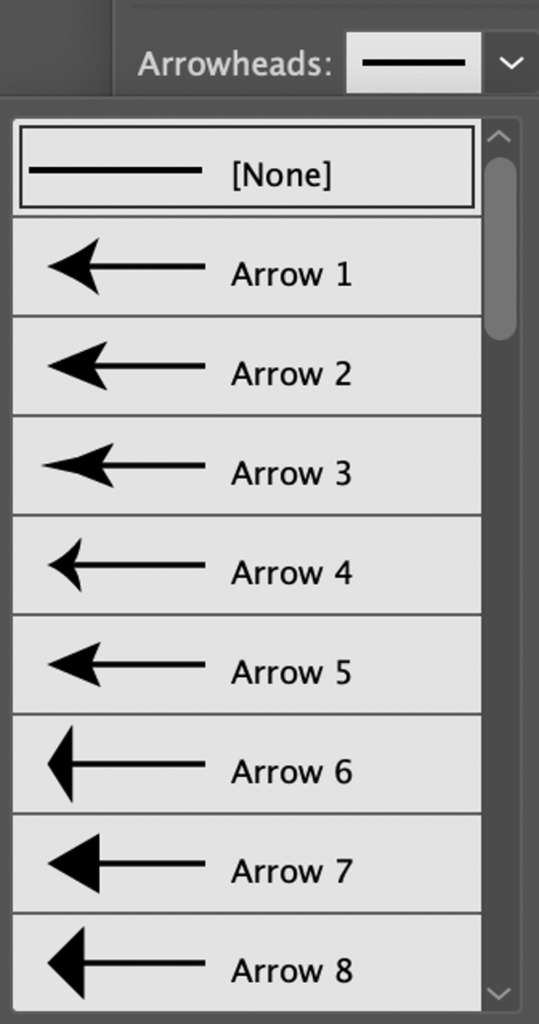
For example, I added Arrow 2 to the left end.

If the arrow is too thin, you can increase the stroke weight to make it thicker.


You can also add an arrowhead on the right side if you need it. The two arrowheads can be different.


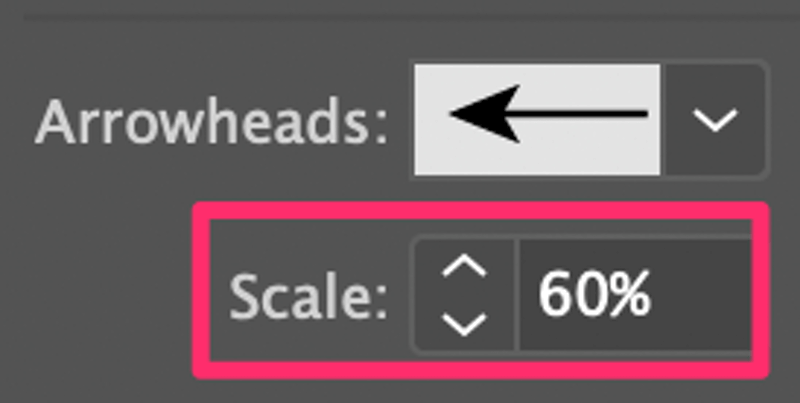
Under the Arrowheads option, you can adjust the scale to change the size of the arrowhead. For example, I changed the Scale to 60% so that it looks more proportional to the line.


Method 2: Shape tools
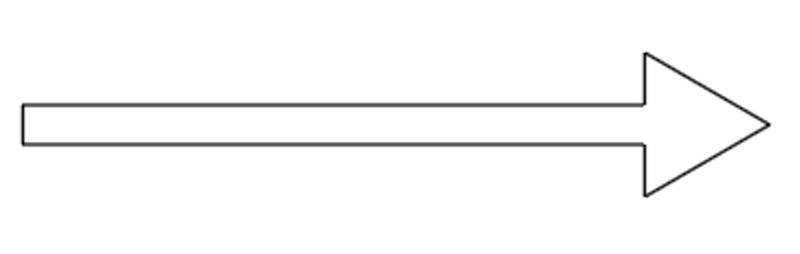
You’ll be uniting a rectangle and a triangle to make an arrow.
Step 1: Use the Rectangle Tool (keyboard shortcut M ) to draw a skinny and long rectangle.

Step 2: Use the Polygon Tool to make a triangle. Simply select the Polygon Tool from the toolbar, click on the canvas, and input 3 sides in the dialog box.


Note: You can use any method you like to make the triangle. I use the Polygon Tool because it’s easier.
Step 3: Rotate the triangle 45 degrees, place it on either side of the rectangle, and center align both shapes. Resize the shapes accordingly.

Looks like it’s done but we’re still missing one important step! If you press Command / Ctrl + Y to see the outlines, you’ll see that these two are separate shapes, so we’ll need to make them into one.

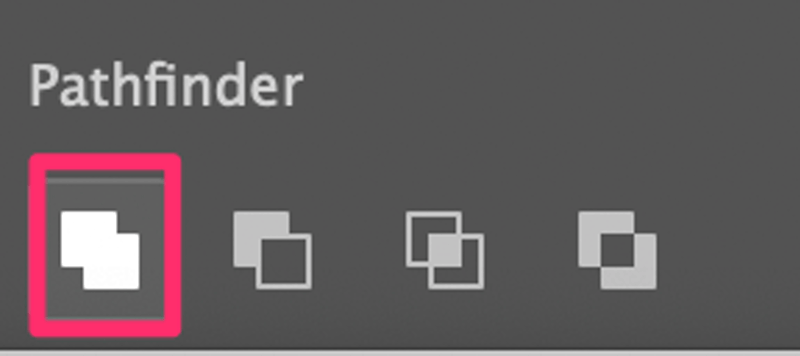
Step 4 (Important): Select both shapes, go to the Pathfinder panel and click Unite.

Now if you go to the Outline view again, you’ll see that the combined shape.

Exit the Outline view by clicking Command / Ctrl + Y again and you can add color to match your design.

Method 3: Pen Tool
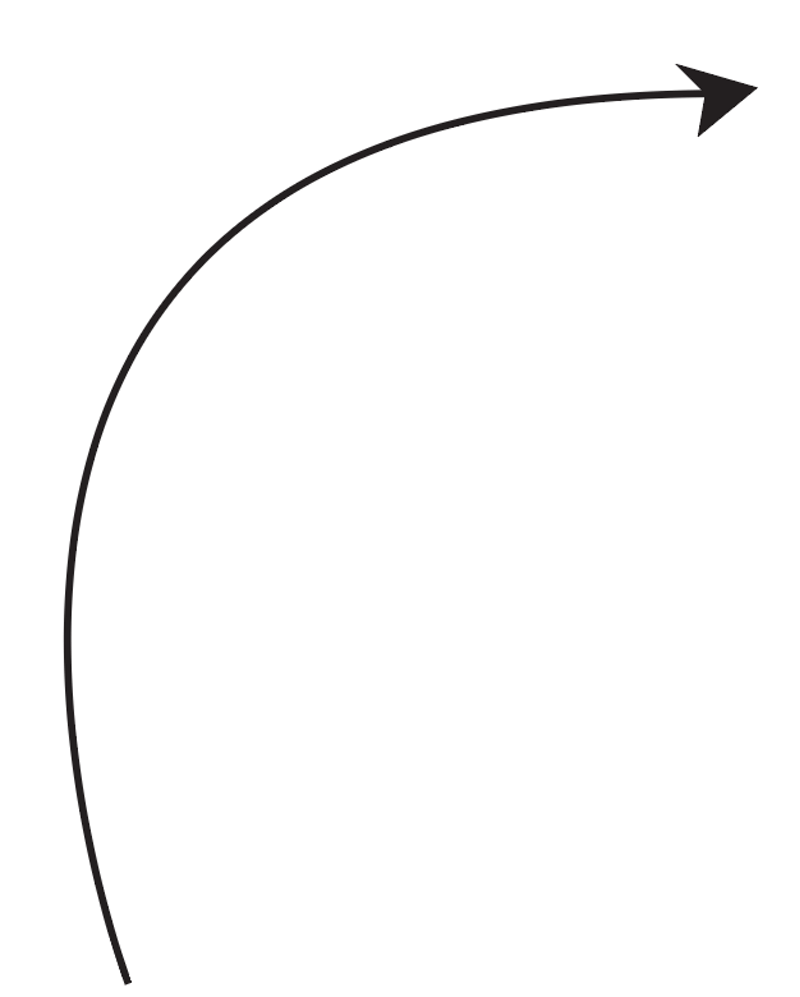
You can use the pen tool to make a curvy arrow. The idea is to draw a curve line, and then you can either add arrowheads from the Stroke panel or draw your own with the pen tool.
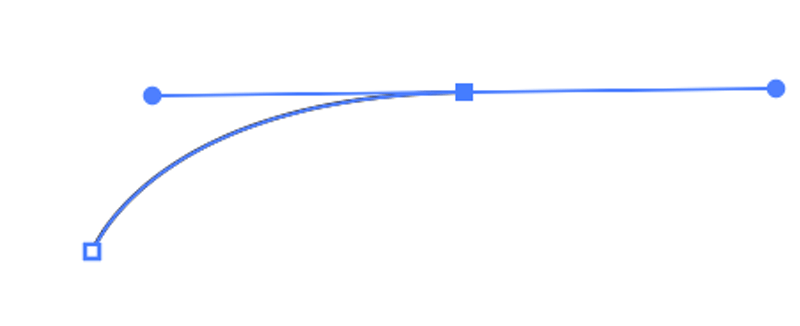
Step 1: Select the pen tool, click on the artboard to create the first anchor point, click again, hold the mouse and drag to create the second anchor point, and you’ll see a curve.

Step 2: Draw a triangle or an arrowhead shape using any method/style you like. I’ll keep using the pen tool.

Tip: You can also add an arrowhead from the Stroke panel. If you do that, you can skip step 3.
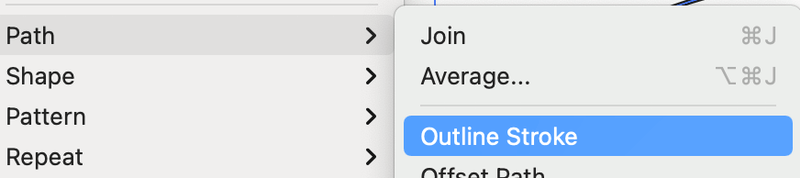
Step 3: Select both the curve line and the arrowhead, go to the overhead menu, and select Object > Path > Outline Stroke. This step turns the curve line (stroke) into a path (shape).
Step 4: Select both again, go to the Pathfinder panel and click Unify.
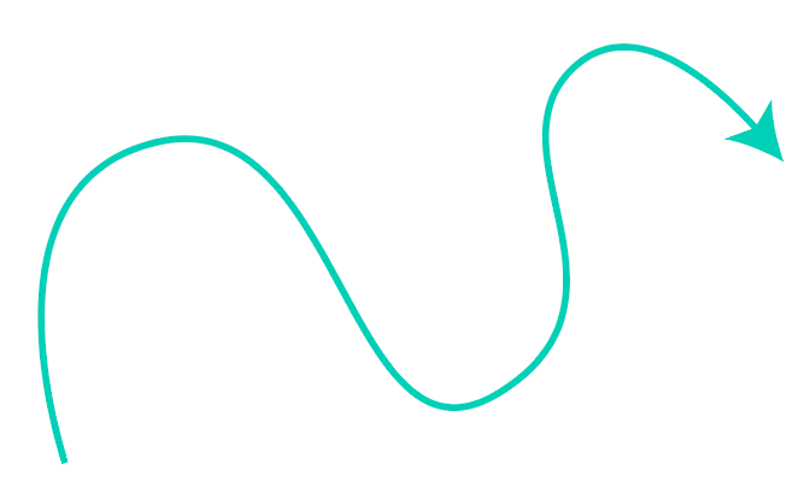
Tip: If you want to make a crazy wavy arrow, you can keep adding anchor points at Step 1.

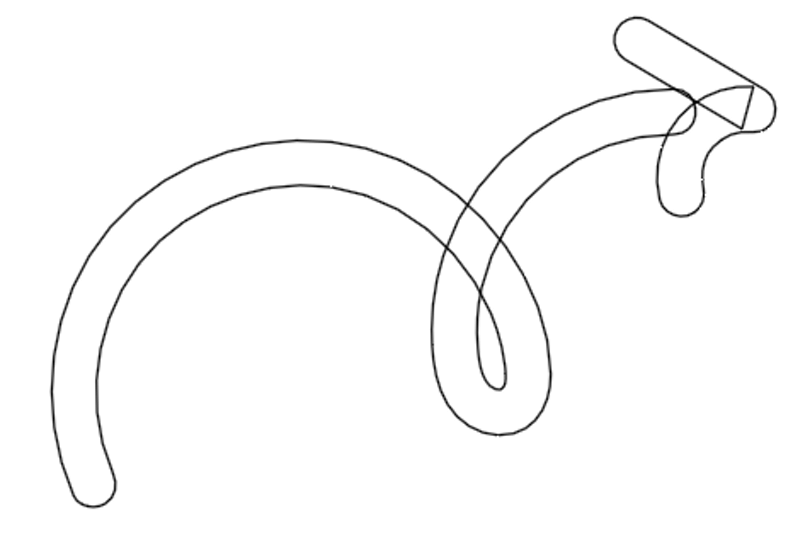
Method 4: Paintbrush/Pencil
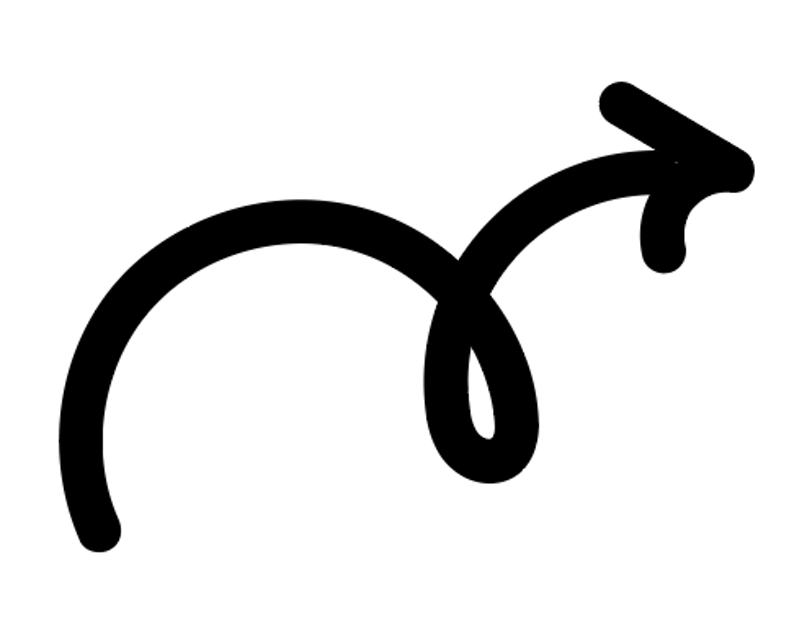
You can use either the Paintbrush Tool or Pencil Tool to draw freehand a freehand arrow.
Step 1: Select a drawing tool (Paintbrush or Pencil) and start drawing. For example, I used the Paintbrush Tool to draw this arrow.

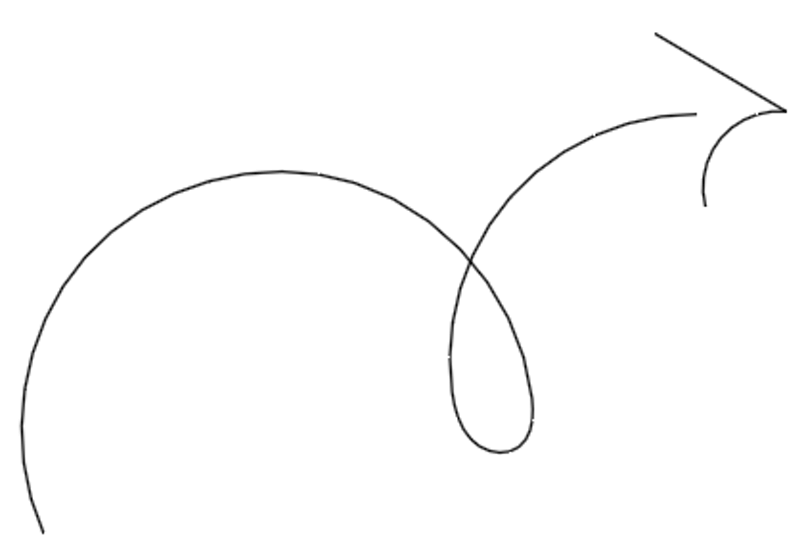
If you go to the outline view, you’ll see that the arrowhead is not connected to the line and they are both strokes instead of shapes.

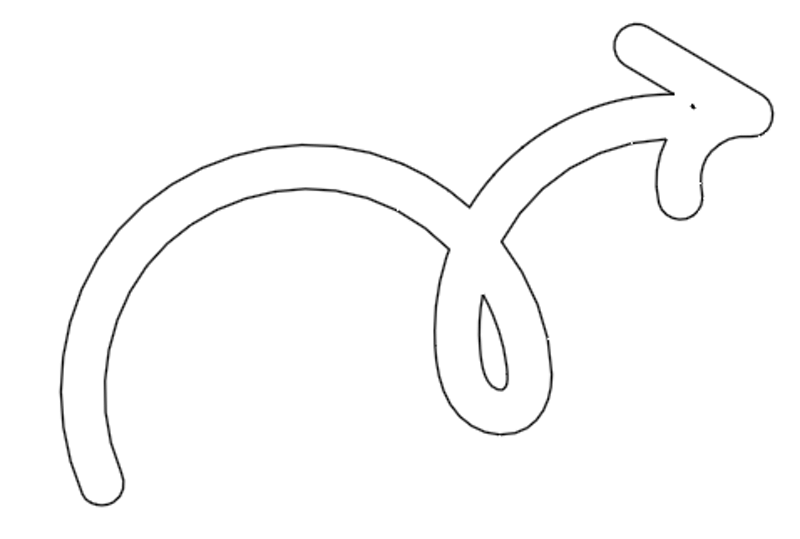
Step 2: Select both the curve line and the arrowhead, go to the overhead menu, and select Object > Path > Outline Stroke. Now the actual shape of the arrow shows.

Quite a mess here, but don’t worry, we’ll combine the shapes and the outline will look like this.

Step 3: Select both again, go to the Pathfinder panel and click Unify, same as step 4 from Method 2.
That’s It!
It’s super easy to draw an arrow in Adobe Illustrator. If you choose method 1, basically you only need to draw a line and change the stroke options.
For other methods, remember to convert to a stroke outline because it’ll be easier for you to edit it later. Also, don’t forget to combine the shapes so that you move, and scale the arrow proportionally. If you want, you can also combine the tools to make your favorite arrows.
Как нарисовать стрелку в Adobe Illustrator
 Cathy Daniels
Стрелки полезны для информативных дизайнов, таких как меню. Они помогают читателям быстрее найти информацию, и вам не нужно втискивать изображения прямо рядом с текстом. Иногда, когда пространство для фотографий ограничено, использование стрелки для указания на соответствующее блюдо является самым простым решением.
Когда я разрабатывал меню для пищевой промышленности, я создавал все типы стрелок для различных типов меню. Так что если вы хотите нарисовать изогнутую стрелку, нарисованную от руки, или просто стандартную стрелку, вы попали по адресу!
В этом уроке я покажу вам четыре различных способа нарисовать стрелку в Adobe Illustrator. Вы можете использовать инструмент линии, инструмент фигуры или инструмент рисования.
Приготовьте инструменты и приступим.
4 способа нарисовать стрелку в Adobe Illustrator
Для рисования различных типов стрелок в Adobe Illustrator можно использовать разные инструменты. Например, если вы хотите сделать стандартную прямую стрелку, просто нарисуйте линию и добавьте наконечник стрелки на панели «Обводка». Если вы хотите получить симпатичный стиль, нарисованный от руки, используйте инструмент «Кисть» или «Карандаш».
Примечание: все скриншоты из этого руководства сделаны из версии Adobe Illustrator CC 2021 Mac. Windows или другие версии могут выглядеть иначе.
Метод 1: Стиль штриха
Это самый быстрый метод создания стрелки в Illustrator. Технически, вам не нужно рисовать ее, все, что вам нужно сделать, это выбрать стиль стрелки из опций Stroke.
Шаг 1: Выберите Инструмент линейного сегмента (\) провести линию.

Шаг 2: Выберите линию, и вы увидите панель Stroke в правой части окна документа. Если нет, откройте панель Appearance в верхнем меню Окно > Внешний вид , и вы увидите Штрих. Нажмите на Инсульт .

Вы увидите больше опций, таких как вес, стиль углов, наконечники стрелок и т.д.
Шаг 3: Щелкните на опции arrowheads, чтобы выбрать нужные вам стрелки. Если вы выберете левое поле, стрелка будет добавлена к левому концу линии, и наоборот.

Например, я добавил стрелку 2 к левому концу.

Если стрелка слишком тонкая, вы можете увеличить вес штриха, чтобы сделать ее толще.


При необходимости можно добавить наконечник стрелки с правой стороны. Оба наконечника стрелки могут быть разными.


В опции «Наконечники стрелок» можно настроить масштаб, чтобы изменить размер наконечника стрелки. Например, я изменил масштаб на 60%, чтобы он выглядел более пропорциональным по отношению к линии.

Метод 2: Инструменты для придания формы
Вам предстоит соединить прямоугольник и треугольник, чтобы получилась стрелка.
Шаг 1: Используйте Инструмент «Прямоугольник» (M) чтобы нарисовать тонкий и длинный прямоугольник.

Шаг 2: Используйте Инструмент «Полигон Чтобы создать треугольник, выберите инструмент «Многоугольник» на панели инструментов, щелкните на холсте и введите 3 стороны в диалоговом окне.
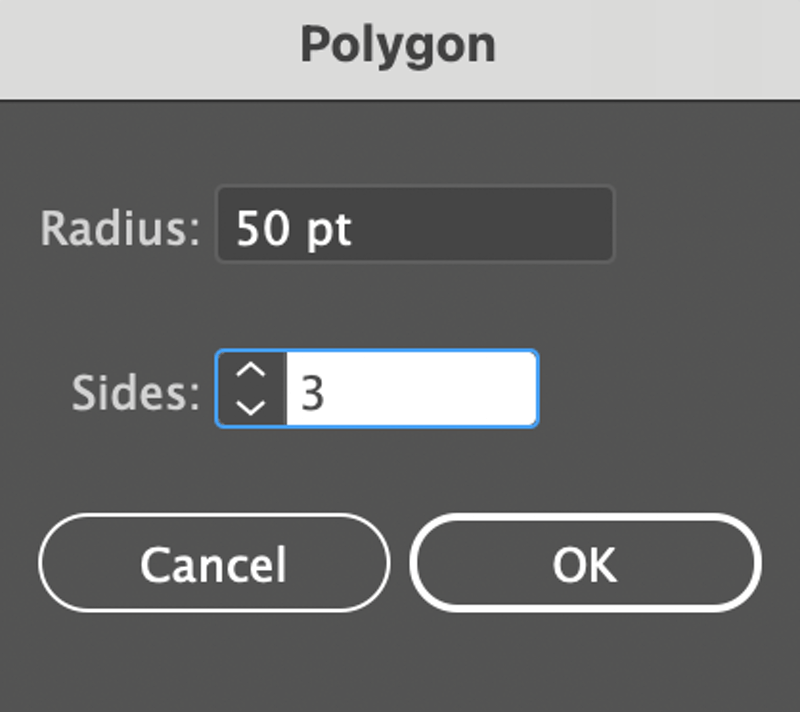

Примечание: Вы можете использовать любой метод для создания треугольника. Я использую инструмент «Полигон», потому что это проще.
Шаг 3: Поверните треугольник на 45 градусов, расположите его по обе стороны от прямоугольника и выровняйте обе фигуры по центру. Измените размер фигур соответствующим образом.


Кажется, что все готово, но нам все еще не хватает одного важного шага! Если вы нажмете кнопку Команда / Ctrl + Y чтобы увидеть контуры, вы увидите, что это две отдельные фигуры, поэтому нам нужно сделать из них одну.

Шаг 4 (важный): Выберите обе фигуры, перейдите к Pathfinder панель и нажмите Объединяйтесь .
Теперь, если вы снова перейдете к представлению Outline, вы увидите, что комбинированная форма.
Выйдите из представления «Контур», нажав кнопку Команда / Ctrl + Y снова, и вы можете добавить цвет в соответствии с вашим дизайном.

Метод 3: Инструмент «Перо
Вы можете использовать инструмент «Перо» для создания кривой стрелки. Идея заключается в том, чтобы нарисовать кривую линию, а затем вы можете добавить наконечники стрелок с панели «Обводка» или нарисовать свои собственные с помощью инструмента «Перо».
Шаг 1: Выберите инструмент «Перо», щелкните на артборде, чтобы создать первую опорную точку, щелкните еще раз, удерживая мышь, и перетащите, чтобы создать вторую опорную точку, и вы увидите кривую.
Шаг 2: Нарисуйте треугольник или наконечник стрелы, используя любой метод/стиль, который вам нравится. Я буду использовать инструмент «Перо».
Совет: Вы также можете добавить наконечник стрелки из панели Stroke. Если вы это сделаете, вы можете пропустить шаг 3.
Шаг 3: Выберите кривую линию и стрелку, перейдите в верхнее меню и выберите пункт Объект > Путь > Контурный штрих На этом этапе кривая линия (штрих) превращается в контур (фигуру).

Шаг 4: Выберите оба снова, перейдите к Pathfinder панель и нажмите Unify .
Совет: Если вы хотите сделать безумную волнистую стрелку, вы можете продолжать добавлять опорные точки на этапе 1.
Метод 4: Кисть/карандаш
Вы можете использовать инструмент «Кисть» или «Карандаш», чтобы нарисовать стрелку свободной формы.
Шаг 1: Выберите инструмент рисования (Кисть или Карандаш) и начните рисовать. Например, для рисования этой стрелки я использовал инструмент Кисть.
Если вы перейдете в режим просмотра контура, вы увидите, что наконечник стрелки не соединен с линией, и они оба являются штрихами, а не фигурами.
Шаг 2: Выберите кривую линию и стрелку, перейдите в верхнее меню и выберите пункт Объект > Путь > Контурный штрих Теперь показана реальная форма стрелки.
Здесь довольно беспорядочно, но не волнуйтесь, мы объединим фигуры, и контур будет выглядеть так.
Шаг 3: Выберите оба снова, перейдите к Pathfinder панель и нажмите Unify , аналогично шагу 4 из Метода 2.
Вот так!
Нарисовать стрелку в Adobe Illustrator очень просто. Если вы выберете способ 1, в основном вам нужно будет только нарисовать линию и изменить параметры обводки.
Для других методов не забудьте преобразовать в контур обводки, потому что так вам будет легче редактировать его позже. Также не забудьте совместить фигуры, чтобы перемещать и масштабировать стрелку пропорционально. Если хотите, вы также можете комбинировать инструменты, чтобы сделать свои любимые стрелки.
Как создать собственные стрелки в Illustrator CC?

Откройте палитру символов (Окно > Символы) В палитре символов продублируйте любую существующую стрелку, она будет автоматически нумероваться постепенно. Дважды щелкните новый символ. Внесите необходимые изменения в этот символ, чтобы создать новую настраиваемую стрелку (меняйте только головку, а не внешнюю рамку или линию)
Как добавить стрелки в Illustrator CC?
- Выберите гарнитуру, в которой используются символы глифов, выбрав Окно > Тип > Глифы.
- Выберите нижнюю часть панели и прокрутите, чтобы найти символы стрелки.
- Создайте текстовое поле там, где вы хотите, чтобы стрелки.
Как сделать наконечники стрел?
Наилучший метод придания формы наконечникам стрел (камень или стекло) — это использовать инструмент для отщепления под давлением, например, рог, чтобы приложить давление к одному краю отщепа, а затем контролируемым образом отламывать кусочки отщепа. Вы можете сделать инструмент для отслаивания под давлением, прикрепив медный гвоздь к твердому куску дерева.
Что такое линия со стрелками на обоих концах называется?
Представьте, что это продолжается бесконечно в обоих направлениях. Мы можем проиллюстрировать это маленькими стрелками на обоих концах. Мы можем назвать линию, используя две точки на ней. Это линия EF или линия (обратите внимание на стрелки).
Как сделать сердечко в Illustrator?
Метод 2: форма таблетки
Создайте длинный (вертикальный) прямоугольник. Потяните за углы, чтобы они были полностью изогнутыми / в форме таблеток (если используется более старая версия иллюстратора, используйте эффект go > стилизовать > закругленные углы). Поверните его на 45º, продублируйте и отразите по оси Y. Выровняйте, пока не получите желаемую форму сердца.
Как сделать стрелки толще в Illustrator?
Чтобы изменить толщину стрелки, отрегулируйте толщину обводки на вкладке веса на верхней панели инструментов или на панели обводки. В этом примере мы установим толщину стрелки на 12.
Что я могу использовать для стрелок?
Лучшими камнями для изготовления наконечников стрел являются кремень, сланец, обсидиан, яшма, кварцит и другие камни, которые являются несколько хрупкими и имеют мелкозернистую однородную текстуру, не имеющую трещин, трещин и трещин. Также можно использовать стекло и фарфор. Вы также можете нажать на камень и послушать подачу.
Какой камень используется для наконечников стрел?
Те, что сохранились, обычно сделаны из камня, в основном состоящего из кремня, обсидиана или кремня. Во многих раскопках также были найдены костяные, деревянные и металлические наконечники стрел.
Близость