Sprite Editor
Иногда текстура спрайта содержит только один элемент графики, но часто гораздо удобней объединить несколько изображений связанных друг с другом в одно изображение. Например, изображение может содержать составные части персонажа, как для машины колеса которой двигаются независимо от корпуса. Для этих целей Unity предоставляет Sprite Editor позволяя с легкостью извлекать элементы составного изображения.
NOTE:
Make sure the graphic you want to edit has its Texture Type set to Sprite (2D and UI). For information on importing and setting up sprites, see Sprites.
Sprite textures with multiple elements need the Sprite Mode to be set to Multiple in the Inpsector. (See Fig 2: Texture Import Inspector… below.)
Открытие редактора спрайтов
Открытие редактора спрайтов
Select the 2D image you want to edit from the Project View (Fig 1: Project View).
Note that you can’t edit a sprite which is in the Scene View.
Click on the Sprite Editor button in the Texture Import Inspector (Fig 2: Texture Import Inspector) and the Sprite Editor displays (Fig 3: Sprite Editor).
Note: You can only see the Sprite Editor button if the Texture Type on the image you have selected is set to Sprite (2D and UI).
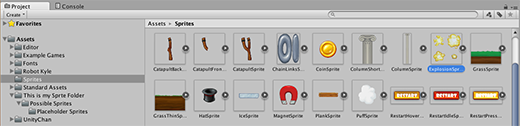 Fig 1: Project View Fig 2: Texture Import Inspector with Sprite Editor button
Note: Set the Sprite Mode to Multiple in the Texture Import Inspector if your image has several elements.
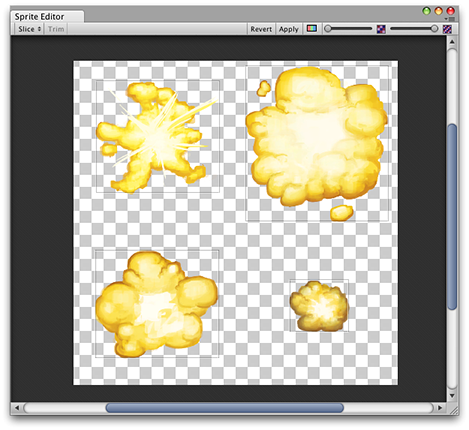 Fig 3: Sprite Editor
Помимо составного изображения, вы увидите различные элементы управления в заголовке окна редактора. Слайдер в правом верхнем углу управляет приближением, в то время как кнопка с цветными полосками слева от него переключает режим отображения альфа-канала и обычный вид изображения. Самый важный элемент управления это меню Slice в левом верхнем углу, который предоставляет опции для автоматической нарезки элементов изображения. Кнопки Apply и Revert позволяют вам сохранить или отменить сделанные изменения.
Использование редактора
The most direct way to use the editor is to identify the elements manually. If you click on the image, you will see a rectangular selection area appear with handles in the corners. You can drag the handles or the edges of the rectangle to resize it around a specific element. Having isolated an element, you can add another by dragging a new rectangle in a separate part of the image. You’ll notice that when you have a rectangle selected, a panel appears in the bottom right of the window:
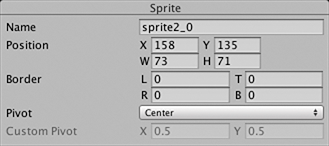
The controls in the panel let you choose a name for the sprite graphic and set the position and size of the rectangle by its coordinates. A border width, for left, top, right and bottom can be specified in pixels. There are also settings for the sprite’s pivot, which Unity uses as the coordinate origin and main “anchor point” of the graphic. You can choose from a number of default rectangle-relative positions (eg, Center, Top Right, etc) or use custom coordinates.
The Trim button next to the Slice menu item will resize the rectangle so that it fits tightly around the edge of the graphic based on transparency.
Note: Borders are only supported for the UI system, not for the 2D SpriteRenderer.
Автоматическая нарезка (slicing)
Isolating the sprite rectangles manually works well but in many cases, Unity can save you work by detecting the graphic elements and extracting them for you automatically. If you click on the Slice menu in the control bar, you will see this panel:

With the slicing type set to Automatic, the editor will attempt to guess the boundaries of sprite elements by transparency. You can set a default pivot for each identified sprite. The Method menu lets you choose how to deal with existing selections in the window. The Delete existing option will simply replace whatever is already selected, Smart will attempt to create new rectangles while retaining or adjusting existing ones, and Safe will add new rectangles without changing anything already in place.
Grid by Cell Size or Grid by Cell Count options are also available for the slicing type. This is very useful when the sprites have already been laid out in a regular pattern during creation:
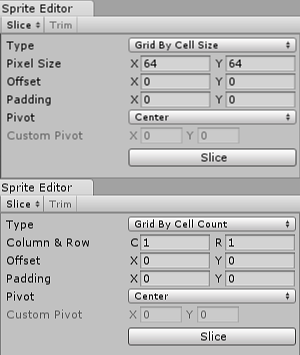
The Pixel Size values determine the height and width of the tiles in pixels. If you chose grid by cell count, Column & Row determines the number of columns and rows used for slicing. You can also use the Offset values to shift the grid position from the top-left of the image and the Padding values to inset the sprite rectangles slightly from the grid. The Pivot can be set with one of nine preset locations or a Custom Pivot location can be set.
Note that after any of the automatic slicing methods has been used, the generated rectangles can still be edited manually. You can let Unity handle the rough definition of the sprite boundaries and pivots and then do any necessary fine tuning yourself.
Polygon Resizing
Open the Sprite Editor for a polygon and you have the option to change its shape, size, and pivot position.
Shape
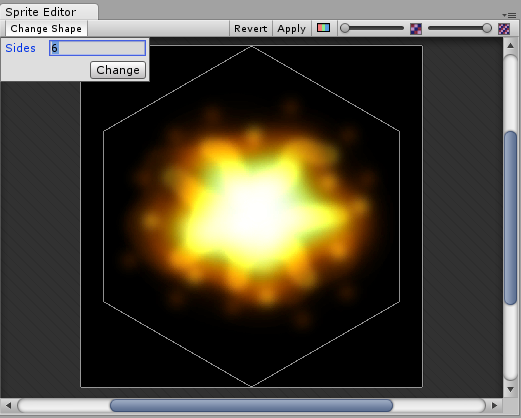 Sprite Editor: Polygon resizing — shape
Enter the number of sides you want the polygon to have in the Sides field and click Change.
Size and Pivot
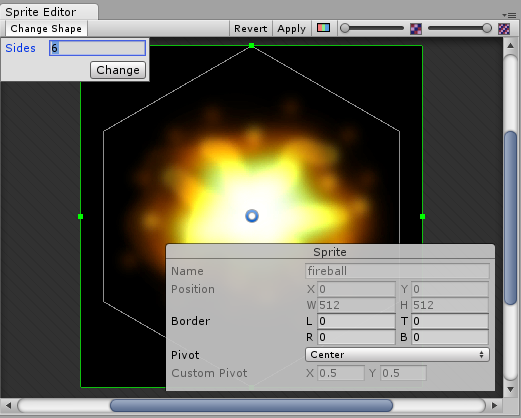 Sprite Editor: Polygon resizing — size and pivot point — click on the polygon to display these options
SIZE: To change the polygon’s size, click on the sprite to display green border lines and the Sprite information box. Click and drag on the green lines to create the border you want, and the values in the Border fields change. (Note that you cannot edit the Border fields directly.)
PIVOT: To change the polygon’s pivot point (that is the axis point the polygon moves around), click on the image to display the Sprite information box. Click on the Pivot drop down menu and select an option. This displays a blue pivot circle on the polygon; its location depends on the pivot option to you have selected. If you want to change it further, select Custom Pivot and click and drag on the blue pivot circle to position it. (Note that you cannot edit the Pivot fields directly.)
Working with Sprite Sheets in Unity
Sprites are a vital part of working on a game in Unity. Part of that is how do you go about slicing a sprite that contains multiple images within it. I’m going to spend some time going through a basic example of how to split a sprite and hook it up to an animation 2D platform game! Let’s get started!
To start you are going to need to acquire a sprite sheet from somewhere. Here is a link to where I acquired the platform character for this project. 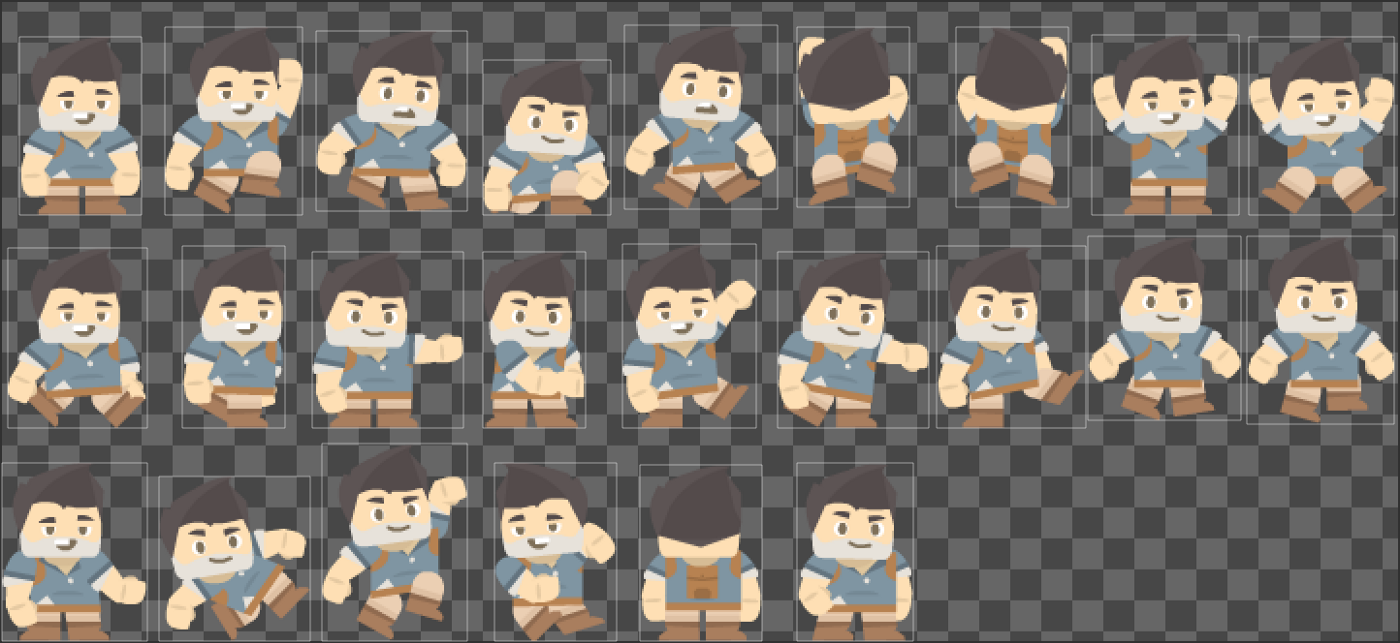
Once imported into Unity, you are going to need to splice the sprite. You can do this in a number of ways, but I suggest starting by seeing if Unity can automatically figure out each of the images. To do this, use automatic mode as pictured below. 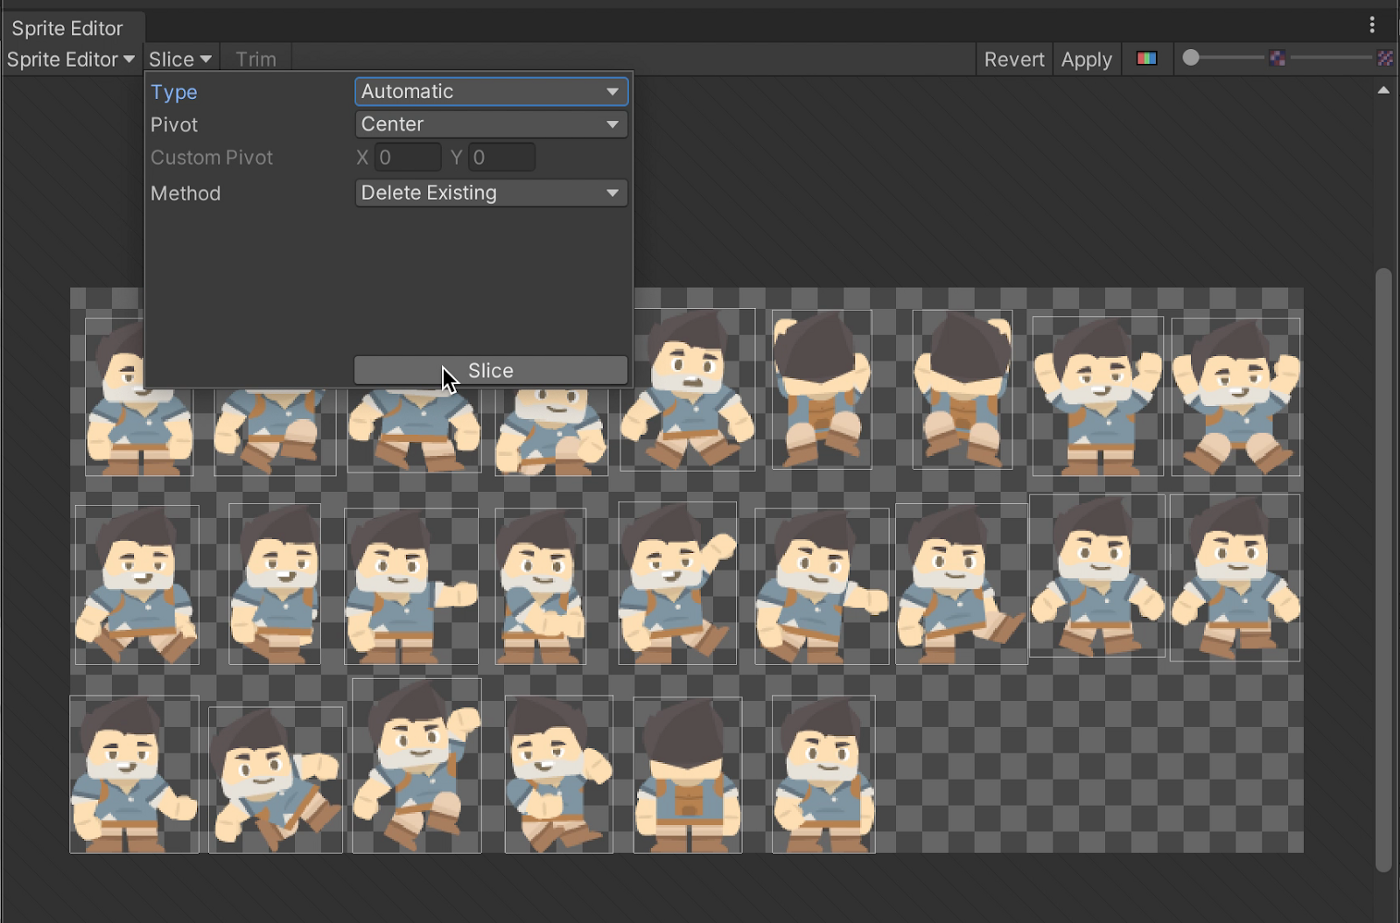
Once finished, you will see a light grey box around each of the images in the sheet. Hit Apply and let Unity work the magic behind the scenes to cut each image into a usable asset. You will know it is done when you can expand the sheet and see each image appended. Something like this: 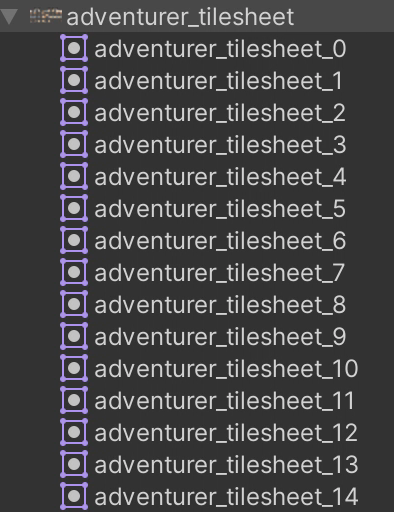
At this point, you can start making your animations for your character. In my basic example, this just involved swapping the sprites on each possible state to be the correct image.
Pro tip: Expose lots of variables within your Animator so that it’s easy to tell your player how to move! 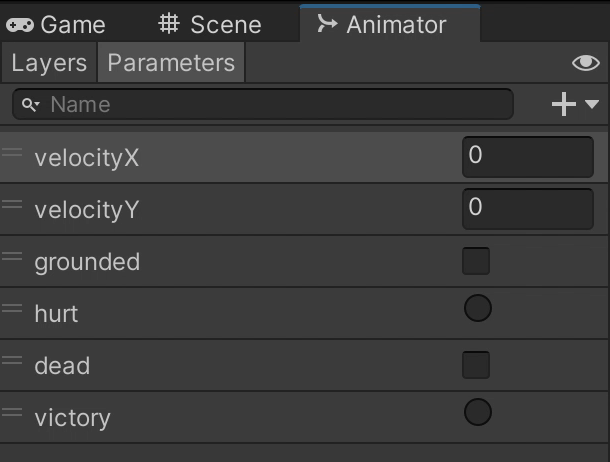
And then you’re done! You now have an easy way to control your player in code so that you can make a cool game!
Как правильно разрезать изображения на спрайты в Unity
Приветствую начинающих разработчиков! Для разработки 2д игр используют изображения, называемые спрайтами. И как правило, для лучшей оптимизации игры, данные спрайты обычно размещают на одном большом изображении, которые в дальнейшем с помощью редактора Unity вырезаются из этого большого изображения, на множество мелких спрайтов.
В данной статье мы научимся правильно разрезать изображение на спрайты, а так же предварительно настраивать данное изображение перед нарезкой.
Обычные спрайты
Для начала в окне Project выберите то изображение, которое хотите разрезать на спрайты. Я скачал с интернета вот такой набор UI интерфейса. Вот его мы и будет разрезать на мелкие спрайты под каждый UI элемент.

Для начала кликнем на наше изображение в окне Project, и далее в окне Inspector настраиваем наше изображение следующим образом(1):
- В поле Sprite Mode указываем значение Multiple, которое говорит о том, что данная картинка содержит не один, а множество спрайтов.
- В поле Pixel Per Unit можете оставить значение 100. Чем меньше это значение, тем больше по размерам будут Ваши спрайты — и наоборот.
- Если у вас пиксельная графика, то в поле Filter Mode указываем значение Point (no filter), чтобы разрезанные спрайты не создавали эффект размытости.
- В поле Compression желательно поставить None.
- Далее Жмём кнопку Apply(2), чтобы сохранить все настройки.
Отлично, настройка произведена, и теперь нажав на кнопку Sprite Editor(3), мы откроем новое окно Sprite Editor, в котором и будет происходить разрезание спрайтов.
Особенность данных спрайтов в том, что все они имеют разные размеры, и расположены на изображении хаотично, поэтому разрезание таких спрайтов происходит легче всего. В новом открывшем окне Sprite Editor необходимо проделать всего 4 простых действия:
- (1) Жмём кнопку Slice.
- (2) В поле Type выбираем Automatic, чтобы юнити автоматически разрезал наше изображение на множество спрайтов.
- (3) Далее жмём кнопку Slice, и после чего все ваши спрайты будут обёрнуты в белый контур, который обозначает границы каждого спрайта. Контуры каждого спрайта можно в ручном режиме отредактировать, если что-то где-то выделено не правильно.
- (4 ) Далее жмём кнопку Apply, и закрываем данное окно.
В итоге в окне Project внутри изображения с UI элементами можно наблюдать множество нарезанных спрайтов.
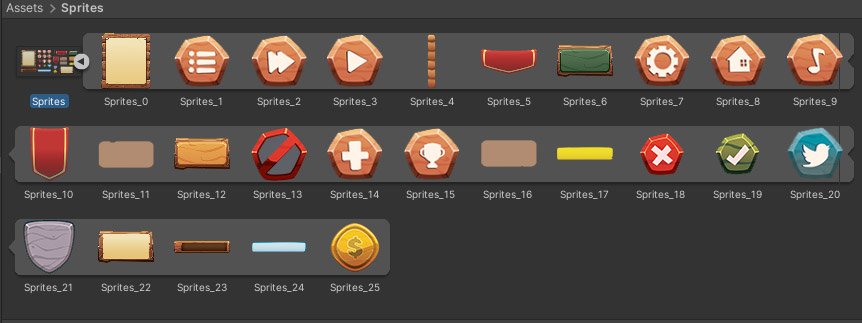
Всё готово, и теперь можно работать с каждым отдельным спрайтом.
Спрайты для анимаций
Перейдём теперь к более сложному разрезанию, ведь бывают случаи, когда нам необходимо разрезать спрайты для анимаций какого-либо объекта, например персонажа.

Если же в предыдущем случае все спрайты имели разные размеры, и предназначались для разных объектов, то в данном случае все спрайты должны иметь одинаковые размеры, и предназначаться к одному объекту. Поэтому автоматическая нарезка здесь точно не подойдёт.
Для таких видов изображений, в окне Sprite Editor в поле Type необходимо выбрать Grid By Cell Size, чтобы разрезание происходило по сетке с теми размерами ячеек, которые мы укажем. В поле Pixel Size указываем размеры ячеек данной сетки в пикселях. Указывайте то значение, какого размера является каждый ваш спрайт. У меня это 296×296.
После нажатия на кнопку Slice, мы можем увидеть сетку из шести ячеек, обведённые тонким красным контуром, чтобы мы могли видеть, правильно ли будет происходить нарезка спрайтов. Обратите внимание, что шестая ячейка пустая, поэтому здесь нарезаться ничего не будет.

Готово, спрайты в количестве пяти штук нарезаны, и теперь их можно спокойно использовать для своей анимации.
Спрайты для тайлмапа
Последнее что хотелось бы затронуть, это разрезание изображения на спрайты для тайлмапа. Разрезка спрайтов в 90% случаях происходит по сетке, то-есть так же, как и в предыдущем примере. Размеры спрайтов здесь могут быть разными, НО, все итоговые нарезанные тайлы — одинаковыми, так как спрайт может состоять из нескольких одинаковых по размеру тайлов.
Но здесь есть одна важная особенность. Перед разрезанием изображения, необходимо в окне Inspector в поле Pixels Per Unit указать размер ваших тайлов. Например, если все Ваши тайлы имеют размеры 64×64 пикселей, то в это поле необходимо вписать 64.
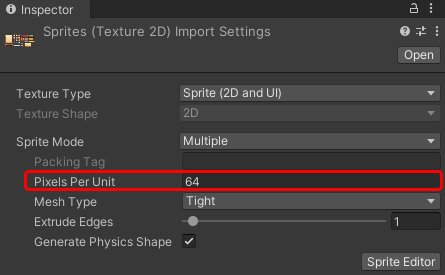
Ну а далее можно спокойно переходить к разрезанию спрайтов на тайлы по сетке, нажав кнопку Sprite Editor.
На этом всё. Из выше сказанного можно все наши спрайты условно разделить на 3 вида:
- Обычные спрайты, где все спрайты расположены хаотично, и все они имеют разные размеры. Данные спрацты ВСЕГДА разрезаются в автоматическом режиме.
- Спрайты для анимации. В 90% случаях спрайты должны иметь одинаковый размер, и разрезаются по сетке.
- Спрайты для тайлмапа. Спрайты могут быть разных размеров, но все разрезанные в итоге тайлы — одинаковыми! Разрезаются тайлы в 99% случаев по сетке.
Конечно же, данная классификация условная, как и все те настройки, которые мы производили в данной статье. Безусловно, настраивать спрайты и разрезать их не обязательно так, как описаны в данной статье. Я лишь рассказал о частоиспользуемых и удобных методах нарезок и настроек.
Если данная статья была полезной, буду рад лайкам. А так же оставляйте свои вопросы в комментариях.
Cutting sprites in Unity programmatically
This tutorial gives one possible solution to a cut sprite effect in Unity with just one script.
There are many approaches to do this, I recommend using the following if you want a reusable script that can create independent objects, allowing you to add any effect to the generated pieces. However, keep in mind that this solution does not cover diagonal cuts, sprites are only split in straight lines.
Example scenario
Given a character that has an animation, the script should cut his sprite in half in a way that each part can be pushed to a different direction.
We must also consider pivots since each sprite may have different sizes and a different pivot position for each one. This post covers how to set up an animation with different sprite sizes.
I’m using a sprite sheet from a character made by Balmer.
This is the end result of this tutorial, but keep in mind that you can edit the script to cut the sprite in more parts and add more effects to it.
Sprite Cutter script
The first step is to declare the MonoBehaviour class that will contain the method to cut the sprite.
The CutSpriteFromEditor method has a ContextMenu attribute that allows it to be called from the Unity inspector. You can do it even in the edit mode.
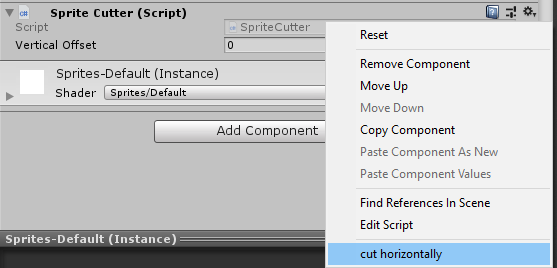
Notice that the method returns an array with references to the new sprites. This is necessary since new behaviour will be added to those parts (like force to different directions) and doing that is not a responsibility for the SpriteCutter component.
Inside the CutSpriteHorizontally method we will declare the first variables.
Then we can use the texture from the original sprite to create two new sprites, each with half of the original. The problem behind that is the texture.
The spriteToCut.texture holds a reference to the entire sprite sheet. Unity knows how to render the right piece of the sprite sheet by referring to the rect property in the sprite. This means that we need to use the rect x and y position as our guide while cutting the sprite.
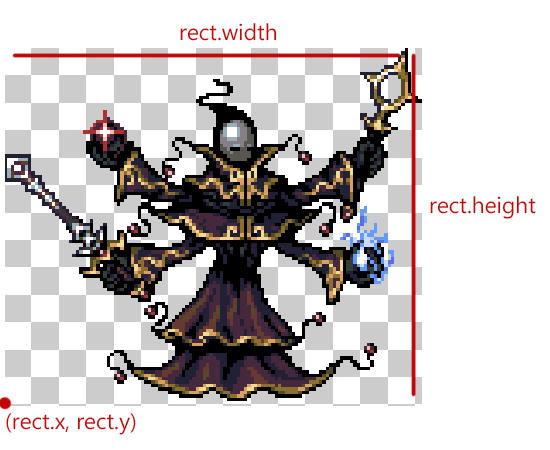
The image shows where each value of the rect used is in the sprite sheet for this specific sprite.
The pivot is set to Vector2.zero and will be placed in the bottom left. This is important since it will be used for later to place the new sprites in the same position as the last one.
We’re keeping the same pixel per unit value as the original sprite to avoid problems with sprites of different sizes.
Extrude is zero since it’s not necessary for this case. Sprite.Create docs.
The SpriteMeshType.FullRect is important since it’s faster, you can read more about it here.
Finally we can create the lower body sprite:
Those method calls could have been structured in a loop, but since it’s only two sprites it made sense to me to leave it like this for easier readability. Anyway, if you’re aiming for more cuts I highly recommend writing a loop.
The next step is to create new game objects that will hold the SpriteRenderer component.
If you run the method in the Unity inspector two new game objects should be placed on the scene. However, their position is messy. Since the pivot for those new sprites are at (0, 0) we need to subtract it by the pivot from the original sprite to get the right relative position.
The lower body is the easiest since it doesn’t need to have its height fixed. For the upper body we need to remove lower body’s height to make sure it will appear above it.
Then you can just return those objects as a GameObject array.
If you try the method once again in the inspector you’ll notice that the two new sprites are together and appear to be one, this is wanted since the change between them must be seamless.
Using the script
This next script allows the functionality to be used in game. It calls the CutSpriteHorizontally when the Space bar is pressed and deletes the original sprite right after.
Example project
You can check the full source code of this tutorial in this github repo.
For the demo in my github repo I’ve also added an alpha remover to make the parts fade and a force applier to make it float.
In this demo there’s also a verticalOffset variable that allows the cut to be made with an offset, this is necessary if you don’t want to cut exactly in the middle.