Settings
Example: /sub_folder1/sub_folder2 . Now sub_folder2 will be root of the server.
Default value is “ / ”.(The Workspace Root).
- Default value is «Null» [String, not null ]. (It will open your system’s default browser.)
- Available Options :
- chrome
- chrome:PrivateMode
- firefox
- firefox:PrivateMode
- microsoft-edge
Not enough? need more? open an/a issue/pull request on github. For now, use liveServer.settings.AdvanceCustomBrowserCmdLine settings (see below).
liveServer.settings.AdvanceCustomBrowserCmdLine : To set your any favorite browser (Eg: Chrome Canary, Firefox Nightly) using advance Command Line. (You can specify full path of your favorite custom browser).
- This setting will override CustomBrowser and ChromeDebuggingAttachment settings.
- Default Value is null
- Examples:
- chrome –incognito –headless –remote-debugging-port=9222
- C:\Program Files\Firefox Developer Edition\firefox.exe –private-window
Note: Either use AdvanceCustomBrowserCmdLine or CustomBrowser . If you use both, AdvanceCustomBrowserCmdLine has higher priority.
NOTE: You must have to install Debugger for Chrome.
If the value is true , Start Live Server and select ‘Attach to Chrome’ from Debug Window to start debugging. Debugger for Chrome Extension will inject debugging feature into running instance of browser window.
Default value is false .
liveServer.settings.NoBrowser : If it is true live server will start without browser opened.
- Default Value is false
Now, by default Live Server will not track changes of your .scss & .sass files.
liveServer.settings.donotShowInfoMsg : To turn off information pop-up messages like “Server starts with port xxxx” or like that. To turn off it, you can set the value as true or you can click to “Don’t show again” when a information message pop-up.
- Default value is : false
- Default is 127.0.0.1 .
[This Settings is dropped and this feature can be replacemented with Live Server Web Extension]
- Default value if false
- Properties : «`js /* In easy word, it means you’re shifting your real url (actual PHP url) to another url (which LiveSever will start). */
- Default is false
liveServer.settings.fullReload: : By Default Live Server inject CSS changes without full reloading of browser. You can change this behviour by making this setting as true .
- Default: false
liveServer.settings.wait: : Delay before live reloading. Value in milliseconds.
- Default: 100
liveServer.settings.mount: : Mount a directory to a route.
liveServer.settings.useLocalIp: : Use local IP as host.
- Default: false
liveServer.settings.file: : Path to the entry point file. Useful for SPA
- Default: «»
liveServer.settings.multiRootWorkspaceName: : This the entry point of server when you’re in multiroot workspace.
You can change it using Command Palette ctrl+shift+p & type Live Server: Change Live Server workspace
Tips: You don’t need to set this setting, Live Server is smart enough, it’ll eigher ask what you want or automatically set the correct workspace if open the server by right clicking any HTML file.
Установка и настройка LiveServer в VS Code
Visual Studio Code — один из самых популярных редакторов кода. Он бесплатный, у него чистый интерфейс и бесчисленные расширения, которые делают программирование проще и веселее.
Фронтенд разработчики часто задаются вопросом: как сделать ,чтобы браузер обновлялся автоматически во время программирования, без нажатия кнопки перезагрузки.
Это возможно, если настроить полезное расширение в VS Code под названием live-server. В этом посте я подробно расскажу о том, как оно работает и как установить и настроить live-сервер в редакторе VS Code.
Принцип работы плагина:
Как только вы внесете изменения в свой код или напишете что-то новое, после сохранения браузер автоматически обновится.
Установите LiveServer в магазине расширений.
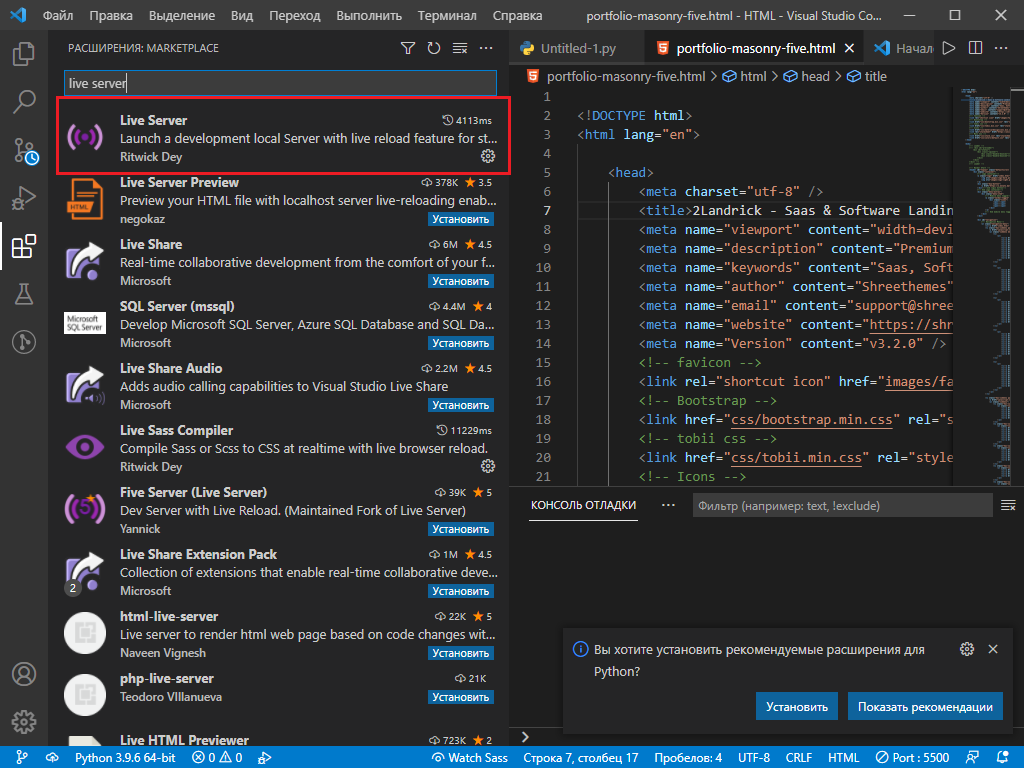
Live Server — расширение в VS code
После установки VS может перезагрузиться, это нормально.
Теперь, переходите в рабочий проект. В области редактора кода щелкните правой кнопкой мыши. Откроется контекстное меню.
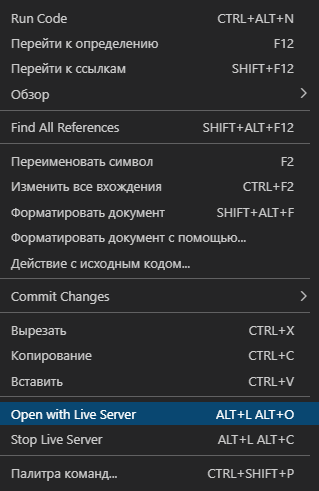 live server запуск
Нажмите «Open with Live Server» или воспользуйтесь комбинациями клавиш ALT+L или ALT+O.
После этого откроется браузер, в котором страница будет перезагружаться как только вы сохраните файл.
Расширение Live Server для VS Code
Плагин Live Server для VS Code позволяет перезагружать страницу после внесения измений в js, css, html код. Для установки надо перейти в раздел плагинов, набрать в поисковой строке «Live Server» и нажать кнопку «Установить».
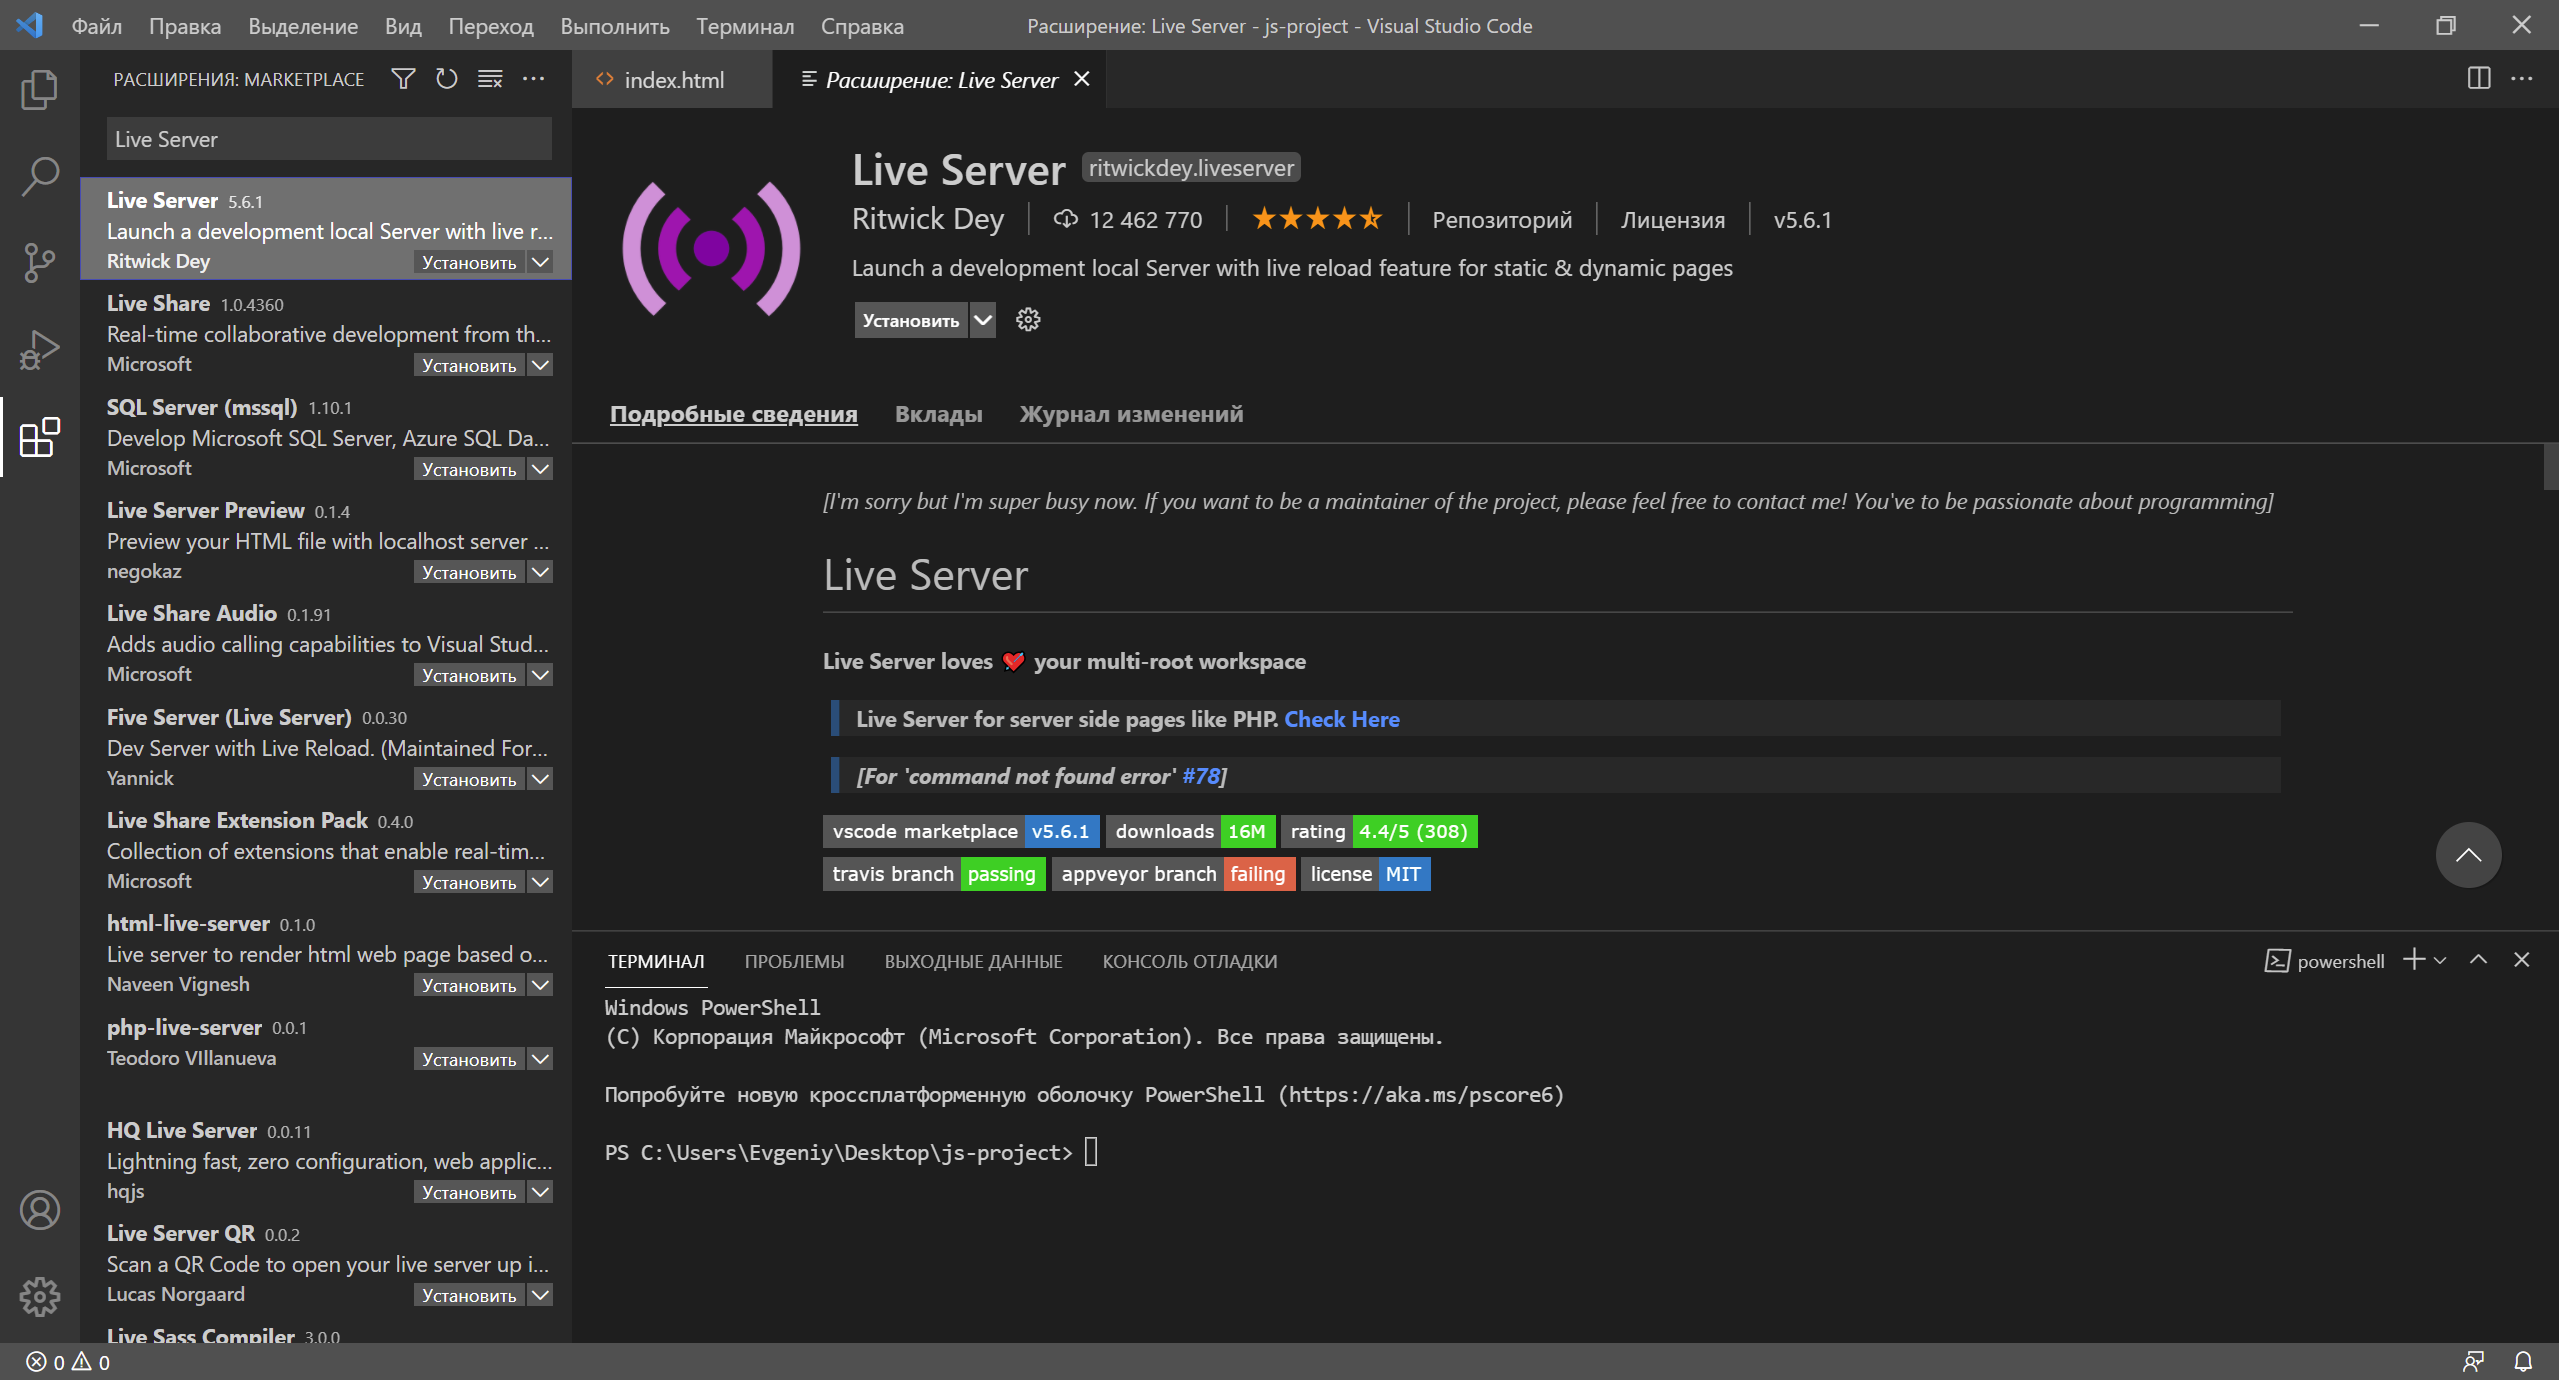
Теперь в правом нижнем углу есть кнопка «Go Live», которая запускает сервер. Давайте создадим директорию project , а внутри нее еще две директории — src и dist . В директории src будут исходники, а в директории dist — готовая сборка. И откроем проект в VS Code — нужно кликнуть по директории project правой кнопкой мыши и выбрать в контекстном меню «Открыть с помощью VS Code».
Live Server Extension of Visual Studio Code

The learning journey of Web Development includes plenty of stages such as tools, terms, programming languages, deployment issues, and so on. Where I want to focus now is a must-install extension of Visual Studio Code which we come across at the very beginning of the process.
Live server is almost one of the most actively used Vscode extensions. You can view the project you have done on Vscode instantly in the browser using only the live server extension and thus you can make changes instantly.
I naturally installed this extension at the very beginning of the learning process and there was no extra action that I had to do during the installation process. But I couldn’t get it to work. I tried other ways to view the project instant in the browser or had to do things manually, but this was a very time-consuming and inefficient way.
Therefore, I watched several videos from channels such as freeCodeCamp, researched similar problems from StackOverflow, and tried possible solutions in my own extension. But none of them helped and the problem I had was still there. I guess this problem continued for a week after that, I made a small change in the extension’s settings file that I caught on a question from StackOverflow. As a result of this change, the annoying problem has disappeared.
I thought sharing this might be helpful for those who haven’t found a solution to similar extension issues. Especially for those who are at the beginning of this process, such problems can sometimes seem huge to the eye. But with research, patience, and trial-error, you can overcome it.
The change I made in the live server settings I mentioned above was the solution. The route is Extensions → Live Server → Manage → Live Server Settings: Https then change value of enable as a false.
I hope it’ll be a solution for you too.
You can also find the question I opened on StackOverflow here.