Что такое плагин OBS VirtualCam, установка и инструкция
Применение OBS VirtualCam считается отличным методом проявления творческого потенциала в применении веб-камеры с целью совершения видеовстреч разностороннего формата. Если вы до сегодня еще ни разу не слышали про OBS VirtualCam, данное руководство поможет вам справиться со всеми трудностями последующей установки плагина.
Что такое плагин OBS VirtualCam
OBS VirtualCam является дополнительной функцией, которая внедряется непосредственно внутрь вашего плагина OBS. Программа устанавливается с целью создания виртуальной камеры, которая идеально подходит для вашей работы на любом сайте. Таким образом отпадает потребность в скачивании дополнительного софта наподобие Logitech capture или сплиттеров, которые будут нагружать устройство.
Софт OBS VirtualCam отличается от встроенной виртуальной WEB-камеры стандартного образца несколькими дополнительными возможностями:
- Способность вывода определенной сцены или источника как виртуальной WEB камеры;
- Способность вывода четырех виртуальных WEB камер.
Пользователь сможет выводить основную WEB камеру из OBS Studio 27.2.4 в любое нужно для вас приложение по типу Skype, Discord или Zoom. С этой возможностью раскрывается возможность параллельного применения множества дополнительных функций. Стоит отметить, что VirtualCam способен бесперебойно совмещать свою деятельность с неограниченным количеством сайтов.
Установка плагина OBS VirtualCam
Полную установку плагина OBS VirtualCam трудно назвать затруднительной процедурой. Давайте более детально рассмотрим порядок ваших действий:

- Изначально потребуется установить последнюю версию программы OBS Studio.
- Далее устанавливаем специальный модуль для использования WEB камеры, поскольку функция виртуальной камеры до сих пор не встроена программное обеспечения.
- Производим настройку источников и различных сцены, которые вы планируете использовать для дальнейших звонков в Zoom или для подобных собраний на любой другой платформе.
- После завершения настроек остается только активировать виртуальную камеру. Для этого перейдите в раздел «Управление» в правом нижнем углу окна OBS и нажмите «Запустить виртуальную камеру».
После выполнения данного руководства уже можно приступить к непосредственной работе. Программа позволяет вашему компьютеру использовать OBS в качестве видео источника в другом приложении. Просто выберите OBS в качестве веб-камеры в настройках видео программного обеспечения.
Инструкция по применению OBS VirtualCam
Поскольку все больше людей предпочитают работать у себя дома, можно наблюдать как стремительно увеличивается количество вопросов относительно инструкции по применению OBS Studio в качестве виртуальной камеры.
Чтобы настроить параметры виртуальной камеры, щелкните значок шестеренки на панели управления. Далее следуем строго в соответствии с инструкцией:
• Установите плагин OBS VirtualCam.
• Перезагрузите ваш компьютер.
• Настройте OBS с применением дополнительного цветного ключа.
• В OBS Studio выберите вкладку «Инструменты», расположенную в верхнем меню, затем перейдите во вкладку «VirtualCam».
• Нажмите кнопку «Пуск». При желании можно установить флажок «Автозапуск», если вы желаете, чтобы VirtualCam запускался всякий раз, когда вы работаете с OBS Studio.
Настройка завершена. Теперь вы можете наблюдать «OBS-Camera» в качестве опции веб-камеры.
В настоящие время в жизни людей складывается тенденция учащенного использования удаленной коммуникации через сторонние методы связи. Улучшите воспроизведение онлайн медиаконтента, транслируемого через OBS Studio. Интегрируйте плагин и наслаждайтесь результатом.
Virtual Camera Guide
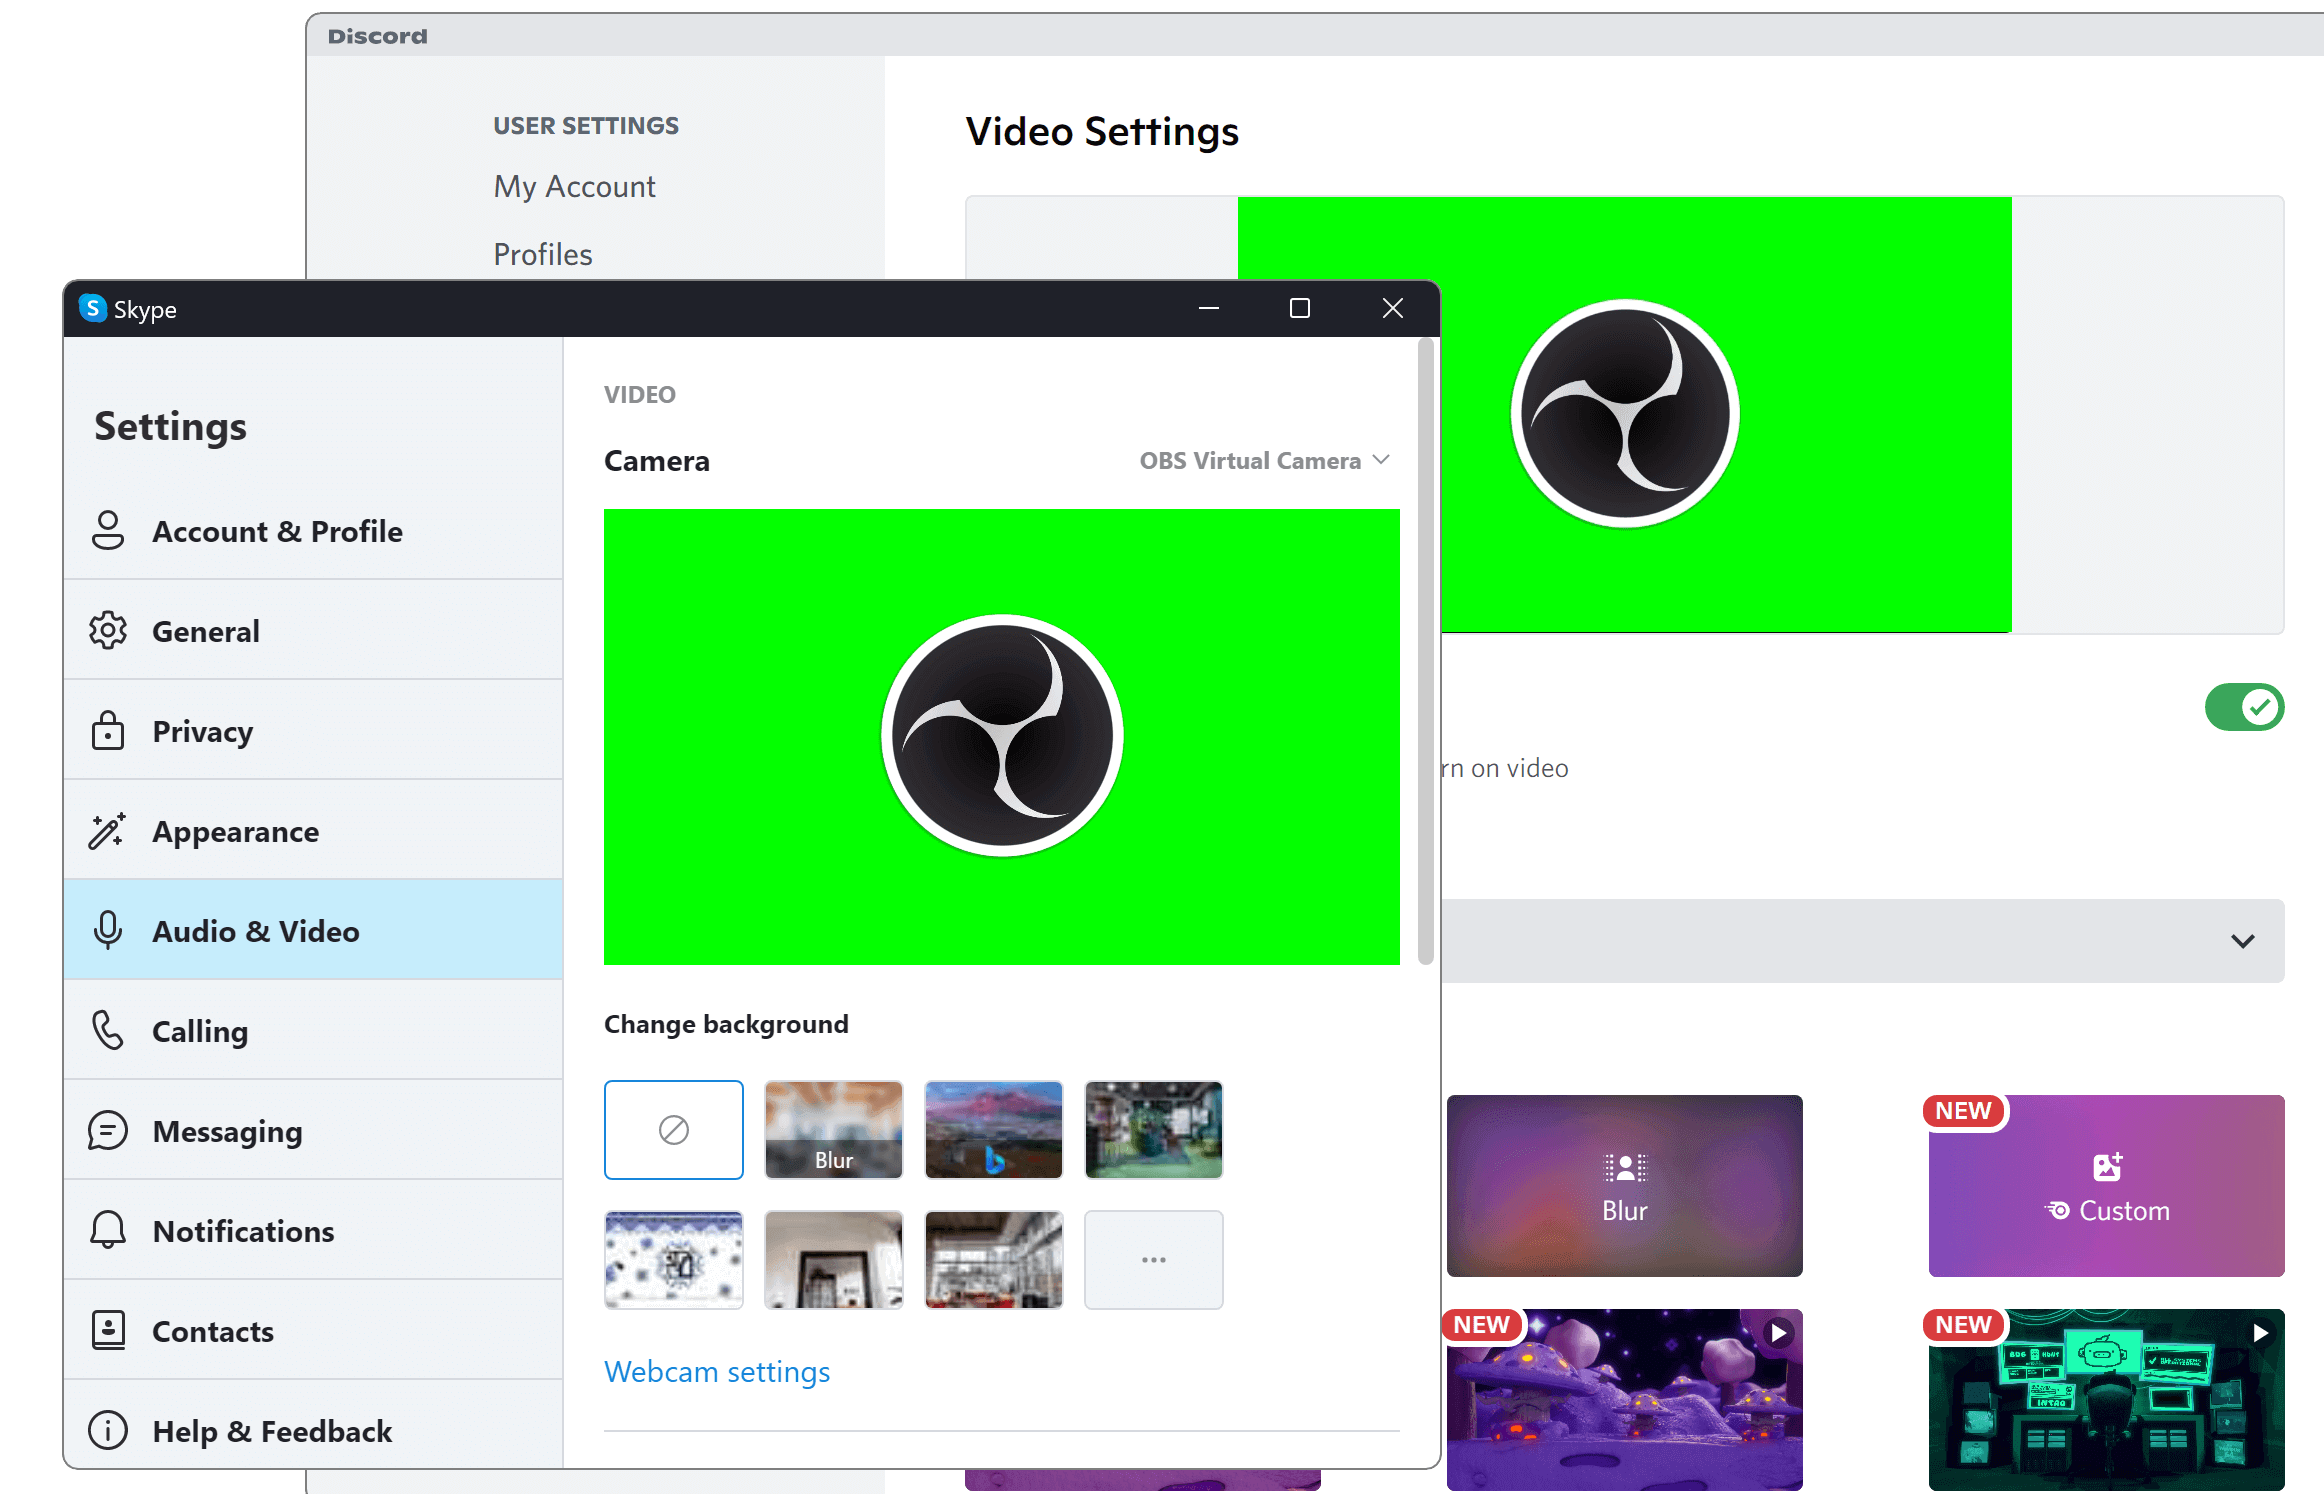
The Virtual Camera is a feature of OBS Studio that allows you to share your OBS Studio scene with any applications that can make use of a webcam, such as Zoom, Skype, Discord, etc. This feature is particularly useful for applications that cannot capture the screen directly.
Using the virtual camera
To start the virtual camera, click Start Virtual Camera in the Controls dock. To stop the virtual camera, click the same button again (which will be labelled Stop Virtual Camera).
To adjust settings for the virtual camera, click on the ⚙ Gear icon in the Controls dock.
From the Virtual Camera settings window, you can adjust the following settings:
- Internal
- Program Output: the virtual camera will show what OBS Studio normally outputs
- Preview Output: if using Studio Mode, the virtual camera will show the Preview. This means anybody watching the video feed will see you changing scenes, making edits, etc.
Show a single source in the virtual camera
In a future update, you will be able to select a single source for the virtual camera to show. Until then, you can show a single source by creating an extra scene containing the source.
- Add a new scene. In this tutorial, it will be called Virtual Camera.
- Add an existing source:
- click on the + Add Source button
- select the type of the source you want to show
- click on Add Existing
- select the source
(Alternatively, you can copy the source and paste a reference to it)
- Your Virtual Camera should contain a single source. You can resize the source to fit the source to the size of the scene.
The quickest method to fit a source to the scene is to right-click on the source and choose:
How to set up OBS Virtual Camera
Why You Need OBS virtual camera Use it as a powerful tool for streaming your games Add multiple sources and set up an unlimited amount of scenes .
Last Updated on June 05, 2023
Why You Need OBS virtual camera
- Use it as a powerful tool for streaming your games
- Add multiple sources and set up an unlimited amount of scenes
- Have advanced audio mixer settings and filters
- Create fully customizable layouts that you may miss in browser-based solutions
But what if you want to get the most out of both — OBS and the current encoder you’re using? The solution is easier than you think. Integrate the layout you created with the help of OBS and use it as a Virtual Camera with live streaming tools like Talk Studio.
How It Works
1. First and most important step is to download OBS Studio on your device. Once downloaded, follow the installation instructions that will pop up (depending on your operating system (OS), steps might be slightly different)
2. Once downloaded and installed, open your OBS studio:
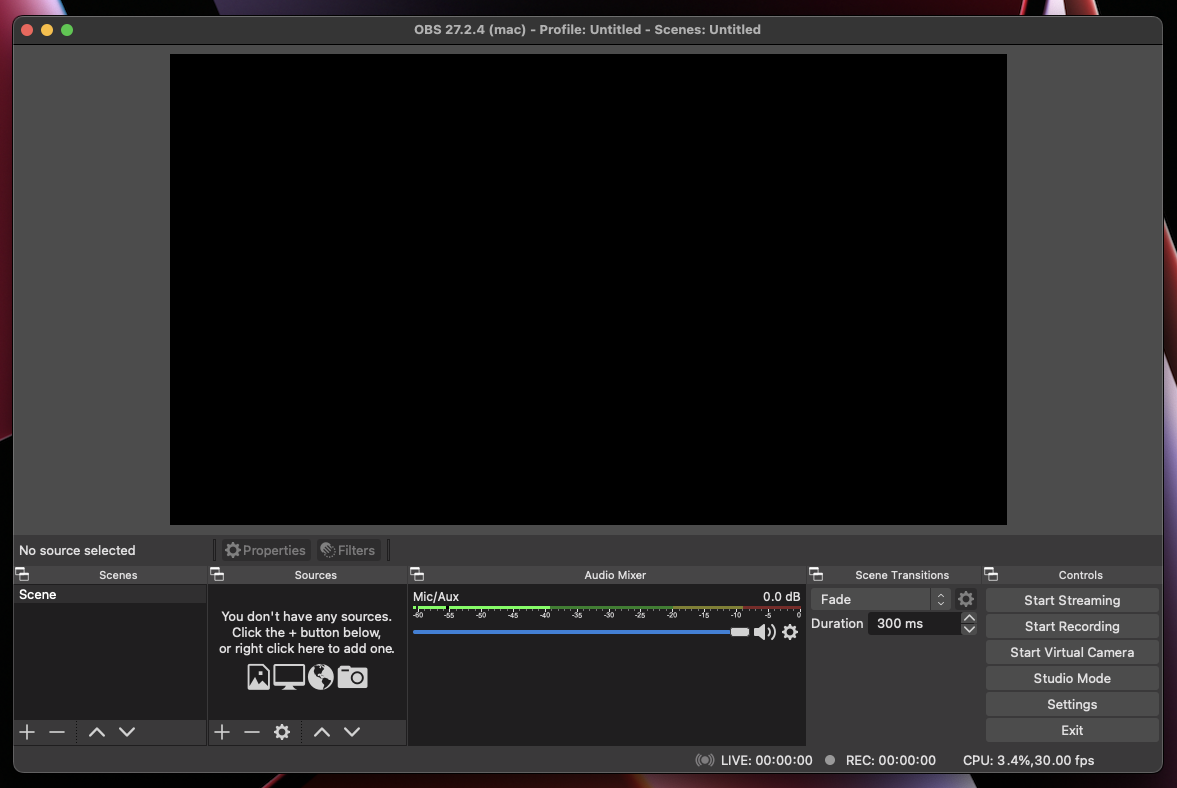
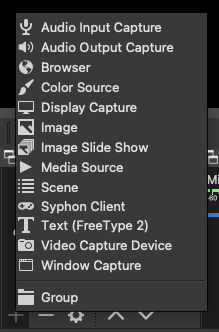
3. Under Sources, click on the + icon to add a new source — we will show you an example with the Video Capture Device option.
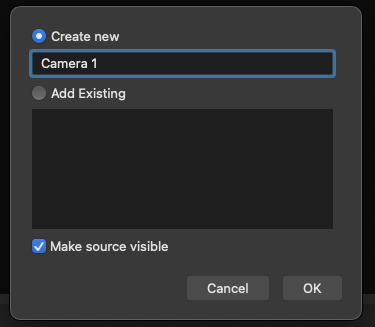
4. Name your Source and click OK.
5. You may see an access request if this is the first time you’re using OBS — please press OK to allow access:
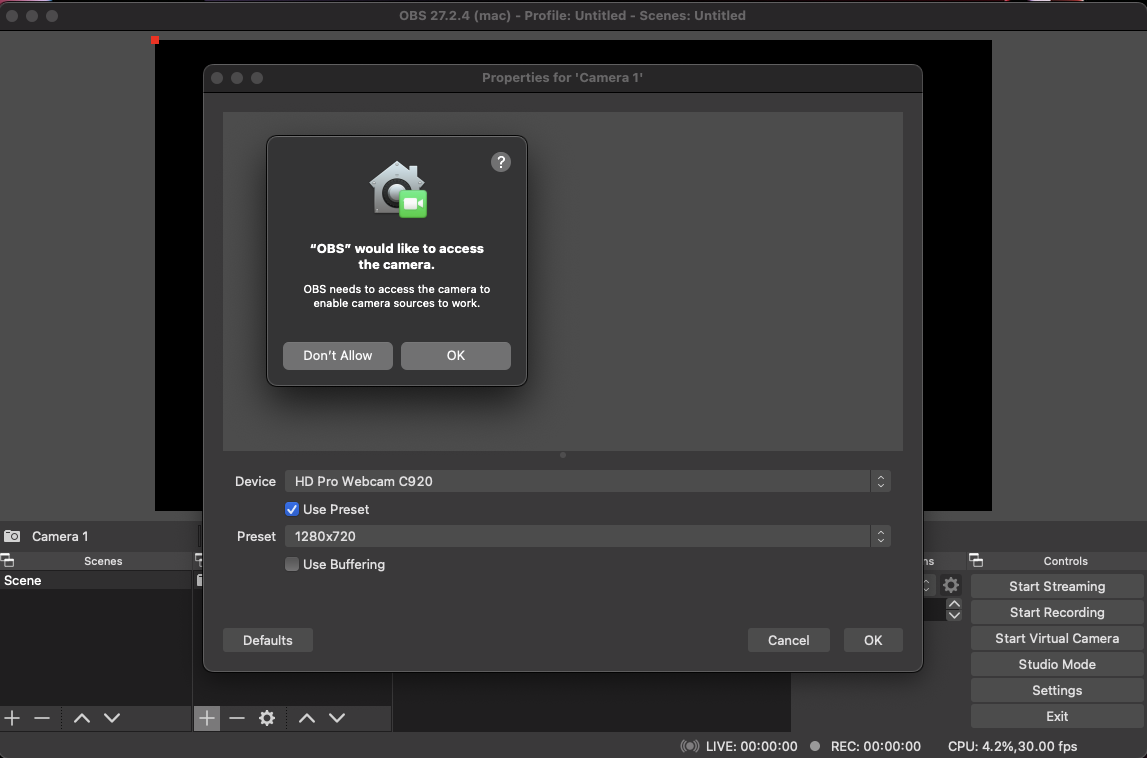 (Mac version)
6. Once you allow camera access, you will see Device options to select from. Please choose accordingly and click OK:
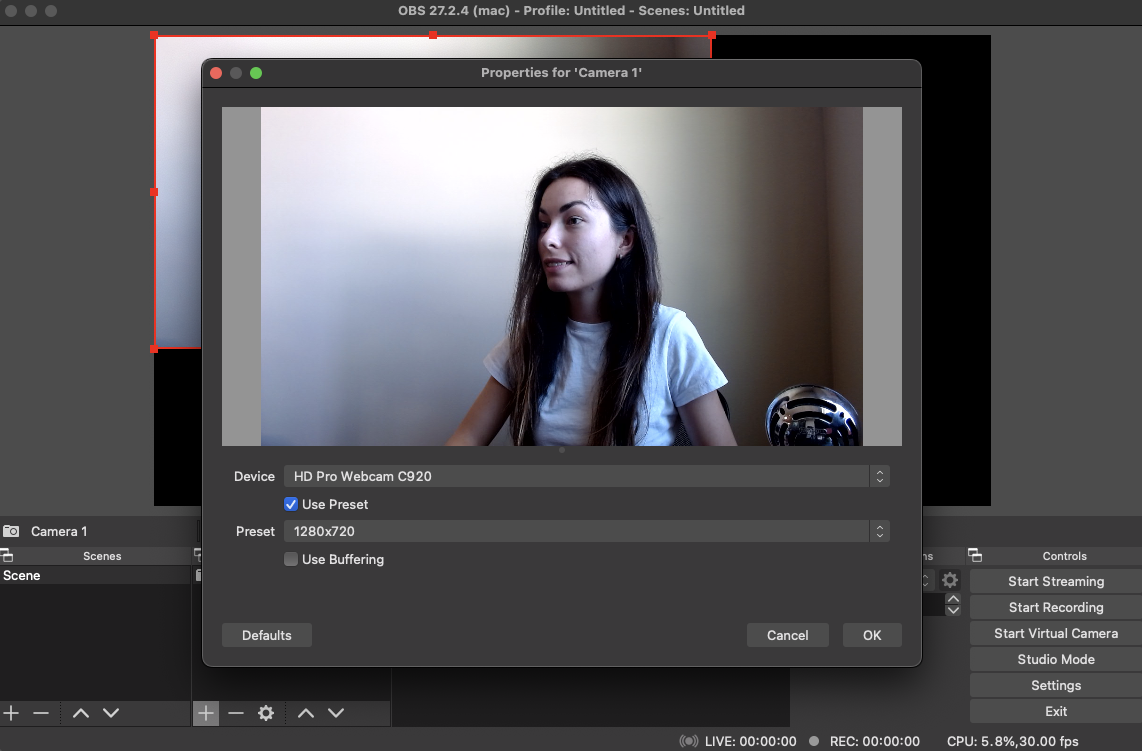
7. You will see a camera added to your main canvas. You now have options to resize your camera feed or change its position on the canvas:
8. Now let’s add a new source by clicking the + icon under Sources — we will be adding an Image this time:
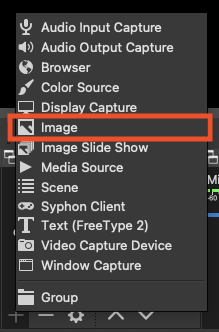
9. Let’s give it a name:
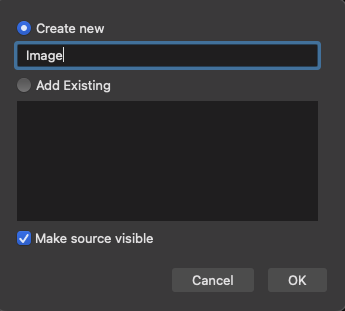
10. Upload the image of your choice from your folder:
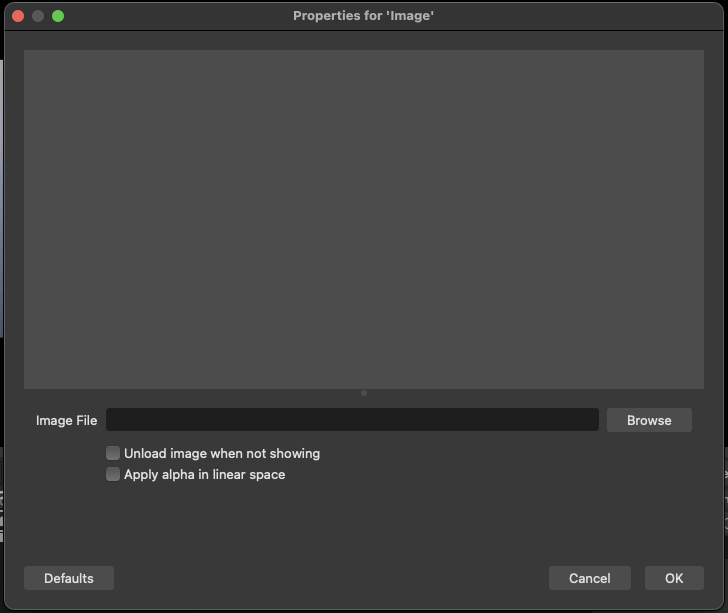
11. Once uploaded — you will see a preview, click OK when ready.
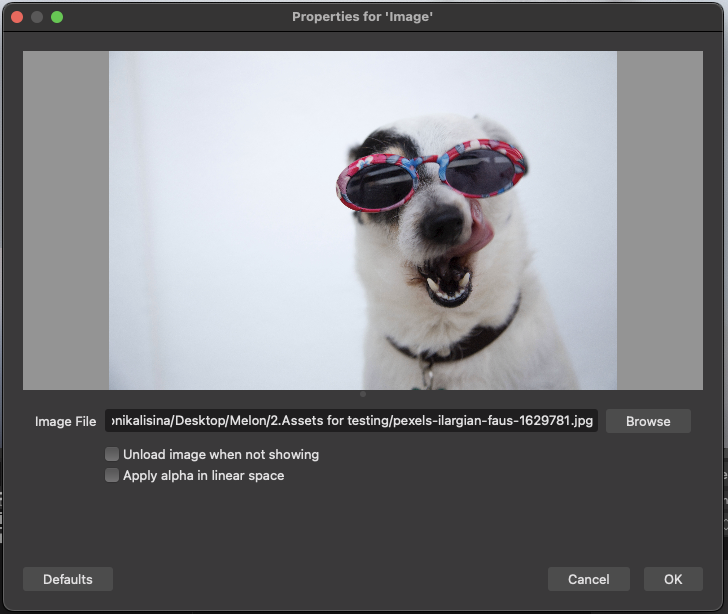
12. If you need to resize, please do so at this point (depending on your layout vision and image dimensions):
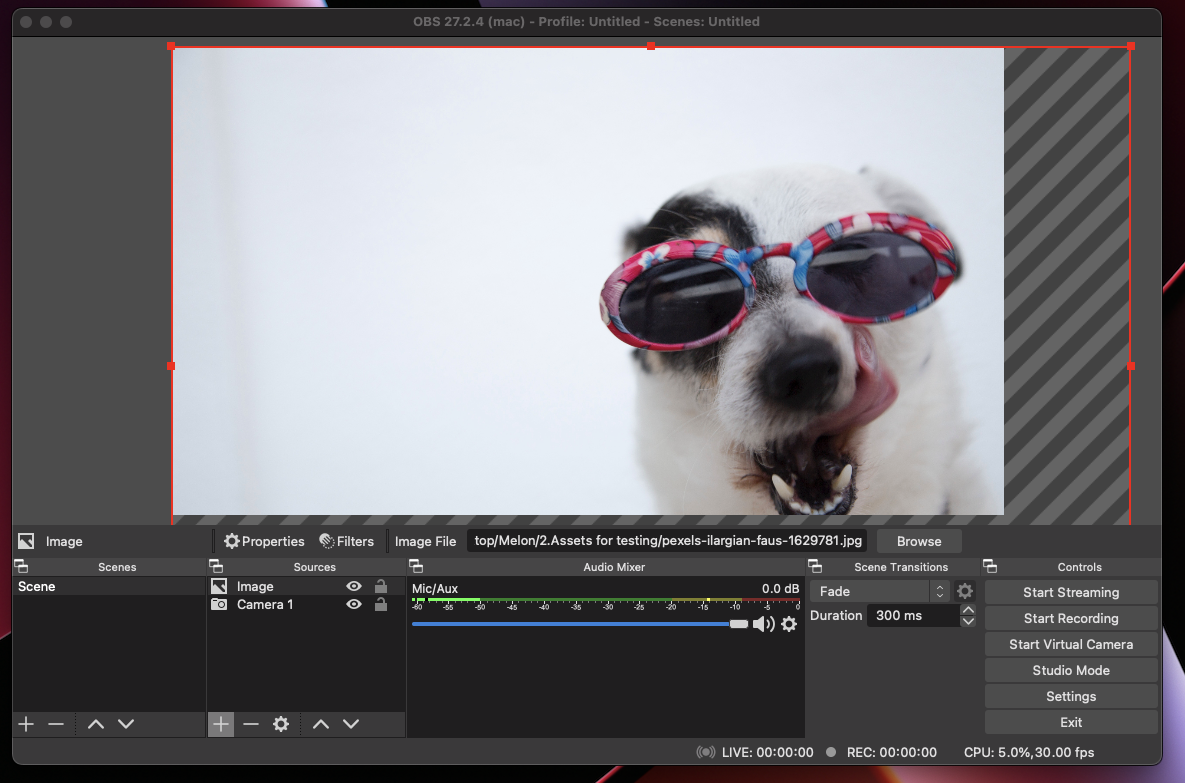
13. You may also notice that your camera is no longer visible. It happens because each new element you add will be forwarded and reflected as the primary source. You can easily make a change in Sources section by dragging and dropping one under another or by clicking on the arrows at the bottom of the section:
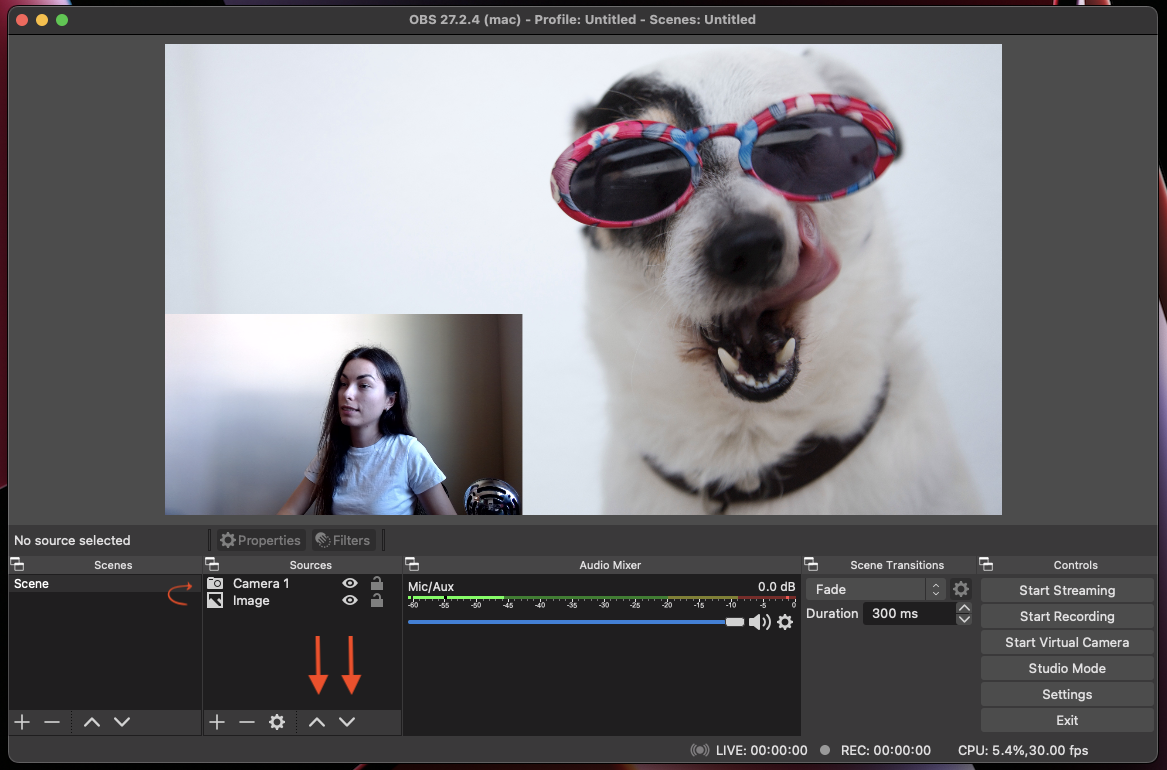
Depending on your layout preference, you can add more sources repeating the same steps. We will pause here and show you how you can use newly created layouts in other tools like Talk Studio.
Connecting OBS with Your Tool:
We will be connecting OBS as a camera source on Talk Studio as an example:
1. Open your Talk Studio and add yourself on the main screen by pressing Show on stream.
2. Click the up-arrow next to your Stop Video icon and open the Video Input dropdown:
3. Select «OBS Virtual Camera» from the dropdown.
4. Once you selected OBS Virtual Camera, your Talk Studio canvas will most likely be displayed as the below:
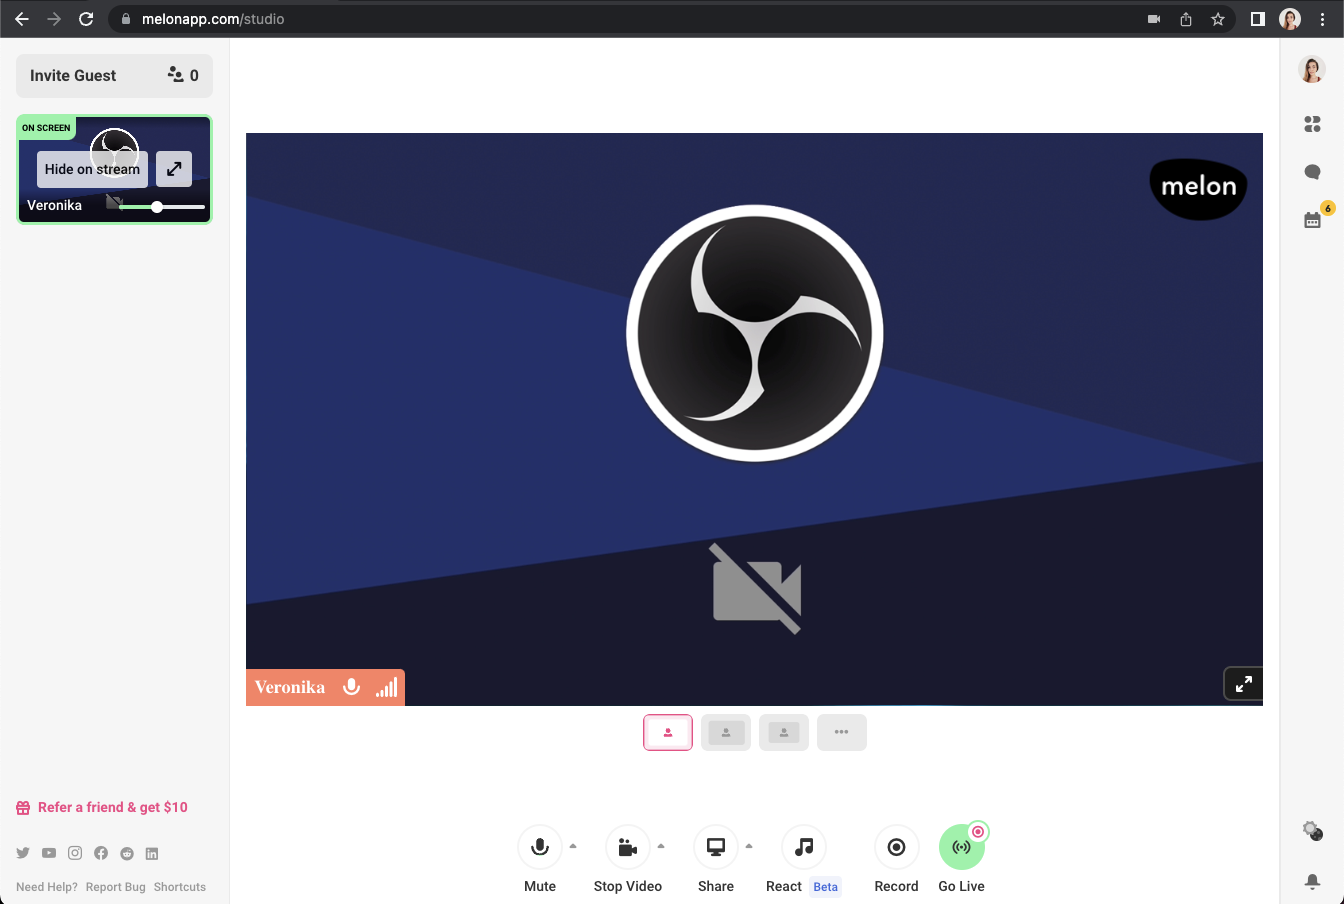
This is expected. We will need to take one more step to fix this:
5. Open OBS and click Start Virtual Camera:
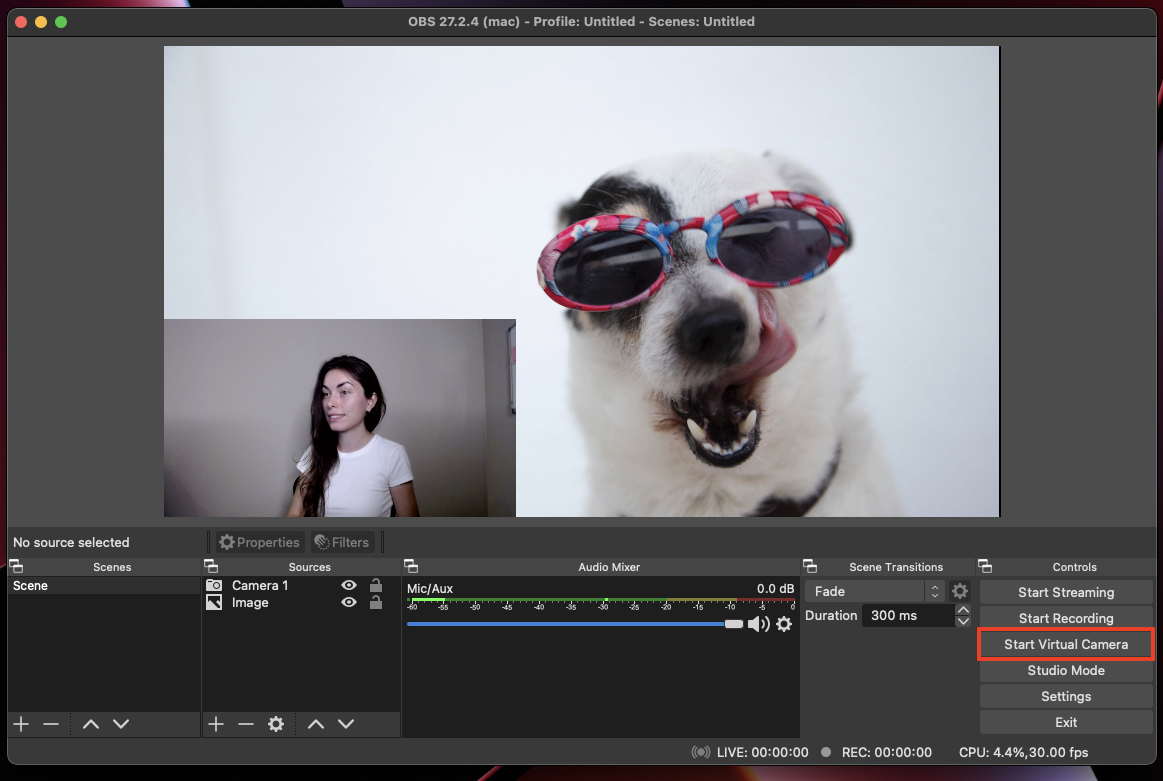
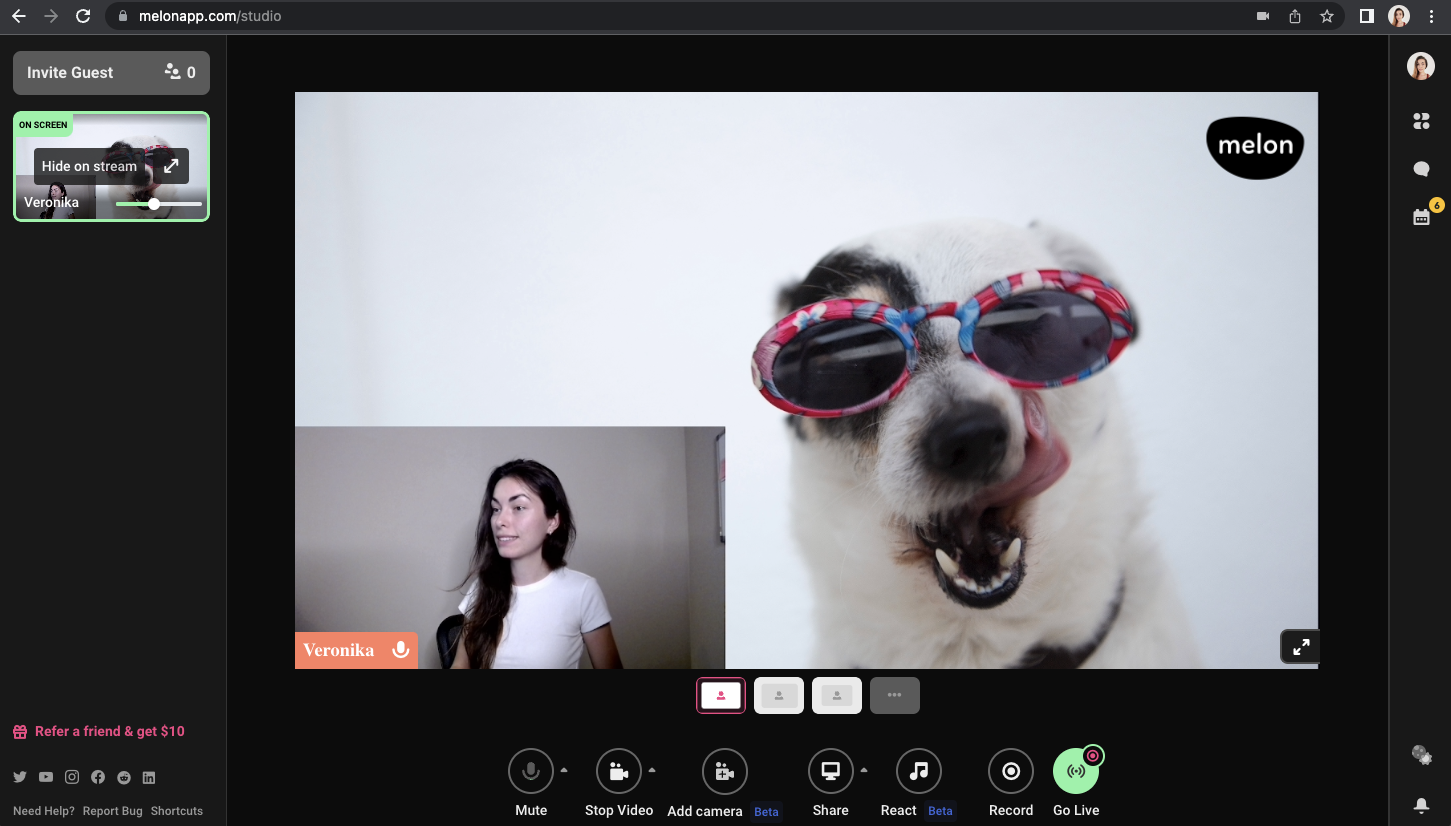
6. You can now go to your Talk Studio and see the new layout of your screen, add overlays, logos and other important elements.
As always, if you have any questions or feedback — don’t hesitate to reach out at [email protected] — we would like to hear from you!
Introduction

This is a method of outputting OBS as a virtual camera and recognizing it as a video source with Zoom or Teams.
OBS is originally distributed in cooperation with YouTube and video distribution systems.
However, by adding a virtual camera as a plug-in, Zoom, Teams, etc.
It can be used as a video source for other software.
I will show you how.Install OBS plugin
It is possible by introducing the following OBS plug-ins.OBS-VirtualCam
https://obsproject.com/forum/resources/obs-virtualcam.539/Install OBS while stopped.
After installation, launch OBS.
(The source of the image is BaBiNiku with FaceRig © ︎Kizuna AI)Sorry, The UI is Japanese Interface.
Open “Tools”-> “VirtualCam” from the menu at the top.
Select “OBS-Camera” (default) for Target Camera.
Buffered Frames “0”. I think it’s probably a delay.
Start with Start.Zoom settings
Open Zoom, join the meeting and select the camera “OBS-Camera”.
That’s it for Zoom.
(If the mirror is displayed, change the mirror setting in the Zoom settings.)Teams Settings
Next is Teams.
After startup, select the camera “OBS-Camera”.
It will be displayed inverted.
I just want to be able to set up mirrors in Teams, but unfortunately not.There is a solution.
Make the reverse setting on the OBS side.Select all sources (Ctrl + A).
Click “Edit” → “Convert” → “Flip Horizontal” from the top menu.After reversing, the placement location is shifted, so relocate it in a good condition.
If you display it in Teams, you can see it without problems.
Close
The above is an introduction of how to output OBS as a virtual camera and make it recognized by Zoom and Teams.
OBS has a lot of plugins, so it might be interesting to play around with it.