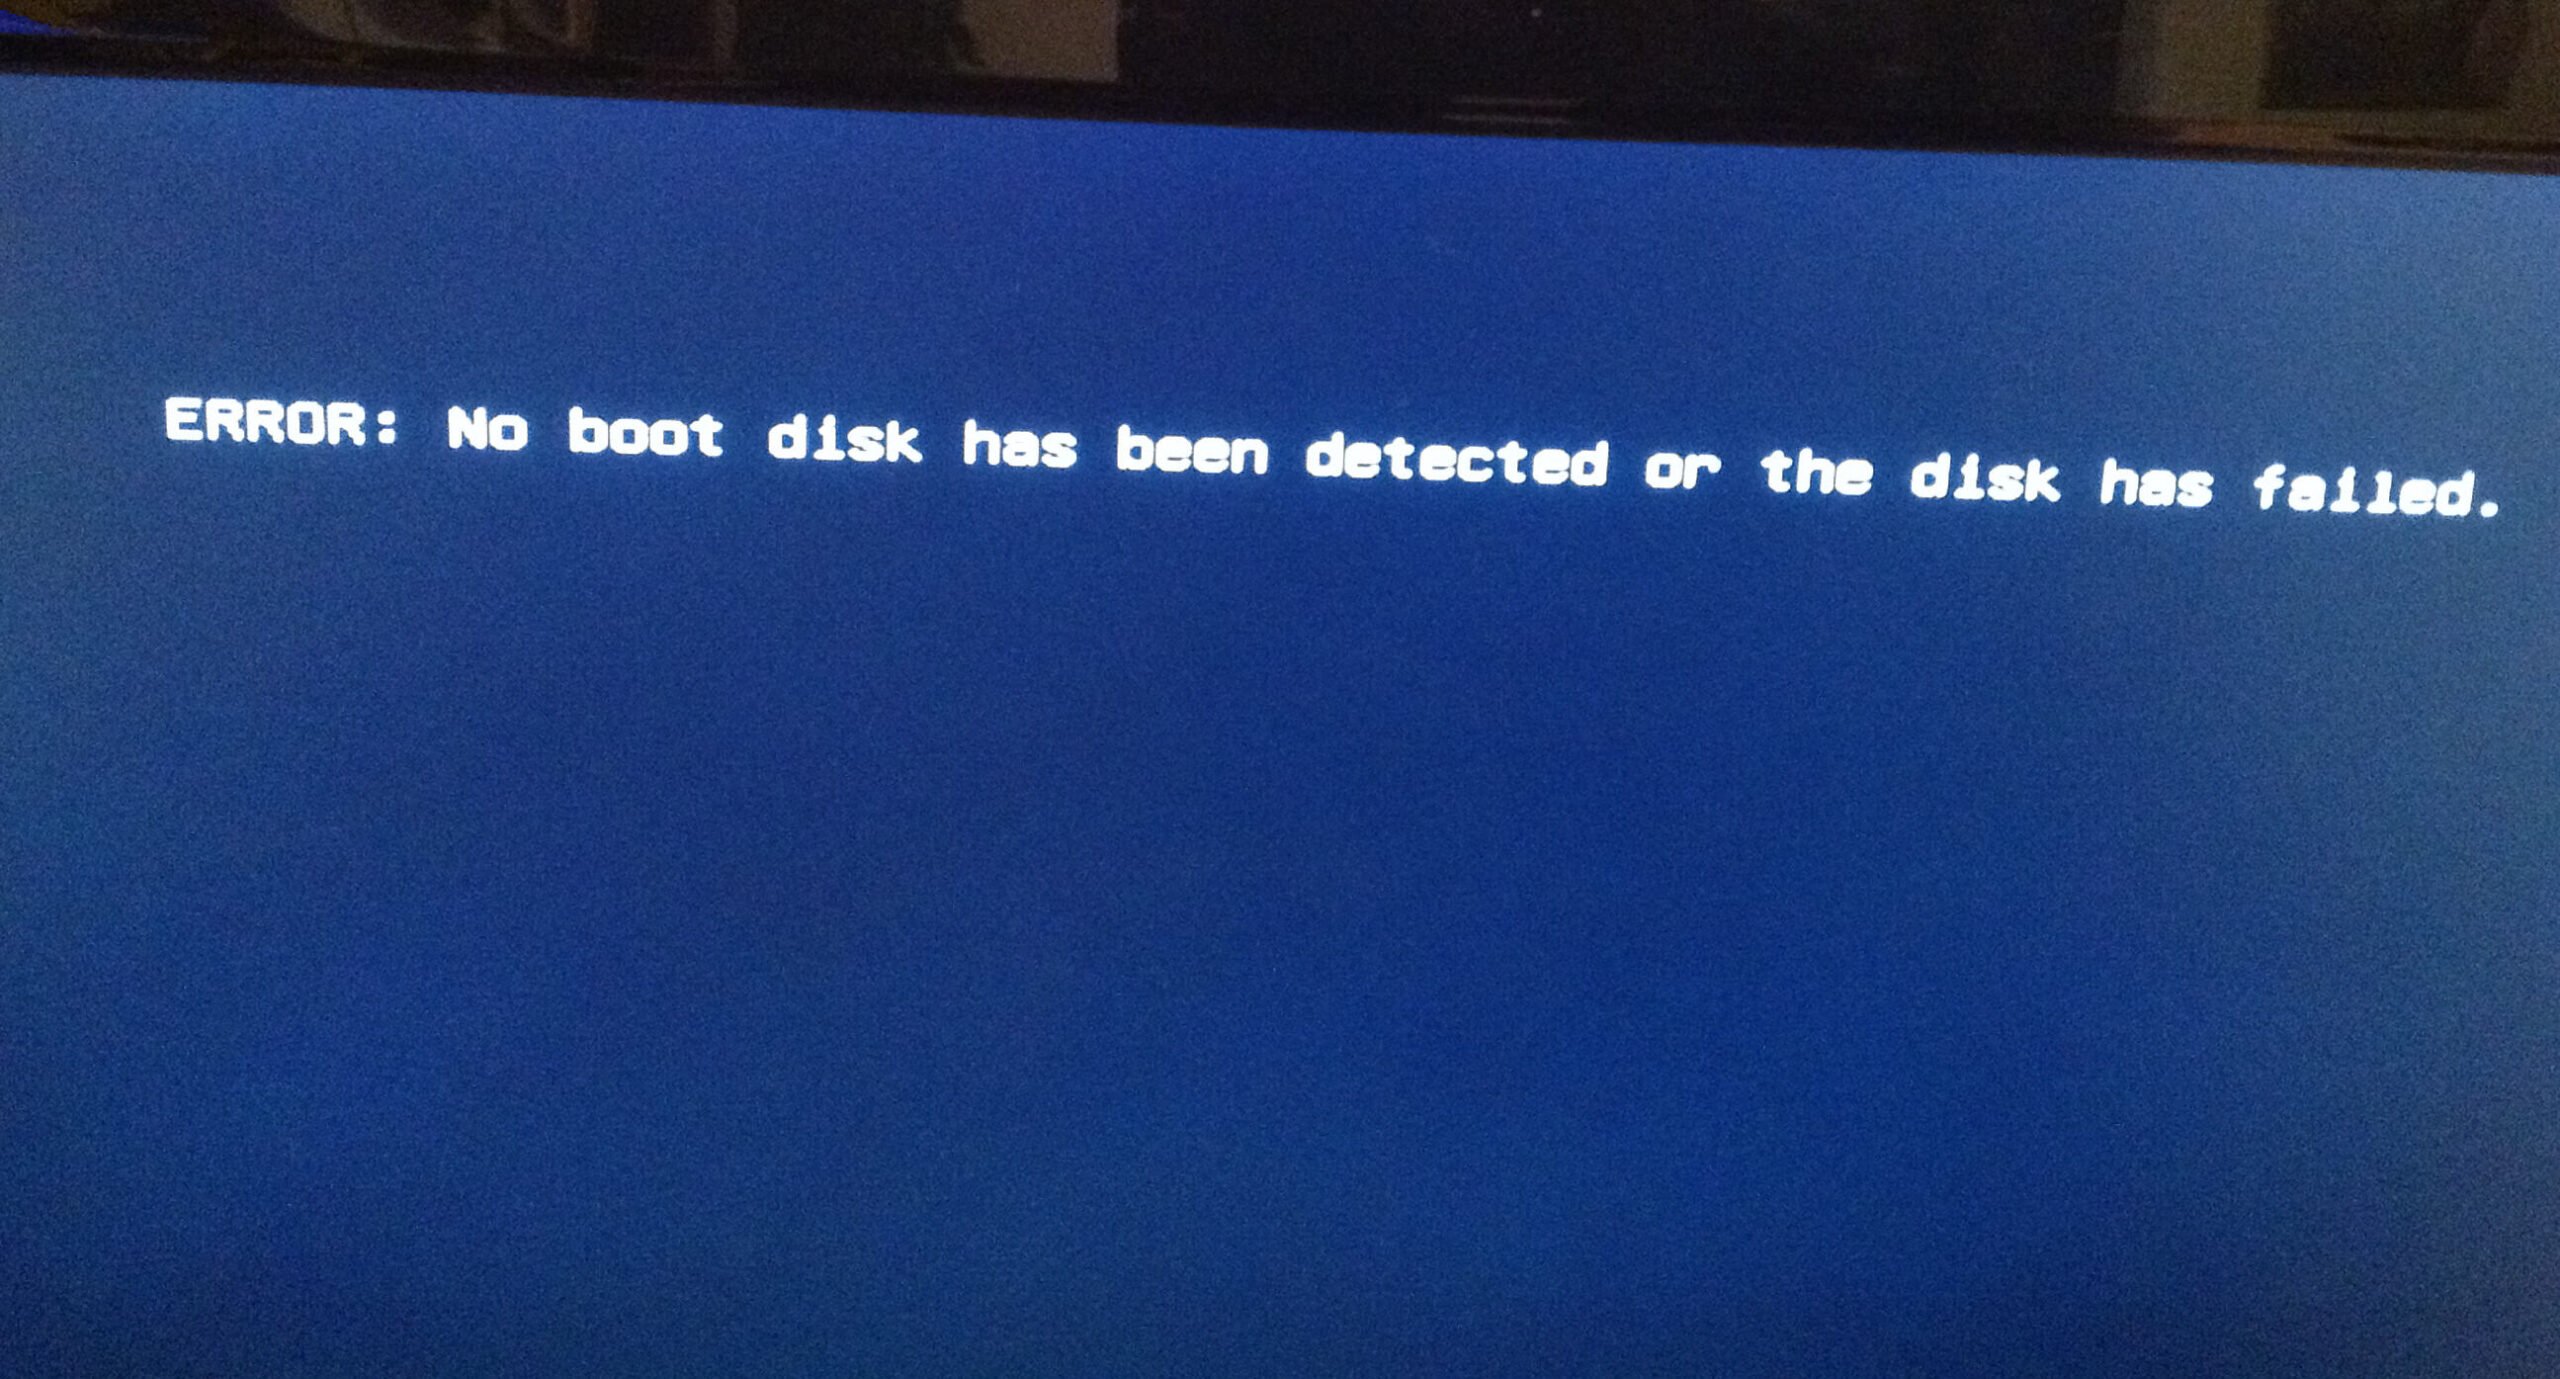
7 Effective Solutions to “No boot disk has been detected or the disk has failed” Error
“No boot disk has been detected or the disk has failed” error usually pops up when users try to boot up computer. It normally refers to that the boot configuration is incorrect or the boot disk is corrupt. This article will introduce 7 approaches to this issue.
Are you disturbed by the “No boot disk has been detected or the disk has failed” error? It generally indicates that something wrong has occurred to the boot configuration or the boot disk on your computer. To eliminate it, you can utilize the following 7 solutions.
Solution 1: Ensure Boot Disk Connected Properly
There are chances that the error results from faulty or loose connections of your computer’s hard disk. Therefore, to identify if the faulty connection is culprit, you need to open the computer case to check the cables. Of course, this step seems a bit knotty for novices. So, you had better contact professionals for help.
Solution 2: Check Computer’s Boot Order
In addition, improper boot order on the computer can result in this error as well. So, you ought to check the boot sequence.
- Firstly, restart your computer and meanwhile press “Delete” or “F1” or “F2” key to enter BIOS setup screen.
- Then, turn to the “BIOS” tab in the above option list.
- Next, you can check the boot device priority to see if the computer hard drive as the top priority. If not, change the order.
- Lastly, press “F10” to save the changes and exit BIOS setup.
Solution 3: Run Diagnostic for Boot Disk Check
If the above means don’t help in fixing this error, it is likely that the hard drive is experiencing some issues. In this situation, you need to scan and repair the disk, such as using the inbuilt “Windows Diagnostic” tool.
- At first, restart computer and press “F12” key.
- When entering Boot menu, highlight “Utility Partition” or “Diagnostics”.
- Then, press “Enter” to run the tool.
- It will auto check all hardware on the computer and report the found issues.
Solution 4: “Automatic Repair” on Boot Disk
Aside from “Diagnostic”, Windows also offers “Automatic Repair” feature for disk repair.
- To start with, insert Windows installation DVD.
- Then, restart the PC.
- Next, press any key to boot from the DVD.
- Later, click “Repair your computer” > “Troubleshoot” > “Advanced Options” > “Automatic Repair”.
- After the repair, try to reboot PC.
Solution 5: Run CHKDSK and SFC
Provided that the “Automatic Repair” is helpless, don’t be discouraged. Just utilize CHKDSK and SFC to repair the disk again.
- At the outset, follow the steps in Solution 4 to enter “Advanced Options” list.
- Then, choose “Command Prompt” option.
- In the command prompt window, input the following lines and press “Enter”:
- Ultimately, exit command prompt and restart the PC.
Solution 6: Repair Boot Sector
Moreover, provided that the boot sector is bad, the error will occur too. Hence, it is essential to repair the boot sector.
- Like the above solution, launch command prompt.
- Then, try the following command lines one by one.
- After that, exit command prompt and reboot PC.
Solution 7: Clean Install Windows
If unfortunately, all the solutions above are useless, it is possible that the criminal is the malfunctioning Windows system. In this situation, you can try “clean install Windows”. But, in this way, all the data in the boot disk will be erased. After that, you have to attempt data recovery, such as employing PST recovery software to get back lost PST data.
Методы исправления ошибки No boot disk has been detected or the disk has failed на Windows 7 и выше
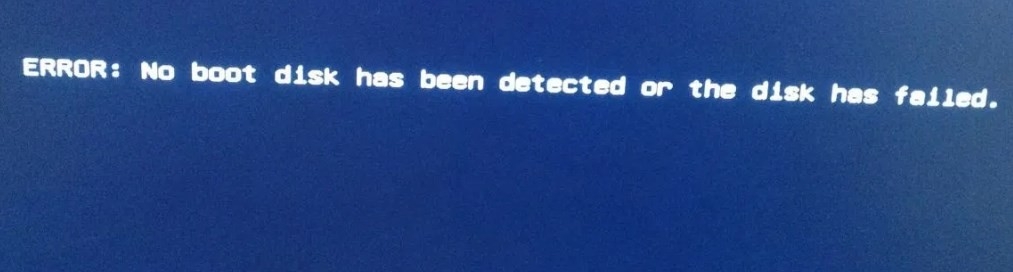
При включении ПК с Windows 7, а также с Windows 10, пользователь может столкнуться с ошибкой No boot disk has been detected or the disk has failed, которая указывает на то, что загрузочный диск поврежден или не обнаружен. Возникает такая ошибка в следующей ситуации: при загрузке Windows система ищет на диске нужную для себя информацию, а если HDD или SSD поврежден, неправильно указана приоритетность загрузки носителей в BIOSе, неверно подключено устройство к материнской плате, поврежден сам загрузчик или системные файлы, то появляется такое сообщение.
Исправляем ошибку No boot disk has been detected or the disk has failed
Если на вашем ПК появилась ошибка No boot disk has been detected or the disk has failed, то в первую очередь нужно переподключить диск. Если у вас ноутбук, то придется отключить его от сети, вытянуть батарею, на несколько секунд зажать кнопку питания, чтобы снять остатки заряда с материнской платы и открыть крышку нижней части. Некоторые модели ноутбуков на нижней части имеют разбивку по отсекам, поэтому может понадобиться открутить только какую-то часть.
Далее нужно отсоединить HDD или SSD от порта. Смотрим, чтобы диск не был закреплен винтиками. В обычном системном корпусе вам придется только отключить SATA кабель от диска. Продуваем порт и контакты диска от пыли.
Подключаем диск обратно, проверяем, исчезла ли ошибка No boot disk has been detected or the disk has failed.
Следующим шагом будет проверка приоритетности загрузки носителей. Для этого нужно при включении ПК начать нажимать клавишу F2 или DEL. Комбинацию клавиш для входа в BIOS стоит посмотреть в спецификациях к ноутбуку или материнской плате. В BIOSe нужно найти раздел «Boot Device Priority» или «Boot Option». Здесь на первом месте должен стоять жесткий диск, далее дисковод (если есть), а далее – по желанию пользователя. Если на первом месте не стоит носитель, нужно его переместить и потом нажать «F10», чтобы сохранить изменения в системе.
После перезагрузки ПК нужно проверить систему на работоспособность некоторое время.
Если ошибка No boot disk has been detected or the disk has failed после манипуляций с BIOS-ом не исчезла, стоит загрузиться в безопасном режиме (при загрузке ПК нажимаем F8). Далее выбираем командную строку с правами Администратора и вводим sfc /scannow, чтобы выполнить проверку системных файлов на целостность.
Если утилита обнаружит нарушение целостности файлов, то исправит поврежденные элементы. Если не удаётся выполнить восстановление, то можно подключить к ПК установочный диск, загрузиться в режиме восстановления системы, выбрать командную строку и ввести sfc /scannow /offbootdir=c:\ /offwindir=c:\windows.
Если же повреждений не обнаружено, то нужно в этой же командной строке ввести wmic diskdrive get model,status.
В графе «Статус» должно быть указано «ОК». Если указано «Caution» или «Pred Fail», то диск скоро выйдет из строя. Для более глубокой проверки в командной строке можно ввести «chkdsk /?», а далее указать букву для команды. Утилита проверит жесткий диск на ошибки.
Для проверки жесткого диска на предмет битых секторов нужно скачать и запустить от имени Администратора программу Victoria HDD. Если жесткий диск неисправен, то программа покажет количество как битых, так и медленно читающихся секторов.
Если диск в порядке, но ошибка No boot disk has been detected or the disk has failed продолжает появляться на вашем ПК, то исправить ошибку можно с помощью отката системы до более раннего состояния. Для этого можно воспользоваться точкой восстановления системы или установочным диском.
No Boot Disk Has Been Detected Or The Disk Has Failed
This error occurs because during the boot process, the system checks the HDD/SSD for boot information and other Operating System information so as to utilize the information to boot up the system. However, if the computer is unable to retrieve any boot information or the OS details on the drive, the error message is displayed on the screen. You might encounter this error message due to one or more (but not limited to) of the following known causes:
Incorrect boot order settings.Missing operating system from the HDD.Hard Disk failure.Loose hard disk connection to PC.Corrupt Boot Configuration Data (BCD).
No boot disk has been detected or the disk has failed#
If you’re faced with this No boot disk has been detected or the disk has failed issue, you can try our recommended solutions below in no particular order and see if that helps to resolve the issue. Let’s take a look at the description of the process involved in relation to each of the listed solutions.
1] Check the PC-to-HDD/SSD cable connection#
The cables connecting the HDD/SSD to the computer and vice versa might have been unfastened which can give rise to the No boot disk has been detected or the disk has failed error message. Follow these steps to check the connections and fix the problem: Note: You may require the services of a computer hardware technician.
Power off your computer and remove the battery.Open up your computer’s casing afterward.Detach the HDD from your computer.Clean all the ports and wirings linking the HDD to the computer and vice versa.Now, reconnect the HDD to the computer. (Ensure that all the connections are fastened tightly).Lastly, attach the battery and power up your computer.
Check to see if the issue persists. If so continue with the next solution.
2] Check the PC’s boot priority#
You may be receiving the No boot disk has been detected or the disk has failed error message on boot because your computer is trying to boot from another source and failing to find any boot information instead of booting from the boot disk. If that’s the case, all you need to do in order to resolve this problem is to ensure that the boot disk is at the top of your computer’s boot order. If this doesn’t resolve the issue, try the next solution.
3] Check if the HDD/SSD is failing#
Another reason for the computer’s inability to boot up is because the HDD/SSD is in a failed state which triggers the No boot disk has been detected or the disk has failed error message. You can detach the drive from your PC and connect it to another PC to access the files and folders on the PC so as to check if the drive is accessible. If you are unable to access the contents of the drive, you definitely need a replacement. Alternatively, you can check the drive’s S.M.A.R.T. status. Most modern drives have a feature called S.M.A.R.T. (Self-Monitoring, Analysis, and Reporting Technology) that monitors different drive attributes in an attempt to detect a failing disk. That way, your computer will automatically notify you before data loss occurs and the drive can be replaced while it still remains functional. In Windows, you can manually check the S.M.A.R.T. status of your drives from the Command Prompt. Here’s how: Press Windows key + R. In the Run dialog box, type cmd and hit Enter to launch Command Prompt. In the command prompt window, copy and paste the command below and hit Enter. wmic diskdrive get model,status It will return “Caution” or “Pred Fail” if your drive is failing or has already failed, or “OK” if the drive’s health is fine. If the result shows the drive is failing, it’s recommended you back up your data and replace the drive.
4] Run Automatic Repair/Startup Repair#
You can also fix the No boot disk has been detected or the disk has failed issue by performing Automatic Startup Repair on your system by using Windows bootable installation DVD. Here’s how:
Insert Windows bootable installation DVD and restart your PC afterward.Press any key to boot from CD or DVD when prompted to continue.Select your language preferences, and click Next.Click Repair your computer in the bottom-left.In the Choose an option screen, click Troubleshoot > Advanced option > Automatic Repair or Startup Repair.Wait for the Windows Automatic/Startup Repairs to be complete.Restart your PC.
If the issue is still not resolved, continue with the next solution.
5] Run CHKDSK and SFC#
In this solution, utilizing CHKDSK and SFC to repair the disk could help resolve the issue. Do the following: Repeat the steps in Solution 4 above to enter the Advanced Startup Options list. Then, choose Command Prompt option. In the command prompt window, type the command below and hit Enter. When the operation completes, exit command prompt and restart the PC. If the issue is still not resolved, proceed with the next solution.
6] Rebuild BCD & Repair MBR#
Provided that the boot sector is damaged or corrupted, the No boot disk has been detected or the disk has failed error will occur. In this case, you need to rebuild the Boot Configuration Data file and repair the Master Boot Record file and see if that resolves the issue. If not, you can move to the next solution. Hopefully one of these solutions will fix the issue for you!
ERROR: No boot disk has been detected or the disk has failed — как исправить ?
При загрузке ПК проверяет жесткий диск или SSD накопитель на наличие «загрузочной информации» необходимой для запуска операционной системы. В случаях когда эта информация недоступна\искажена или опрашиваемый системой диск не отдает ответа возникает эта ошибка.
No boot disk has been detected or the disk has failed — дословно означает, что загрузочный диск не был обнаружен или этот диск неисправен. Выглядит эта неисправность как черный экран при загрузке и надпись. Давайте рассмотрим из за чего это происходит и что делать.
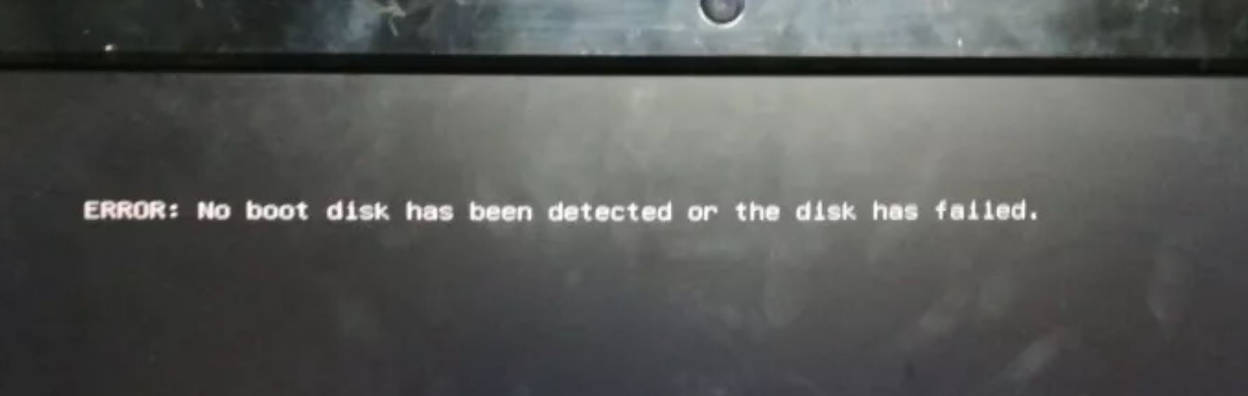
В большинстве случаев причиной возникновения этого бага являются проблемы не связанные с железом если речь идет о надежных производителях. Если ваше устройство от HP или Acer то шансы на серьезную поломку выше статистически.
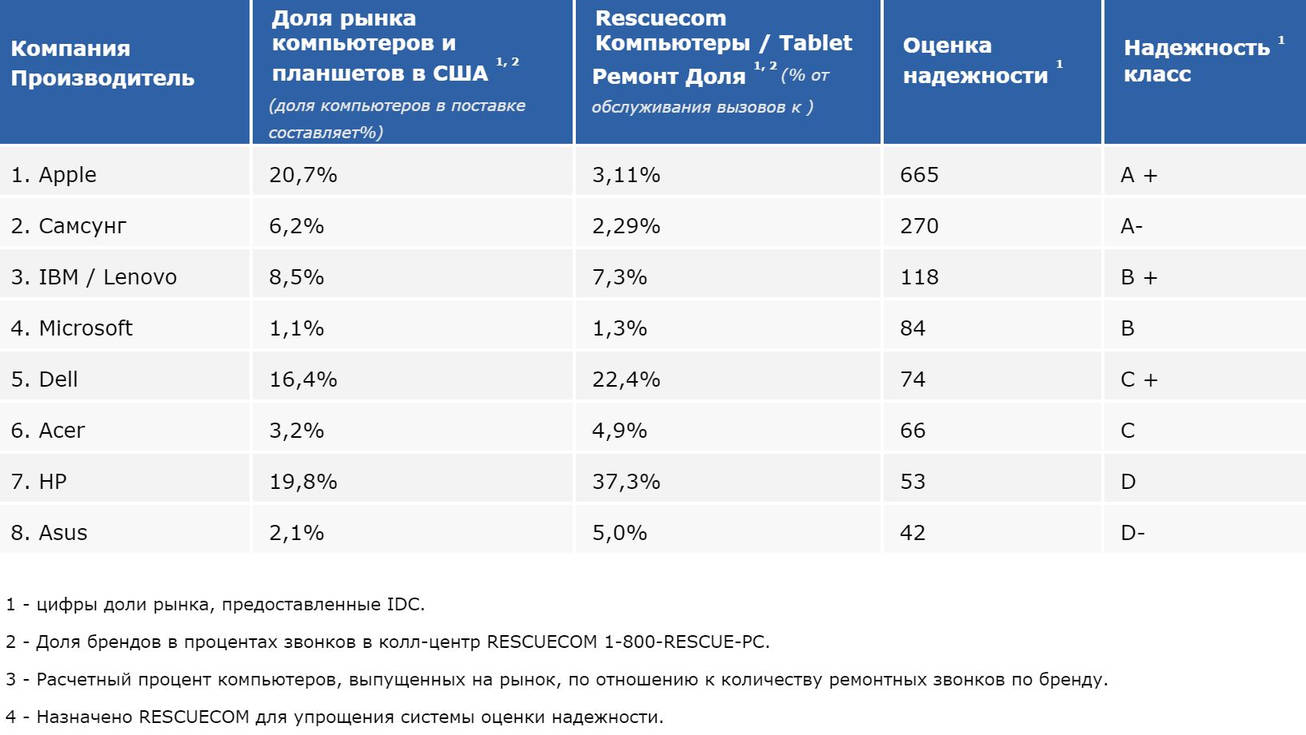
Acer, HP, Asus имели самую высокую долю гарантийного ремонта на рынке США за 2018.
Основные причины ошибки
По убыванию в порядке от наибольшей вероятности к наименьшей выявленной в процессе изучения статистики обслуживания официальных дилеров и сертифицированных центров ремонта есть шанс что:
- Слетели настройки BIOS из-за испорченной батареи
- Отходят контакты на шлейфах подключения диска
- Сделан апгрейд с установкой нового носителя или мат. платы
- Проблемы с реестром\вредоносный софт в Windows
- Неисправность диска
Исходя из этого понятно, что в большинстве случаев что бы исправить ошибку будет достаточно проверить контакты, наличие диска, произвести настройку BIOS или сброс к заводским параметрам.
Решаем проблему
Шаг 1. Проверяем диск и шлейф
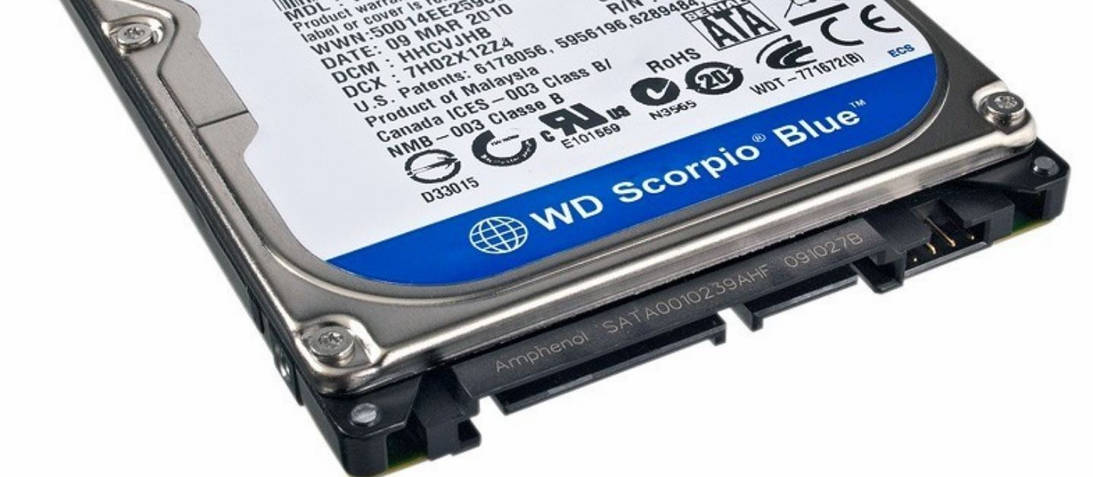
Для начала необходимо убедиться что диск на месте, присутствует питание. Кабель питания и шлейф визуально должны выглядеть нормально, если в местах перегибов отсутствуют значительные повреждения, контактная группа выглядит нормально, не содержит копоти, ржавчины и тд.
В зависимости от конфигурации Вашего Системного блока или ноутбука разъёмы и кабели могут выглядеть по разному, но принцип один — 2 контактные группы которые отвечают за питание и передачу данных могут иметь подключение от одного (часто на ноутбуках) или двух кабелей (обычный ПК).
В случае если у Вас ноутбук или системный блок на гарантии, разбор может повлечь отказ в гарантийном обслуживании, поэтому лучший вариант сдать устройство в сервисный центр, поэтому пропускайте этот шаг, попробуйте откатить настройки BIOS и провести диагностику об этом далее.
Шаг 2. Проверяем Систему
Обычно это можно сделать нажав при включении компьютера F2 или F12. В зависимости от производителя эта опция называется Boot Menu, Boot Manager или ePSA. Выбираем опцию Diagnostics.
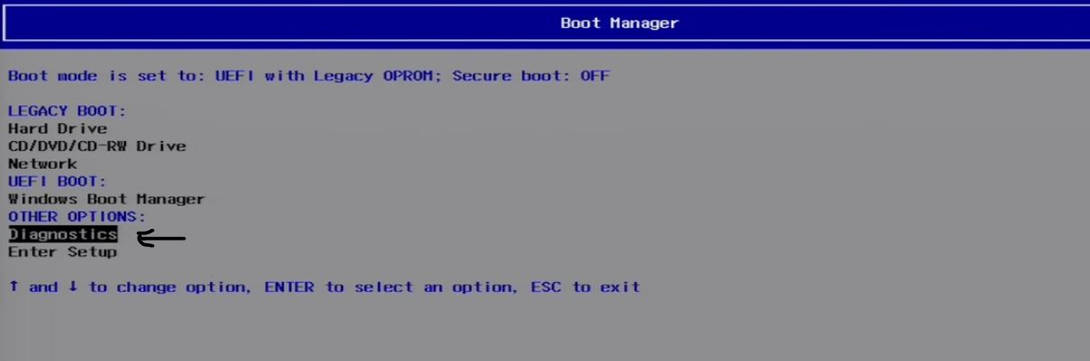
Ждем окончания, сохраняем коды неисправности и гуглим, как правило в современных устройствах на этом этапе можно диагностировать причину. Но не стоит полагаться на это на 100%.
Шаг 3. Сбрасываем BIOS
В зависимости от Вашего устройства зайти в меню BIOS можно зажав либо нажав многократно при включении кнопки:
- F1 или F2 или Fn+F2
- F10 или F11 или F12
- Редко встречаются также ESC либо Delete
Далее попадаем в меню в котором необходимо выбрать в зависимости от типа BIOS обычно пункт Exit либо File.
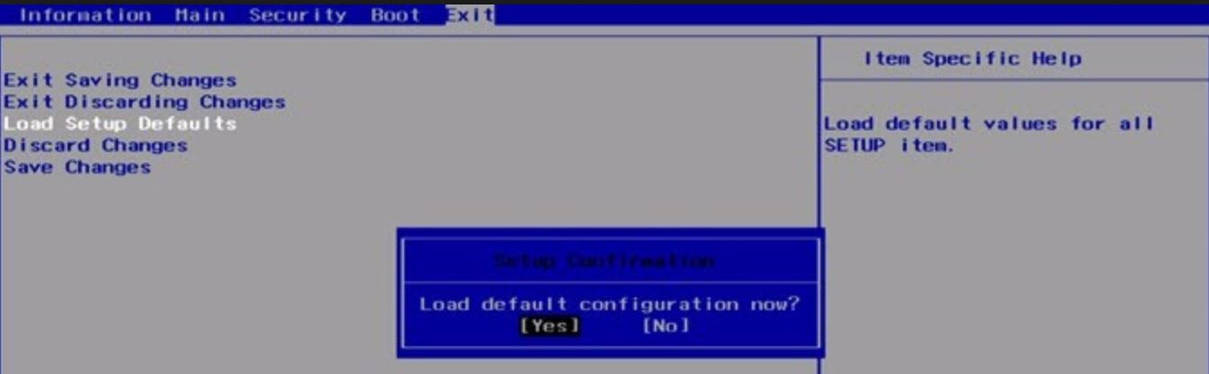
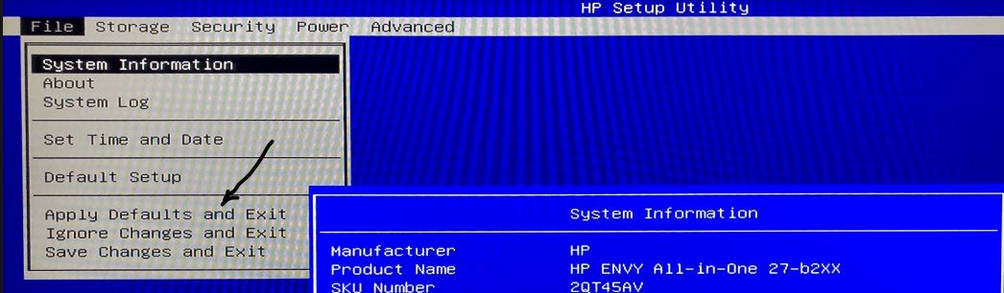
И нажимаем Load Setup Defaults или Apply Defaults and Exit это одно и тоже, просто на разных устройствах меню и названия пунктов могут немного отличаться, встречаются также русифицированные версии. В вашем руководстве к ноутбуку или материнской плате должно быть подробное описание как вернуть заводские настройки.
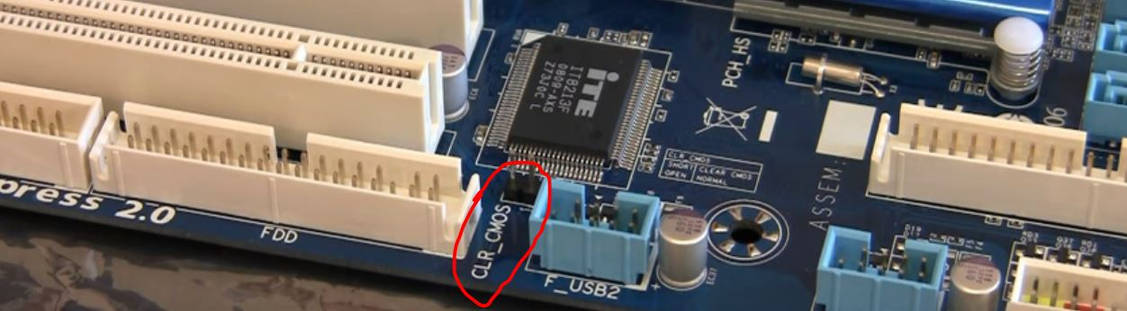
Также BIOS можно сбросить на стационарном ПК замкнув контакты CLR CMOS на материнской плате или вытащив батарейку.
Обычно после сброса, загрузочный том возвращается в исходное состояние и если нет других неисправностей, всё начинает работать.
Шаг 4. Возвращаемся в BIOS после перезагрузки, проверяем загрузочный диск через меню Boot или Boot Priority.
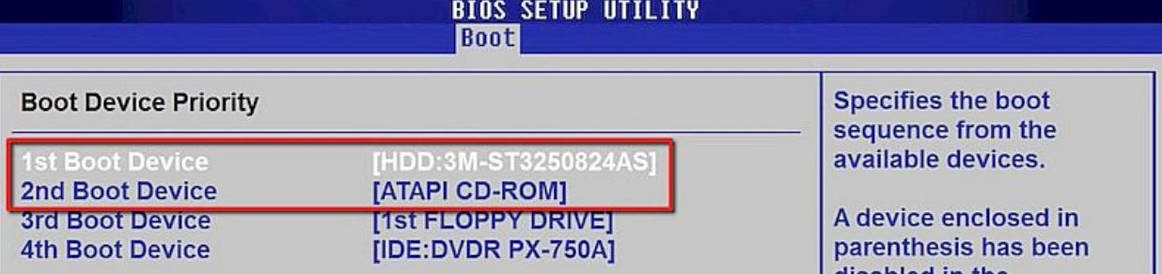
Необходимо проверить, что жесткий диск с которого загружается ОС, находиться в очереди первым (1st Boot Device). Ниже несколько скринов из разных версий и устройств, на которых выставлена правильная очередность.
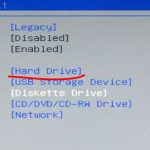
Большинство современных ноутбуков имеют также систему восстановления, включая переустановку Windows. Загуглите «Recovery mode + ваша модель» и быстро найдете как активировать этот режим конкретно на Вашем устройстве.
Если эти действия не помогают, вероятно присутствуют повреждение самого диска или его подключения. По данным сервисного центра HP, вероятность этого не высокая, но в таком случае устранить ошибку поможет только замена.