What’s lencr.org ?
lencr.org is a domain name owned by Let’s Encrypt. We use it to host data that is referenced inside the certificates we issue.
Why is my computer fetching this data? Is it malicious?
No, the data on lencr.org is never malicious. When a device connects to lencr.org , it’s because client software on that device (like a web browser or an app) connected to another site, saw a Let’s Encrypt certificate, and is trying to verify that it’s valid. This is routine for many clients.
We can’t speak to whether the other site being connected to is malicious. If you’re investigating network activity that seems unusual, then you may want to focus on the connection that started just before the connection to lencr.org .
The pattern of clients’ connections to lencr.org might look unusual or intermittent. Clients might never retrieve this data; only retrieve subsets of it; or “cache” some data for efficiency, so they’ll only access it sometimes (the first time they need it, and when the data may have expired).
What exactly is this data for?
When client software (like a web browser or an app) connects to a site, and that site presents a certificate, the client should verify that the certificate is authentic and valid. This data helps clients do that in several ways.
Under o.lencr.org , we provide Online Certificate Status Protocol (OCSP) data. A client may use this data to confirm whether an individual unexpired certificate that we issued is still valid, or was revoked. (This is only for “end-entity” or “leaf” certificates, which we’ve issued to subscribers from one of our intermediate certificates.)
Under c.lencr.org , we provide Certificate Revocation Lists (CRLs) listing all the unexpired certificates that we issued and later revoked.
Under i.lencr.org , we provide copies of our intermediate “issuer” certificates, which are either signed by one of our root certificates or “cross-signed” by another Certificate Authority (CA). A client may use this data to confirm the “chain of trust” from the end-entity certificate it’s verifying, via one or more intermediate steps, to a root CA certificate that it recognizes and trusts.
Why are connections to o.lencr.org over insecure HTTP?
OCSP responses are always served over HTTP. If they were served over HTTPS, there would be an “infinite loop” problem: in order to verify the OCSP server’s certificate, the client would have to use OCSP.
The OCSP response itself is timestamped and cryptographically signed, so the anti-tampering properties of TLS aren’t needed in this case.
Why “ lencr.org ”?
We used to use longer URLs like http://ocsp.int-x3.letsencrypt.org/ . However, when we issued our new root and intermediate certificates, we wanted to make them as small as possible. Every HTTPS connection on the web (billions per day) has to send a copy of a certificate, so every byte matters. We chose lencr.org because of its similarity with our name: Let’s ENCRypt. We pronounce it much like the fictional region of Lancre in Terry Pratchett’s Discworld novels.
Let’s Encrypt adalah otoritas sertifikasi terbuka yang gratis dan terotomatisasi, dipersembahkan oleh organisasi non-profit Internet Security Research Group (ISRG).
R3.o.lencr.org Malware
R3.o.lencr.org is a browser-redirecting app that attaches itself to the main browser in the computer and takes control over some of its settings. R3.o.lencr.org aims to bring different ads to the user’s screen and to promote certain sites by page-redirecting the browser to them.
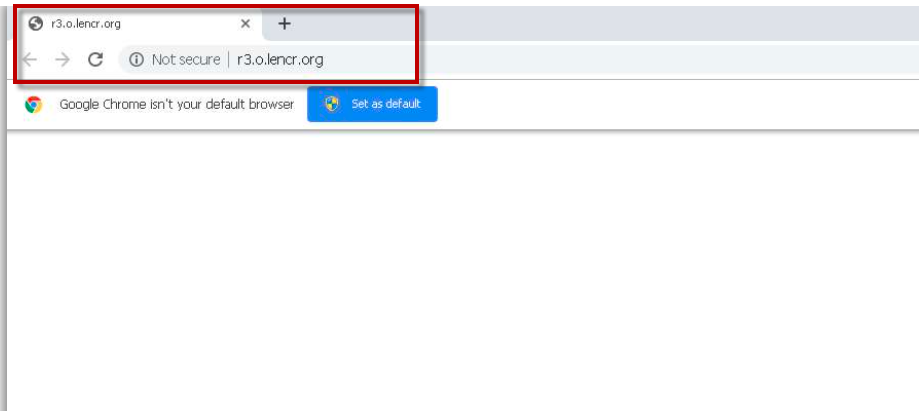
The R3.o.lencr.org Malware will make unwanted changes to your browser.
This is not an uncommon type of software and many computer users (both Windows and Mac) are forced to deal with the consequences of having such an app installed in their systems. R3.o.lencr.org, in particular, is a Windows browser hijacker. It typically spreads via spam messages and file bundles so that more users would install it without actually realizing it. For example, this app may be added as an optional element to the installer of some other program and get installed alongside it. Once installed, R3.o.lencr.org takes over the homepage and the main search engine of the browser. It could be Chrome, Firefox, Edge, Opera or another browser that gets targeted by this app – it doesn’t matter. Most representatives of the browser hijacker category don’t have any compatibility limitations. They are optimized to be as widely compatible as possible so that they can reach a big number of users.
Of course, the end goal of all this is to make money from the ads that this unwanted app displays and from the paid page redirects that it triggers in the browser. Even though to some users this may not seem like too serious of a problem, once a hijacker like R3.o.lencr.org gets installed in the browser, it quickly becomes apparent that surfing the Internet in peace is no longer an option. The undesirable app would keep showering different pop-ups, banners, and box messages on your screen and it will frequently redirect the browser to the sites it is tasked with popularizing. This could make it quite difficult and frustrating to reach the information you are looking for while using the infected browser. Getting a new browser, however, is not a very good solution to this problem, because the unwanted app would still be present in your computer and this may potentially lead to some more serious issues in the long run.
The R3.o.lencr.org Malware
The R3.o.lencr.org malware is not programmed to cause damage or to carry out any criminal activities in the computers it is installed. The R3.o.lencr.org malware is, above all, an advertising app, which means that it will mainly focus on generating revenue through its paid ads and site-promoting activities.
However, this is where the real problems may start to occur. Many of the sites that use the promoting services of apps like R3.o.lencr.org are not to be trusted. Some may even be illegal and be used for spreading different kinds of malicious software, including Ransomware file-encrypting viruses, Trojan horses, and Spyware. In other cases, the hijacker may land you on a fake page that contains phishing elements aimed at extracting sensitive information about you (for example, credit or debit card numbers).
Endangering your computer or virtual privacy may not be the goal of the people behind R3.o.lencr.org, but this may still end up being an indirect result of the advertising activities of this app. Therefore, if you want to keep your PC safe and secure and if you want to stay away from Ransomware, Worms, Trojans, or other threats, we advise you to use the removal guide we’ve prepared and posted below and uninstall the hijacker with its help.
SUMMARY:
R3.o.lencr.org Malware Removal
If you have a Mac virus, please use our How to remove Ads on Mac guide.
Removing R3.o.lencr.org may be a lenghty process but the quick instructions below may save you some time and efforts:
- From the browser’s main menu, select More Tools (or Add-ons) and click on the Extensions tab.
- Then, on the Extensions page search for suspicious-looking extensions that could be linked to R3.o.lencr.org.
- If you find any extensions that have been installed inside the browser without your approval, remove them.
- Restart the browser and see if the browser hijacking problem has been resolved.
In some cases, after the completion of the instructions above R3.o.lencr.org will be removed successfully. If this is not your case, then you may need to use the more detailed R3.o.lencr.org removal guide below.

We highly recommend that you Bookmark this removal guide before you proceed with the steps below as you will need to get back to it after a system reboot.
A system reboot in Safe Mode is required for the smooth completion of the next steps. If you don’t know how to do that, we recommend that you follow the guidelines from this link to safely reboot your computer in Safe Mode and then get back to this page to complete the R3.o.lencr.org removal steps.

WARNING! READ CAREFULLY BEFORE PROCEEDING!
 We get asked this a lot, so we are putting it here: Removing a malware manually may take hours and damage your system in the process. We recommend downloading SpyHunter to see if it can detect the malware for you.
Сам себе PKI: Теория на примере Let’s Encrypt. (Статья 1)
За последние годы инфраструктура приватных ключей PKI (Public Key Infrastructure) незаметно окружила нас со всех сторон:
Большинство сайтов в сети Интернет используют HTTPS протокол. Для его работоспособности необходимо получать сертификаты из удостоверяющих центров (Certificate Authority)
Компании организуют доступ к своей IT инфраструктуре и информационным ресурсам с помощью ключей и сертификатов, которые сотрудники получают из специальных систем.
Для отправки документов в государственные и коммерческие структуры требуется цифровая подпись, которая реализуется теми же механизмами.
Давайте разберемся как работают системы PKI, т.к. они еще долго будут актуальны для обеспечения аутентификации и безопасной передачи данных. В данной статье рассмотрим теорию и в качестве примера PKI возьмём самую известную в мире реализацию PKI — HTTPS протокол в сети Интернет. В качестве удостоверяющего центра будем использовать бесплатный Let’s Encrypt. В следующей статье «Сам себе PKI: Практика на примере OpenSSL и CA Smallstep» перейдем к практике и организуем безопасную передачу данных на основе TLS протокола:
Сначала вручную (с помощью OpenSSL) пройдем цепочку генерации и использования самоподписанных сертификатов в HTTPS сервере.
Далее развернем собственный удостоверяющий центр Smallstep и будем автоматически получать подписанные им сертификаты.
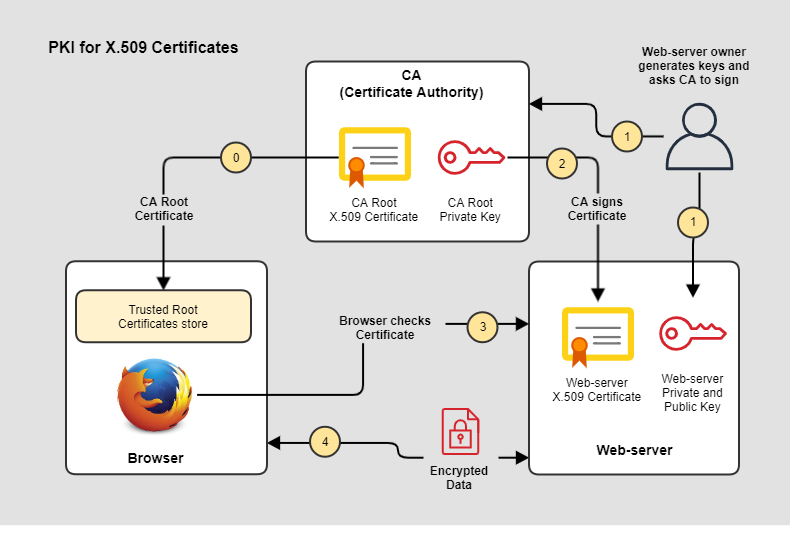
На схеме упрощенная система PKI для организации HTTPS в сети Интернет:
Термины
PKI (Public Key Infrastructure)
Системы PKI построены на криптографии, которая использует пару ключей: публичный (public key) и приватный (private key). Глобальная цель систем PKI — связать пользователей и соответствующие публичные ключи. Пользователями могут быть как реальные люди, так и IP адреса устройств, доменные имена компьютеров и т.д. Разбор принципов криптографии выходит за рамки данной статьи, но для наших целей важно понимать несколько принципов:
Публичный и приватный ключи криптографически связаны между собой.
Публичный ключ можно и нужно распространять открыто. Приватный ключ владелец должен хранить в секрете.
Если владелец приватного ключа зашифрует данные, то каждый сможет их расшифровать с помощью публичного ключа.
Зная публичный ключ любой может зашифровать данные, которые расшифрует только владелец приватного ключа.
CA (Certificate Authority)
Главным элементом систем PKI является удостоверяющий центр (УЦ) — это организация, которая выдает цифровые сертификаты пользователям. С удостоверяющим центром можно взаимодействовать как в ручном режиме, так и организовывать автоматическое получение сертификатов. Для автоматического взаимодействия существует ряд протоколов, перечислю их без подробностей:
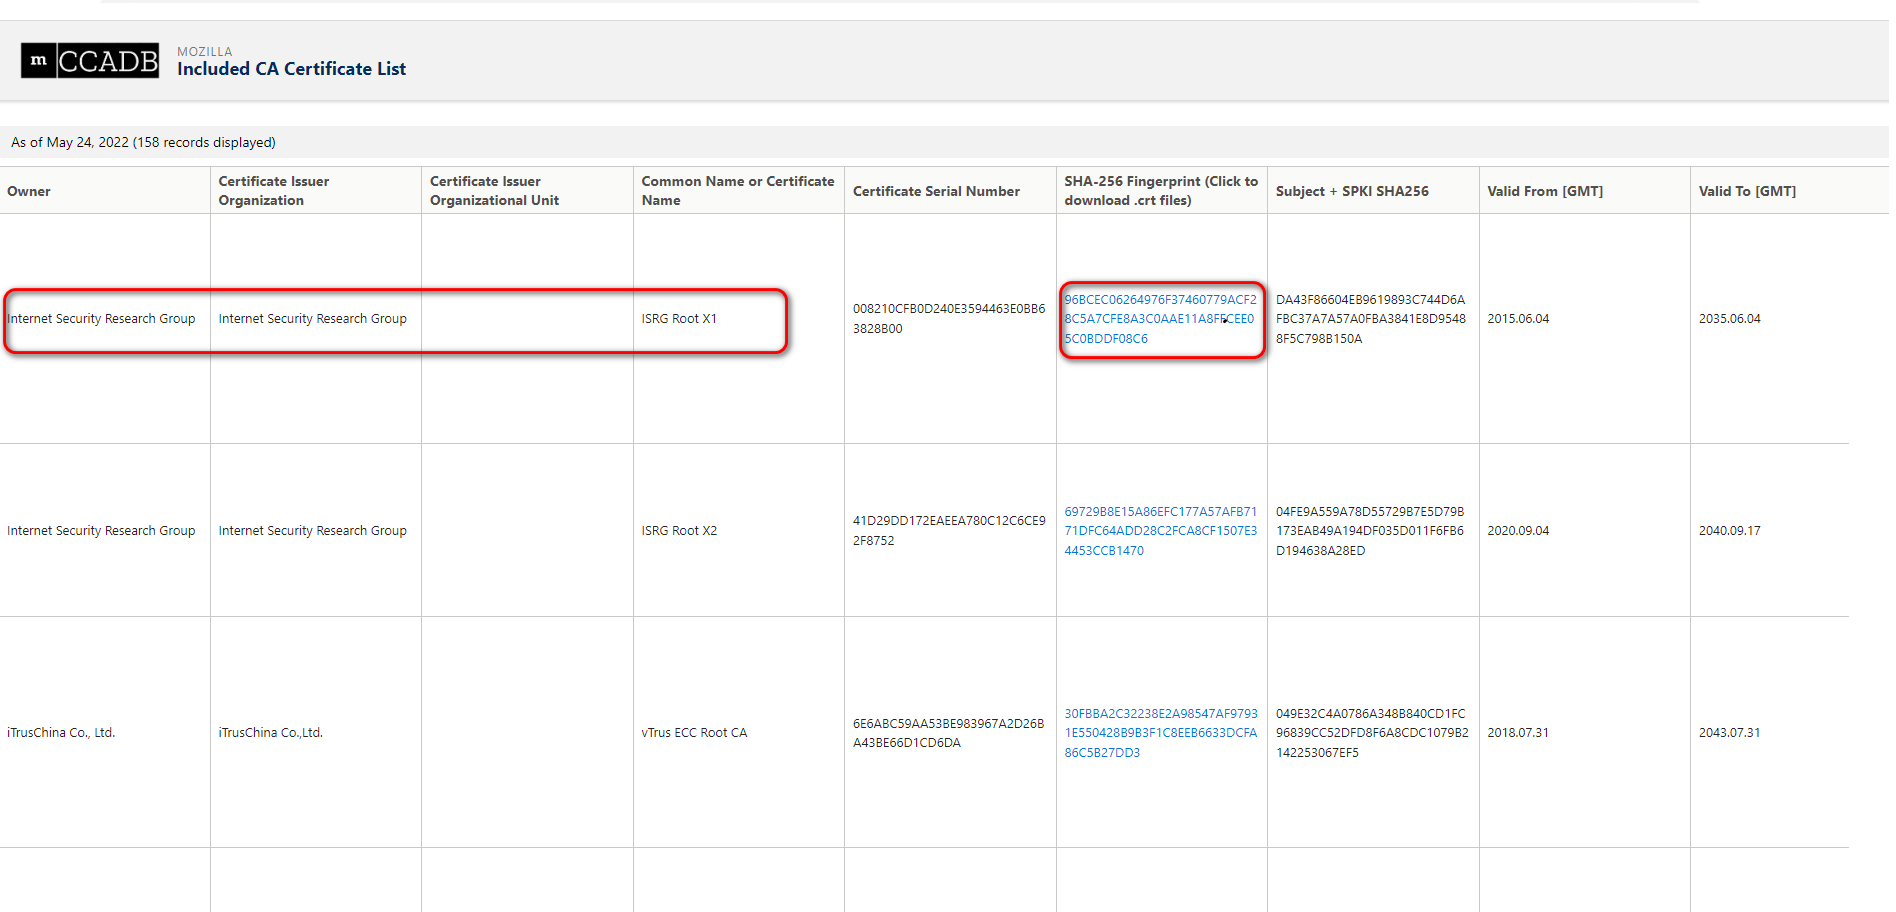
Каждый браузер и операционная система хранит предопределенный список доверительных удостоверяющих центров. Эти списки общедоступны, например, вот список для браузера Firefox от компании Mozilla. Найдем в этом списке компанию Let’s Encrypt (Internet Security Research Group), о которой подробно будем говорить далее. Смотрим на ее корневой сертификат, он называется «ISRG Root X1» и запоминаем его хеш 96BCE. 08C6:
Теперь запускаем браузер Firefox, заходим в хранилище сертификатов (меню Settings / Privacy & Security / View Certificates) и видим тот же корневой сертификат с тем же хешом (fingerprint):
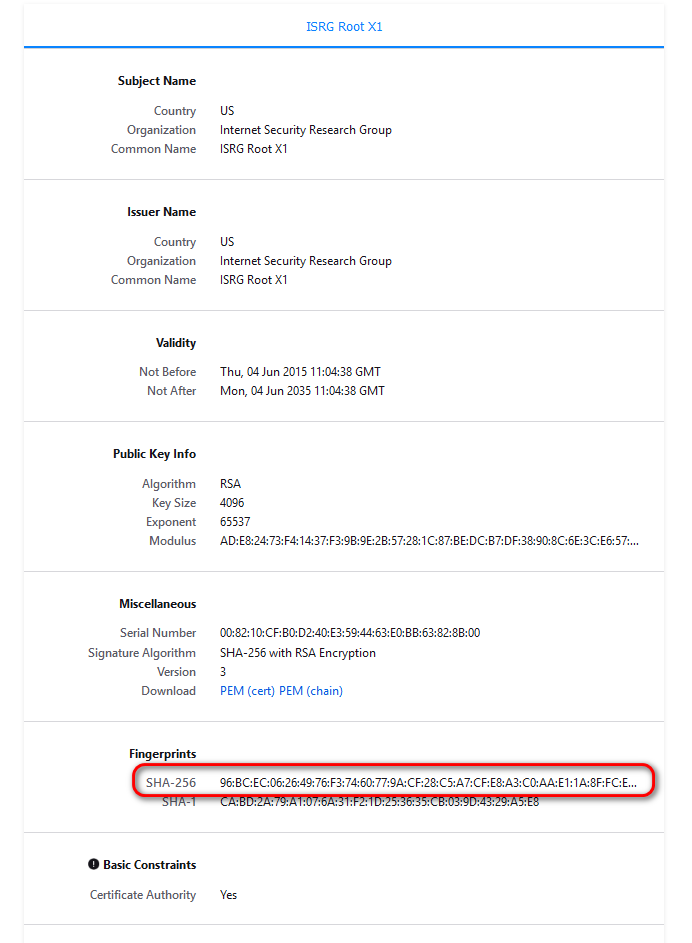
Эта проверка доказывает, что в нашем браузере находится именно тот корневой сертификат, который поместила компания Mozilla, а не злоумышленник.
X.509 certificate
Факты которые необходимо знать про сертификаты:
Сертификаты, которые относятся к удостоверяющим центрам, называются корневыми (root certificates) или промежуточными (intermediate certificates) в зависимости от типа CA.
Приватным ключом корневого CA можно подписывать как сертификаты промежуточных CA, так и сертификаты конечных точек (end-point). Обычно конечные сертификаты подписываются приватными ключами промежуточных CA.
Приватными ключами конечных точек нельзя подписывать другие сертификаты.
Сертификаты выдаются в формате X.509:
Такой сертификат содержит структуру данных, которая состоит из идентификационных данных (Identity), дополнительных расширений (Extensions) и публичного ключа (Public Key) его владельца.
Сертификат подписывается корневым или промежуточным CA и его подпись связывает Identity владельца с его публичным ключом.
Схематично X.509 сертификат имеет следующую структуру:
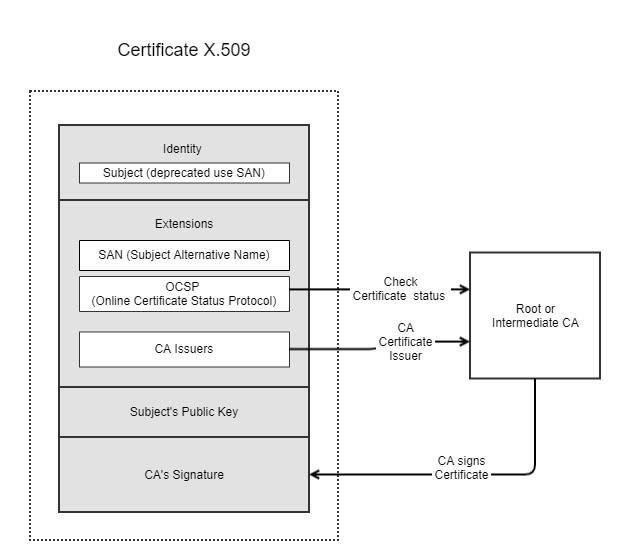
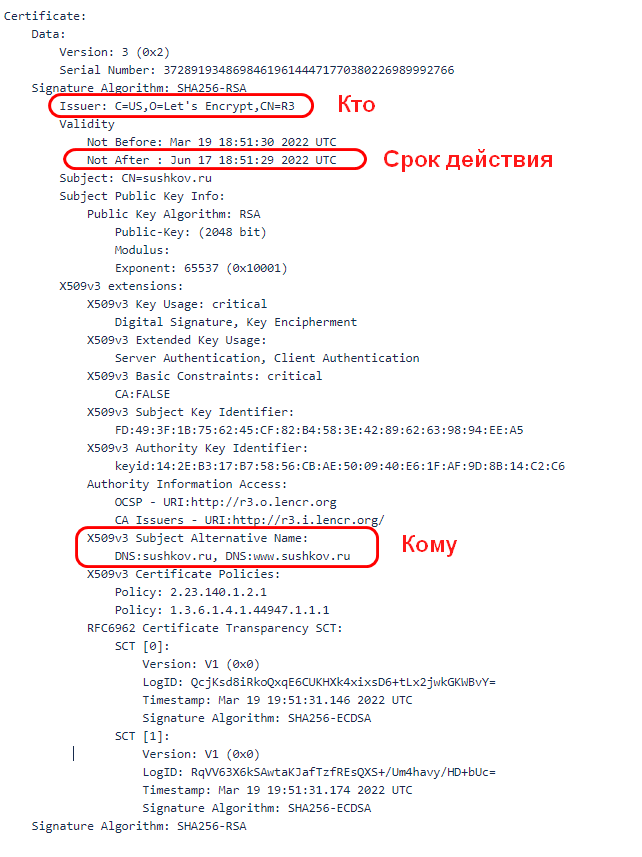
Рассмотрим подробнее атрибуты сертификата. Для просмотра информации о сертификате сайта есть как онлайн средства, о которых поговорим далее, так и офлайн утилиты. Здесь приведу вывод утилиты OpenSSL, которая доступна для всех популярных операционных систем и будет подробно рассмотрена в следующей статье: «Практика на примере OpenSSL и CA Smallstep». Для примера посмотрим на сертификат моего сайта:
openssl s_client -connect sushkov.ru:443
Главные атрибуты, на которые надо обратить внимание при просмотре сертификата — это кто, кому и на какой срок выдал сертификат:
Какой CA выдал сертификат:
Issuer: C=US,O=Let’s Encrypt,CN=R3
Имя пользователя. Раньше для этого использовалось поле Subject. Теперь используется его расширение:
X509v3 Subject Alternative Name: DNS:sushkov.ru, DNS:www.sushkov.ru
Validity Not After : Jun 17 18:51:29 2022 UTC
Остальные поля не столь наглядны и, в основном, используются для установки безопасного HTTPS соединения с сайтом:
Способы использования сертификата:
X509v3 Key Usage: Digital Signature, Key Encipherment
X509v3 Extended Key Usage: Server Authentication, Client Authentication
Не является CA сертификатом, а значит — это конечный сертификат
X509v3 Basic Constraints: CA:FALSE
Имя пользователя (Subject):
X509v3 Subject Alternative Name: DNS:sushkov.ru, DNS:www.sushkov.ru
Публичный ключ пользователя:
Subject Public Key: / блок с бинарными данными /
Уникальные ключи для Subject и CA, используются в процессе проверки сертификатов (certificate path validation):
X509v3 Subject Key Identifier: / блок с бинарными данными /
X509v3 Authority Key Identifier: / блок с бинарными данными /
Адрес для получения статуса отзыва (revocation status) X.509 сертификатов:
Адрес для получения сертификата CA:
Параметры Certificate Transparency
RFC6962 Certificate Transparency SCT
Цифровая подпись сертификата, которая записана удостоверяющим центром:
Signature Algorithm: SHA256-RSA / блок с бинарными данными /
Certificate chain / certificate path validation
Цепочкой сертификатов называют последовательность из корневого сертификата CA, промежуточного сертификата CA и конечного сертификата CA.
Обычно конечный сертификат подписан приватным ключом промежуточного CA, сертификат промежуточного CA подписан приватным ключом корневого CA, сертификат корневого CA подписан собственным приватным ключом. Таким образом корневой сертификат является самоподписанным сертификатом (Self-signed certificate) и в нем совпадают Issuer name и Subject name.
В общем случае может быть несколько промежуточных CA, но это сильно усложняет топологию.
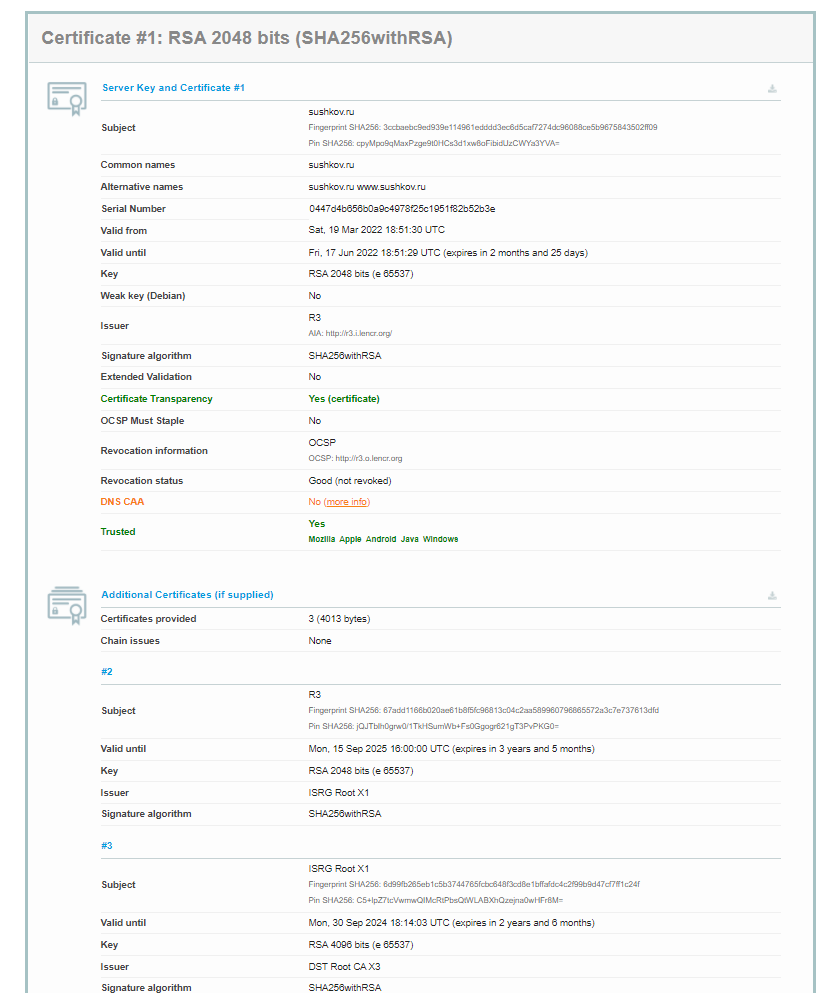
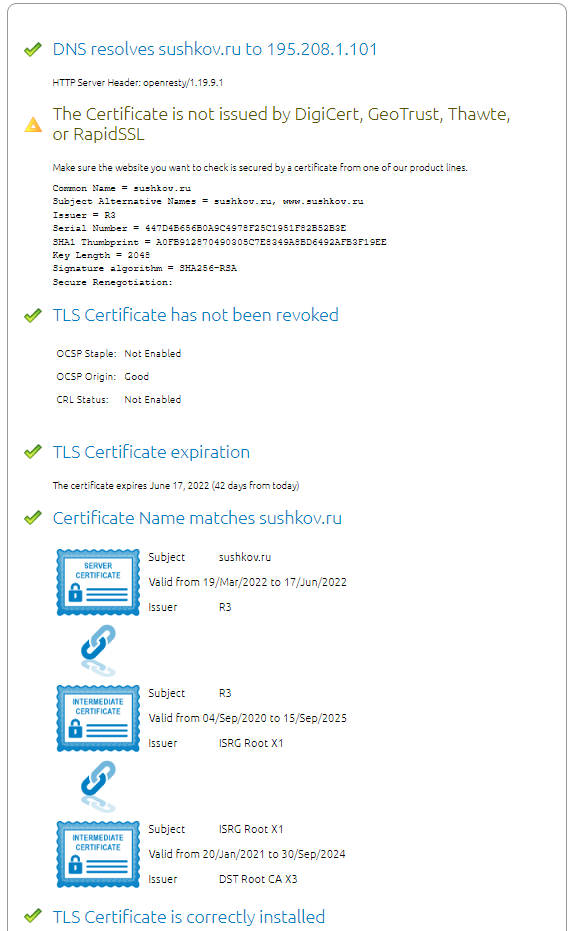
Для установления HTTPS соединения сайт может посылать браузеру как цепочку из промежуточного и конечного сертификата, так и только конечный сертификат. В любом случае при установке HTTPS соединения (TLS handshake) браузер должен проверить всю цепочку до корневого сертификата в своем списке доверенных корневых удостоверяющих центров (Trusted Root Certification Authorities). Этот процесс называется certificate path validation. Пример проверки цепочки сертификатов для моего сайта можно посмотреть на сайтах, которые специализируются на проверке сертификатов, например, сайт показывает полную цепочку сертификатов :
Под номером 1 идет конечный сертификат для сайта sushkov.ru
Номер 2 — промежуточный сертификат CA
Номер 3 — корневой сертификат CA находится в списке доверенных удостоверяющих центров:
Протоколы
SSL / TLS
В стандартах название SSL протокола было заменено на TLS в 1999 году, но до сих пор используется как синоним технологии. Наиболее актуальный стандарт TLS 1.3, опубликованный в 2018. TLS обеспечивает три главных принципа безопасного обмена данными:
Сonfidentiality — конфиденциальность данных обеспечивается шифрованием трафика между браузером и сайтом.
Authentication — аутентификация сайта. CA выдает сертификаты для сайтов, к которым у владельца сертификата действительно есть доступ. Для этой проверки могут использоваться разные механизмы. Например, во время процесса выдачи сертификата владельцу сайта может быть предложено поместить по определенному адресу на сайте файлы с определенным содержанием.
Integrity — целостность или защита от изменения данных. Эта защита является частью алгоритма обмена шифрованными данными, при котором в сообщение включается MAC (message authentication code).
HTTPS
Если трафик HTTP шифруется и передается с помощью протокола TLS, то он называется HTTPS. При этом шифруются как сами данные, так и HTTP заголовки.
TLS handshake
Для установления TLS соединения используется процесс, который называется TLS handshake. В TLS handshake участвуют клиент (браузер или web-приложение) и HTTPS сервер. Алгоритм установки HTTPS соединения следующий:
Клиент посылает сообщение ‘client hello‘, которое содержит:
Версии поддерживаемых протоколов TLS (TLS 1.0, 1.2, 1.3, etc.)
Набор поддерживаемых алгоритмов шифрования (cipher suite)
Производьную строку «client random»
Сервер отвечает сообщением ‘server hello‘. Сообщение содержит:
Выбранный сервером алгоритм шифрования (cipher suite)
Произвольную строку «server random»
Клиент аутентифицирует сервер. Для этого проверяет сертификат сервера:
Осуществляется процесс проверки цепочки сертификатов (certificate path validation)
Проверяется, что запрашиваемое из браузера доменное имя присутствует в сертификате в списке Subject Alternative Name
Проверяется срок действия сертификата
Проверяется revocation статус сертификата. Для этого браузер использует список отозванных сертификатов CRL (Certificate Revocation List) или протокол OCSP (Online Certificate Status Protocol)
Ряд дополнительных атрибутов таких как policy, restrictions и т.п.
Если все проверки прошли успешно, клиент генерирует premaster secret зашифровывает публичным ключом сервера и отправляет ‘change cipher spec’.
Сервер расшифровывает premaster secret своим приватным ключом.
Клиент и сервер генерируют сессионный ключ (session key), используя параметры client random, server random и premaster secret. Сессионный ключ получается одинаковым у клиента и сервера и будет использоваться для симметричного шифрования данных после завершения процедуры TLS handshake.
Клиент и сервер отправляют друг другу сообщение «finished», зашифрованное session key.
На этом процедура TLS handshake завершена и дальнейший обмен данными шифруется с помощью session key.
mTLS (Mutual TLS ) — это дополнительный шаг установки TLS соединения, при котором происходит проверка сервером клиентского сертификата. Подробнее этот процесс разберем на практике в следующей статье: «Практика на примере OpenSSL и CA Smallstep».
Использование CA Let’s Encrypt
Теперь запросим бесплатный сертификат из удостоверяющего центра Let’s Encrypt и разберём процесс организации HTTPS соединения между браузером и моим сайтом https://sushkov.ru. На схеме показана топология CA Let’s Encrypt и процесс получения сертификатов:
Корневой приватный ключ для корневого сертификата «ISRG Root X1» хранится offline, им подписываются intermediate сертификаты, в Let’s Encrypt их несколько. R3 — один из них.
С помощью intermediate ключей уже подписываются конечные (endpoint) сертификаты.
Предусловия для работоспособности сценария:
0. Корневой сертификат Let’s Encrypt должен быть помещен в браузер в список «Trusted Root Certification Authorities». Это мы уже уже видели.
1. Первым шагом владелец сайта запускает утилиту certbot, которая взаимодействует с его сайтом и CA Let’s Encrypt.
2. Certbot просит владельца поместить два файла с определенными именами и содержимом по указанному адресу на сайте. Если владелец это сделал, значит он подтвердил, что имеет к нему доступ. Пример запроса для одного из файлов:
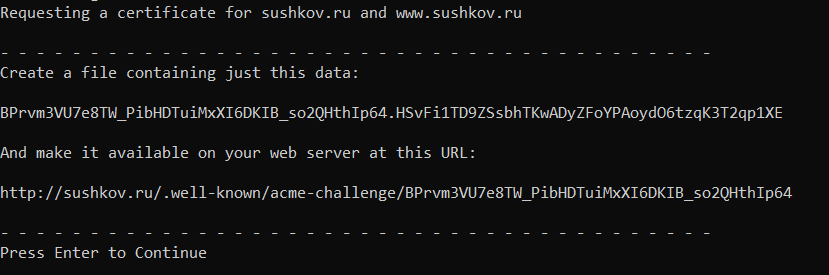
3. Certbot проверяет наличие файлов.
4. Certbot генерирует приватный ключ, публичный ключ и запрос на сертификат (CSR) и отправляет его на подпись CA Let’s Encrypt.
5. CA подписывает сертификат своим приватным ключом и возвращает в сertbot.
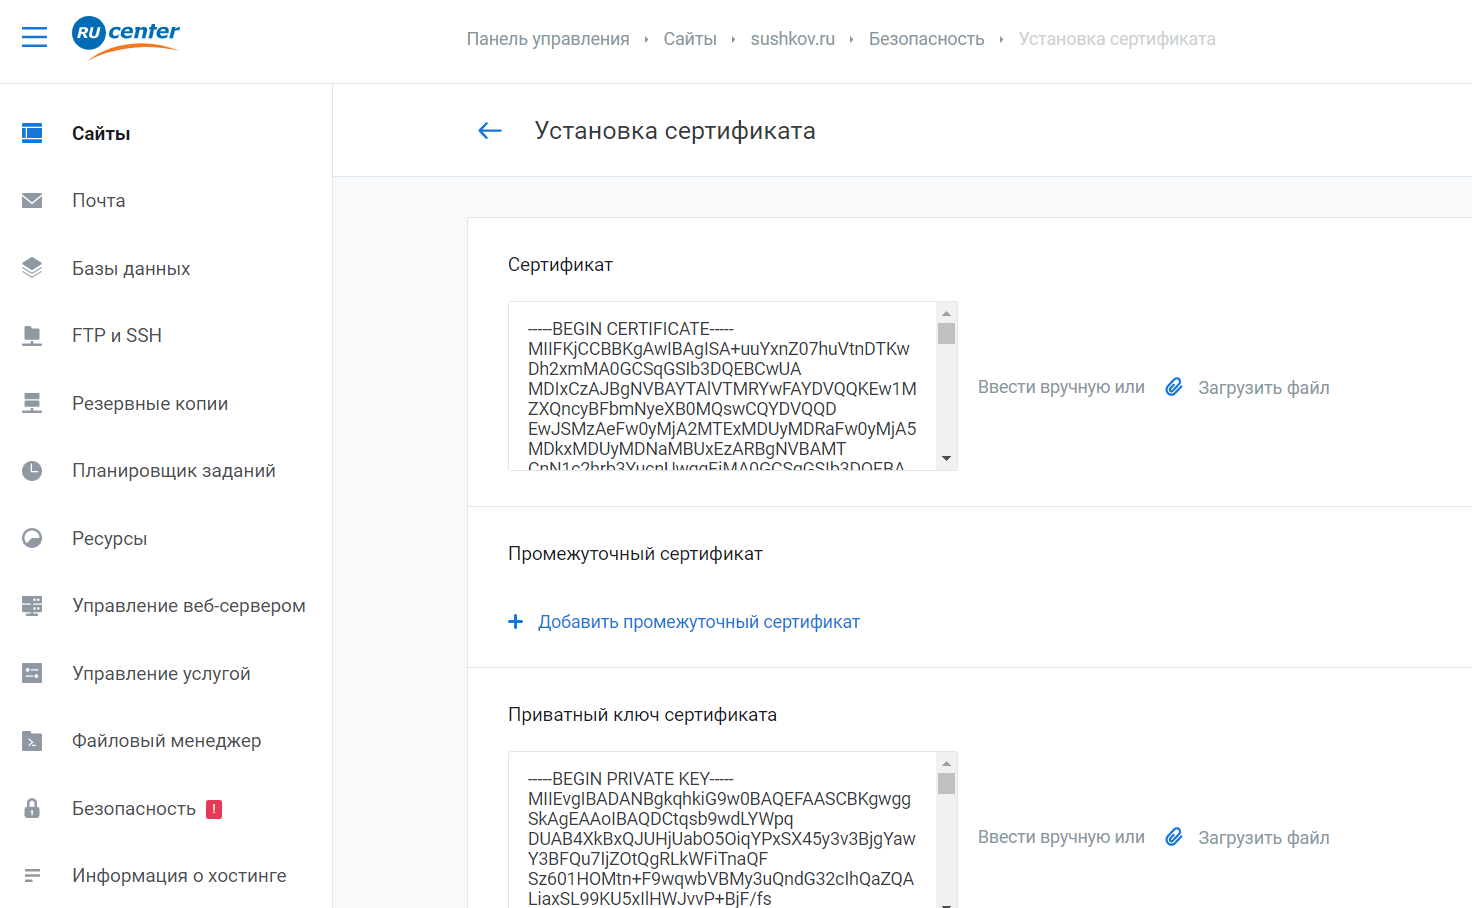
6. После этого владелец помещает сертификат и приватный ключ на сайт. Как конкретно это происходит зависит от платформы, на которой хостится сайт. Пример загрузки сертификата и приватного ключа у провайдера RU-CENTER:
7. Теперь при доступе из браузера к сайту https://sushkov.ru будет устанавливаться TLS соединение .
8. Обмен данными происходит по шифрованному каналу.
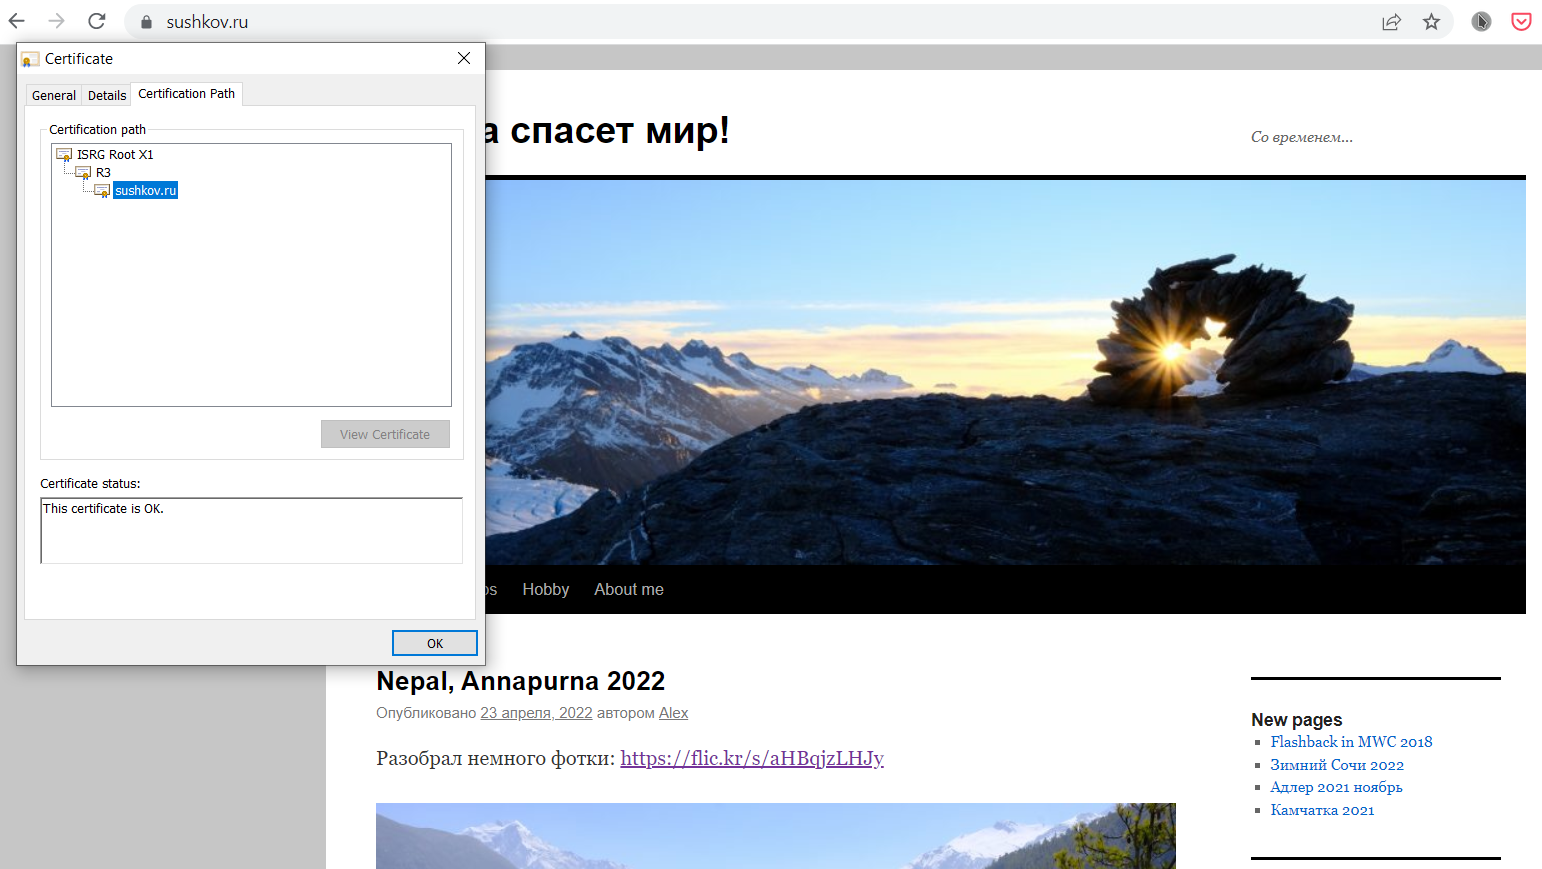
Проверить сертификат сайта может каждый. Для этого надо нажать на замочек в адресной строке и посмотреть сертификат, в котором, как уже обсуждалось в начале статьи, главное — это кто, кому и на какой срок его выдал. Если эти поля соответствуют действительности, то вы находитесь на правильном сайте:

Тут же можно посмотреть на цепочку сертификатов:
Убедиться, что сертификат сайта, действительно, валиден можно и на сторонних онлайн ресурсах. На них, как правило, выдается гораздо информации, чем из браузера. Например, вот вывод сайта компании Qualys:
Заключение
В статье мы изучили теоретические основы PKI и посмотрели, как работает система удостоверяющих центров для организации HTTPS соединений браузера с Интернет сайтами. Поняли, на какую информацию надо обращать внимание при просмотре сертификатов сайтов. Теперь можно сделать несколько важных выводов:
Не надо бездумно добавлять сертификаты в список доверенных CA! А это очень просто сделать в Windows, запустив на выполнение файл с расширением «CRT». Ведь, если в списке окажется сертификат злоумышленника, то он сможет организовать, так называемую, атаку MITM (Man-in-the-middle) и незаметно читать все сообщения в соцсетях и мессенджерах, получать пароли от банковских систем.
Как понять, что используется сертификат злоумышленника? Смотрим на сертификат сайта и видим, что его выдал CA не из эталонного списка, а попавший туда позже. На картинке ниже видим Касперского на сайте Росбанка. Касперский явно не является доверительным CA из списка браузера. Отсюда делаем вывод, что он установил свой сертификат позже. Но Касперскому мы верим, что он ничего плохого делать не будет, а просто проверит на вирусы!)
Основной вывод — тщательно проверяйте сертификаты сайтов, если они имеют важное значение в вашей жизни и финансовом благополучии!
 What is R3.o.lencr.org?
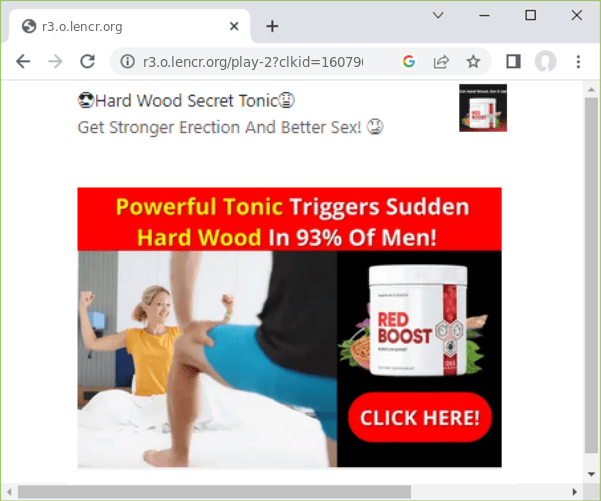
 R3.o.lencr.org attacks Google Chrome, Microsoft Edge, Mozilla Firefox, Brave, Opera, Vivaldi, Safari, and Internet Explorer.

R3.O.LENCR.ORG infects web browsers.

The R3.O.LENCR.ORG risk level is Medium
Threat Summary:
 Removal Instructions for R3.O.LENCR.ORG virus on Windows
It is only for power users!
Remove the virus using UnHackMe — Ultimate Malware Killer
The program is entirely free for 30-days (including the support).
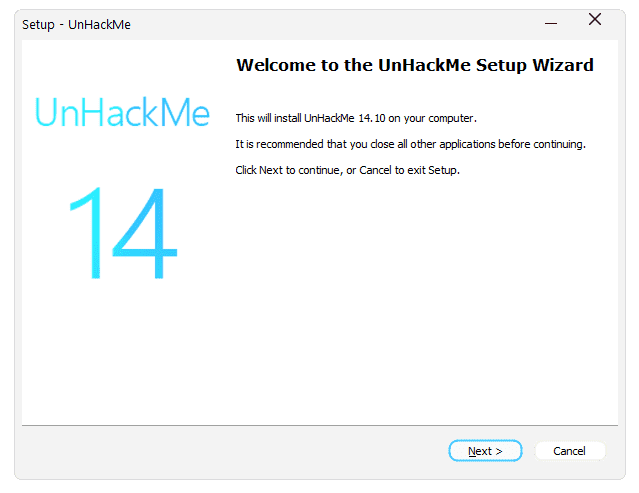
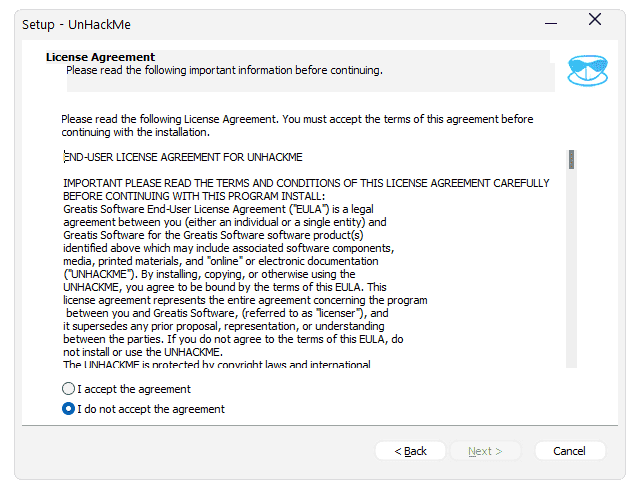
Download and Install UnHackMe
Scan for R3.O.LENCR.ORG malware using UnHackMe
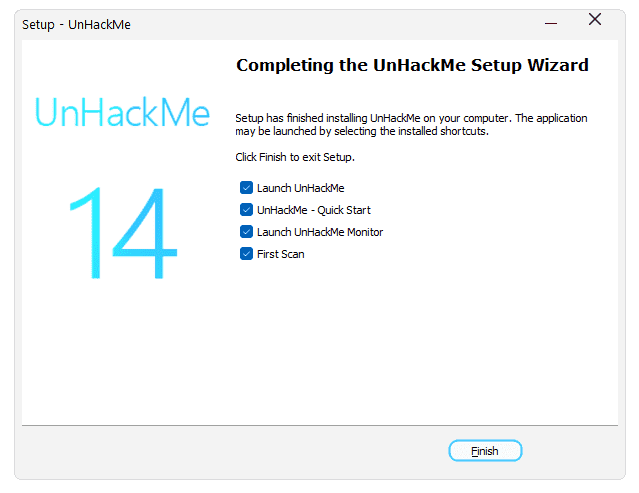
First scan will start automatically.
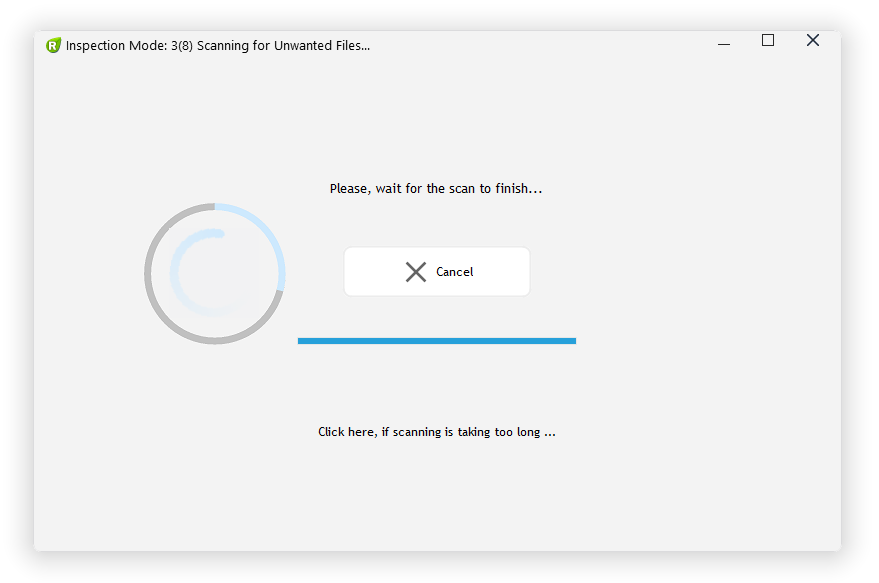
Remove R3.O.LENCR.ORG malware
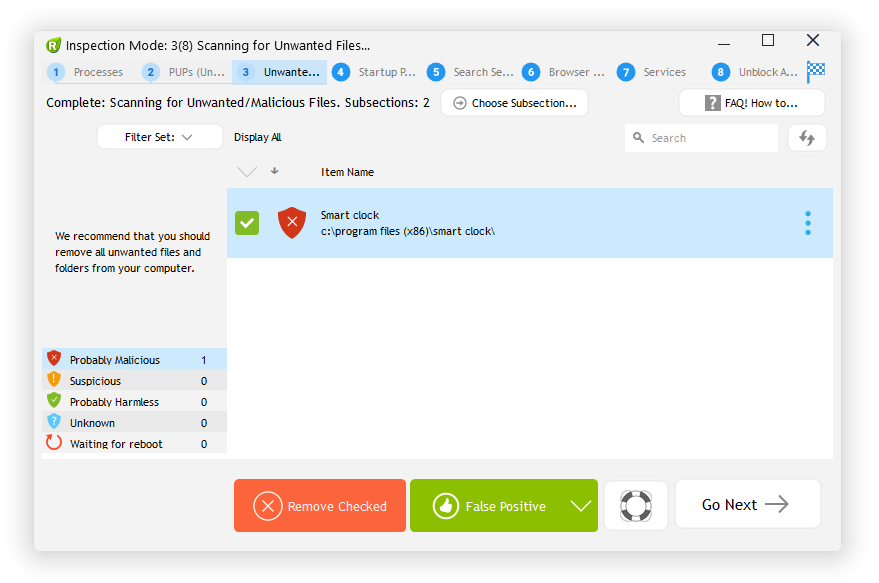
- Carefully inspect found items.
Malicious items are marked by red shield.
Suspicious items are yellow.
UnHackMe automatically creates a System Restore point before fixing!
It is important to have System Restore active in case of recovering deleted files.
Next click the red button: Remove Checked!
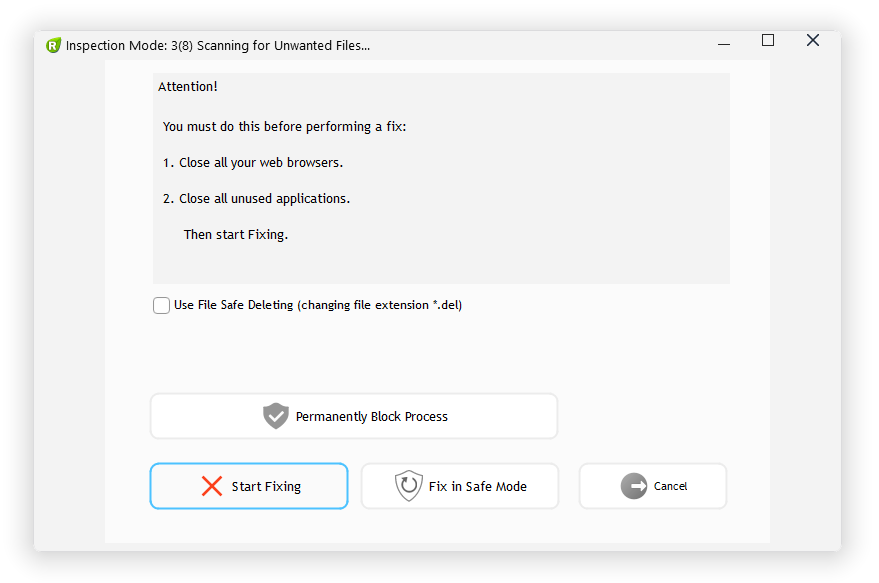
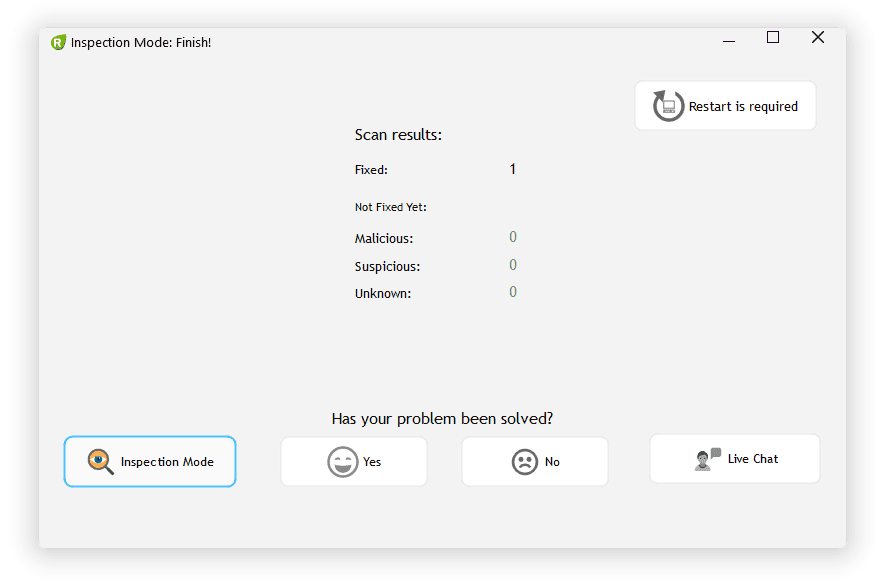
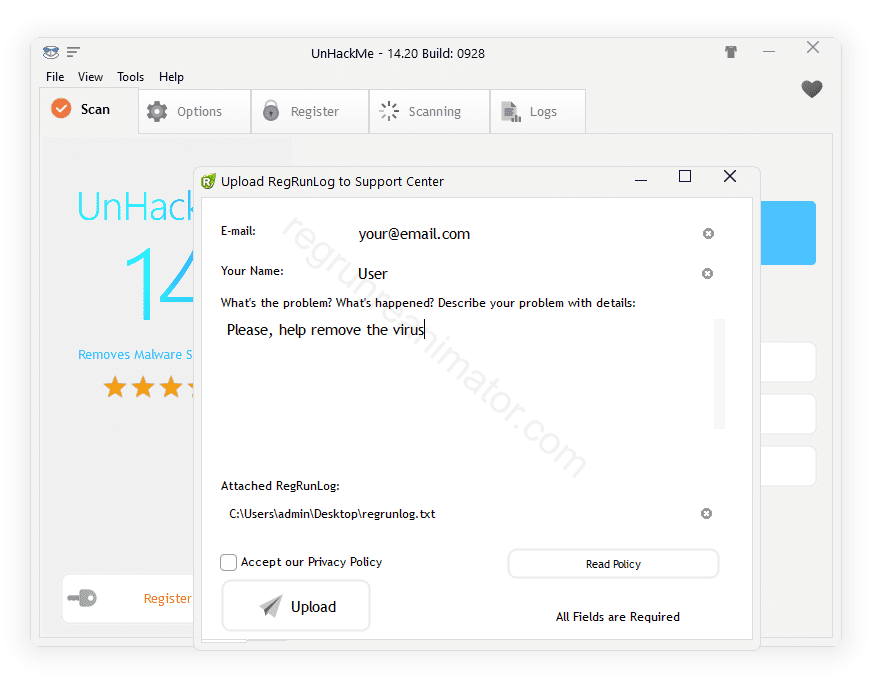
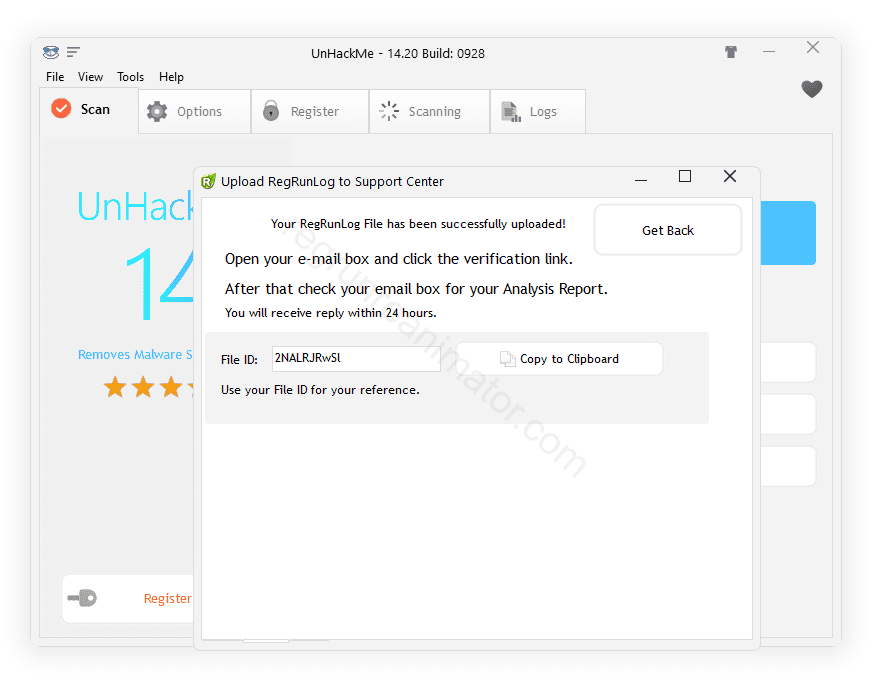
Confirm that the computer is virus free with the UnHackMe support team
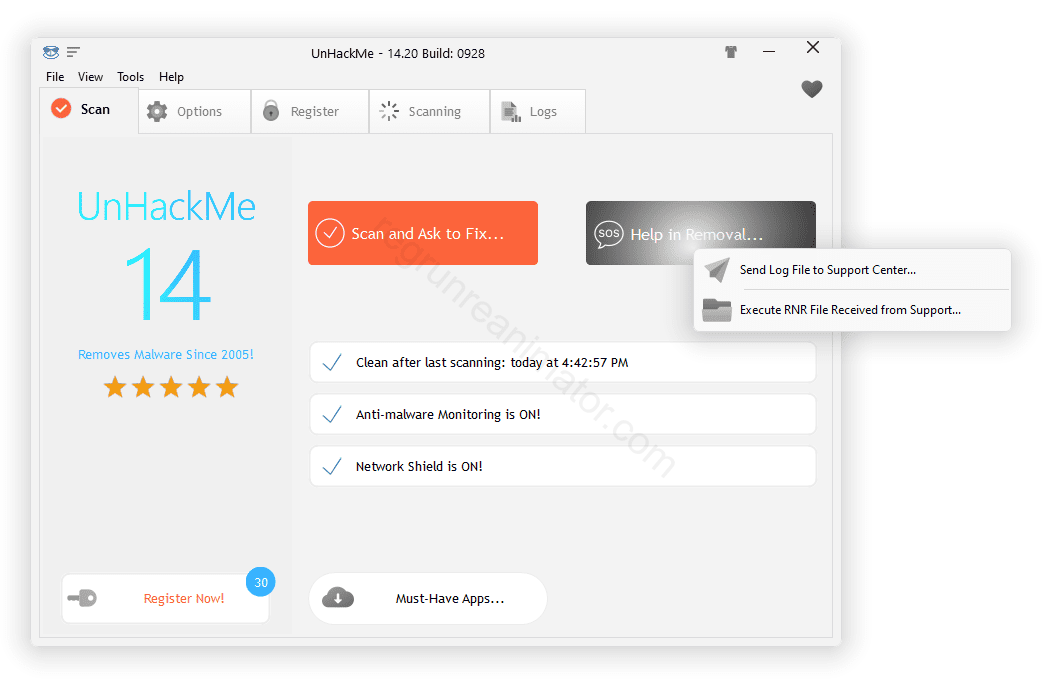
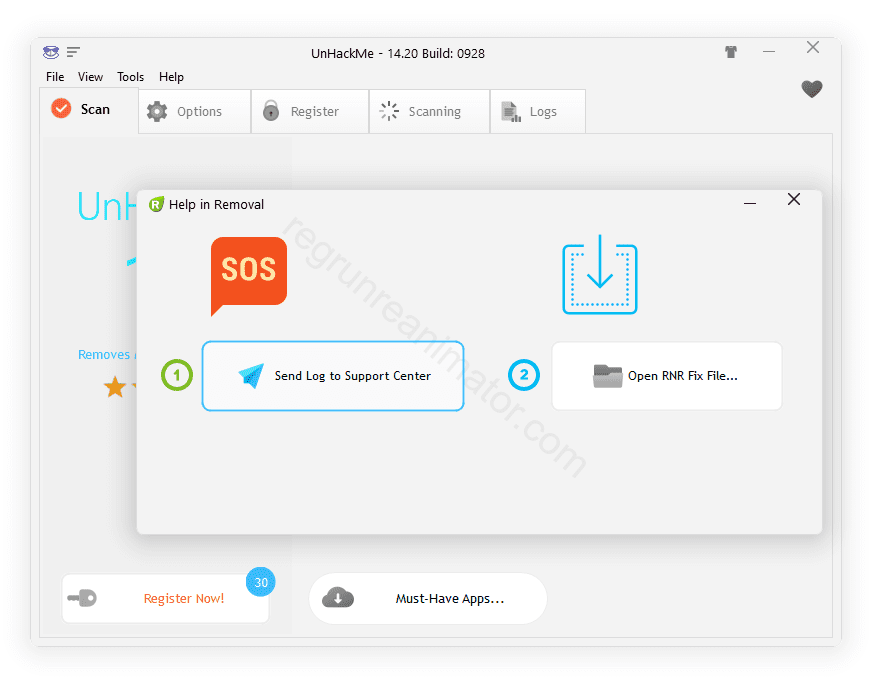
- Open UnHackMe.
- Click the «Help in Removal» button on the main screen.
Remove the virus using Malwarebytes Antimalware
- Download Malwarebytes for Windows. Download Malwarebytes
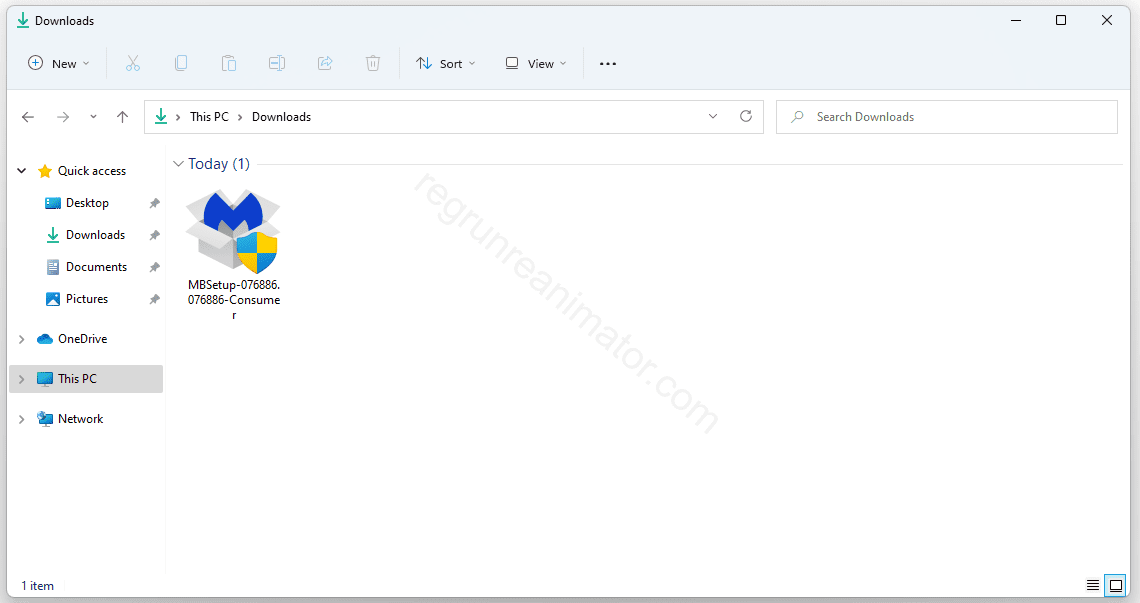
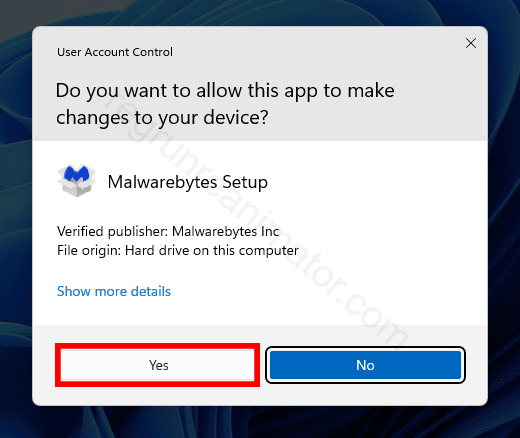
Accept the User Account Control question.
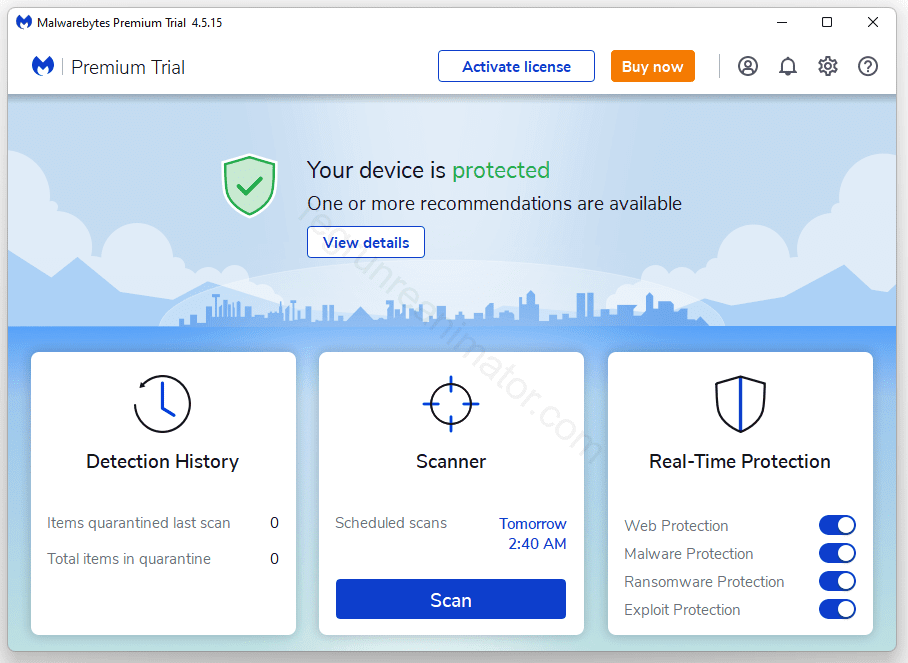
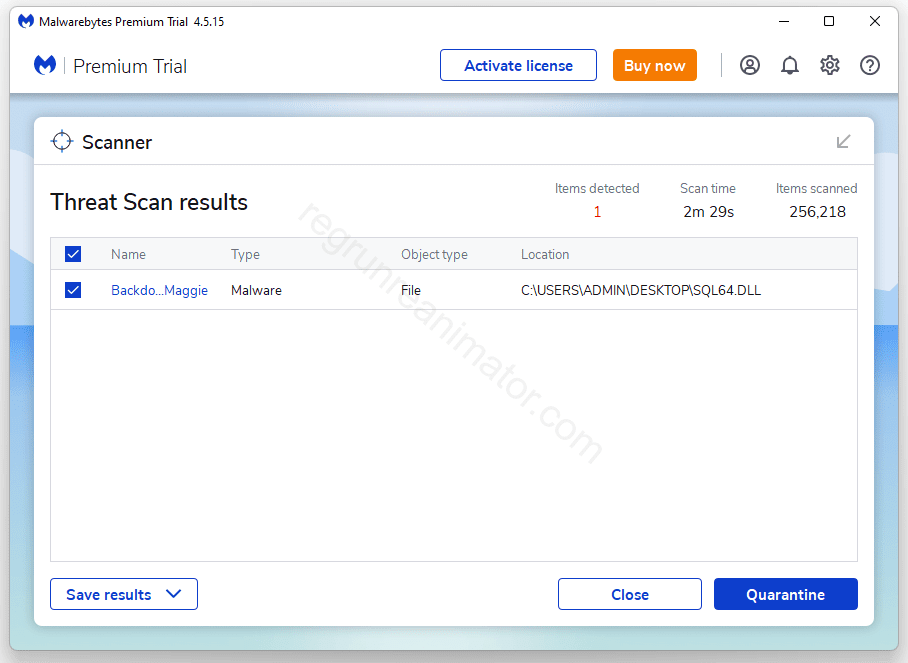
Protect your computer against R3.O.LENCR.ORG using AdGuard Ad Blocker
- Blocks all kinds of ads
- Removes annoying web elements
- Saves traffic and speeds up page loading
- Works for browsers and apps
- Maintains site functionality and appearance
- Download AdGuard
Download Adguard - When the download is finished, double-click on the file adguardInstaller.exe.
- Answer Yes to the question in the User Account Control dialog.
- Follow installer instructions.
- Click the Finish button.
- When the installation is complete, you will see the Quick Tour window.
- Click Let’s do it! to start working with Adguard!
How to remove R3.O.LENCR.ORG virus manually?
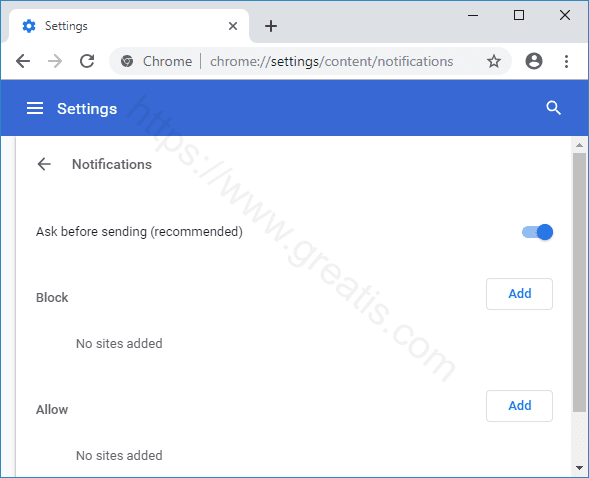
- Disable Web Push Notifications in your browser.
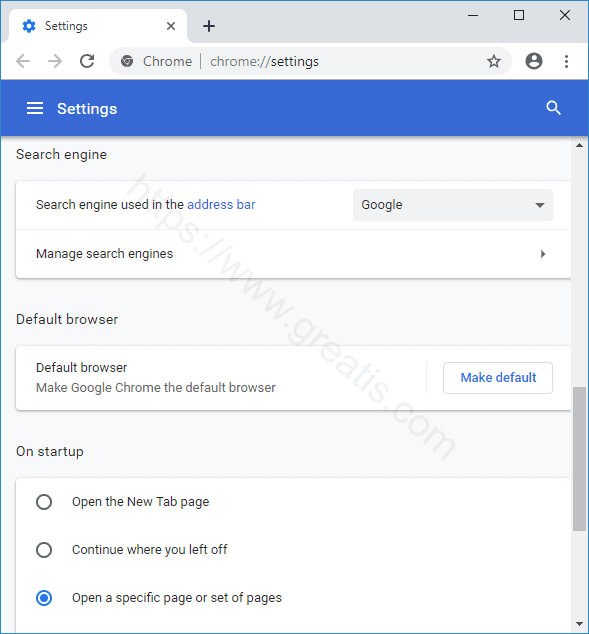
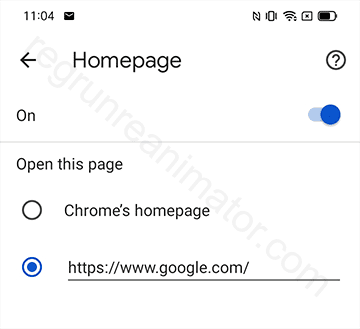
More info. - After that, check the search settings and homepage of your browser. Reset them if needed.
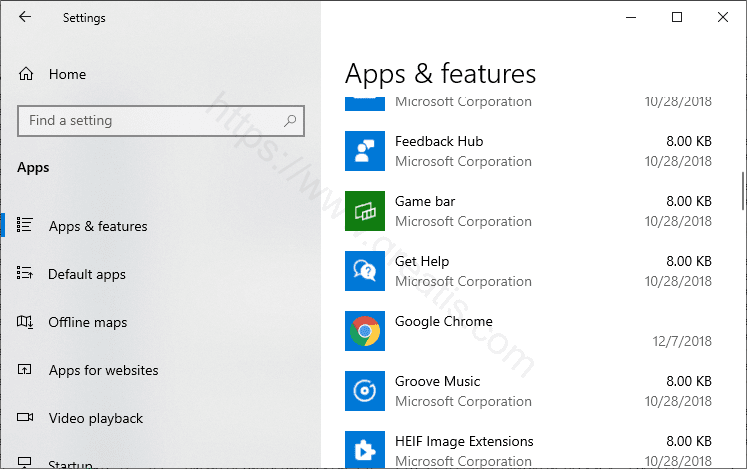
- Check recently installed apps and uninstall unknown apps.
More info. - Open Task Manager and close all unused programs.
Use the Details tab in the Task Manager.
Customize columns to display the «Command line».
Virus programs often use random filenames.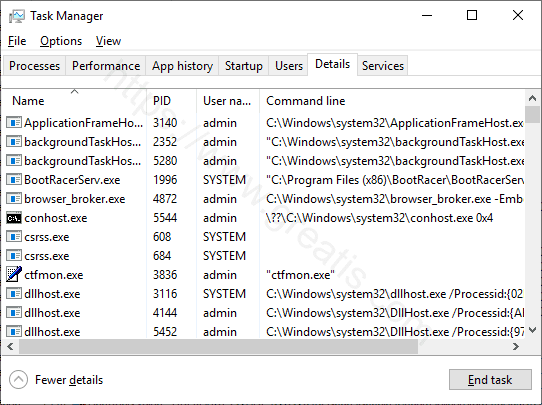
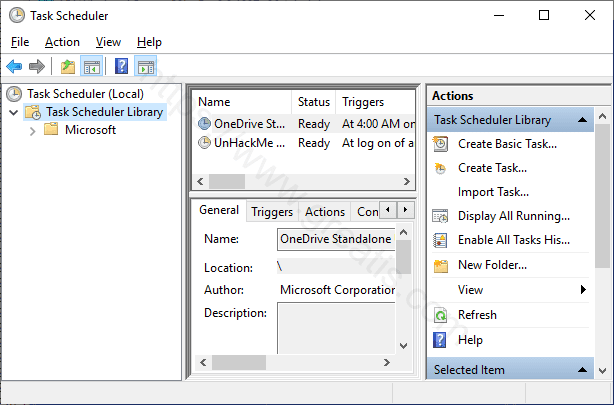
More info. - Delete virus scheduled tasks.
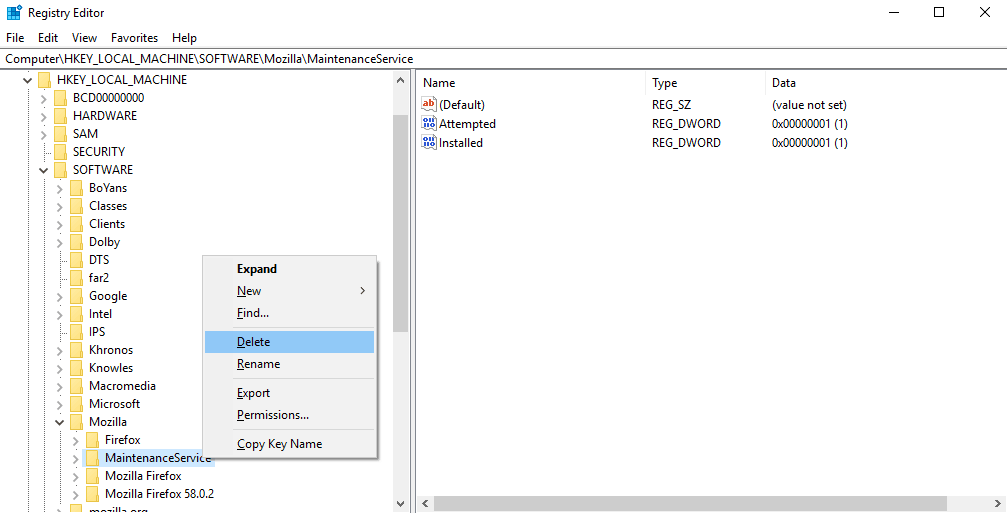
More info. - Find and delete all keys with virus name in it’s content.
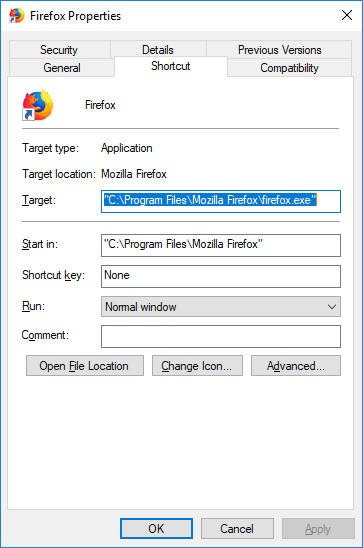
More info. - After that, check the shortcuts of your browsers on having additional addresses at the end of the command line. Check if shortcuts run the actual browser and not the fake ones. Remember: Chromium is a fake browser, the real name has to be Chrome.
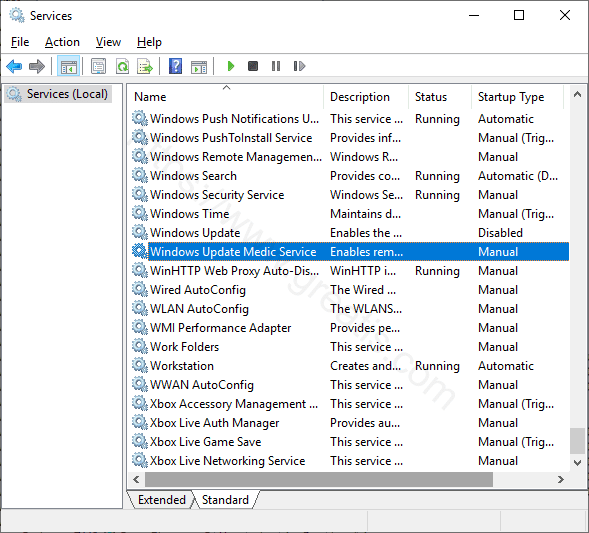
- Stop and disable unknown services. Be careful! Do it only if you are fully sure that you do!
More info. - Remove all unused extensions (or plug-ins) in your browsers. If it does not help, you need totally reset your browser.
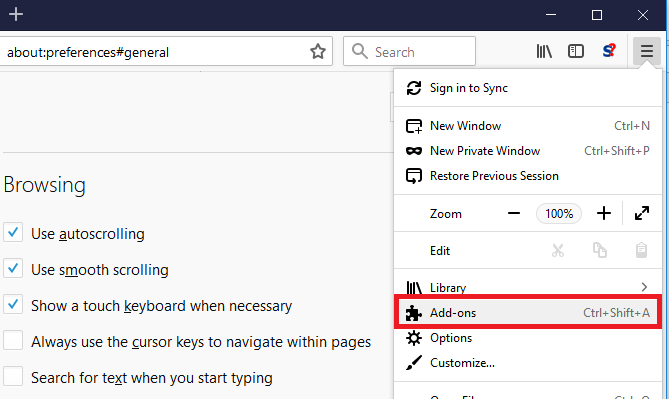
More info. - Next, you have to check your DNS settings. Follow your provider’s instructions, delete all unknown DNS addresses.
More info.
 Removal Instructions for R3.O.LENCR.ORG virus on Android
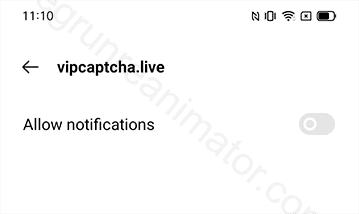
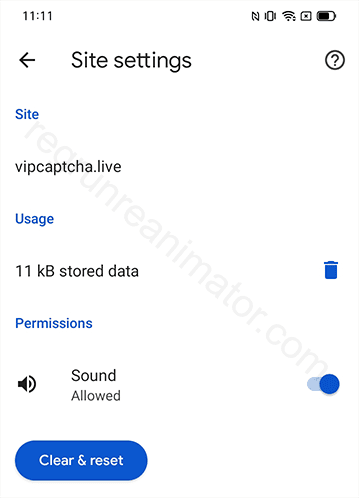
Remove the R3.O.LENCR.ORG website from Chrome on Android
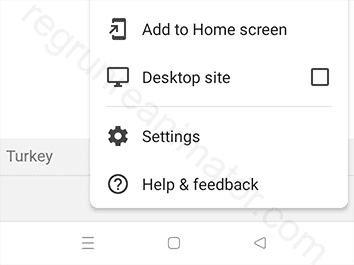
- Open Chrome. Go to the main menu.
- Tap on the Settings.
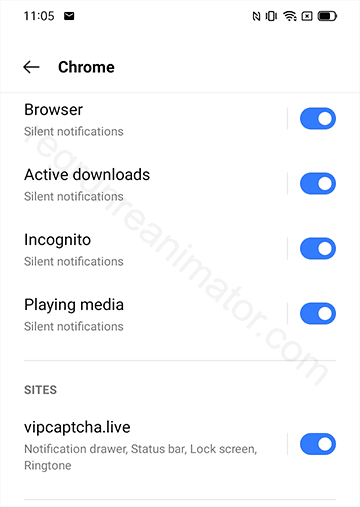
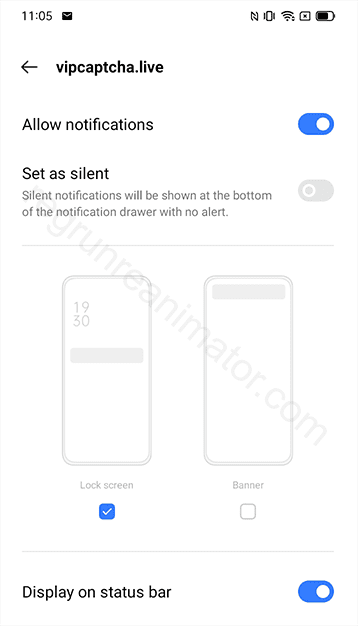
Remove the virus from Android Core
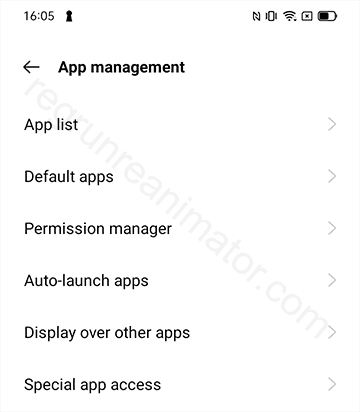
Remove Suspicious Applications
- Open Settings.
- Go to the App Management.
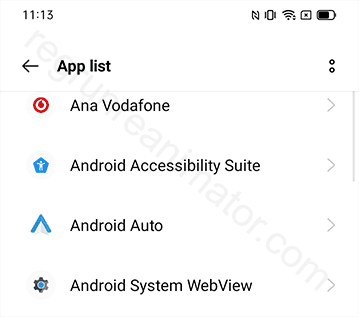
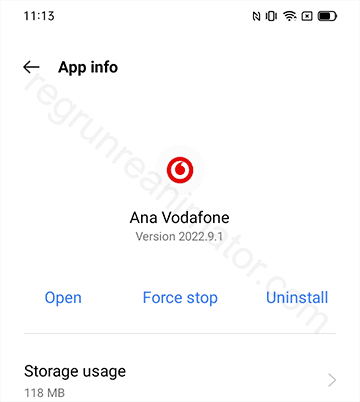
Activate Google Play Protect
- Open Settings.
- Tap Security.
- Choose Google Play Protect.
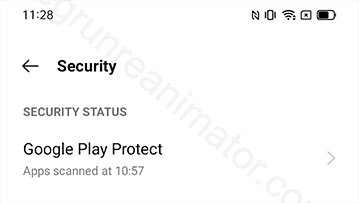
Clear your cache and downloads
- Open Settings.
- Go to the Apps List.
- Locate the Chrome.
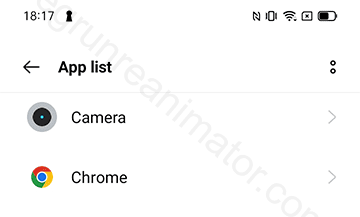
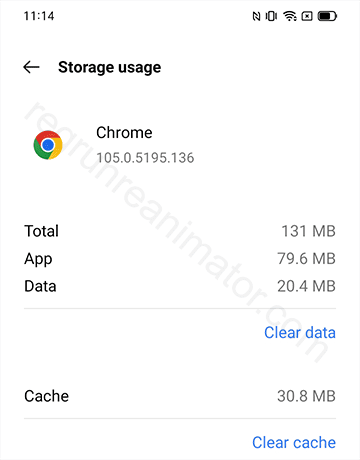
Restart your Android phone in the Safe Mode
if the Safe Mode is available.
- Press and hold the Power button.
- Choose the Safe Mode option.
- Restart your phone.
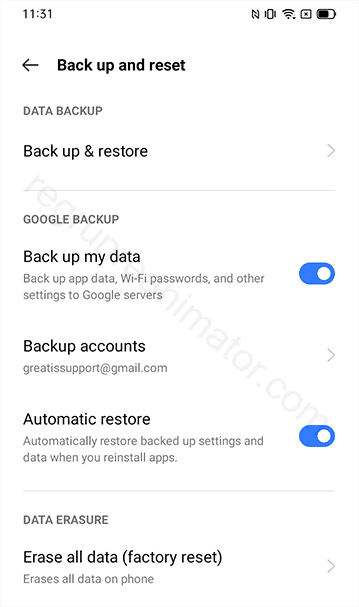
If nothing helps, reset your phone
- Open Settings.
- Tap Additional Settings.
- Choose Backup and Reset. You can use the search to find Reset.
Remove the virus using Malwarebytes for Android
- Download Malwarebytes for Android.
Download Malwarebytes - Install Malwarebytes for Android on your phone.
- Open Malwarebytes for Android.
- Tap the Give Permissions button to set the permissions required for the scan.
- Toggle on Allow access to all files to allow Malwarebytes to access your files and folders.
- Tap Run a scan.
- Tap on Remove Selected to fix the threats.
- Restart your phone.
Protect your computer against R3.O.LENCR.ORG using AdGuard Ad Blocker
- Blocks all kinds of ads
- Removes annoying web elements
- Saves traffic and speeds up page loading
- Works for browsers and apps
- Maintains site functionality and appearance
- Download AdGuard
Download Adguard - — For Android 8+: start downloading AdGuard apk (see next step), you’ll be prompted to allow permission. Tap Settings in the opened window and enable Allow from this source switch. Then resume the installation.
— For Android 6 and 7: open Settings, then select Additional settings in System & Device. Switch on Unknown sources and press OK in the system warning window.
— For Android 5: open Settings, then select Security in the Personal section. Switch on Unknown sources and press OK in the system warning window. - You can now install the app on your device. Start the browser and type in the following URL: https://adguard.com/apk.
- You will see the request to save the downloaded file. Press OK.
- When the download is complete, the system will ask you if you want to install the AdGuard app. Press Install.
- Accept he License agreement and AdGuard’s Privacy Policy. You can also participate in product development. To do this, you should check boxes Send automatic crash reports and Send technical and interaction data. Tap Accept after that.
- Then you’ll need to choose between a Quick and Thorough set-ups.
- The first one will ask you to enable local VPN which is required for AdGuard to function.
- The latter starts a first launch sequence to configure the app to suit your needs. First, you will be asked whether you want to enable search ads.
- The next step is to block or keep social widgets (e.g «Like» buttons):
- Next is Annoyances: cookie notifications, support windows etc.
- Up next is privacy settings. Choose a desirable protection level: Comfortable, High, Ultimate or No Protection.
- Choose the Security Warnings setting.
- Accept installing HTTPS filtering.
- Final step: click Create Local VPN.
 Removal Instructions for R3.O.LENCR.ORG virus on Apple Mac
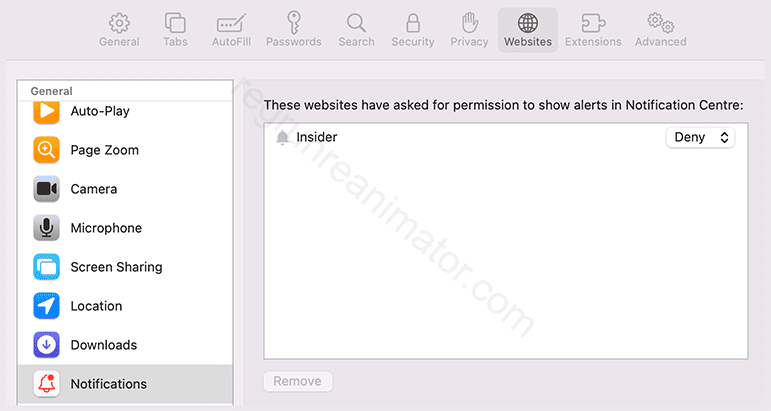
Remove the R3.O.LENCR.ORG website from Safari
- In the Safari application, choose the menu Safari, Preferences.
- Click Websites, then click Notifications.
- Find the website in the list, then select Deny
Remove the R3.O.LENCR.ORG virus from Mac OSX
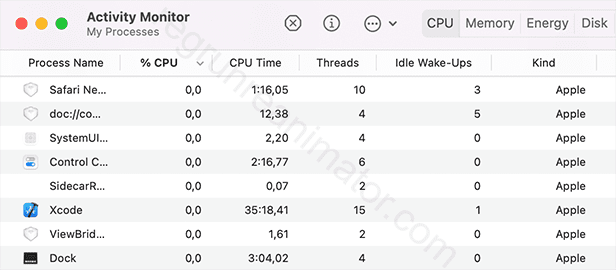
STEP1: End Virus-related Processes
- Use the Launchpad to open the Activity Monitor application.
STEP2: Remove Unwanted Login Items
- Go to the Mac System Preferences.
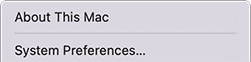
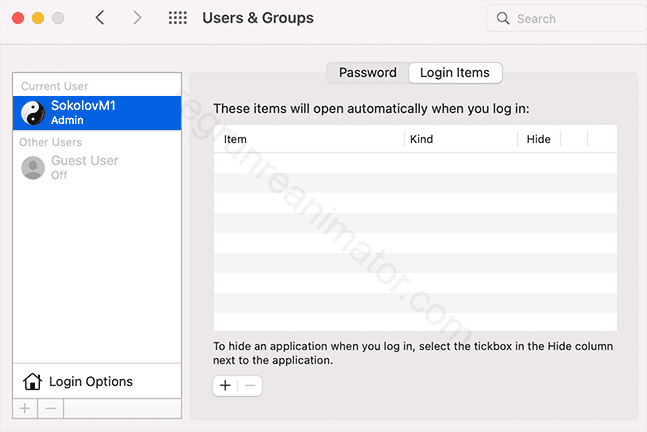
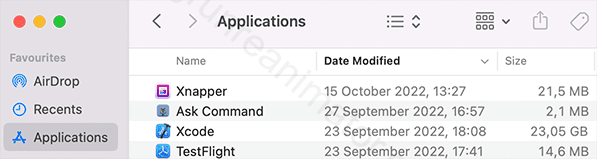
STEP3: Remove Unwanted Applications
- Open the Finder application.
- Choose the Applications folder.
- Select unwanted applications.
STEP4: Remove Auto-Launch Daemons and Agents:
- Open the Finder application.
- Open in the menu Go, Go to Folder.
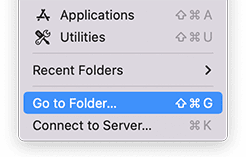
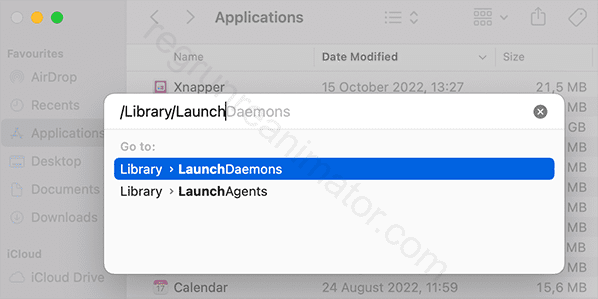
Repeat the same procedure for All User Launch Agents.
Go to the folder:
/Library/LaunchAgents/ if it exists.
Repeat the same procedure for Launch Daemons.
Go to the folder: /Library/LaunchDaemons/ if it exists.
STEP5: Empty the trash bin and reboot your Mac
- Click on the Trash icon in the Dock and choose Empty Trash.
- Go to the Mac main menu and click Restart.
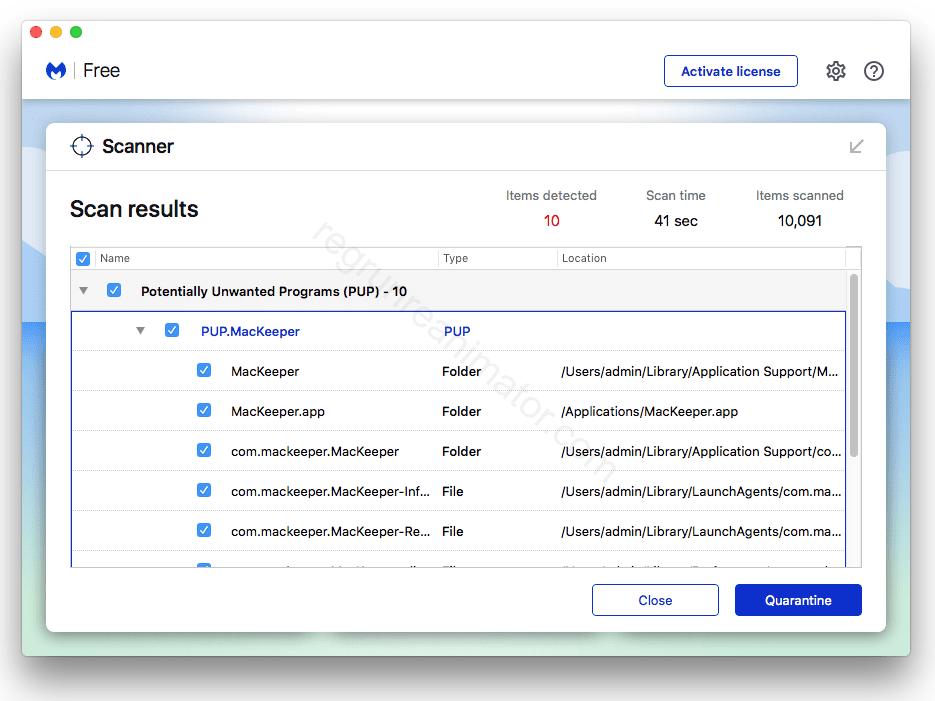
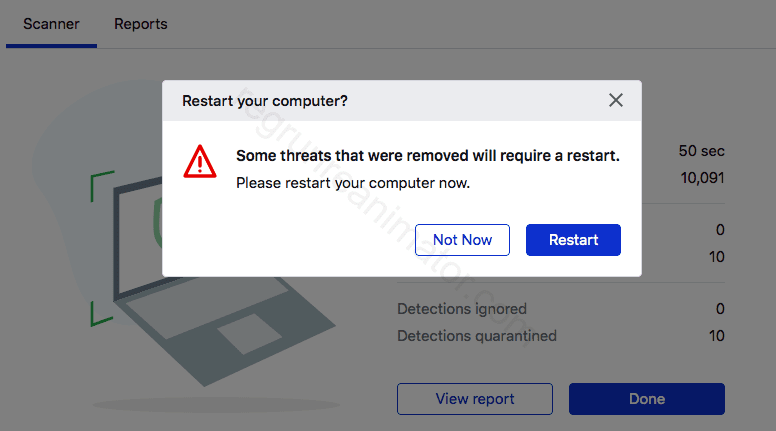
Remove the virus using Malwarebytes Antimalware
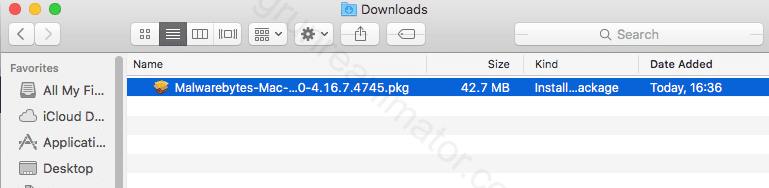
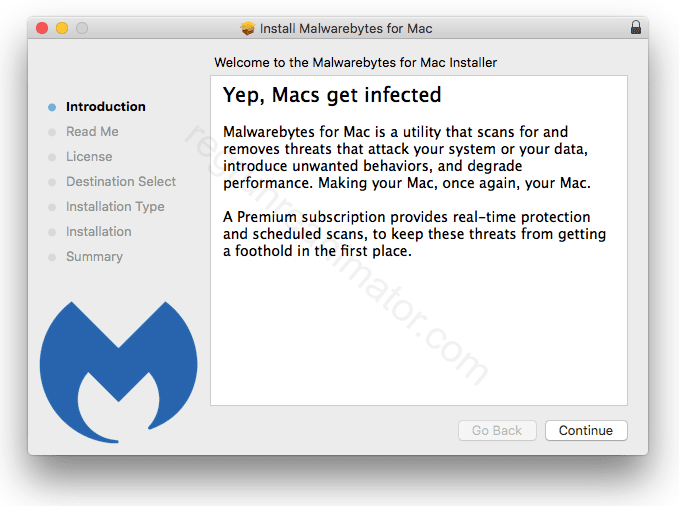
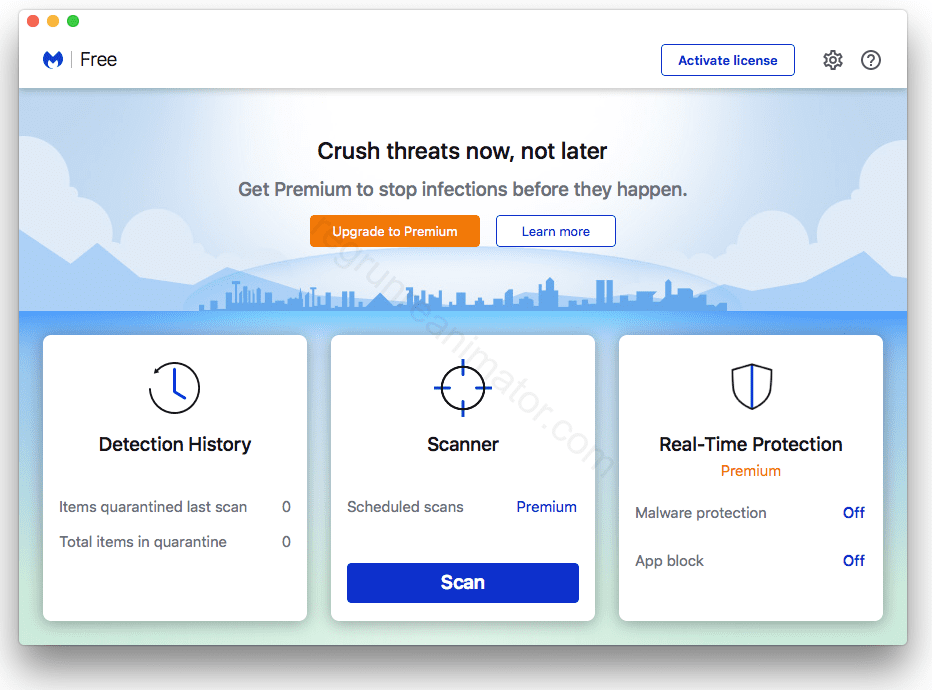
- Download Malwarebytes for Mac Download Malwarebytes
Protect your computer against R3.O.LENCR.ORG using AdGuard Ad Blocker
- Blocks all kinds of ads
- Removes annoying web elements
- Saves traffic and speeds up page loading
- Works for browsers and apps
- Maintains site functionality and appearance
- Download AdGuard
Download Adguard - Double-click on the AdGuard icon in the opened installation window.
- You will be warned that this application was downloaded from the Internet. Click Open.
- In the next step, you’ll need to click Install.
- Wait for the installer to download the required files.
- Enter the administrator password when propped in the dialogue box and press OK.
- Now, you’ll see a quick installation wizard where we will offer you to configure protection to your needs.
- You can either start fine-tuning right away («Let’s do it!») or skip for now («Leave as it is»).
 Permanently protect against the R3.O.LENCR.ORG website attack
Block R3.O.LENCR.ORG website using uBlock Origin
Open Google Chrome Web Store if you are using Chrome, Microsoft Edge, or any Chrome-compatible web browser:
Download uBlock Origin for Chrome Click the «Add to Chrome» button.
Use this link for Mozilla Firefox:
Download uBlock Origin Click the «Add to Firefox» button.
uBlock Origin will start automatically blocking adware and malicious sites, scripts, and contents.
Click on the uBlock Origin browser toolbar icon to block the site manually.