How to Add a Reference Image in Krita

When working with Krita, you may want to use an image as a reference while drawing. Whether it’s a picture of artwork you previously drew or an image from the internet, you can easily add a reference image in Krita.
Krita has a set tool for adding an image to use as a reference, and this tool offers a few functions while you use the picture. You can add a set of reference images to the page and adjust the saturation, opacity, and aspect ratio.
Here is everything you need to know when adding a reference photo in Krita.
Table of Contents
What Is the Reference Image Tool
If you haven’t worked with reference images before, you may be wondering what they are used for and how they behave in a Krita document. A reference image is a photo you can add to your Krita canvas to refer to while drawing and creating digital artwork.
Krita has a set tool to add this picture to your canvas, allowing you to adjust and use the image as needed.
You can use this image as a guide while drawing a tricky element, or you can use your previous artwork to keep the same feel while drawing the next graphic for a comic book or story.
Reference images can also be used to trace pictures or graphics, which is useful if you want to create a hand-drawn sketch of a photo.
You can add one or multiple reference pictures to your canvas. These images aren’t added as new layers, but you can still move, resize, and adjust a few settings, such as the opacity and saturation.
Since the photo isn’t an actual layer, the reference image won’t appear in the saved file if you export your document. You can also delete the image from the canvas if you’d like at any point.
For the example below, I will use multiple images from Pexels to show you how to add one or a set of reference images. I have chosen the following pictures: Human Eye Painting, Close Up Photo of an Eye, Close-up Photography Of Person’s Eye, A Grayscale Photo of a Human Eye, and Macro Photography of Brown Eye.
Overview of Adding a Reference Image
- Access the Reference Images Tool
- Add a Reference Image to the document using the tool
- Add a Reference Image by dragging and dropping
- Select Insert as Reference Image
- Resize the Reference Image(s)
- Move the Reference Image(s)
- Reduce the opacity of the Reference Image
- Reduce the saturation of the Reference Image
- Use the Reference Image(s)
- Delete a Reference Image or Set
How to Add a Reference Image in Krita Step-by-Step
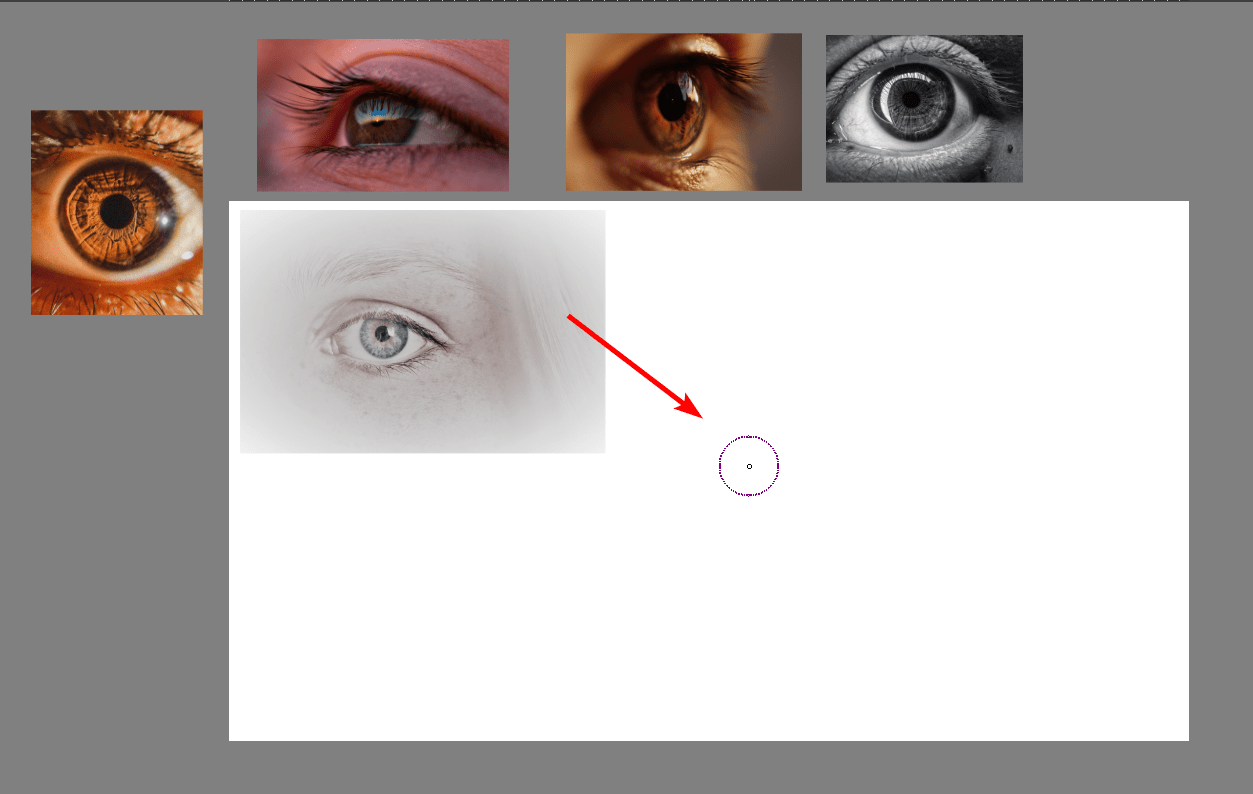
There are many reasons why you may need to add one or more images to your canvas to use as a reference. For example, if you are drawing a detailed eye, you may want to see different eye pictures at different angles to help you create a realistic eye. You can add these photos right next to your canvas, and here is how to do this.
Access the Reference Images Tool
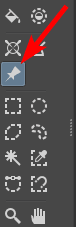
To place a reference image on your canvas and adjust the photo as needed, you need to activate the Reference Images Tool. You can find this tool in the toolbar, and it looks like a thumb tack pin.
Add a Reference Image to the Document Using the Tool
There are two ways you can add a reference image to the document. The first method is to use the Reference Images Tool after you activate it. Once the tool is active, you can locate the Tool Options Docker on the right-hand side of the screen.
In the Tool Options Docker, click the Add Reference Image icon, which is a plus sign. You can then locate the image from your files and click Open to add it to the canvas.
Add a Reference Image by Dragging and Dropping
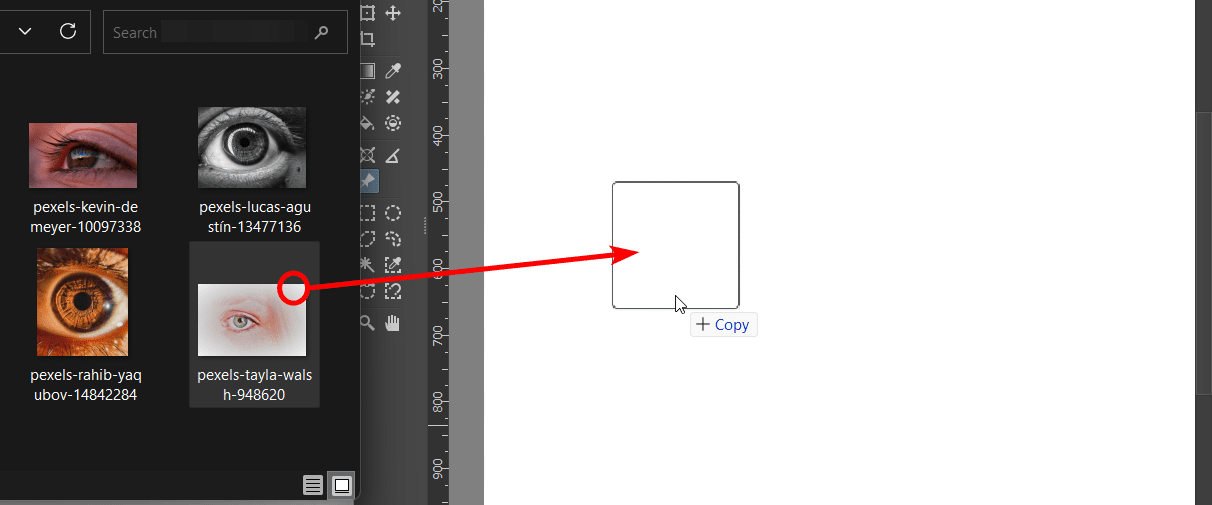
The second method to add the reference image is to open the photo in your files in a window next to your open Krita document. Then, click on the photo and drag it to the Krita workspace and let the mouse go when the image is hovering above the document.
Select Insert as Reference Image
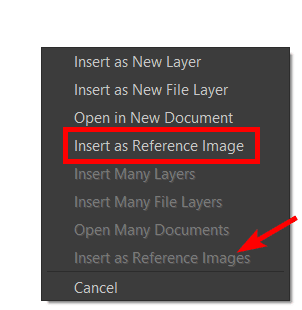
If you used the drag and drop method when you drop the image onto the canvas, a menu opens asking how you want to add the photo to the canvas. Select Insert as Reference Image if you have one image or Insert as Reference Images if you selected multiple photos.
Select, then drag and drop multiple images to create a reference image set.
Resize the Reference Image(s)
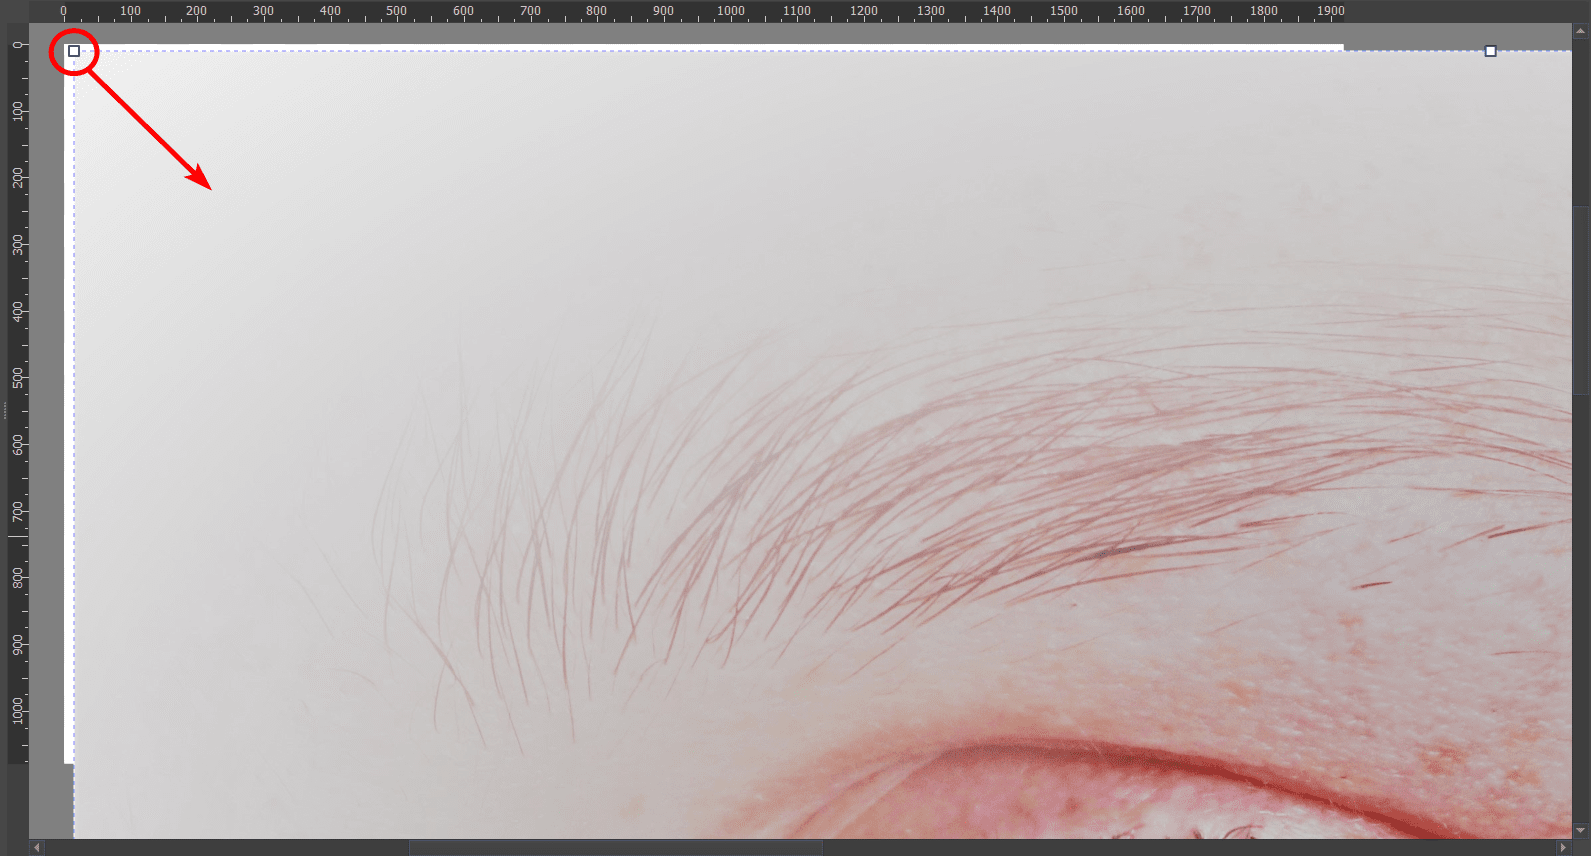
When the reference image or images are added to the canvas, the size may need to be corrected. In my case, the photo is too large. To resize the photo click on one of the corner handles and drag the handle inward to decrease the size. Drag the handle outward to increase the photo size if needed.
Move the Reference Image(s)
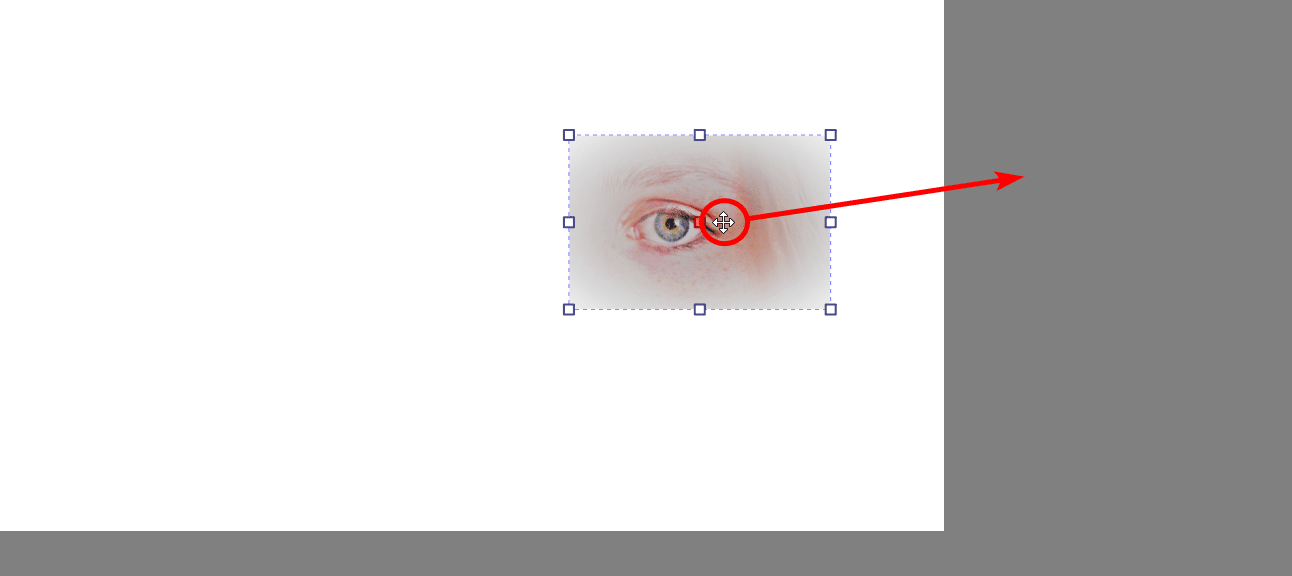
After resizing the photo(s), you can move them anywhere on the canvas or in the workspace. This enables you to move it away from your drawing so it’s not in the way. You can resize and move the picture anytime, but you must activate the Reference Images Tool first.
Reduce the Opacity of the Reference Image
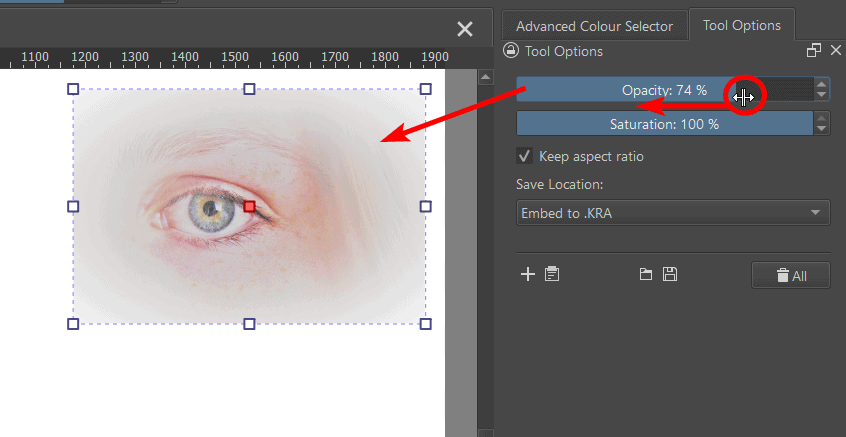
The reference image will always sit above your layers, so if you add brushstrokes to a layer, the photo may hide the brushstrokes. If you want to trace the image, you likely want to see the brushstrokes over the picture. You can do this by reducing the opacity of the reference image, so you can see the elements you add to your canvas.
To reduce the Opacity of the Reference Image, drag the Opacity slider to the left, found in the Tool Options Docker.
Reduce the Saturation of the Reference Image
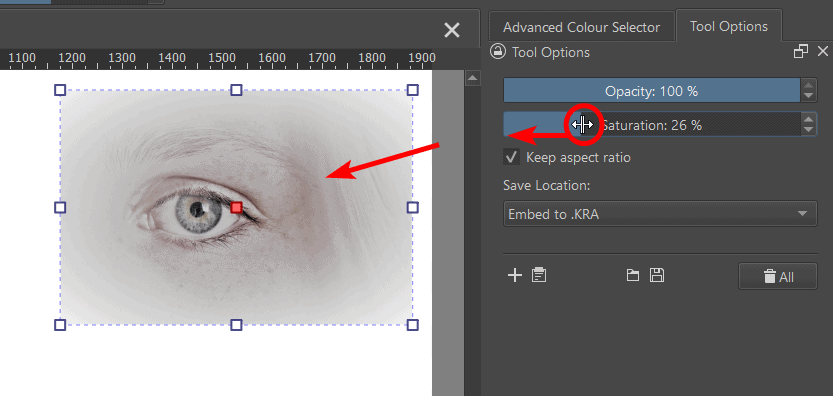
You can also de-saturate the image if you want to remove the color so that you can see the textures and lines of the photo better. Drag the Saturation slider to the left to minimize the color.
Use the Reference Image(s)
Once you have adjusted the setting for your photos, you can use the reference images. You can either trace an image or use the pictures around the canvas as a guide.
Delete a Reference Image or Set
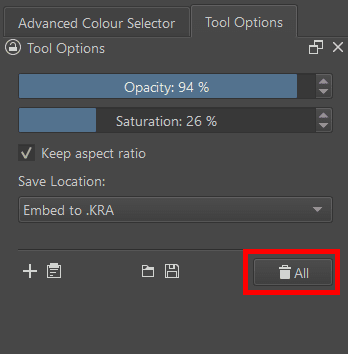
If you are finished with a reference image of multiple ones, you can delete them whenever you need to. You can select the photo with the Reference Images Tool active, and press Delete on your keyboard to remove an individual image.
You can also use the Delete All button in the Tool Options Docker to remove all the photos together.
Tools:
- Krita
�� Expert Krita Guidance: Learn Krita from professionals and uncover exclusive tips!
�� Always Up-to-Date: Courses continuously updated for the latest in Krita and creative trends.
�� Quality Content: Access hundreds of hours of premium Krita tutorials and more!
�� Start for FREE: Get your first month completely free. Cancel anytime.
Reference Images Tool
The reference images tool is a replacement for the reference images docker. You can use it to load images from your disk as reference, which can then be moved around freely on the canvas and placed wherever.
Tool Options
Load a single image to display on the canvas.
Paste as Reference Image
Load an image from the system clipboard and add it as a reference image.
Load a set of reference images.
Save a set of reference images.
Delete all reference images
Delete all the reference images.
Keep aspect ratio
When toggled this will force the image to not get distorted.
Lower the opacity.
Desaturate the image. This is useful if you only want to focus on the light/shadow instead of getting distracted by the colors.
How is the reference image stored.
Store this reference image into the KRA file. This is recommended for small vital files you’d easily lose track of otherwise.
Link to external file.
Only link to the reference image, krita will open it from the disk everytime it loads this file. This is recommended for big files, or files that change a lot. This option is only available when reference images are loaded from a local path.
You can move around reference images by selecting them with  , and dragging them. You can rotate reference images by holding the cursor close to the outside of the corners till the rotate cursor appears, while tilting is done by holding the cursor close to the outside of the middle nodes. Resizing can be done by dragging the nodes. You can delete a single reference image by clicking it and pressing Del . You can select multiple reference images with Shift and perform all of these actions.
To hide all reference images temporarily use View ‣ Show Reference Images .
© Copyright licensed under the GNU Free Documentation License 1.3+ unless stated otherwise. Build 2435.
Как вставить изображение в krita
Reddit and its partners use cookies and similar technologies to provide you with a better experience.
By accepting all cookies, you agree to our use of cookies to deliver and maintain our services and site, improve the quality of Reddit, personalize Reddit content and advertising, and measure the effectiveness of advertising.
By rejecting non-essential cookies, Reddit may still use certain cookies to ensure the proper functionality of our platform.
For more information, please see our Cookie Notice and our Privacy Policy .
Krita — как вставить картинку в рисунок
Есть несколько способов импорта изображений.
Я предпочитаю делать это простым перетаскиванием картинок из проводника.
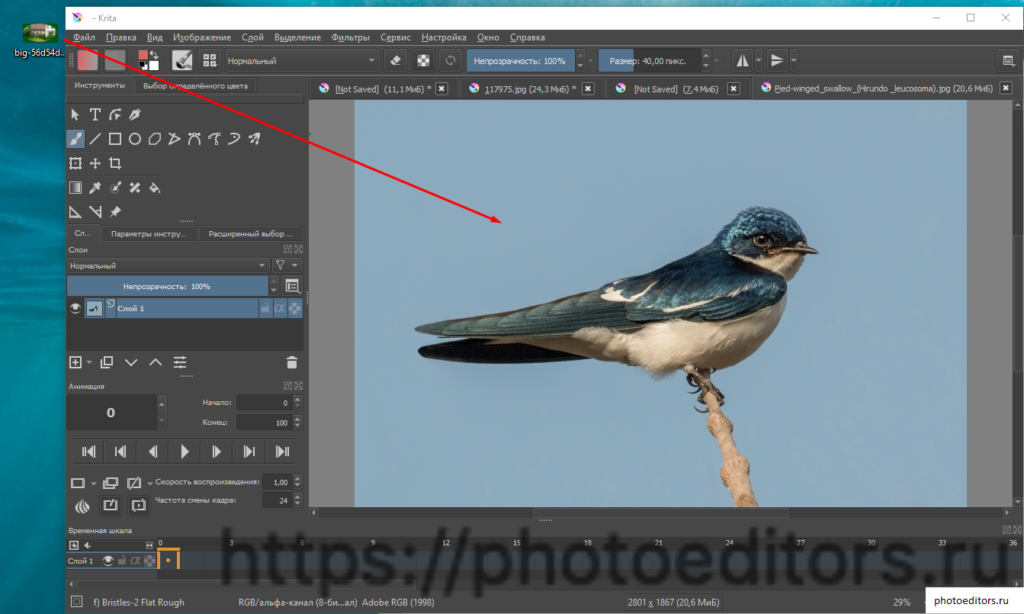
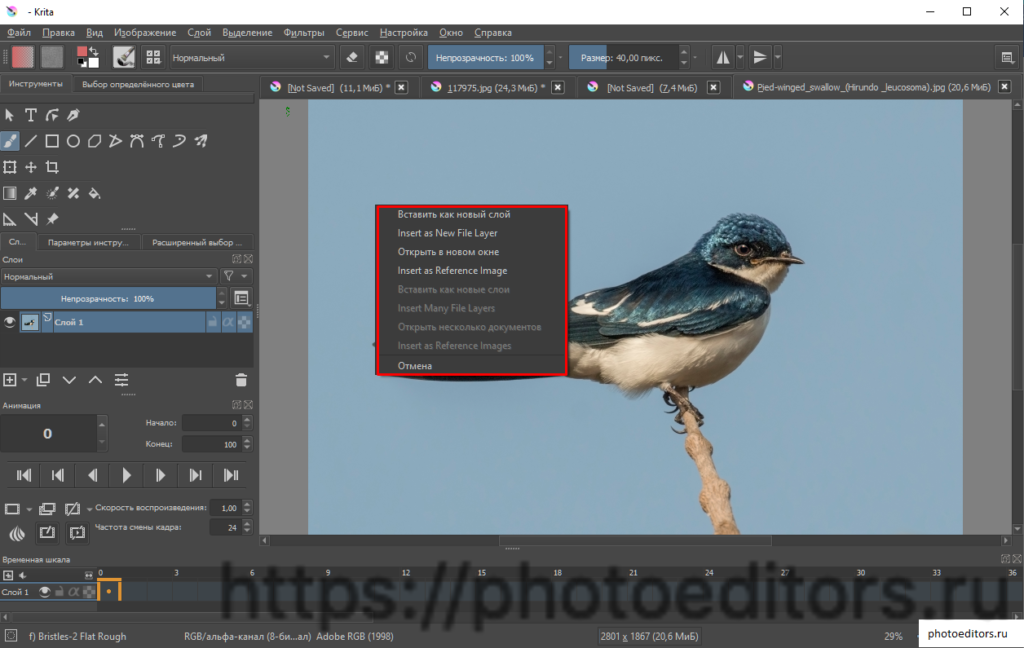
После перетягивания программа запросит, каким образом следует вставить новое изображение. Поясню те пункты, которые не переведены на русский язык:
Insert As New File Layer – вставить как новый слой текущего файла;
Insert As Reference Image – обычная вставка картинки наложением.
Нижние неактивные команды делают то же самое, они становятся доступными в случае, если вы добавляете несколько изображений за 1 раз.