Вставить изображение в Illustrator — Как вставить или импортировать изображения в Illustrator?

Изображения могут быть важны для вас, чтобы работать над созданием художественного произведения в Вставке Изображения в Adobe Illustrator. Когда вы знаете, как импортировать изображение в документ Illustrator, становится очень легко создавать удивительные визуальные эффекты, используя их. Является ли изображение в формате PNG или JPEG.webp, вы можете легко поместить его в свой документ.
Как вставить изображение в Illustrator?
Шаг 1. Откройте существующий или новый файл Adobe Illustrator. Если вы уже создали файл, вам нужно добавить к нему изображение, а после открытия сохраненного документа вы можете продолжить добавление нового изображения в документ. Иначе, если вы хотите попробовать создать новый документ и попытаться увидеть, как добавление изображения работает в Illustrator, то соответственно вы можете перейти к значку Illustrator на рабочем столе или открыть Illustrator прямо из меню поиска и запустить программу.

Шаг 2: Если у вас уже есть сохраненный файл, вы можете получить к нему доступ из меню Файл. В меню «Файл» выберите «Открыть» и выберите файл, сохраненный на жестком диске. Ярлык для того же — Ctrl + O. Если файл был недавно открыт, вы также можете открыть его, открыв опцию недавнего файла.

Шаг 3: Как только документ открыт, в меню «Файл» перейдите к параметру «Поместить». Этот ярлык для места Shift + Ctrl + P.

Шаг 4: Откроется диалоговое окно, в котором вы можете выбрать изображение, которое хотите добавить в документ. Выберите правильный вариант, и у вас будет возможность разместить его в любом месте документа с помощью курсора мыши. Перетащите курсор мыши в соответствии с вашими предпочтениями, и изображение будет пропорционально размещено на пути курсора мыши.

Шаг 5: После размещения изображения вы можете изменить его размер или изменить его положение. Для этого используйте опорные точки на ограничительной рамке изображения. Перетащите его, как вы хотите изменить размер изображения. Всегда лучше удерживать клавишу Shift при перетаскивании, чтобы получить равномерный результат при изменении размера изображения.

Чтобы переместить изображение, вы можете перетащить фотографию с помощью курсора мыши или использовать клавиши навигации на клавиатуре. При использовании клавиш со стрелками на клавиатуре, если вы комбинируете клавишу Shift, она перемещается на большее расстояние, чем при использовании обычной клавиши со стрелкой.
Шаг 6: Если вы хотите обрезать изображение, просто нажмите на изображение и перейдите к опции обрезать изображение в верхней части документа. После этого с помощью мыши обрежьте изображение как вам нужно. Как только обрезка будет соответствовать вашим потребностям, нажмите Enter для подтверждения.

Шаг 7: Для преобразования изображения с применением различных опций, таких как перемещение, вращение, отражение, масштабирование, сдвиг и т. Д., Используйте инструмент преобразования. Чтобы открыть инструмент преобразования, щелкните правой кнопкой мыши изображение и выберите «Преобразование». Затем наведите курсор на соответствующую панель параметров, как показано на рисунке ниже. Панель содержит все вышеперечисленные параметры от поворота до масштаба.

Трассировка изображения в Illustrator
В следующем процессе вы узнаете, как преобразовать растровое изображение в векторный формат. Существует возможность применить функцию трассировки в Adobe Illustrator, которая преобразует ваши изображения в векторный формат. Это особенно полезно, когда вы пытаетесь напечатать свою работу в высоком качестве. Если изображение растрового типа, оно будет терять качество при увеличении масштаба. Как только изображение конвертируется в векторный формат, его можно бесконечно масштабировать без ущерба для четкости. Для этого вам понадобится использовать Image Trace из меню Window.
- После открытия изображения в Illustrator, перейдите в Windows и выберите опцию Image Trace. Он открывает панель трассировки изображений.

- В верхней части окна, в первом ряду, вы найдете такие параметры, как Автоцвет, Высокий цвет, Низкий цвет, Оттенки серого, Черно-белый и Контур. Вы можете попробовать их, изменив значения и применив результат наилучшим образом.
- Цветовой режим позволяет вам установить максимальное количество цветов для отслеживания вашего изображения. Оттенки серого можно использовать для установки точности в диапазоне от 0 до 200. Любые пиксели, которые темнее порогового значения, автоматически изменяются на черные. Ниже вы найдете такие опции, как Preset, View и Mode.

- Нажмите на окно предварительного просмотра, если вы хотите увидеть живой результат вашего изображения при выборе различных значений и эффектов.
- Далее, есть расширенный пункт меню, который дает вам еще больше инструментов и опций для манипулирования изображением. В этом разделе есть опции для изменения настроек путей, углов, шума и многого другого.

- Контуры могут быть установлены от низких до высоких углов, от меньших до больших, а шум — от 1 до 100 пикселей.
Параметры сохранения изображения при вставке изображения в Illustrator
После применения различных эффектов и настроек в вашем изображении, наконец, вам нужно сохранить созданное изображение на жестком диске. Ниже приведены способы сохранения вашей работы в выбранном вами формате.
- Вы можете сохранить изображение в нескольких форматах, таких как Adobe Illustrator, PDF, EPS, SVG и так далее. Для выбора формата выберите «Файл»> «Сохранить как параметр».

- Если вы хотите экспортировать свою работу в формате изображения, выберите «Файл»> «Экспорт». Вы можете увидеть множество типов экспорта, таких как AutoCAD Drawing, PNG, Photoshop, Targa и т. Д. Вы можете выбрать JPEG.webp сейчас.

- Установите флажок «Использовать артборд», чтобы экспортировать только содержимое внутри артборда.

- Наконец, вы найдете панель параметров JPEG.webp. Он содержит дополнительные детали изображения, такие как цветовой режим, разрешение и т. Д. Выберите в соответствии с вашими потребностями и нажмите ОК.

Вывод
Используя шаги, описанные выше, вы можете легко вставить изображения в ваш документ. Вы также можете попробовать изучить различные параметры, представленные в Illustrator, чтобы лучше расположить или выровнять и придать эффект вашему изображению. Вы можете использовать эти изображения в самых разных материалах, таких как плакаты, брошюры, обложки книг, листовки, дизайн веб-сайтов и т. Д. Попробуйте создать новые дизайны, используя изображения в Illustrator, и увеличьте свои творческие способности.
Рекомендуемые статьи
Это руководство по вставке изображения в Illustrator. Здесь мы обсуждаем шаги по вставке изображения в Illustrator, трассировку изображения и возможность сохранения в Illustrator. Вы также можете просмотреть другие наши статьи, чтобы узнать больше —
How to Embed Images in Adobe Illustrator
If you plan to send your Illustrator file to print or maybe share it with your teammate to work on it together, it’s always a good idea to embed your images.
I’m saying this because it already happened to me quite a few times in college when I had to present my work to the class and the images on my Illustrator file didn’t show. Well, we learn best from our experience, right?
Oh, don’t assume that when you place an image in Illustrator it’s already embedded. No, no, no! The image is linked, yes, but to embed it, there are a few extra steps. I mean, very simple trouble-saving extra steps.
Table of Contents
What’s an Embedded Image
When you embed an image in Adobe Illustrator, it means that the image is saved in the AI document file.
You are free to transfer the Illustrator file to other devices without worrying about missing images. Even if you delete the image on your hard drive, you will still be able to view it in Illustrator.
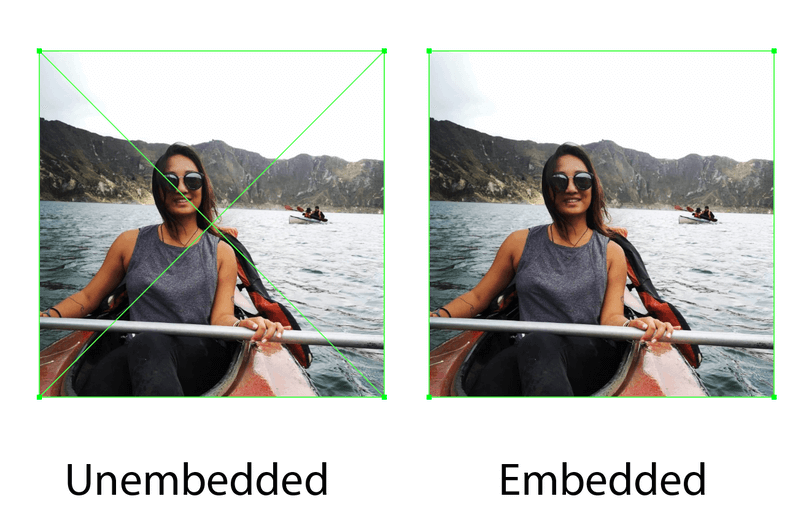
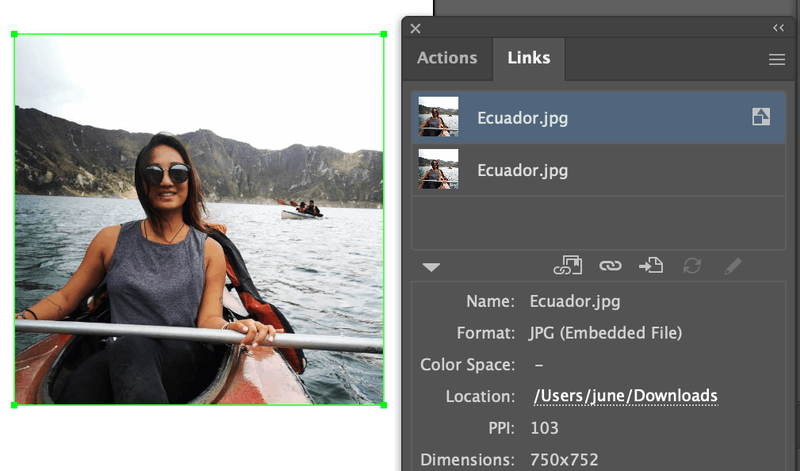
When you place an image in Illustrator, it shows as a link, and there will be two cross lines on the image. But once you embed it, the cross lines will disappear and you’ll only see a bounding box. See an example of an embedded image.
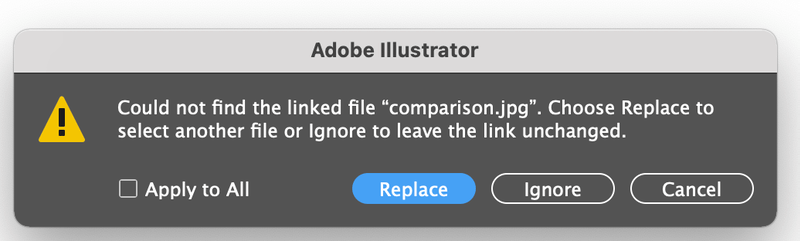
When you see this message, uh oh! Bad luck! Your linked images are not embedded. You have to either replace them or download the original images again.
Why Should You Embed Images
When your images are embedded in Adobe Illustrator, you can open the AI file on different devices and still be able to view the images.
It’s a good idea to embed the images on your AI file when you work on the project together with multiple people. Missing images are no fun, and you’ll spend unnecessary extra time downloading or replacing them.
So yeah, embed your images!
2 Ways to Embed Images in Adobe Illustrator
Note: Screenshots are taken on the Illustrator CC Mac version. The Windows version might look slightly different.
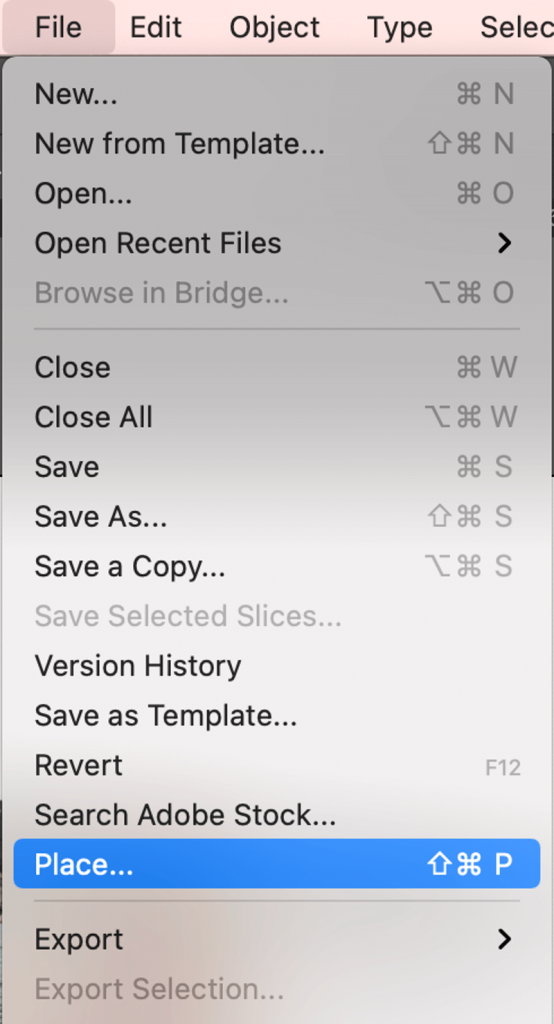
Before embedding images, you need to place the images in your Illustrator file. You can place the images by simply dragging them in the Illustrator document, or you can go to the overhead menu File > Place (keyboard shortcuts Shift + Command + P ).
Then you have two options to embed your images: from the Properties panel or you can do it from the Links panel.
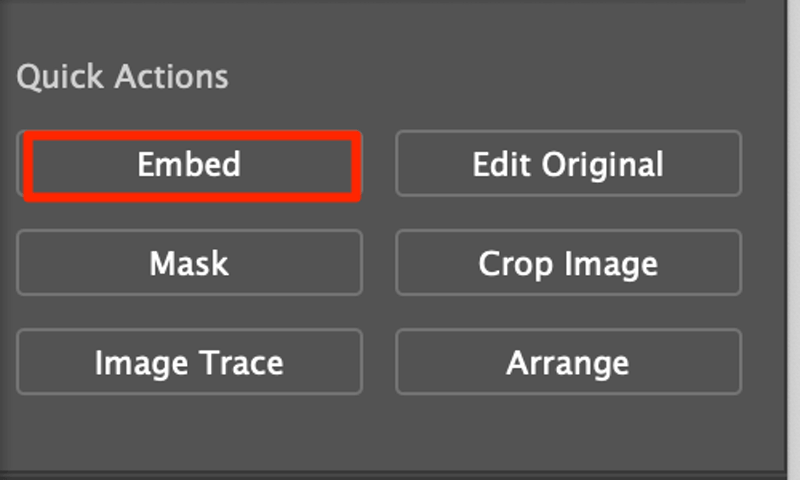
Quick Actions
Illustrator has made things so easy for us today, you can embed your image quickly from Quick Actions under the Properties panel.
Step 1: Place your image in Illustrator.
Step 2: Select the image you want to embed on the artboard.
Step 3: Click Embed on the Quick Actions tool section.
Links panel
Let me give you a brief introduction to the links in Illustrator. A linked image is referred to where the image is located on your computer.
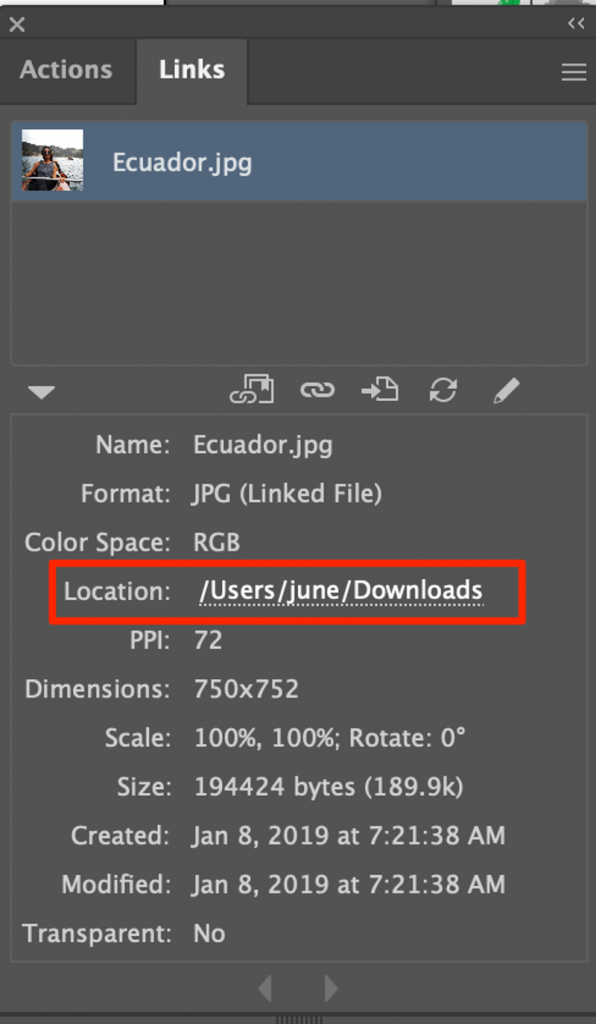
So whenever you change the location of the image on your hard drive, you need to update links in Illustrator to make sure your image is not missing. And if you delete the image on your computer, it’ll be deleted in Al as well.
Step 1: Place images in Adobe Illustrator.
Step 2: Open the Links panel: Window > Links.
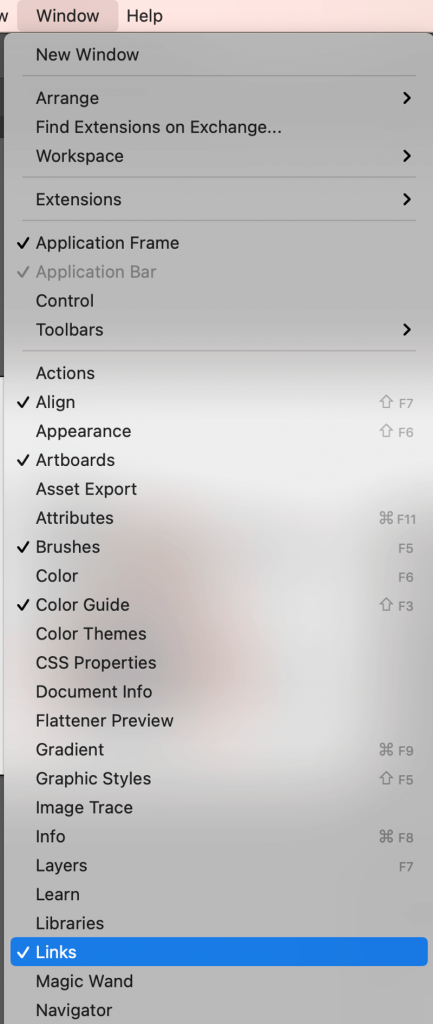
Step 3: Select the images you want to embed. You’ll see two cross lines on the image.
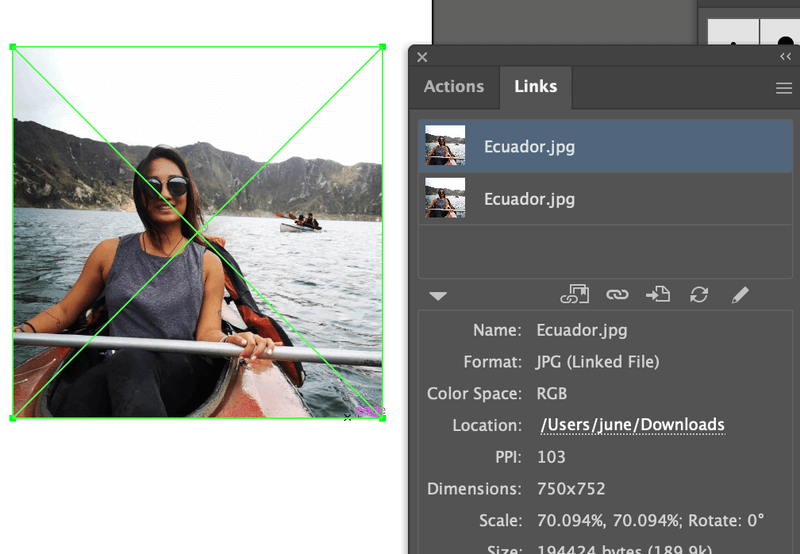
Step 4: Click on the hidden menu in the left-right corner.
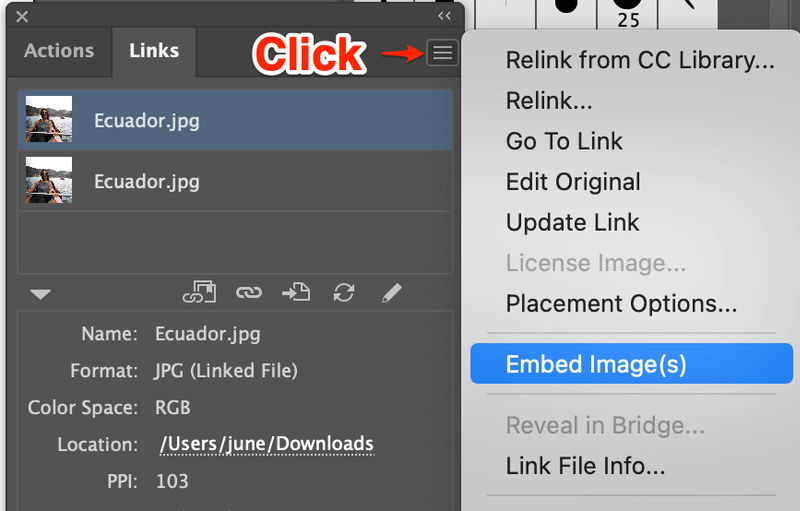
Step 5: Select Embed Image(s).
Other Questions?
I have listed a couple of common questions that other designers asked. See if you already know the answer.
What’s the difference between linking and embedding?
You can see images as links in Adobe Illustrator. Your images are linked to a specific location on your computer. When you change where you put your file on your computer, you must update the link on AI as well, if not, your links (images) will be missing in the AI document.
Embedded images will not show missing because they are already part of the Illustrator document. Even if you delete the original images (links) on your computer, your embedded images will stay in your AI file.
Can I edit an embedded image in Illustrator?
You can change the linked images from the Links panel. Click on the Relink option if you want to change the image.
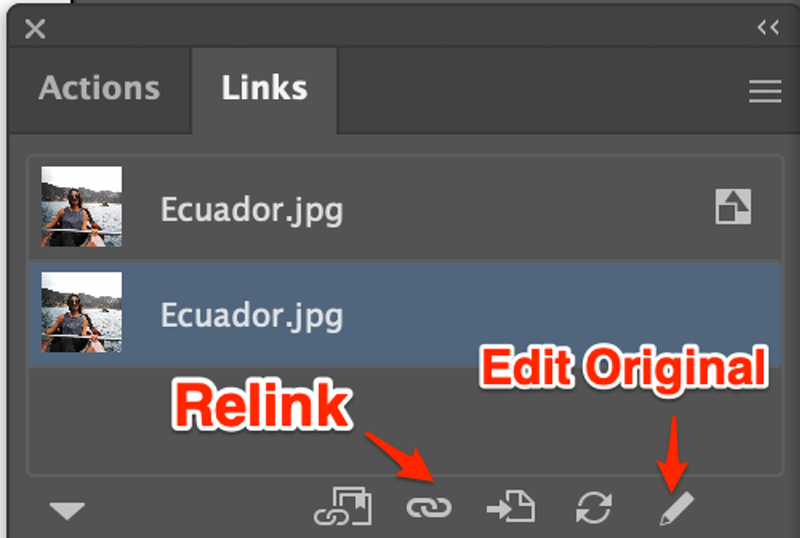
You can only edit the original image before you embed them. Before embedding the image, click Edit Original on the Links panel to edit your image.
How do I know if an image is embedded in Illustrator?
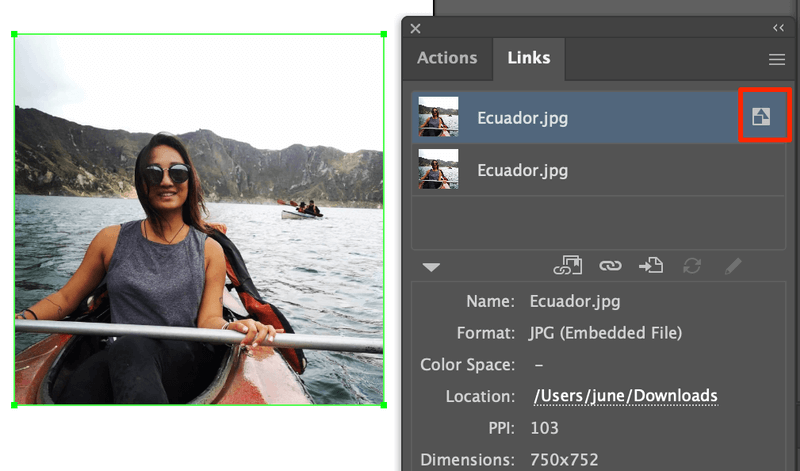
There are two ways you can see if your image is embedded in Illustrator. When you don’t see the cross lines on the image, that means the image is embedded. Another way is to see it from the link panel. You’ll see a small embed icon next to the image name.
Final Thoughts
Embedding images is a must when you transfer Illustrator files that contain images to other devices. Keep in mind that when an image is linked doesn’t mean it’s embedded. So, always do the extra steps to link your image(s).
Записки микростокового иллюстратора

Недавно я провёл полезную консультацию по Adobe Illustrator. Нужно было показать, как вставить фотографию в векторный файл и кадрировать её под нужную форму. Так что если у вас есть подобный вопрос, то можете посмотреть запись.
Как вставить фото в векторный файл
Если у вас есть ещё какие-то вопросы по Иллюстратору, то пишите в комментариях.
Предлагаю ознакомиться с аналогичными статьями:
0 коммент.:
Отправить комментарий
Для тех, кто хочет оставить комментарий, но не знает как:
— Нажмите на стрелку в окошке "Подпись комментария"
— Выберите Имя/URL. Все-таки приятнее общаться с человеком, чем с Анонимом
— Напишите своё имя, строчку URL можете оставить пустой, а можете добавить ссылку на свой блог или профиль в соц. сети
— Нажмите "Продолжить"
— Напишите все, что хотели написать!
— Нажмите "Публикация"
Будьте терпеливы, комментарии отображаются в блоге только после модерации.
How to Embed Images in Illustrator

 What You’ll Be Creating
In the following tutorial, you’ll learn two simple methods that you can use to embed photos in Illustrator.
What You’ll Learn in This Adobe Illustrator Tutorial
- Difference between linked and embedded images in Illustrator
- How to embed images in Illustrator via the Control Panel
- How to embed all images in Illustrator via the Links Panel
Linked vs. Embedded Images in Illustrator
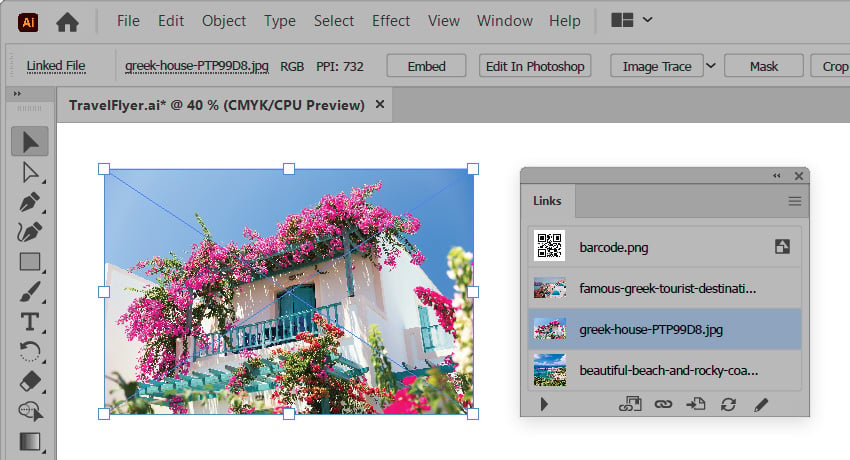
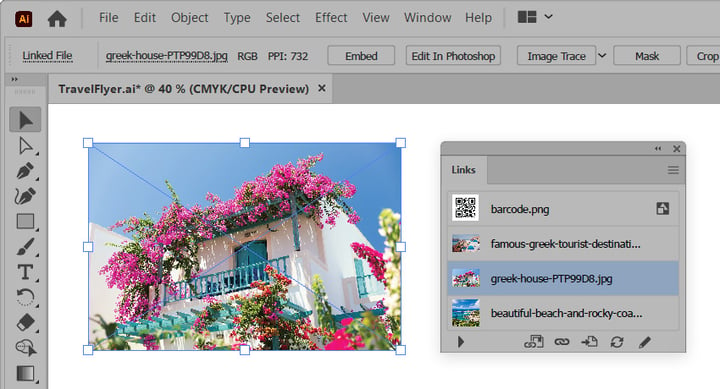
By default, Illustrator links any image that you import into a document. This means that Illustrator connects the image with the location of the image on your hard drive. The image will no longer show up in your document if you change its location or name, or if you delete it.
This can be a bit cumbersome, especially when you are sharing a design with linked images, as you would have to also share the linked images. In such a case, it would be much easier to embed the images. By embedding an image, you are making it part of the design. Just keep in mind that this will increase the size of your document.
Select an image (or more) from your document, have a look in the control panel, and on the left-hand side you can see when you have a Linked File selected. Alternatively, you can open the Links panel (Window > Links), where you can see all linked or embedded images from your design. Now that you understand the difference between linked and embedded images, let’s learn how to embed images in Illustrator.

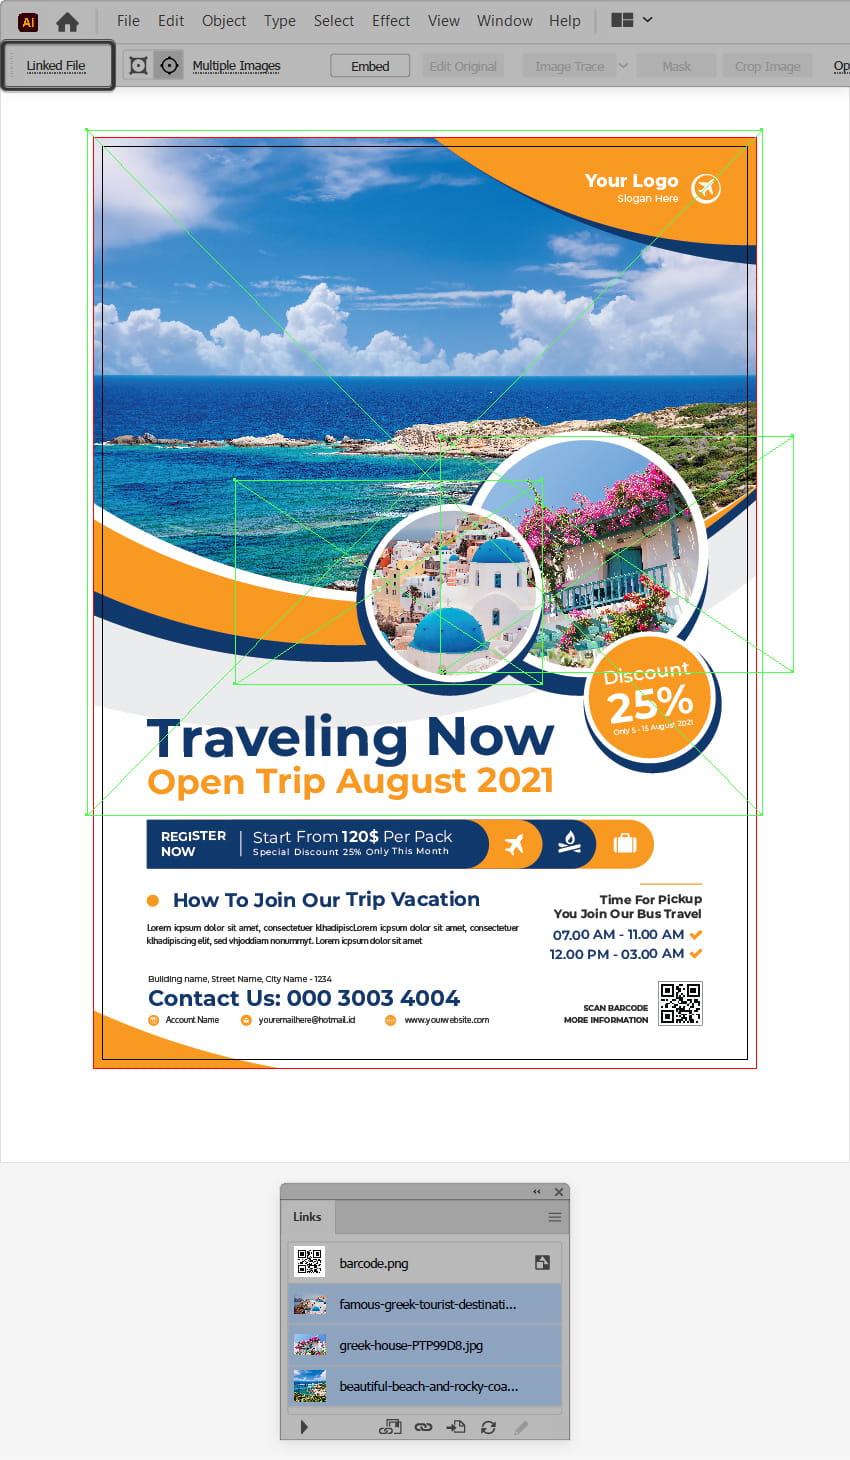

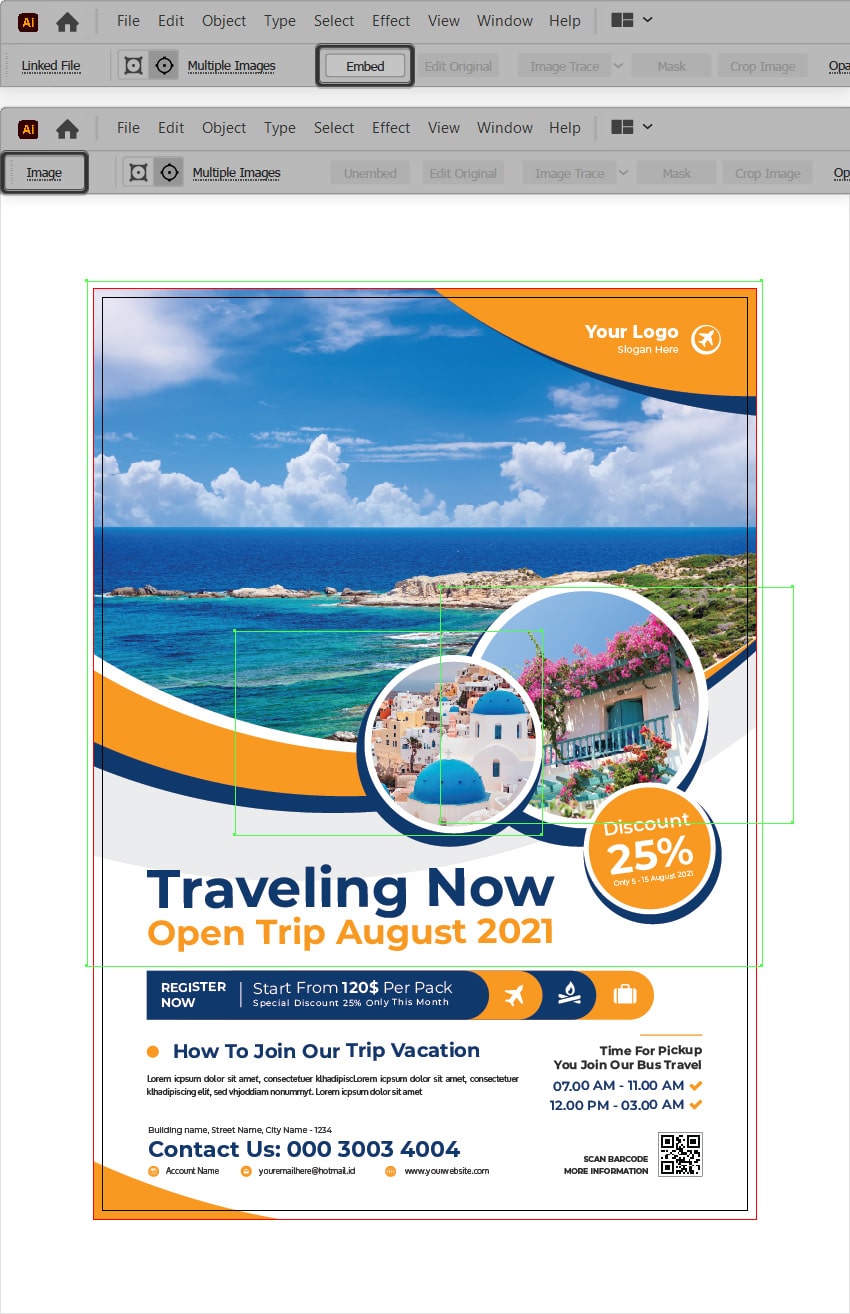
Method 1: How to Embed Images in Illustrator via the Control Panel
The first method that you can use to embed photos in Illustrator is via the control panel.
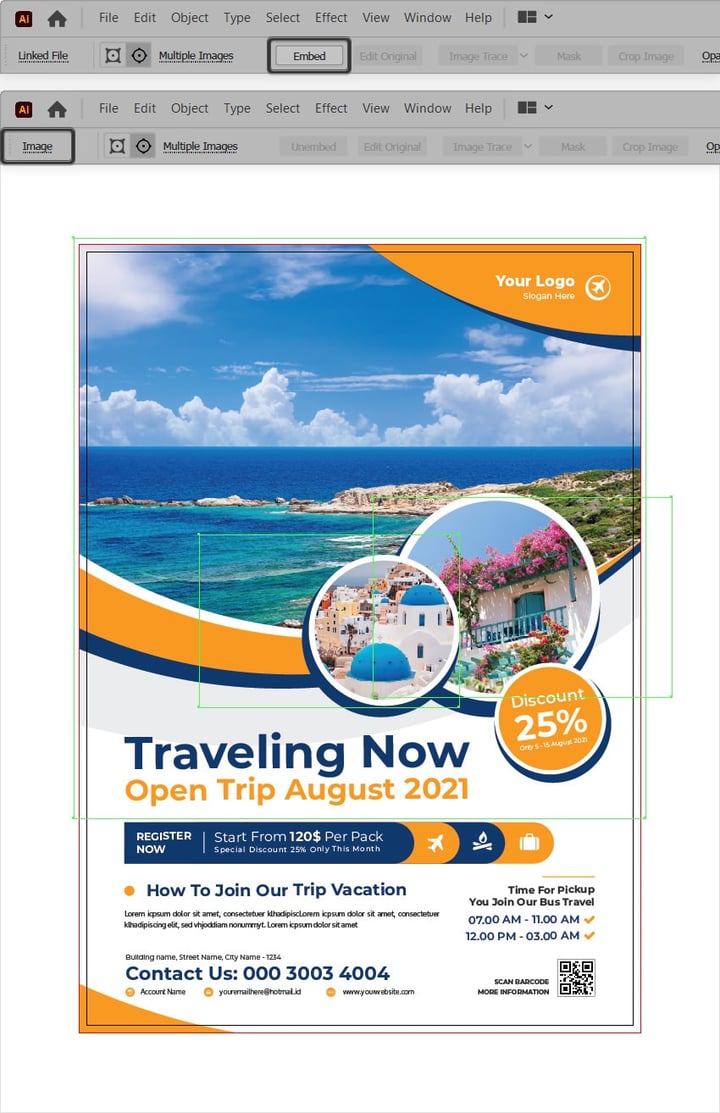
Just select your image/images, focus on the control panel, and click the Embed button. Have a look on the left-hand side of your control panel, and your selection title should turn from Linked File to Image.
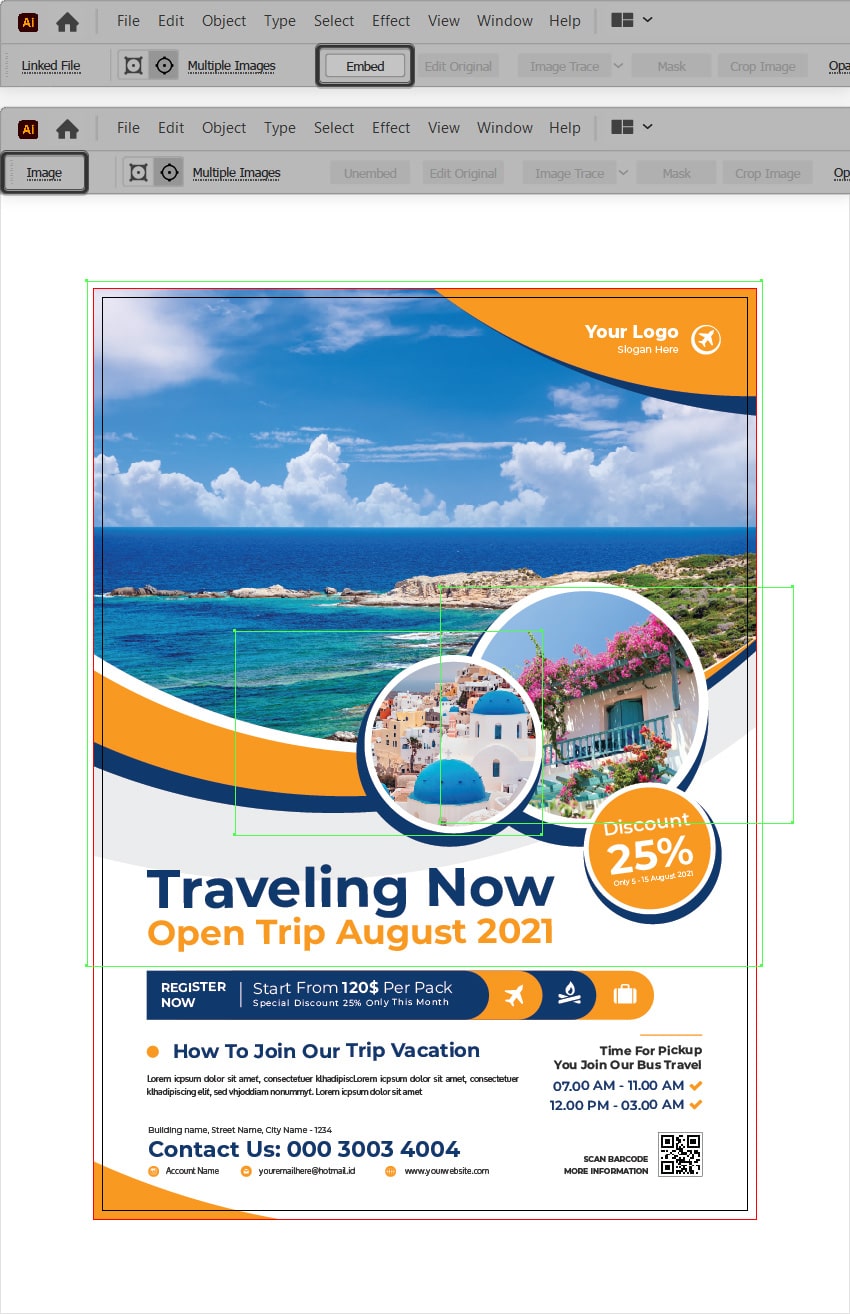
Method 2: How to Embed All Images in Illustrator via the Links Panel
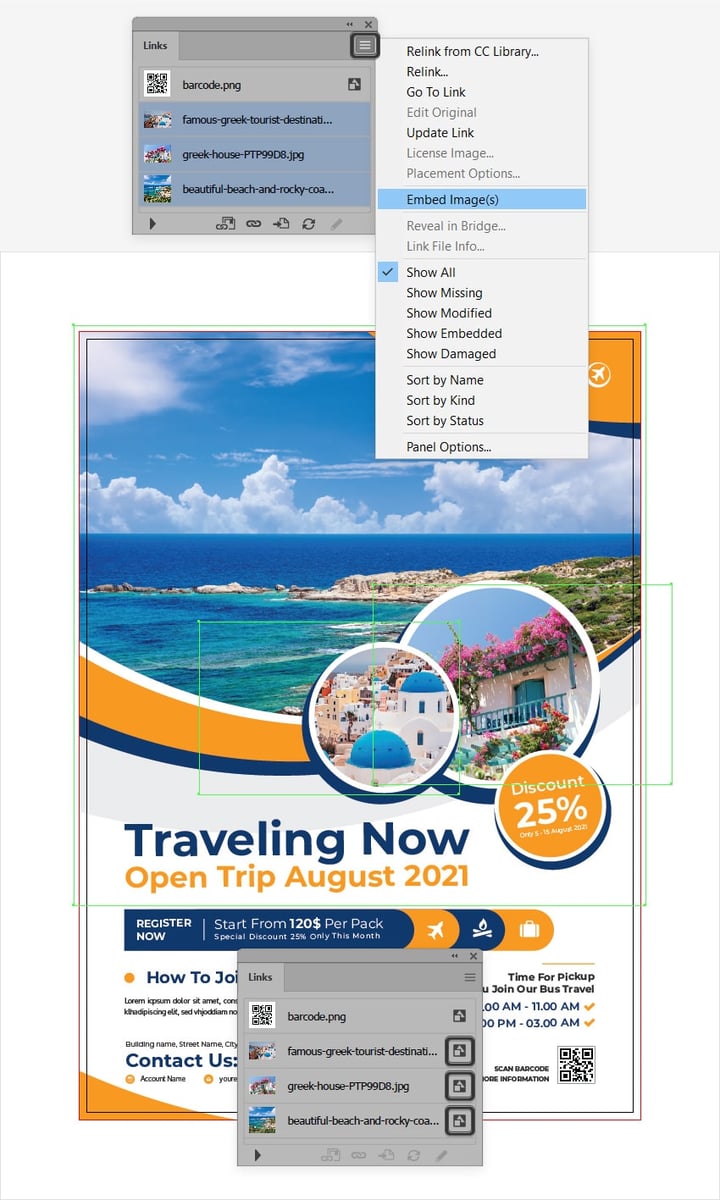
The second method that you can use to embed images in Illustrator is via the Links panel.
Keep in mind that you can select the image straight from this panel. To quickly select multiple images, you can hold down the Shift key, select the first image, and then click the final one to select the rest of the images that lie between these two.
Open the fly-out menu and simply go to Embed Images to turn your selected linked images into embedded images. Focus on the Links panel and notice that all your embedded images are marked by a tiny icon on the right-hand side.


Congratulations! You Know How to Embed in Illustrator!
I hope you’ve enjoyed this tutorial and can apply these techniques in your future projects. Now that you know how to embed in Illustrator, you can enrich your design using beautiful photos. You can find some great sources of inspiration at Envato Elements, with interesting solutions to improve your design.
Popular Resources from Envato Elements
Envato Elements is an excellent resource for photos, templates, and other assets. Here, we’ll show you a top template from the graphic templates category.
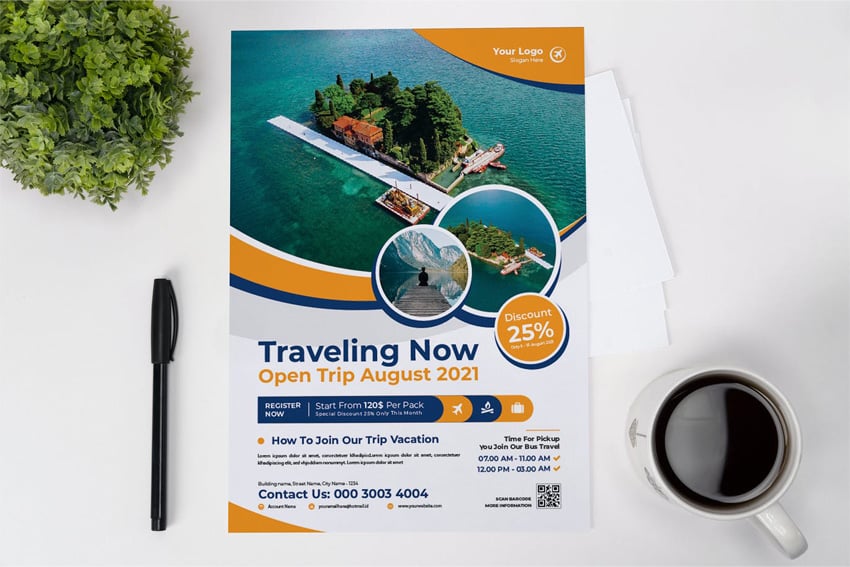
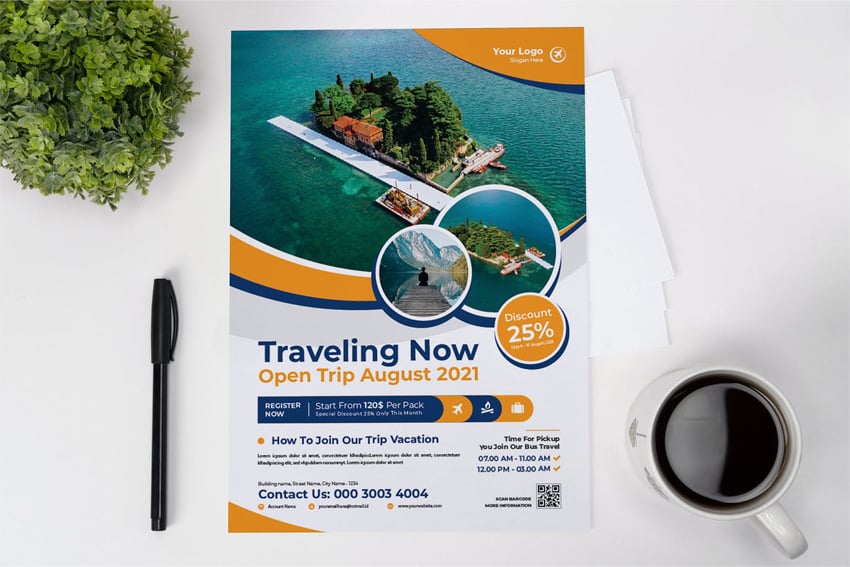
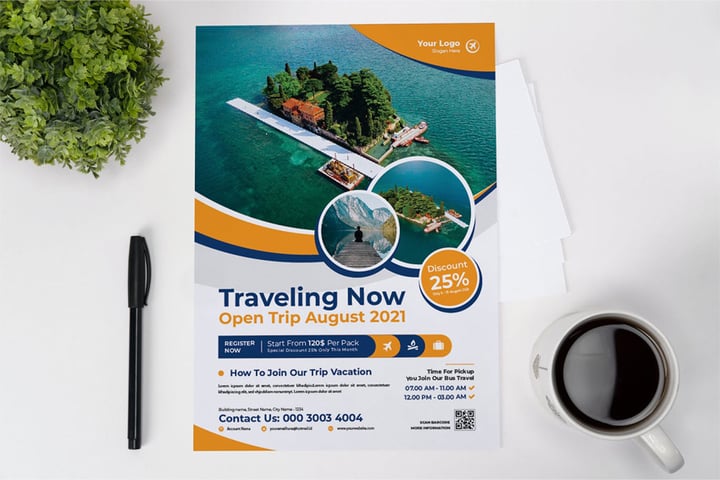
Travel Flyer Template (AI, EPS, PDF)
Check out this clean travel flyer design if you wish to embed photos in Illustrator with a few clicks. Just drag the images inside this document and scale them to fit the masks. Then adjust the text, add your logo, and you’re ready.
Want to Learn More About Adobe Illustrator?
We have loads of tutorials on Envato Tuts+, from beginner to intermediate level. Take a look! If you also prefer to watch video tutorials like this one below, don’t forget to visit and subscribe to the Tuts+ YouTube Channel: