How to run an Ubuntu Desktop virtual machine using VirtualBox 7
In this tutorial, we’ll walk you through one of the easiest ways to try out Ubuntu Desktop on a virtual machine. VirtualBox is a general purpose virtualiser that is available across Linux, Mac OS and Windows. It’s a great way to experience Ubuntu regardless of your current operating system.
VirtualBox 7 and above includes a new feature called Unattended Guest OS Install which significantly streamlines the setup experience for common operating systems like Ubuntu, making it easier than ever to get started.
Note: This tutorial will also work for other distributions, so try it out with some of the Ubuntu flavours as well!
What you’ll learn
- How to install and configure VirtualBox
- How to import an Ubuntu image
- How to run a virtual instance of Ubuntu Desktop
- Further configuration options
What you’ll need
- A PC with internet access!
Download an Ubuntu Image
You can download an Ubuntu image here. Make sure to save it to a memorable location on your PC! For this tutorial, we will use the latest Ubuntu 22.10 release.

Download and install VirtualBox
You can download VirtualBox from the downloads page here. This page includes instructions on how to install VirtualBox for your specific OS so we won’t repeat those here.
Once you have completed the installation, go ahead and run VirtualBox.
2. Create a new virtual machine
Click New to create a new virtual machine. Fill in the appropriate details:
- Name: If you include the word Ubuntu in your name the Type and Version will auto-update.
- Machine Folder: This is where your virtual machines will be stored so you can resume working on them whenever you like.
- ISO Image: Here you need to add a link to the ISO you downloaded from the Ubuntu website.
We want to install Ubuntu unattendedly so we can leave the checkbox to skip unchecked.
Create a user profile
To enable the automatic install we need to prepopulate our username and password here in addition to our machine name so that it can be configured automatically during first boot.
The default credentials are:
- Username: vboxuser
- Password: changeme
It is important to change these values since the defaults will create a user without sudo access.
Ensure your Hostname has no spaces to proceed!
It is also recommended to check the Guest Additions box to install the default Guest Additions ISO that is downloaded as part of VirtualBox. Guest additions enables a number of quality of life features such as changing resolution and dynamic screen resizing so it is highly recommended!
Note: If you choose not to use unattended install then this step will be skipped and you will go straight to the following screen. Once your machine has been created you will be able to create a username and password by proceeding through the standard Ubuntu Desktop installation flow on first boot.
Define the Virtual Machine’s resources
In the next section we can specifiy how much of our host machine’s memory and processors the virtual machine can use. For good performance it’s recommended to provide your VM with around 8GB of RAM (althought 4GB will still be usable) and 4 CPUs. Try to remain in the green areas of each slider to prevent issues with your machine running both the VM and the host OS.
Then we need to specify the size of the hard disc for the virtual machine. For Ubuntu we recommend around 25 GB as a minimum. By default the hard disk will scale dynamically as more memory is required up to the defined limit. If you want to pre-allocate the full amount, check the ‘Pre-allocate Full Size’ check box. This will improve performance but may take up unnecessary space.
Click Next to continue and view a summary of your machine setting.
After this click Finish to initialize the machine!
3. Install your image
Click Start to launch the virtual machine.
You will see a message saying ‘Powering VM up …’ and your desktop window will appear.
On first boot the unattended installation will kick in so do not interact with the prompt to ‘Try and Install Ubuntu’ and let it progress automatically to the splash screen and into the installer.
Note: If you chose not to use unattended install then you will need to progress through the Ubuntu install manually. Check out our Ubuntu Desktop installation tutorial for more details.
You will notice at this stage that the resolution of the window is fixed at 800×600. This is because the Guest Additions features are not installed until after the Ubuntu installation has completed.
Once the installation completes, the machine will automatically reboot to complete the installation.
Finally you will be greeted with the Ubuntu log-in screen where you can enter your username and password defined during the initial setup (don’t forget that the default password is ‘changeme’ if you left everything as the default).
4. Explore Virtual Box
Enjoy your shiny new Ubuntu Desktop!
As always we recommend opening a terminal and running sudo apt update && sudo apt upgrade -y and then sudo snap refresh to get everything updated to the latest versions.
Once you’ve finished your session you can close your machine by clicking the X in the top right of the window and choosing whether to keep your machine frozen in its current state or shut it down completely.
As you can probably tell, there are tonnes of further configuration options available in VirtualBox and we’ve only scratched the surface.
VirtualBox allows you to create and configure multiple virtual machines, so don’t be afraid to create new instances of Ubuntu to try out different system and storage configurations to fine tune your performance.
Why not try following the tutorial above with one of the Ubuntu flavours!
Как установить Linux используя Virtualbox
Если вы работаете на Windows версии ниже 10 или хотите получить изолированную операционную систему Linux, да ещё и с графическим окружением, то можно воспользоваться сторонним бесплатным программным продуктом под названием VirtualBox.
Общая информация о технологии виртуализации
Инсталлятор Oracle VM VirtualBox для Windows Hosts Ссылка на скачивание: Download Oracle VM VirtualBox
Образ операционной системы Ubuntu Linux в формате ISO Ссылка на скачивание: Download Ubuntu Desktop
Для начала необходимо установить и запустить приложение VirtualBox.
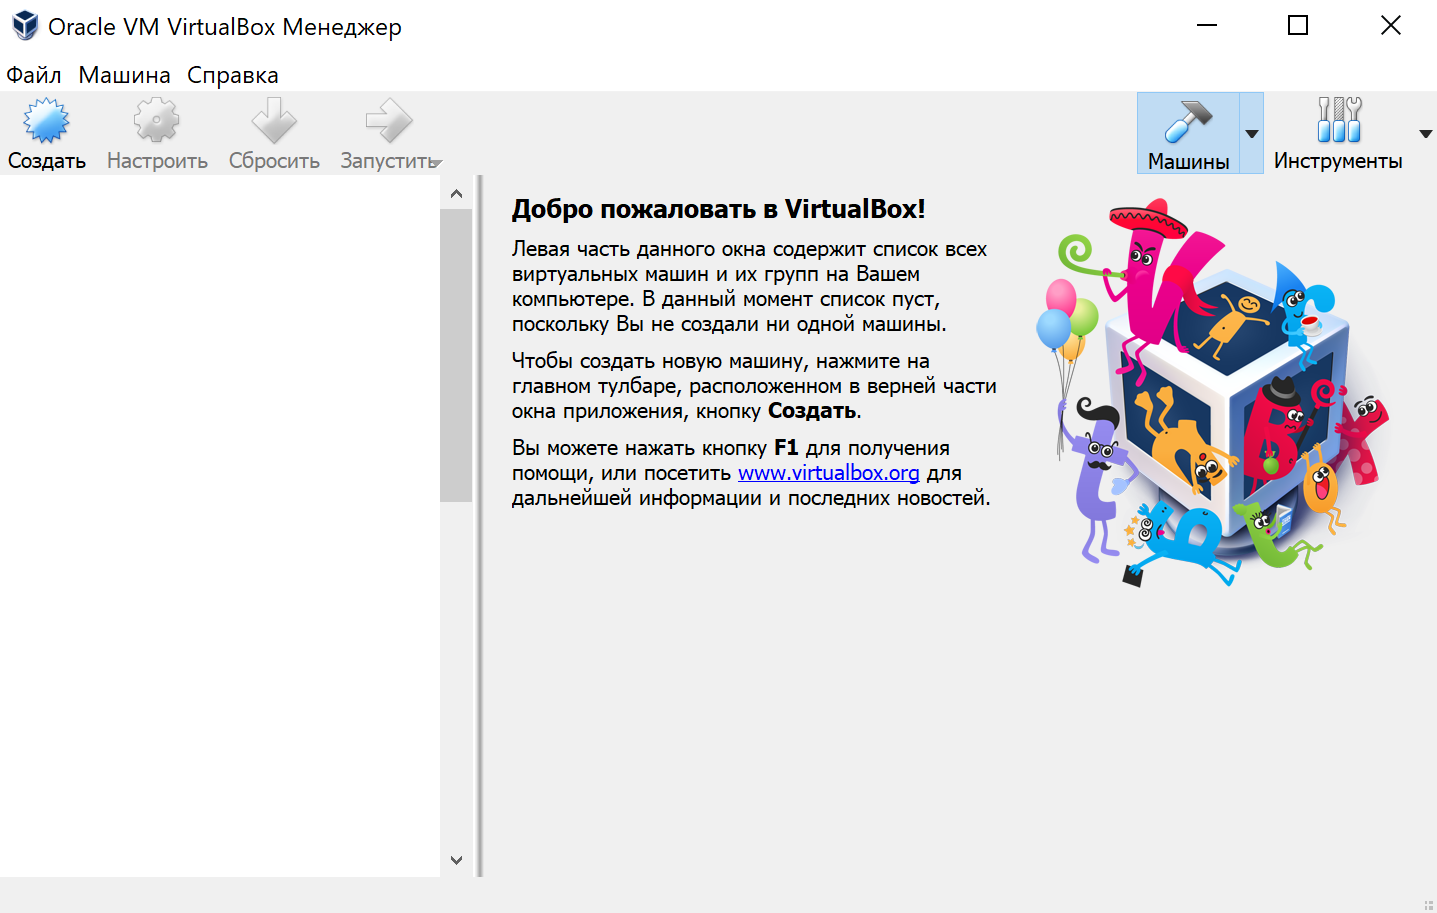
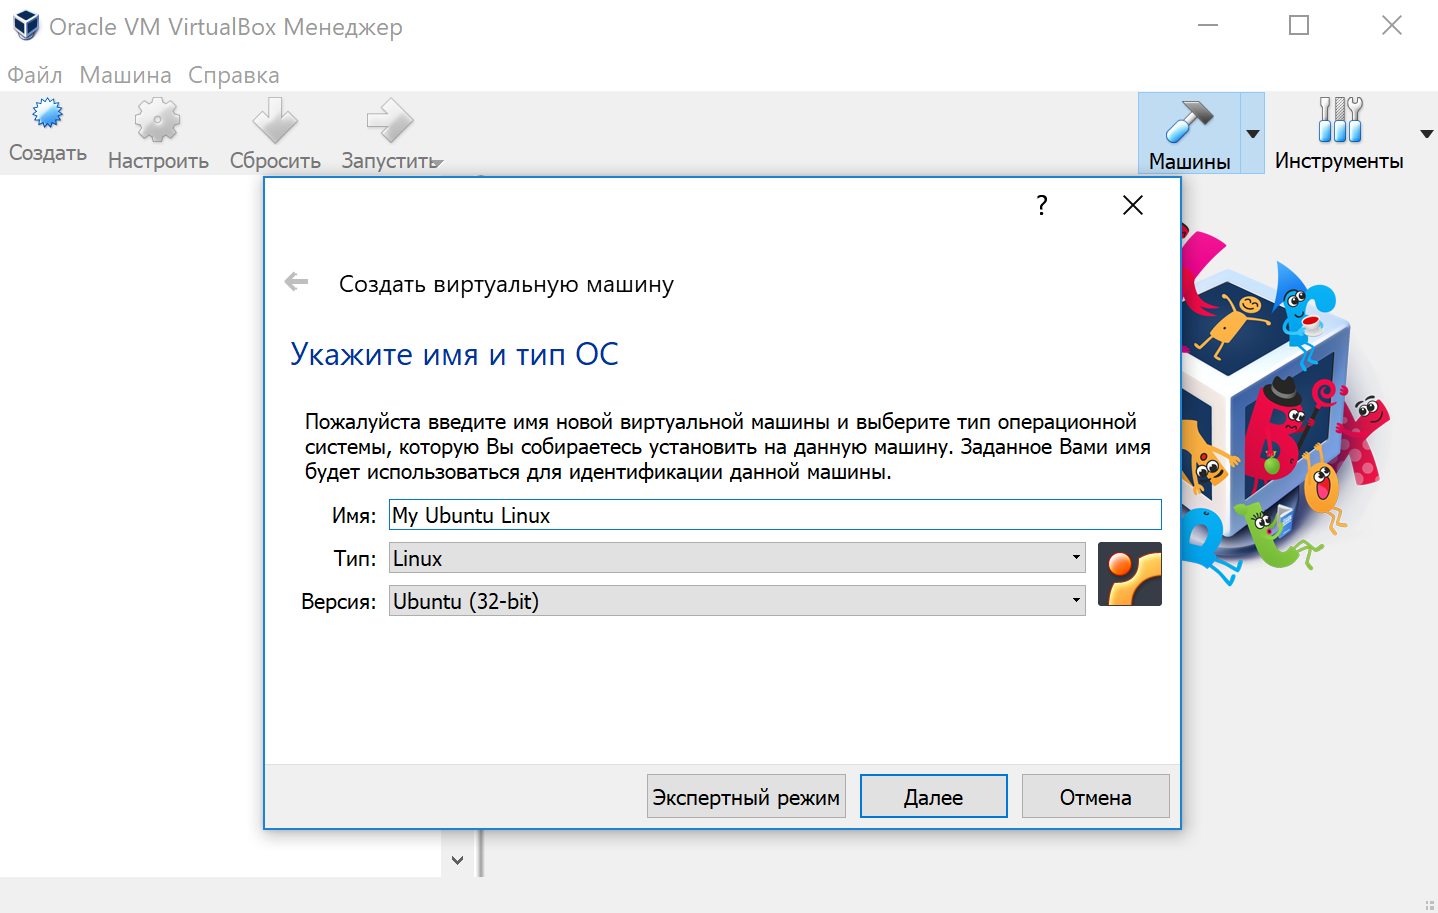
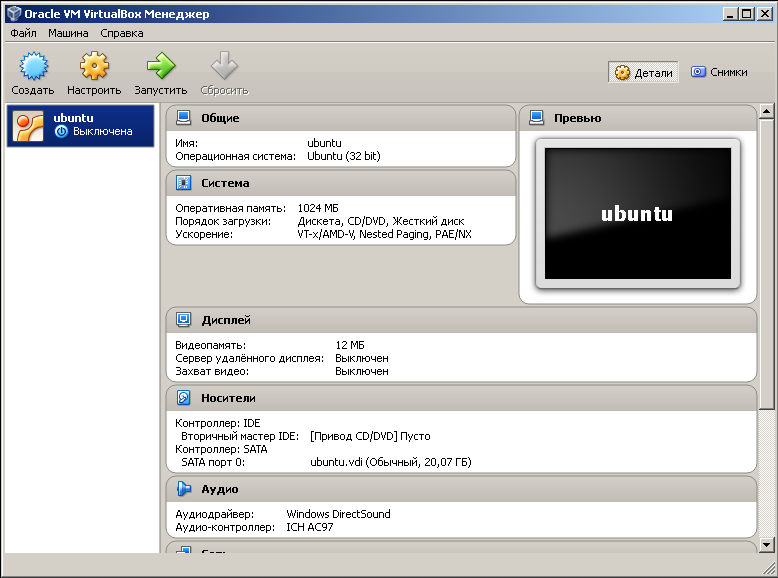
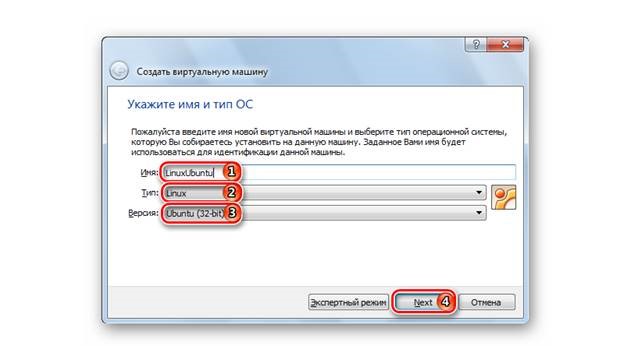
Нажимаем кнопку «Создать», выбираем из списка тип операционной системы «Linux», если нет своих предпочтений по дистрибутиву, то выбираем версию «Ubuntu» 32 или 64 битной архитектуры, а название можно ввести любое.
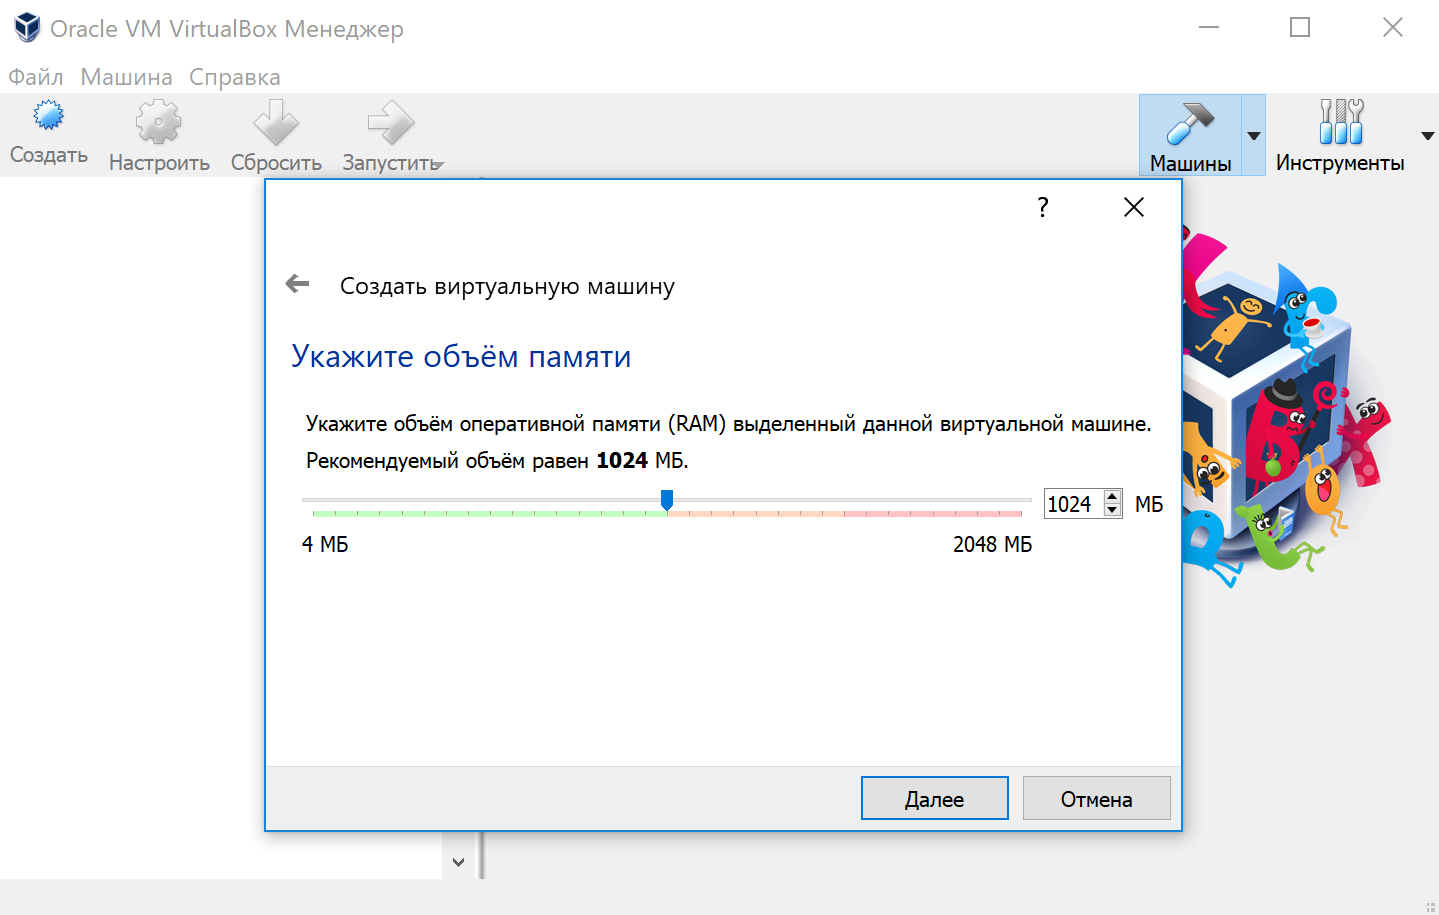
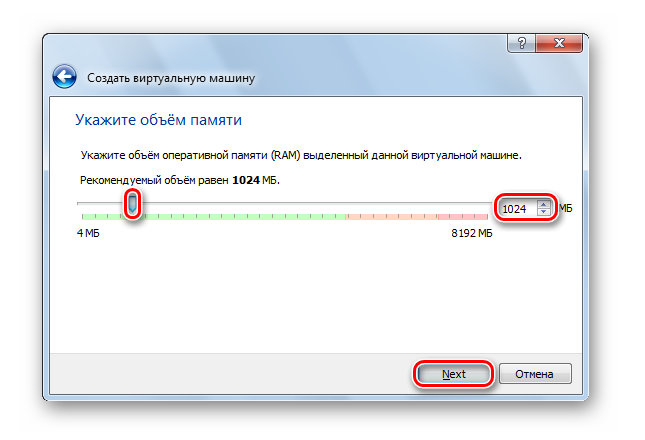
Указываем объём оперативной памяти выделенной под виртуальную систему. Рекомендованный объём составляет 1024 MB.
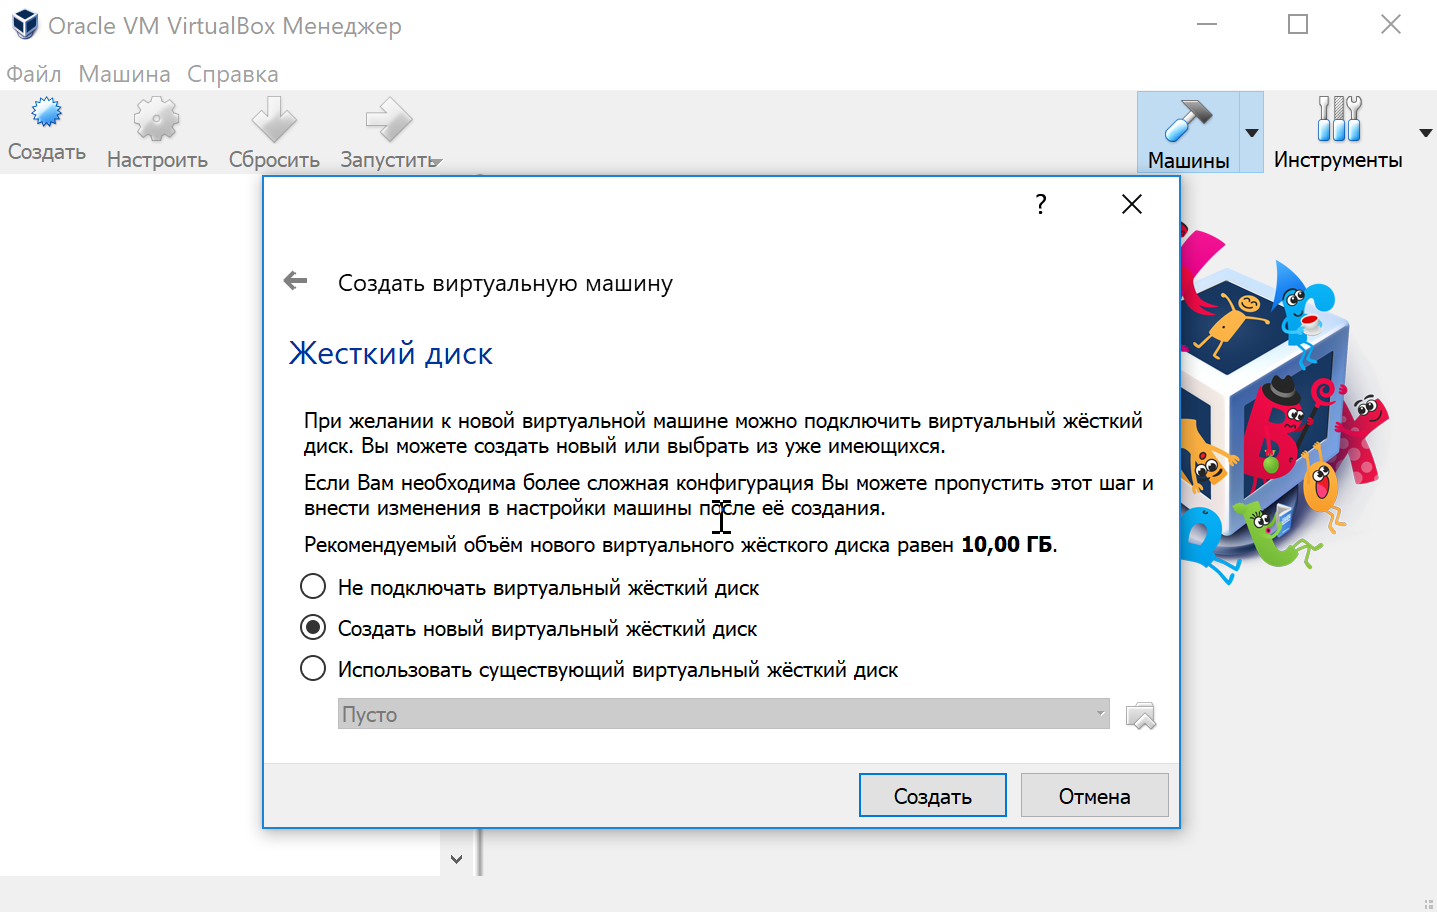
Указываем объём дискового пространства выделенного под виртуальную систему. Рекомендованный объём составляет 10 GB.
Тип виртуального жёсткого диска можно оставить как есть — VDI (VirtualBox Disk Image).
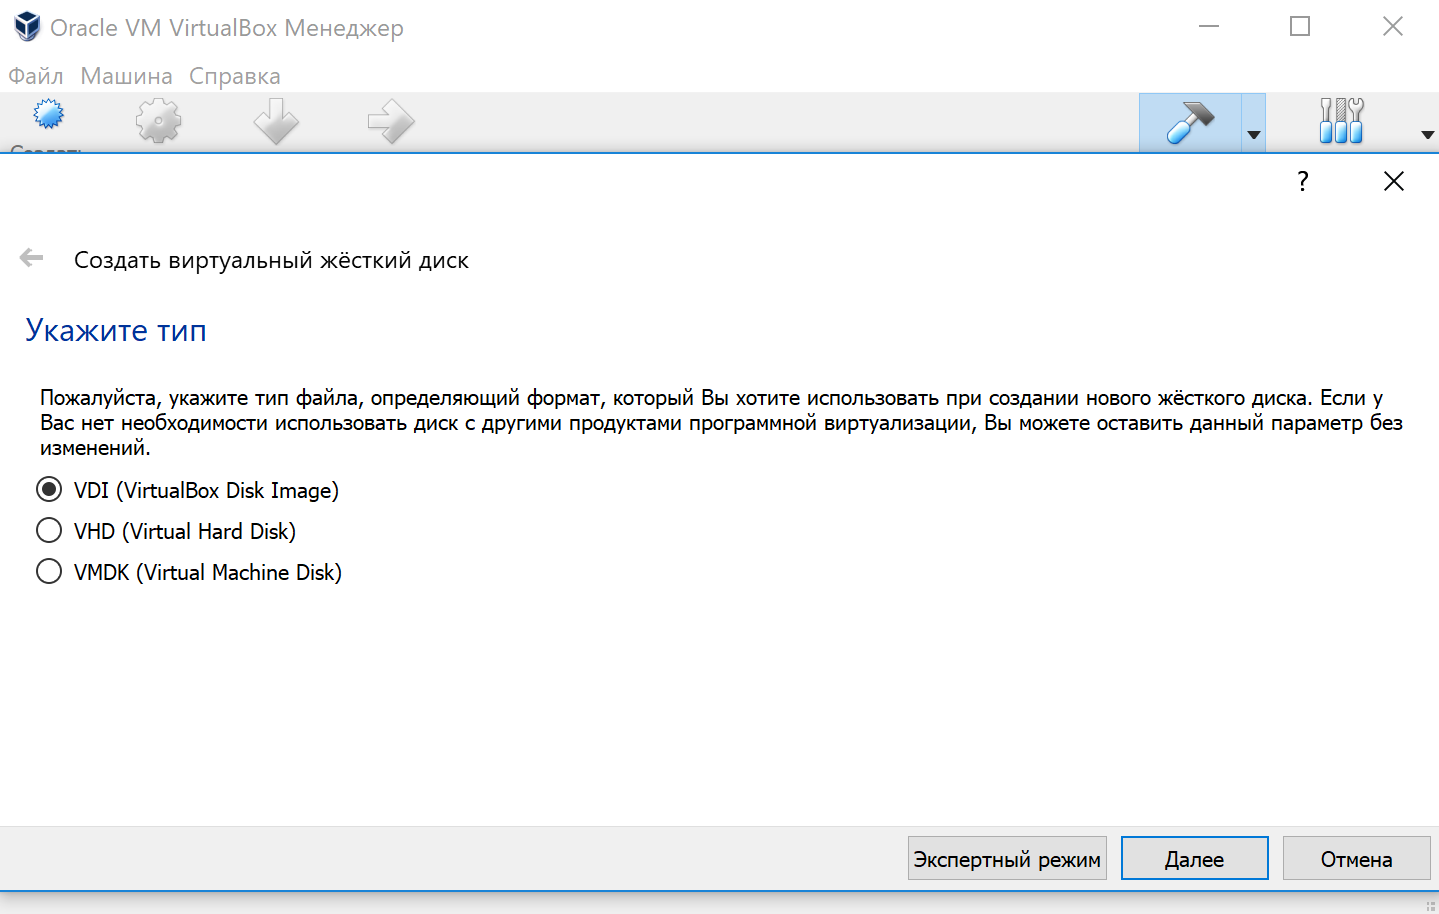
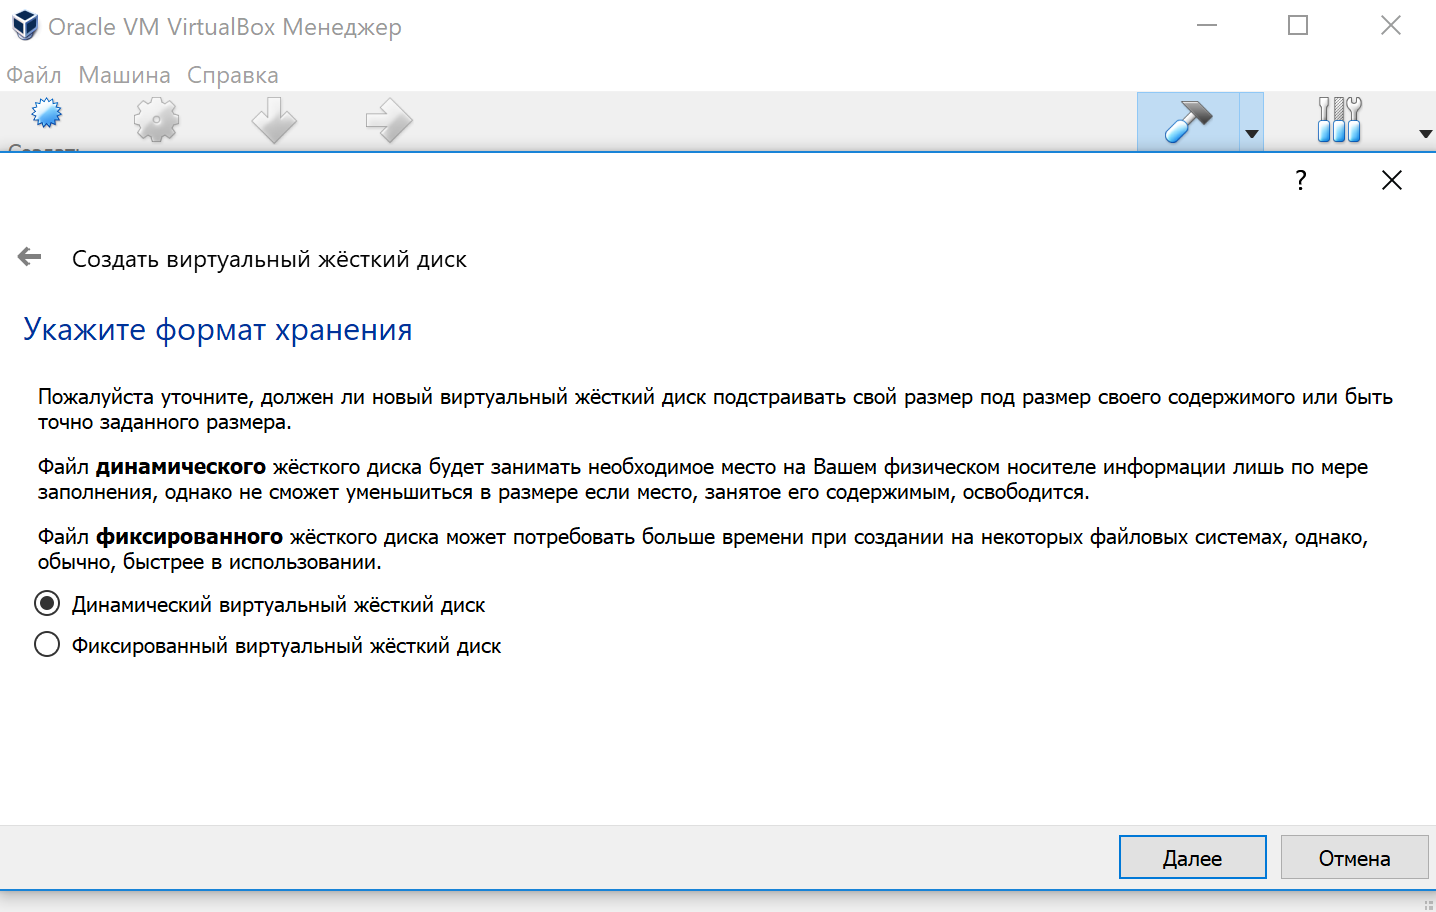
Формат хранения данных выберите исходя из личных предпочтений. Динамический виртуальный жёсткий диск растёт по мере заполнения, а фиксированный создаётся сразу того размера, который был указан на предыдущем шаге.
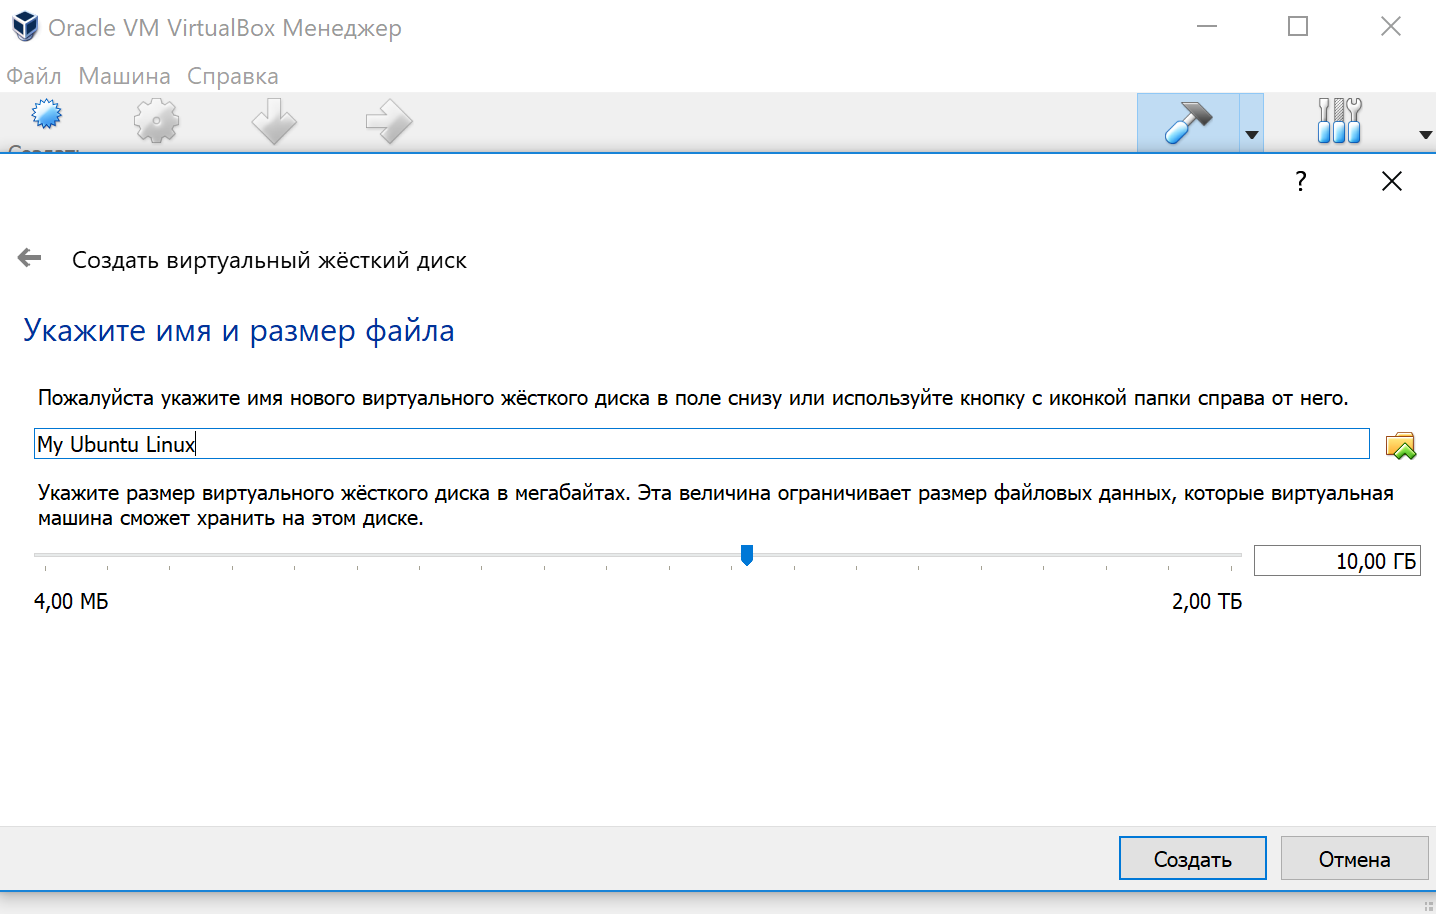
Имя и размер файла можно оставить без изменений и сразу нажать на кнопку «Создать».
По завершению у вас будет создана виртуальная машина, но она пока без операционной системы. Для того чтобы её установить, нужно скачать Ubuntu Linux (32-bit или 64-bit, в зависимости от того, что было выбрано на шаге, где мы указывали тип ОС).
Нажатие на кнопку «Запустить» должно привести к появлению диалогового окна с предложением указать путь до скаченного ISO образа. Сделайте этого и нажмите кнопку «Продолжить»
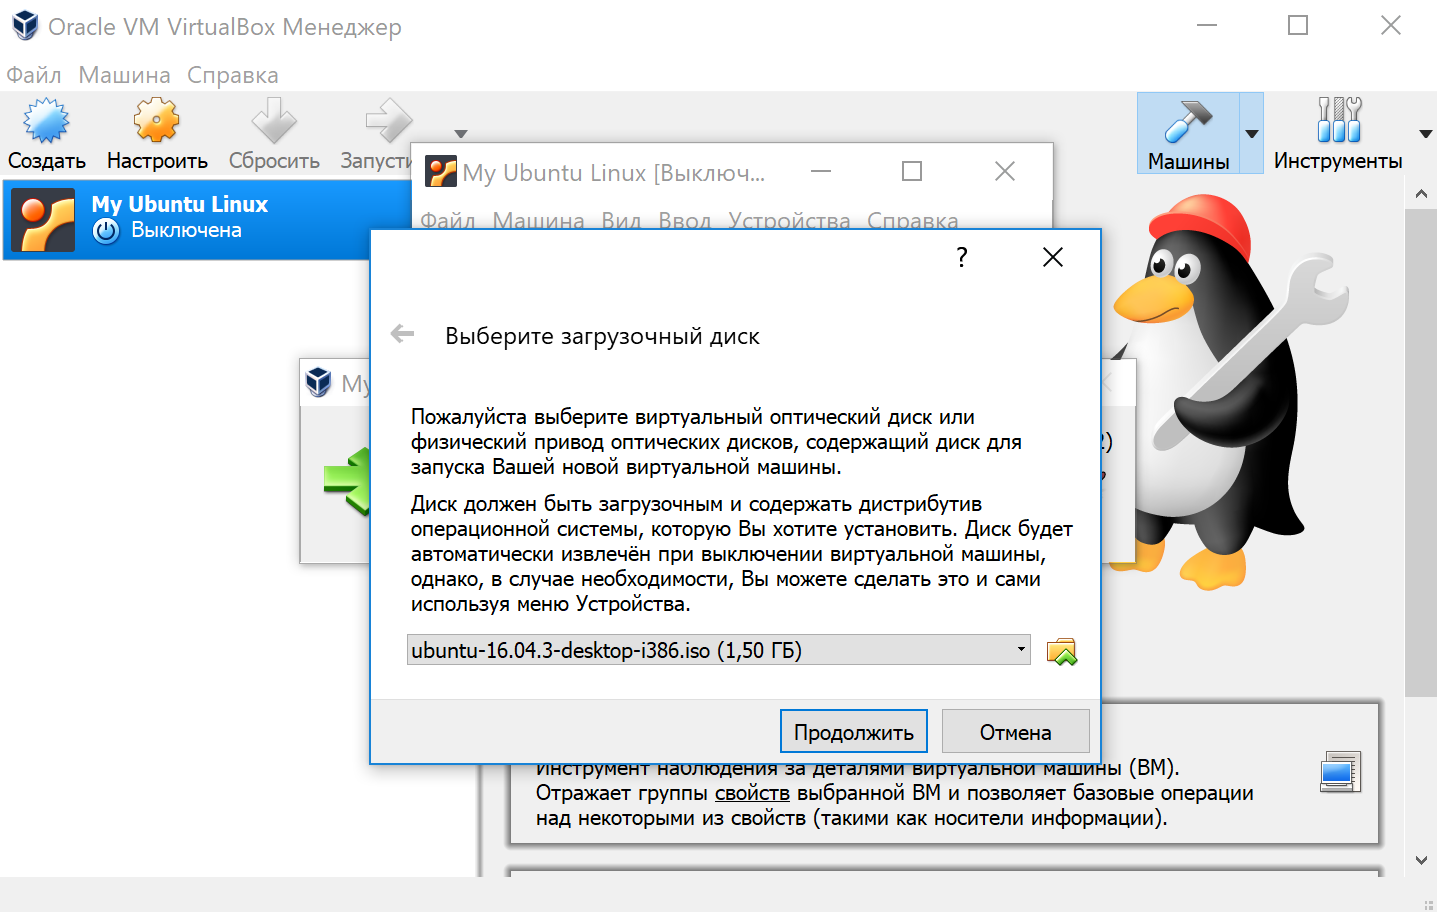
Виртуальная машина автоматически будет выполнять часть процессов, но в некоторых операциях всё же потребуется участие пользователя.
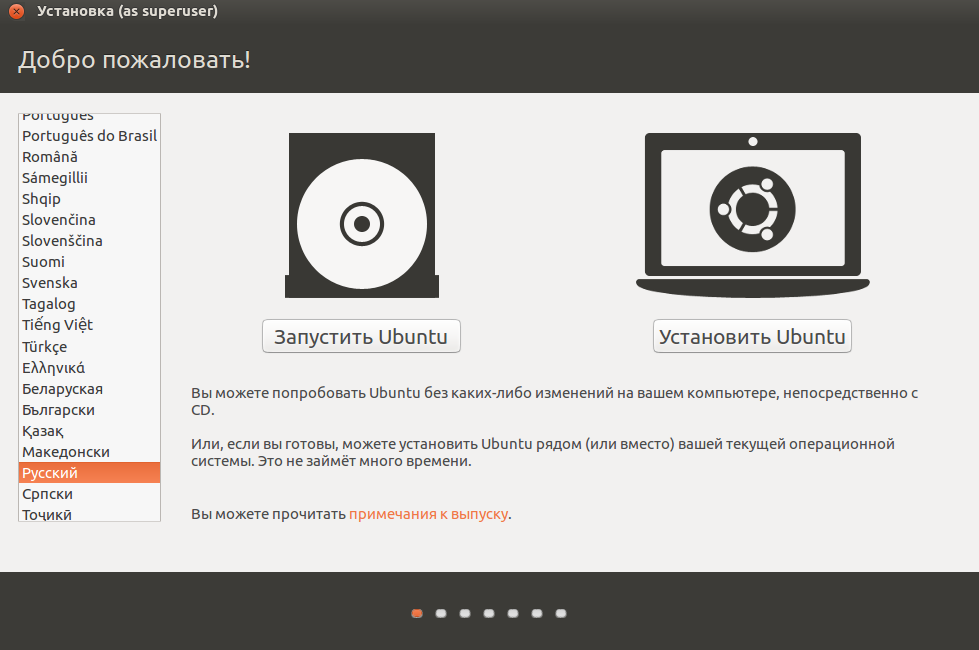
Выберите языковую поддержку в списке слева и нажмите «Установить Ubuntu».
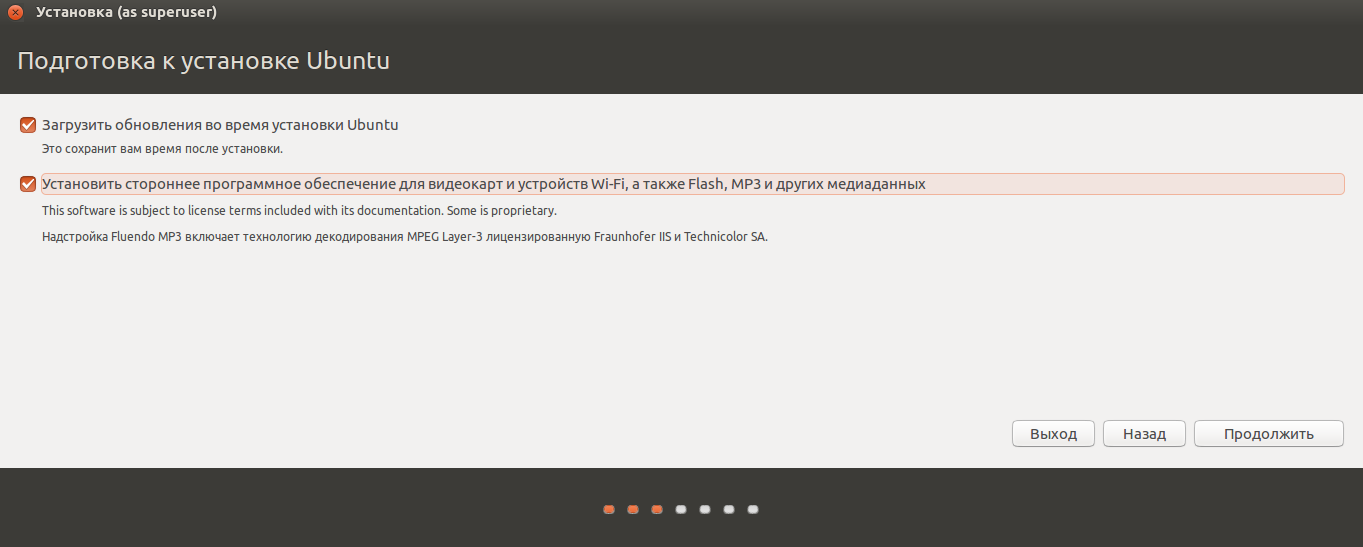
Можно загрузить обновления сразу на этапе установки.
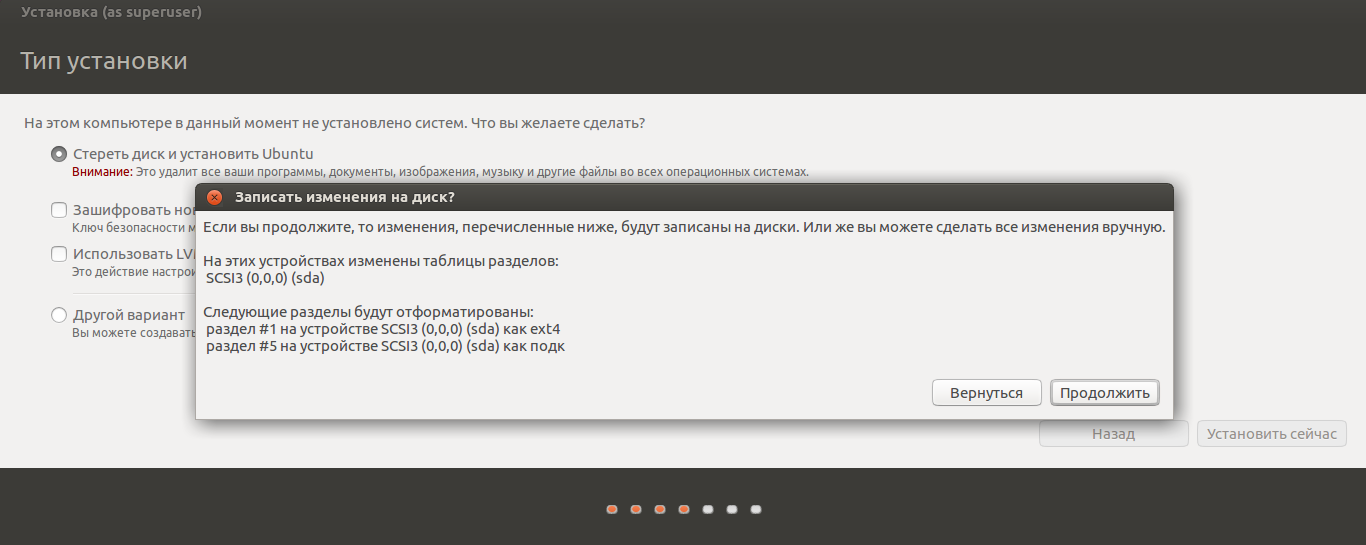
Без особых опасений выбираем пункт «Стереть диск и установить Ubuntu» и двигаемся дальше.
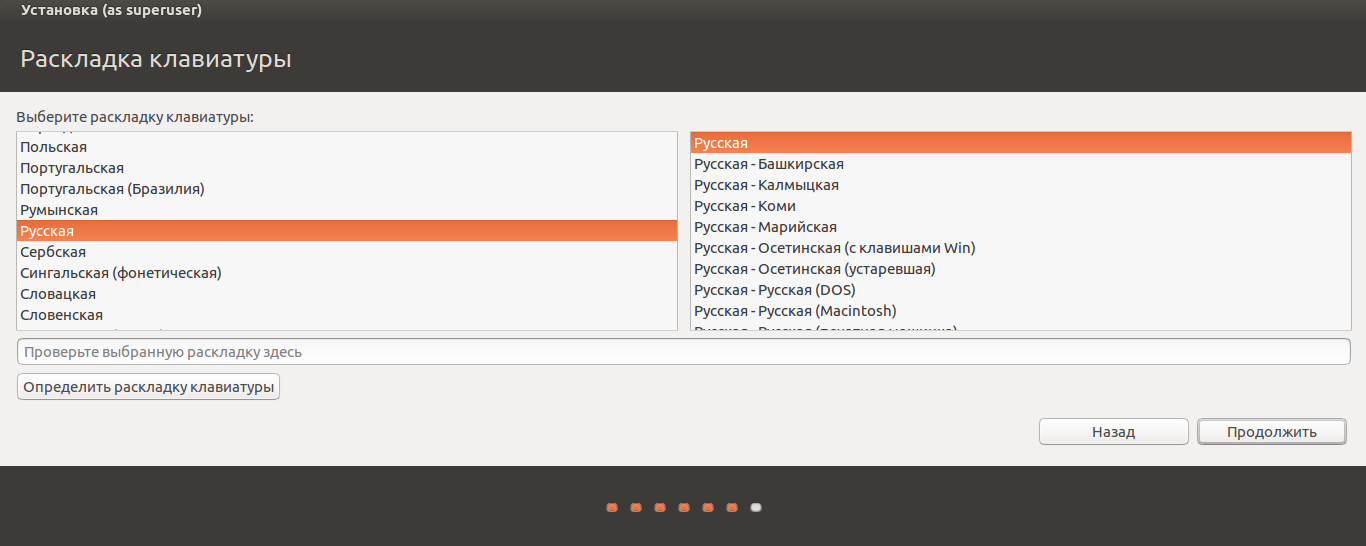
Если вы выбрали русский язык на первом этапе установки, то вам предложат русскую раскладку клавиатуры в качестве дополнительной.
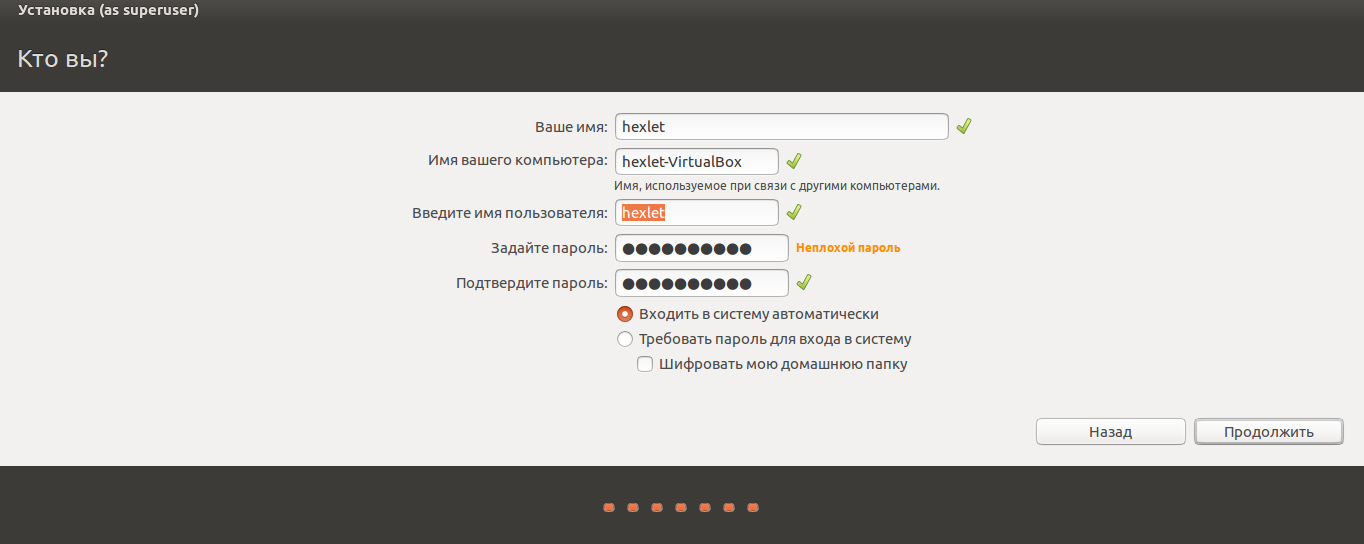
Заполните поля и выберите режим входа в систему.
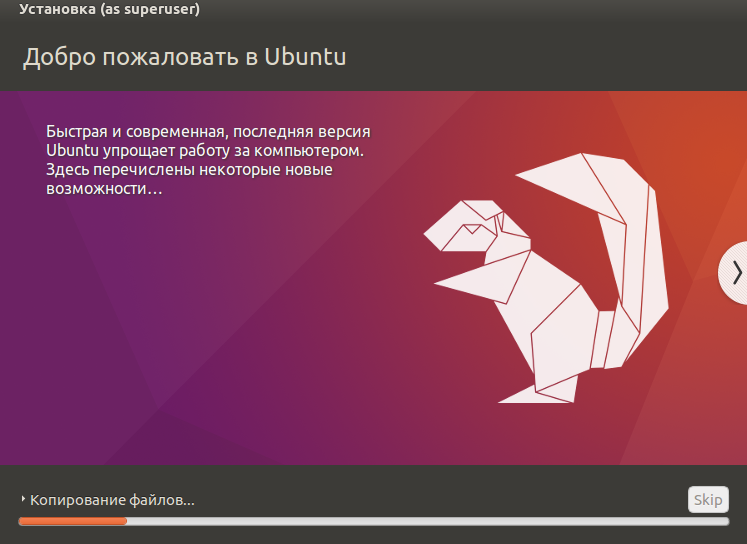
Далее начнётся процедура разметки диска, переноса файлов, установка обновлений и другие процессы, которые не потребуют прямого участия пользователя.
По завершению виртуальный компьютер перезагрузится и вы попадёте в уже установленную среду Ubuntu Linux.
Но это ещё не всё. Весьма желательно установить так называемые «Дополнения гостевой ОС». Они содержат драйверы и прочие системные файлы, необходимые для наилучшей производительности и обеспечения дополнительных функциональных возможностей между виртуальной и гостевой операционными системами.
Выберите пункт меню «Устройства» программы VirtualBox, подпункт «Подключить образ диска Дополнений гостевой ОС…» и дождитесь предложение запустить приложение для автоматического запуска с виртуального привода.
Как в VirtualBox установить Ubuntu
VirtualBox — бесплатное приложение, позволяющее создать двойник домашнего компьютера с любой адаптированной операционной системой, при этом настройки основного железа не изменятся. Утилита позволяет инсталлировать и тестировать сомнительный софт или освоить любое программное обеспечение, не затрагивая домашний ПК. К примеру, можно без труда установить Убунту на Виртуал Бокс, даже если на реальном железе установлен Виндовс.
Подготовка к установке
Весь процесс установки Ubuntu на VirtualBox делится на три этапа:
1. Скачивание образа Ubuntu для дальнейшей инсталляции его на виртуальной машине.
2. Установка утилиты VirtualBox, с помощью которой будет создаваться двойник домашнего ПК.
3. Непосредственная установка Убунту на ВиртуалБокс.
Первый шаг предусматривает под собой скачивание образа ОС Ubuntu, сделать это можно по ссылке https://www.ubuntu.com/download/desktop.
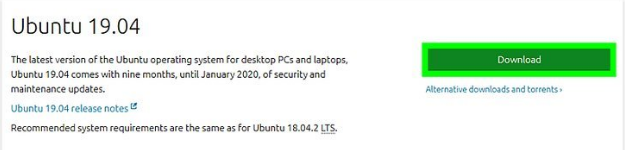
1. Желательно выбрать актуальную версию операционной системы в конце списка. После этого нажать на клавишу Download.
2. Далее откроется окно, где в самом низу следует выбрать Not now, take me to the download. Далее выбрать Save file и нажать OK.
В результате произойдет скачивание ISO-файла, который представляет собой образ операционной системы Убунту.
Следующий шаг подготовки — установка VirtualBox. Скачать утилиту можно с любого проверенного сайта софта, приложение бесплатно. После скачивания в списке программ ПК должно появиться соответствующее название, а на рабочем столе — ярлык.
Этапы загрузки Убунту в VirtualBox
Этап загрузки Убунту можно условно разделить на два — создание виртуальной машины и инсталляция образа операционной системы.
Для начала следует создать прототип компьютера с помощью VirtualBox:
1. Запустите программу ВиртуалБокс, в открывшемся окне выберите вкладку Создать.
2. Появится новое окошко, где необходимо заполнить данные будущей виртуальной машины. В частности, ее название, тип операционной системы и версию. В ОС следует выбрать Линукс, в версии, соответственно, вариант Убунту, который был скачен на этапе подготовки или максимально близкую к ней из предложенных. После того как все графы будут заполнены, нажмите Next.
3. Следующее окошко — выбор оперативной памяти для будущей виртуальной машины с помощью бегунка. Область, выделенная зеленым цветом, считается оптимальной.
4. Далее необходимо создать виртуальный жесткий диск для виртуальной машины. Оптимальный для Убунту размер — 10 Гб.
5. Создавая виртуальный диск, вам придется столкнуться с выбором его типа. Все зависит от преследуемых целей. Соответственно, доступными будут три варианта — VDI, когда нет глобальных задач, VHD — способен обмениваться данными с системой, а также осуществляет резервное копирование, и WMDK — походит для профессиональной работы.
6. Следующий шаг — определение формата хранения. Динамический тип подойдет, если у вас много места на жестком диске, если же вы хотите знать, сколько памяти займет виртуальная машина, придется выбрать фиксированный типа.
7. Задайте размер и название виртуального жесткого диска, можно оставить данные по умолчанию.
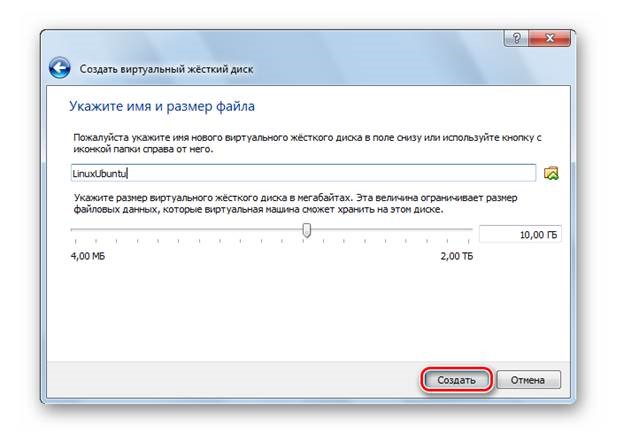
Следует дождаться, пока система создаст виртуальный жесткий диск. Окончание процесса будет означать, что виртуальная машина готова к работе. Теперь следует выгрузить в нее ОС Ubuntu.
Алгоритм выгрузки Убунту:
1. Монтировать загруженный образ Убунту в диск с помощью программы UltraISO, которую следует заранее установить на свое железо. Просто откройте скачанный дистрибутив и нажмите на иконку Монтировать.
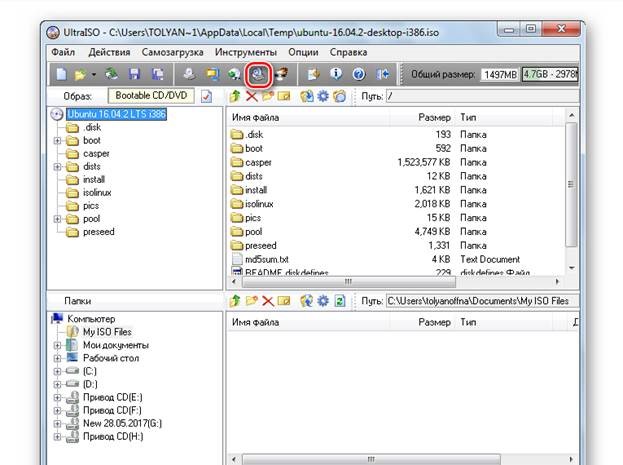
2. В разделе Мой компьютер появится созданный образ под определенной буквой диска.
3. В ВиртуалБокс нажать стрелочку Запустить, а затем выбрать этот дисковод, когда появится запрос на выбор привода после запуска виртуальной машины.
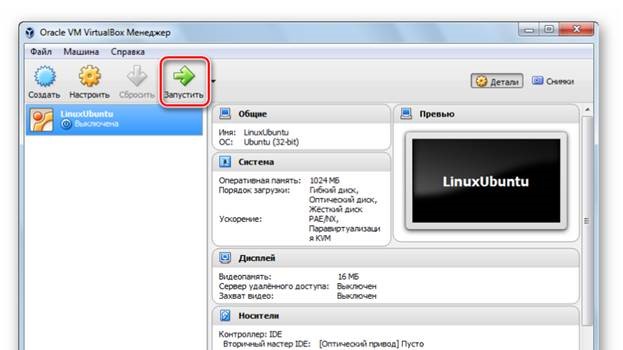
Теперь можно приступать к последнему шагу — непосредственно установке ОС Ubuntu на VirtualBox.
Установка Ubuntu
Последовательность установки ОС несложная:
1. Дождаться, пока загрузится запущенный установщик Ubuntu, слева выбрать язык и выбрать Установить.
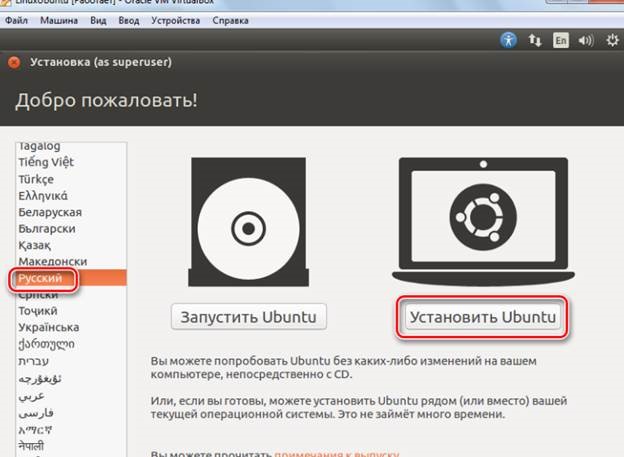
2. Выбрать способ установки обновлений, а затем первый пункт в окне типа установки, нажать Установить сейчас.
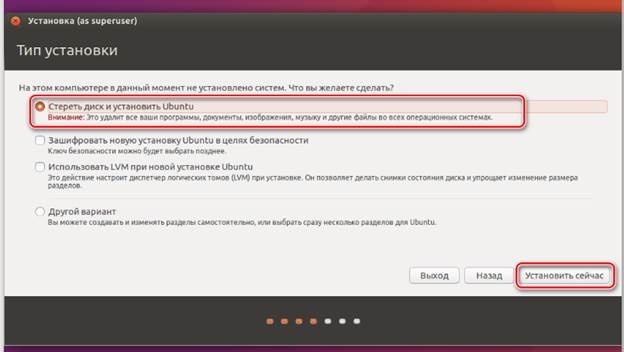
3. Для синхронизации часовых поясов установщик спросит о вашем местонахождении.
4. Затем попросит выбрать язык.
5. И указать личные данные, а также способ захода в систему в специальной анкете.
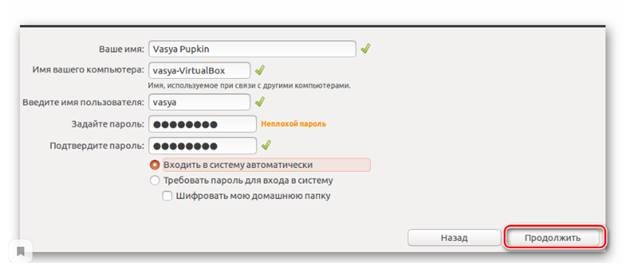
Далее начнется установка Убунту, которая может занять немного времени. О завершении процесса система оповестит служебным сообщением.
Для того, чтобы ОС Ubuntu начала работать, достаточно просто перезагрузить виртуальную машину.
Install Ubuntu on Oracle VirtualBox
Oracle VirtualBox is a cross-platform virtualization application. It installs on your existing Intel or AMD-based computers, whether they are running Windows, Mac, Linux or Solaris operating systems. VirtualBox can create and run a «guest» operating system (virtual machine) in a window of the host operating system. The virtual machine provides a self-contained environment in which to experiment with new software without risking damaging changes to the host operating system.
We will give an instruction with step-by-step screenshots to show how to install VirtualBox with an example of installing Ubuntu OS as a guest machine. We also explain how to share files between the host and guest operating systems.
Downloads
Note the instruction here is based on the latest version of the VirtualBox. If you have already installed an earlier version of VirtualBox, your experience may be different. It is recommended to use the latest version of VirtualBox to avoid issues. The VirtualBox forum is a good place to find a solution if you see any problems.
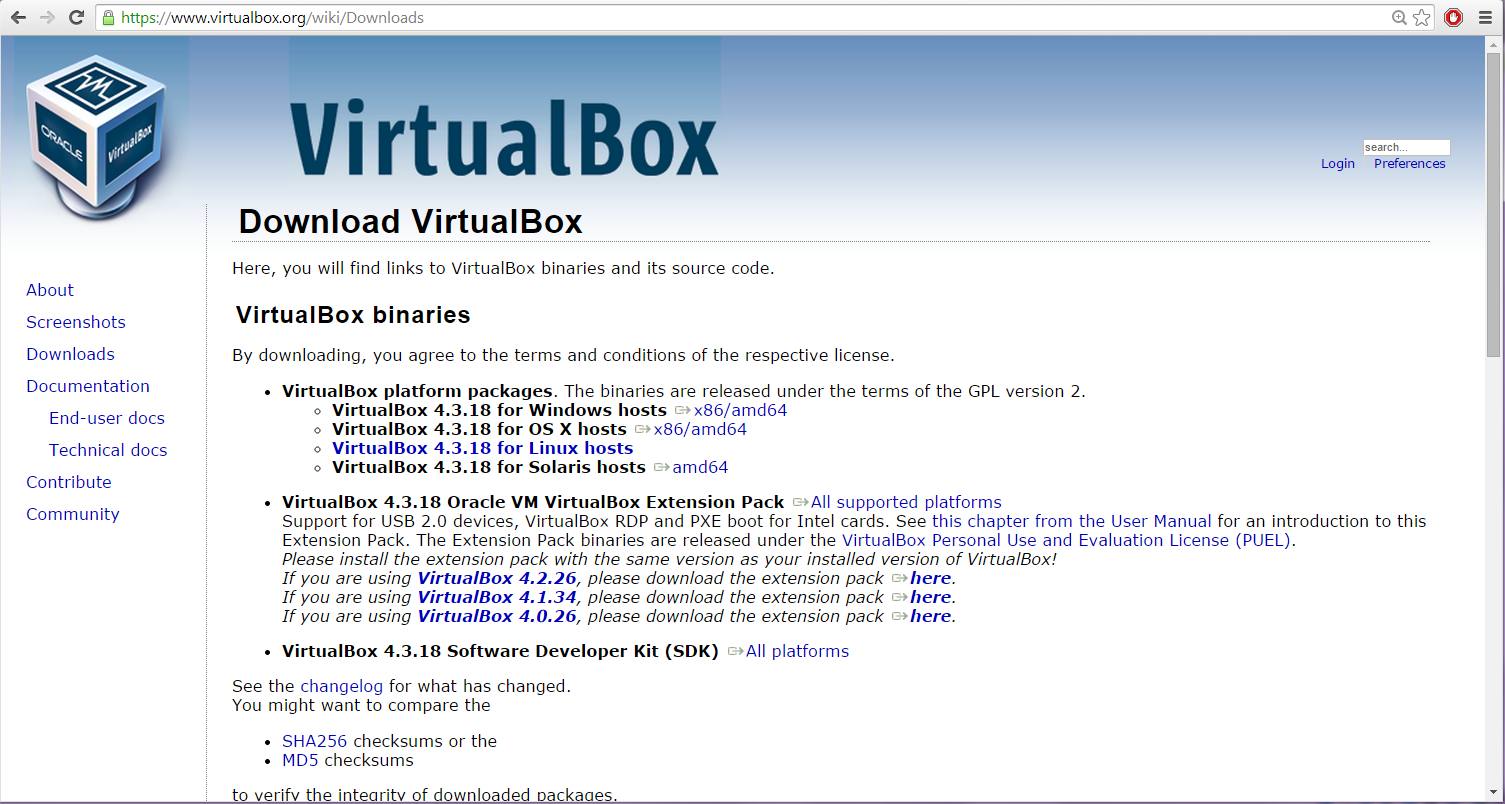
Go to VirtualBox website here to download the binary for your current operating system. Since our host machine is running on Windows, I’ll choose ‘x86/amd64’ from Windows hosts. When download is finished, run the executable file. Continue with the installation of VirtualBox with the defaults. This will open VirtualBox at the end of the installation.
Create Virtual Machine
Click ‘New’ button to open a dialog. 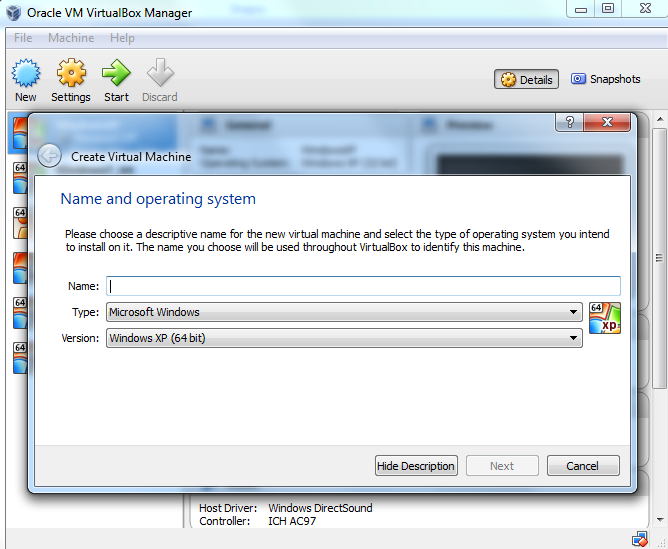
Type a name for the new virtual machine. Since I am planning to install Ubuntu 14.04, I’ll enter ‘ubuntu1404’. Note that VirtualBox automatically changes ‘Type’ to Linux and ‘Version’ to ‘Ubuntu (64 bit)’. These two options are exactly what we need. 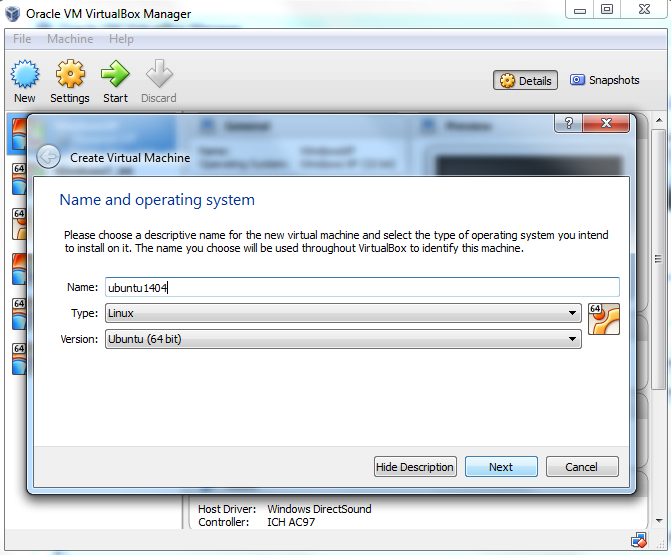
The memory size depends on your host machine memory size. In my case, I have 12GB physical RAM. I like to allocate as much as possible for Ubuntu but leave some for my Windows host machine. I pick 8192 MB for my Ubuntu. Note that VirtualBox will create a swap partition with the same amount space as base memeory you have entered here. So later when you are selecting the size of the virtual hard drive, make sure it is large enough since the hard drive will be splitted into root (/)and swap partitions. The root partition contains by default all your system files, program settings and documents.
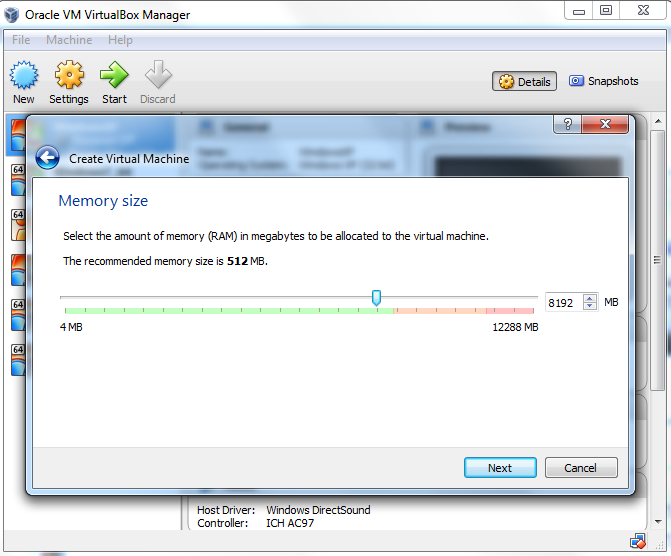
Accept the default ‘Create a virtual hard drive now’ and click ‘Create’ button. 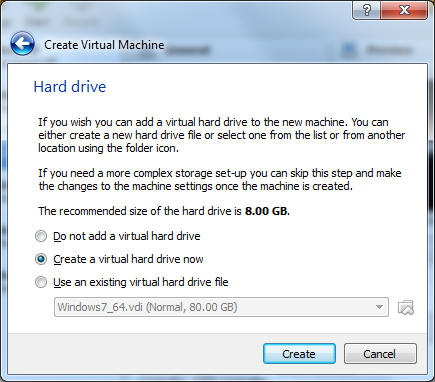
Continue to accept the default ‘VDI’ drive file type and click ‘Next’ button. 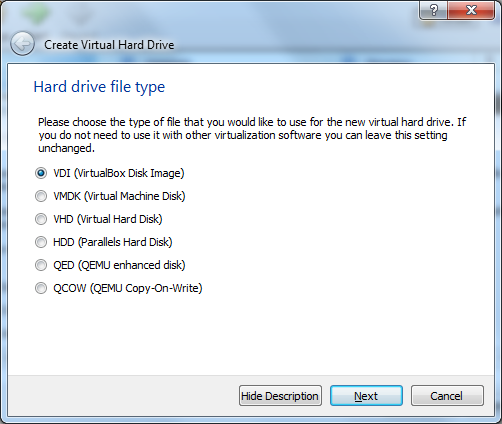
Change the storage type from the default ‘Dynamically allocated’ to ‘Fixed size’ to increase performance. 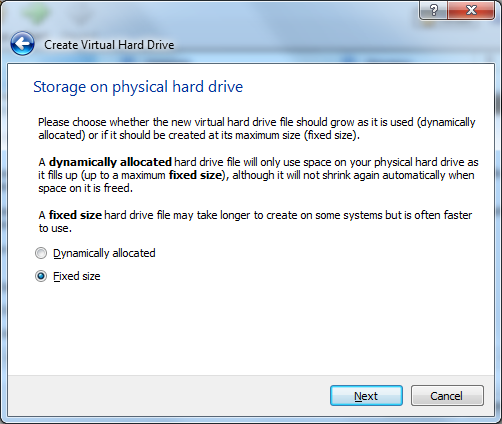
For the virtual hard drive space, the default value is 8GB which is too little for RNA-Seq analysis. I’ll pick 100GB since I have plenty of space in my hard disk. You want to choose a good size for your RNA-Seq analysis. If you realize the drive space is not large enough, you’ll need to go over these steps again to create another virtual machine.
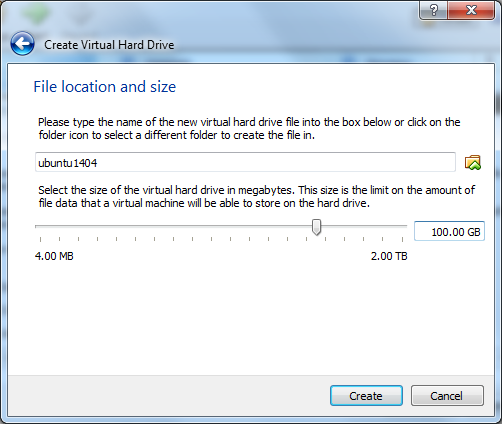
Click ‘Create’ button and VirtualBox will generate Ubuntu virtual machine. 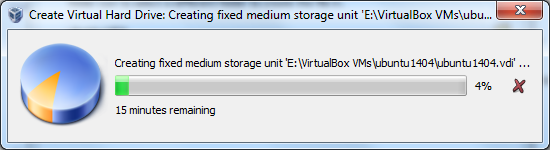
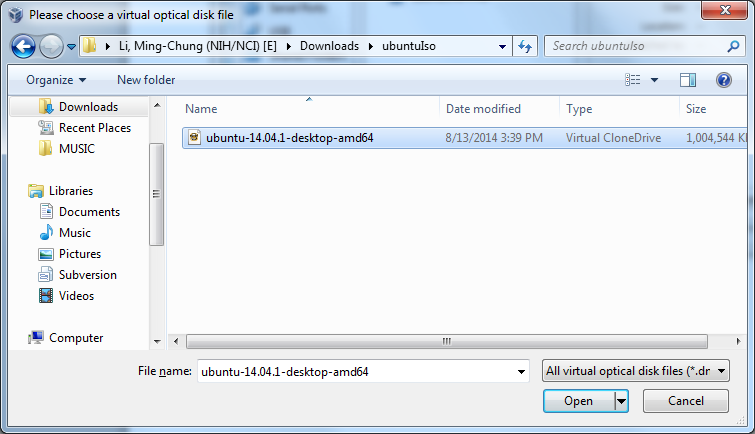
Now the virtual machine is created. We are ready to install Ubuntu in this virtual machine. Select your new virtual machine and click ‘Settings’ button. Click on ‘Storage’ category and then ‘Empty’ under Controller:IDE. Click «CD/DVD» icon on right hand side and select the ubuntu ISO file to mount.
Note that if you have not downloaded 64-bit Ubuntu ISO file, you can check out this page for more information. When downloading Ubuntu ISO file, make sure to selecte 64-bit version. Also make sure the VT-x/Virtualization Technology has been enabled in your computer’s BIOS/Basic Input Output System. 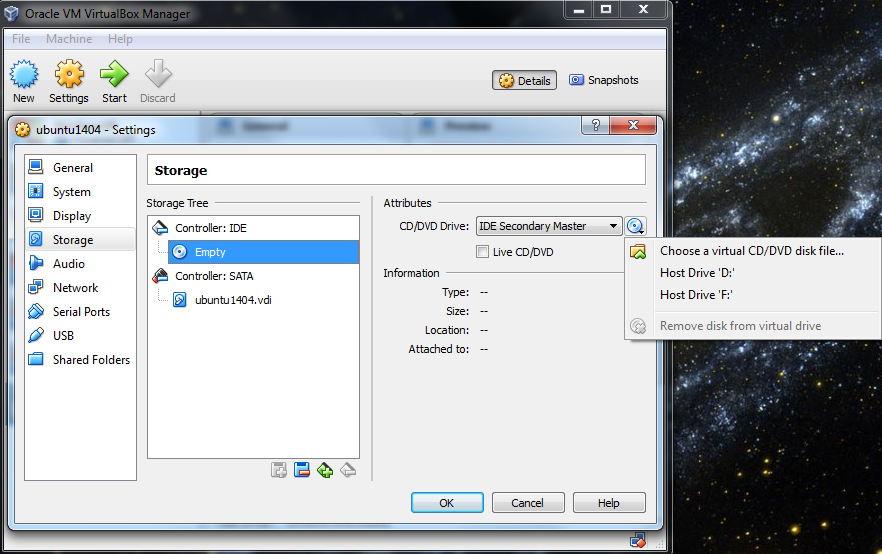
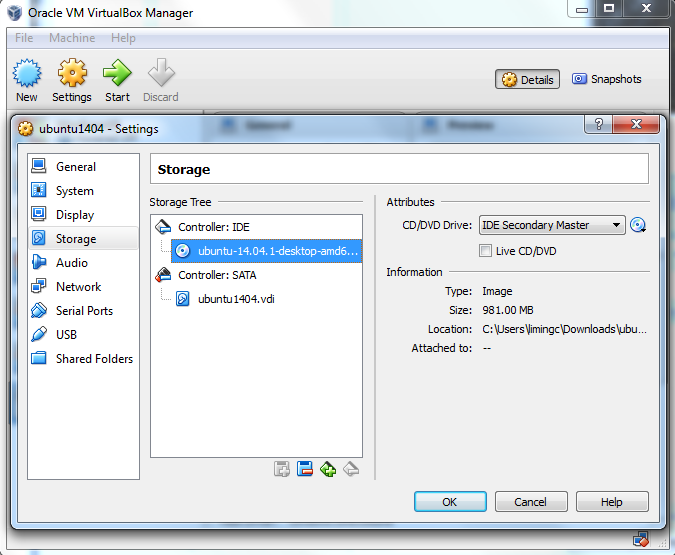
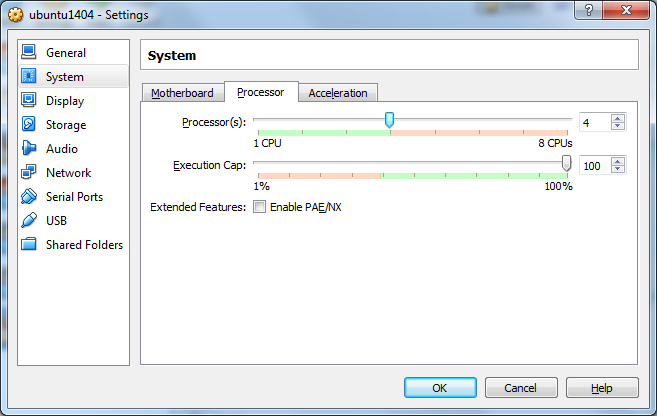
Since Tophat program can take an advantage of multiple processors/threads, it is a good idea to specify a large number of processors in virtual machine (default value is 1). You can change this number by clicking on ‘System’ category. In this case, I change the number of CPUs to 4 since 4 is the largest value shown on the green bar in my case. Now you can click ‘OK’ button to continue.
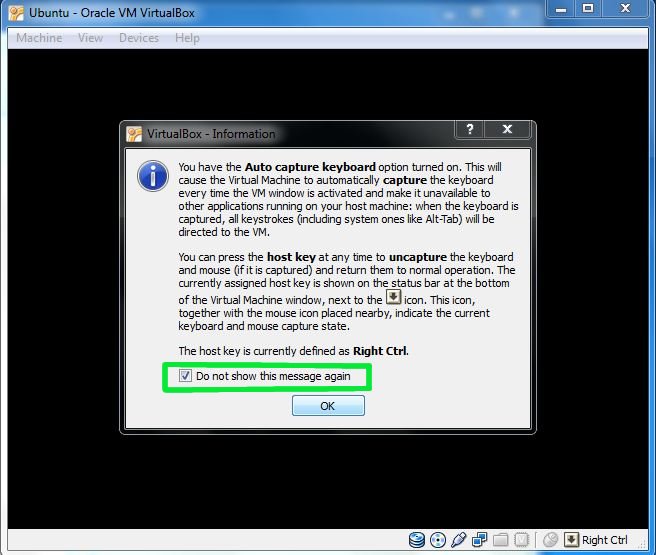
VirtualBox may pop up a message about ‘Auto capture keyboard’ option. Read the message there and check ‘Do not show this message again’ option before clicking OK.
Install Ubuntu
Back to Oracle VM VirtualBox Manager, click on the new Ubuntu virtual machine and hit ‘Start’ button. Now you shall see a ‘Welcome’ screen. Click ‘Install Ubuntu’ button. Note that the installation process may differ a little bit from version to version. The screenshots here are based on Ubuntu 14.04.1. 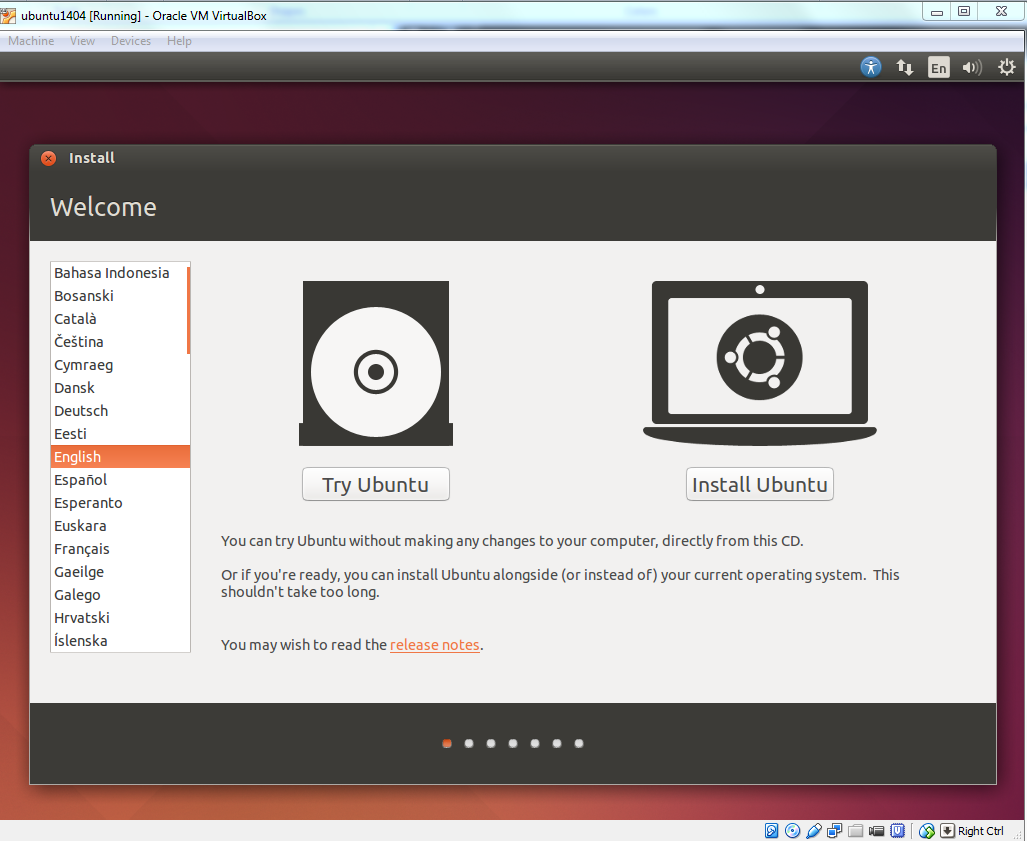
Click ‘Continue’ button. 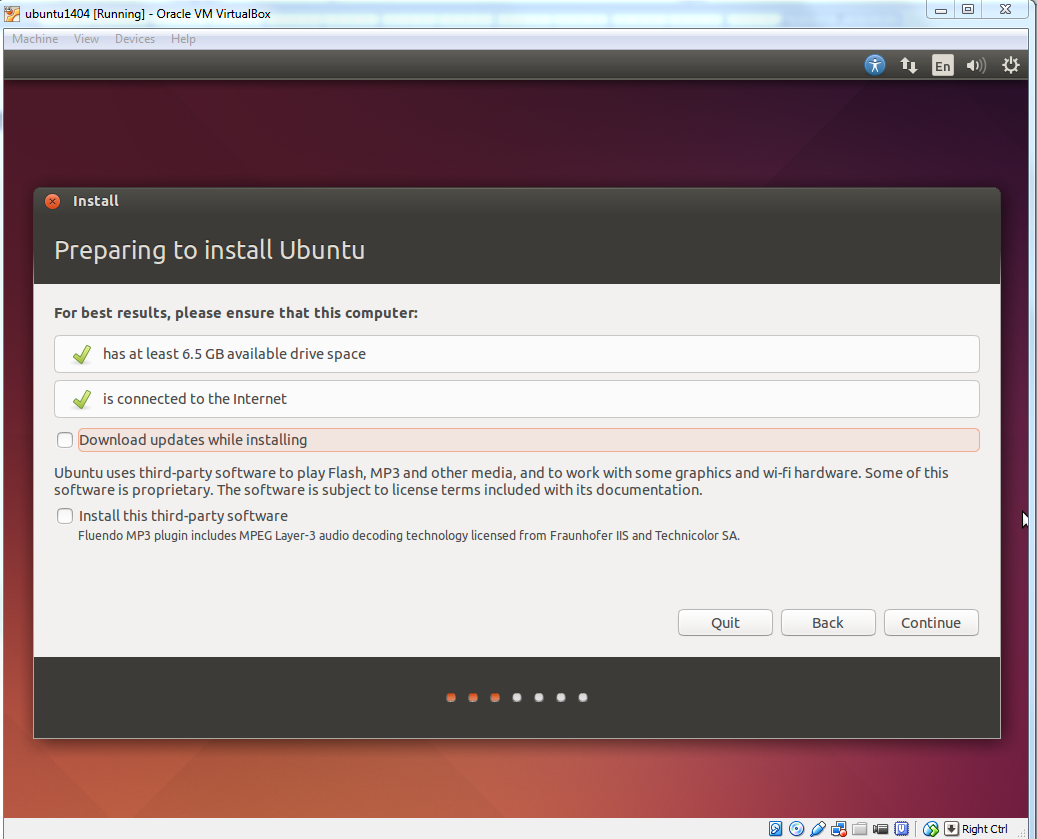
Make sure ‘Erase disk and install Ubuntu’ option is selected and click ‘Install Now’ button. 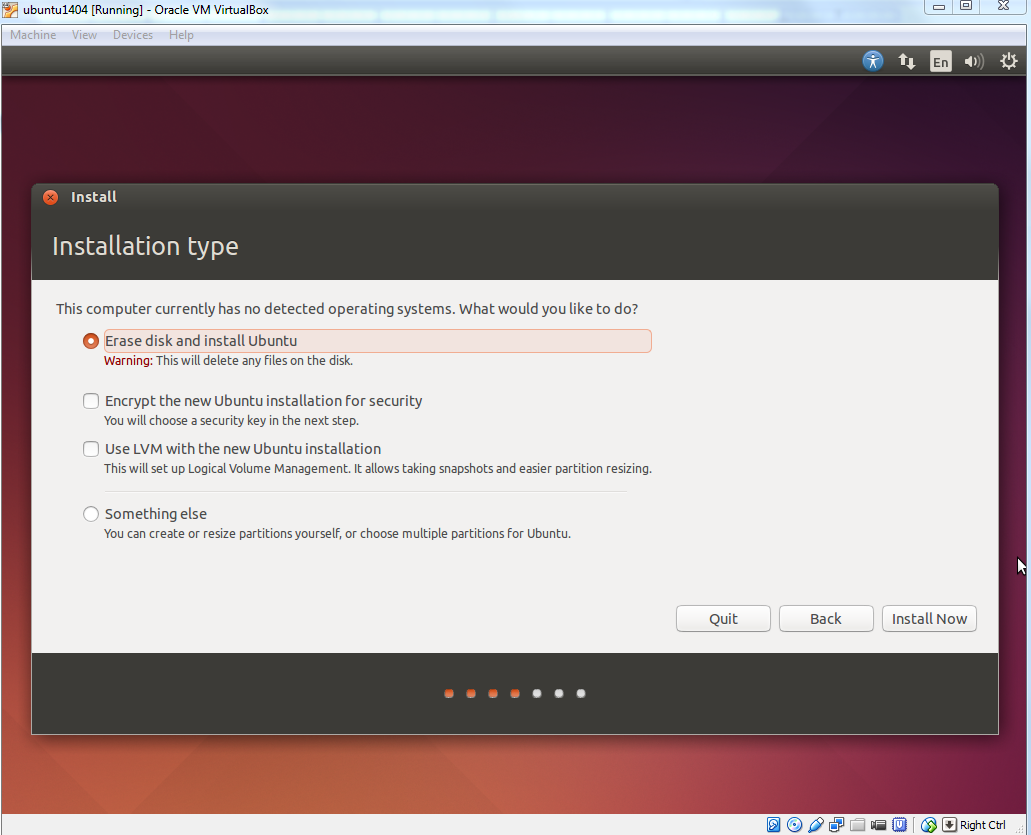
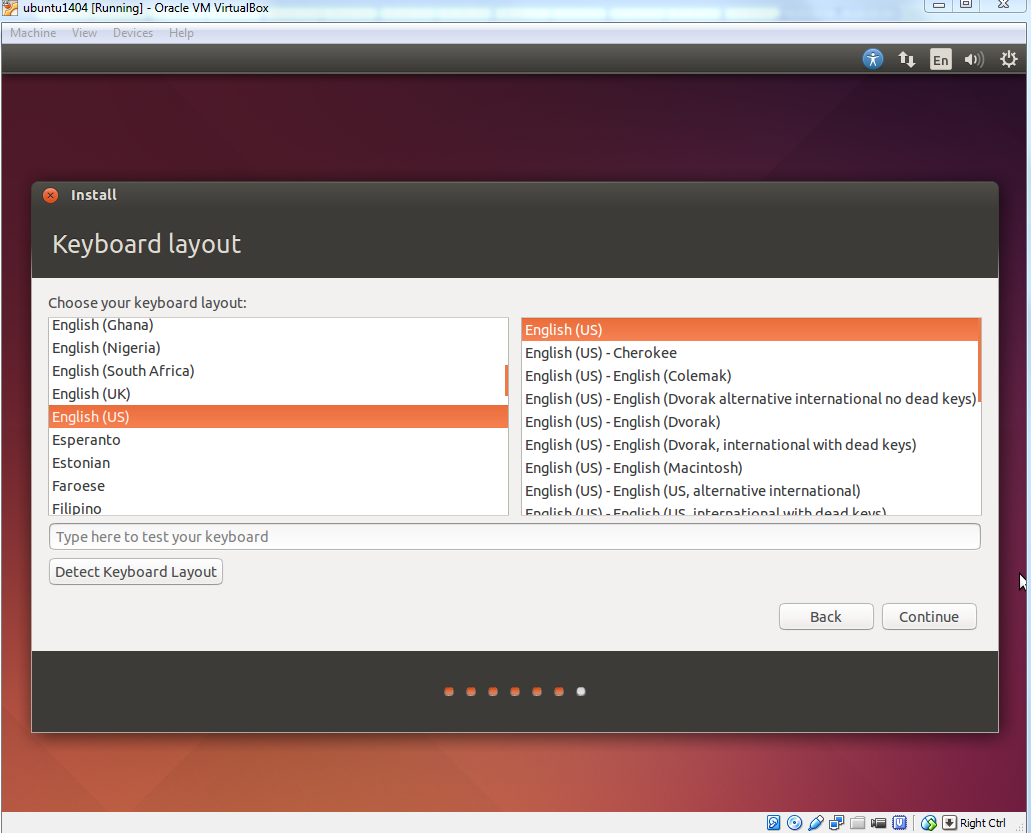
Ubuntu will ask you a few questions. If the default is good, click ‘Continue’ button. 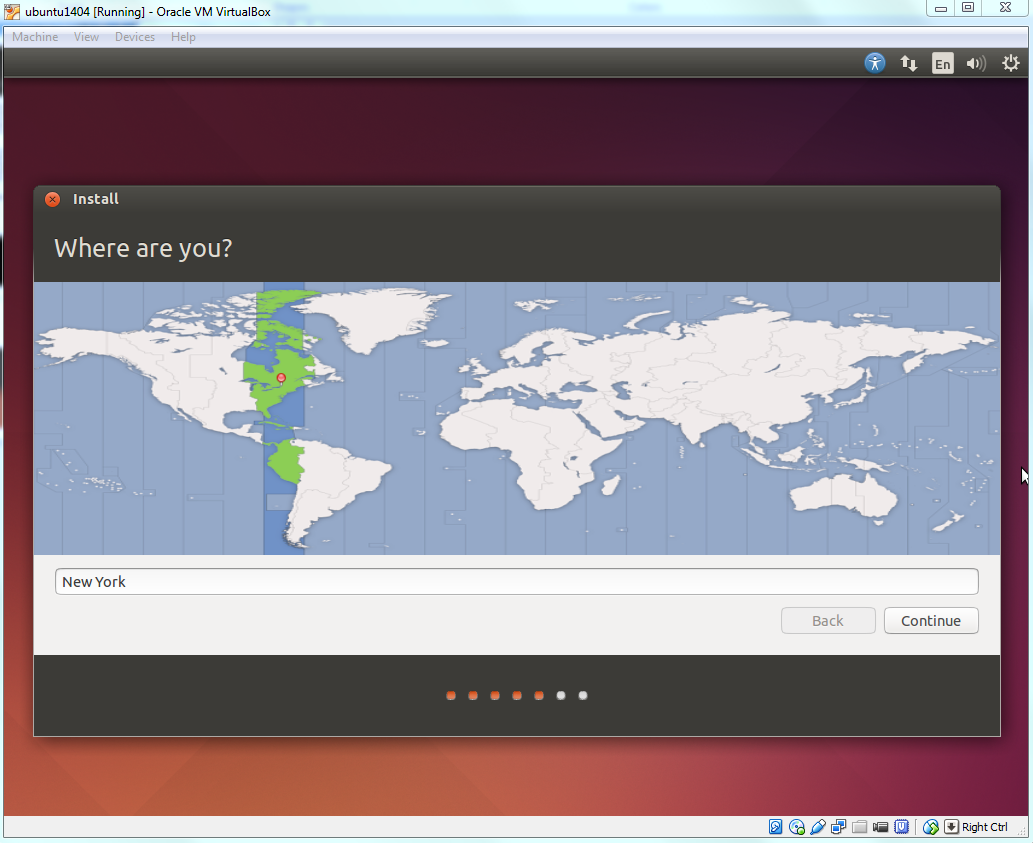
In ‘Who are you?’ dialog, enter your preferred name, username and password. Note that this user will have root/sudo privilege. Click ‘Continue’ button. 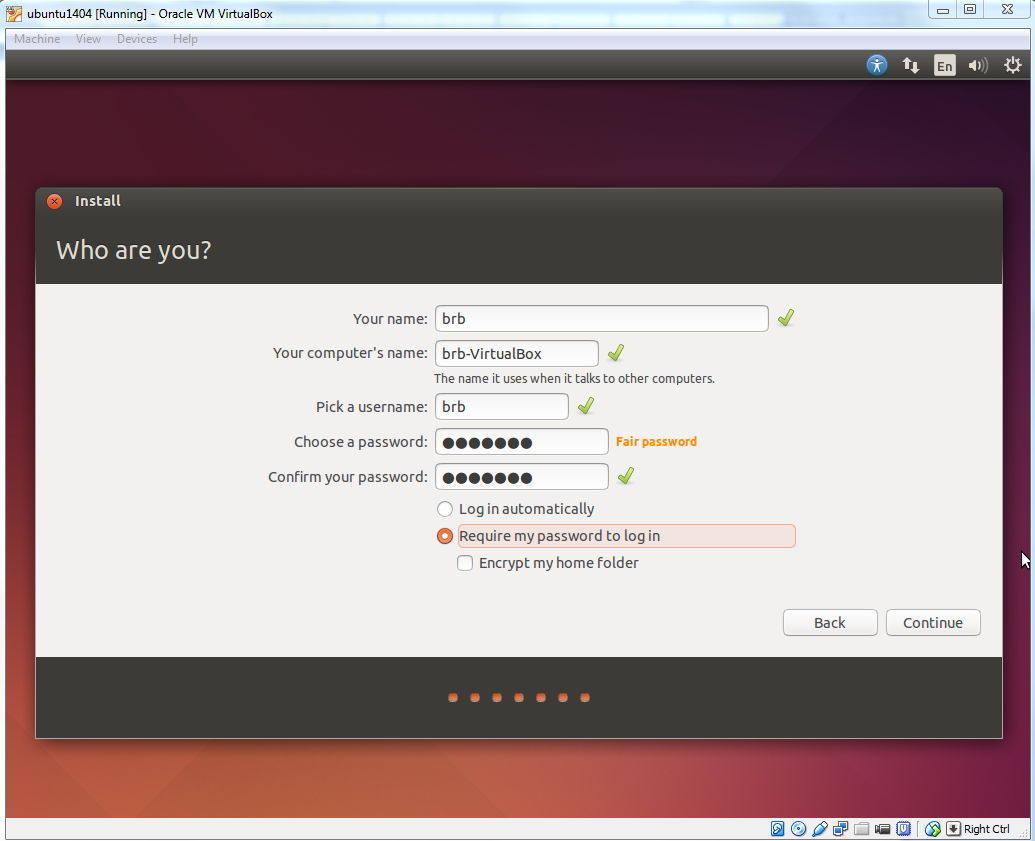
The installation will continue until it is finished. 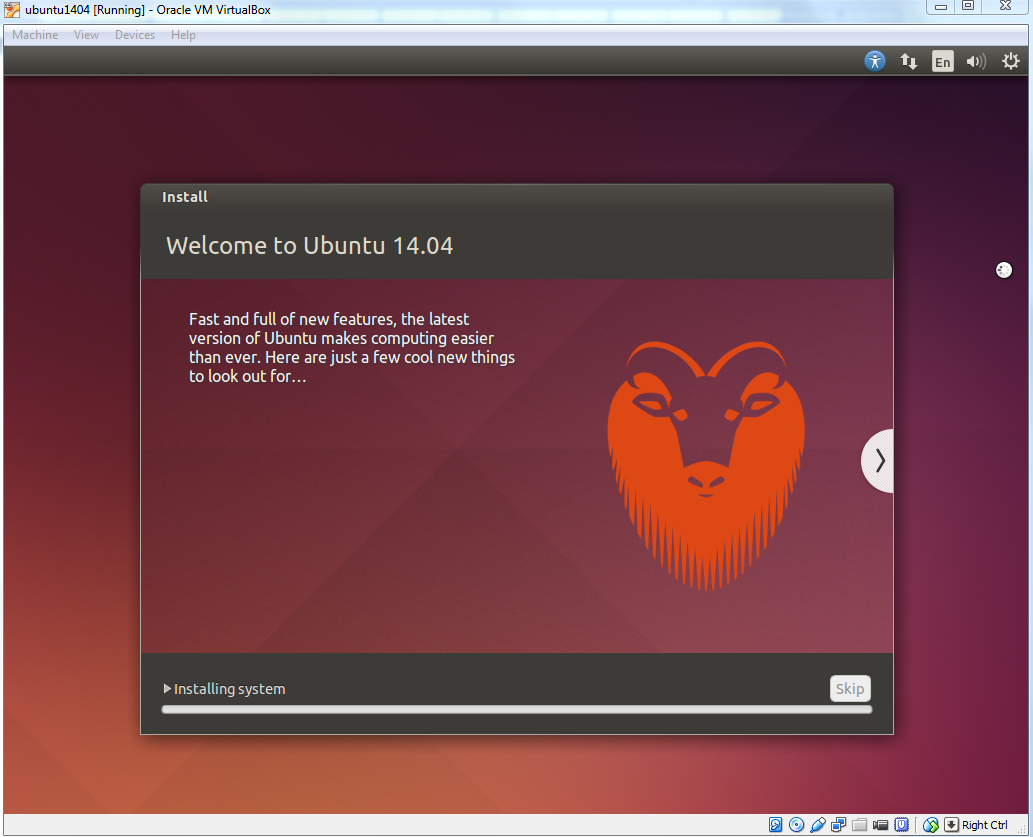
After installation is complete, click ‘Restart Now’ button. When you see a screen with a black background saying ‘Please remove installation media and close the tray (if any) then press ENTER:’, just follow it. 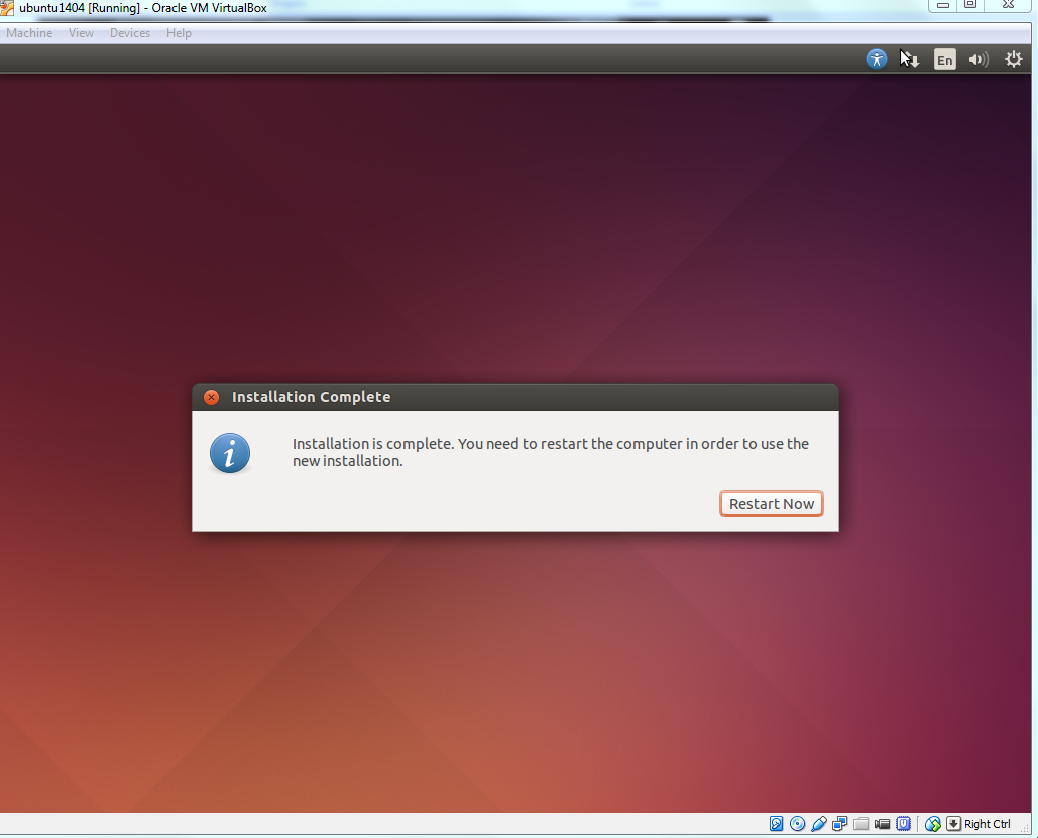
Enter the password you have chosen and press ‘Enter’. 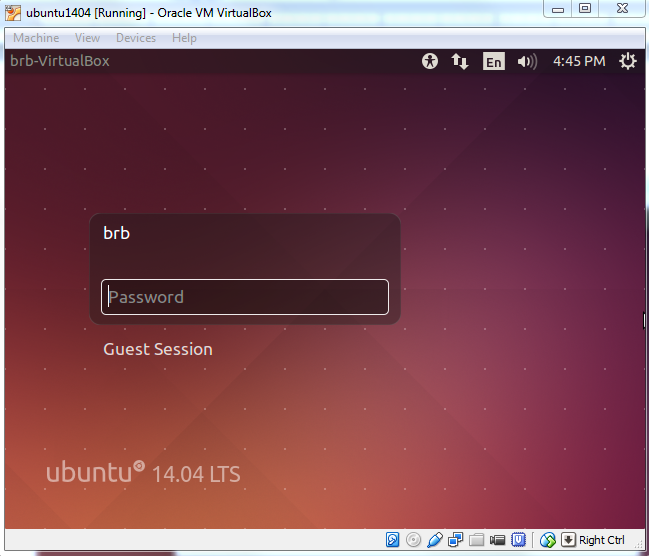
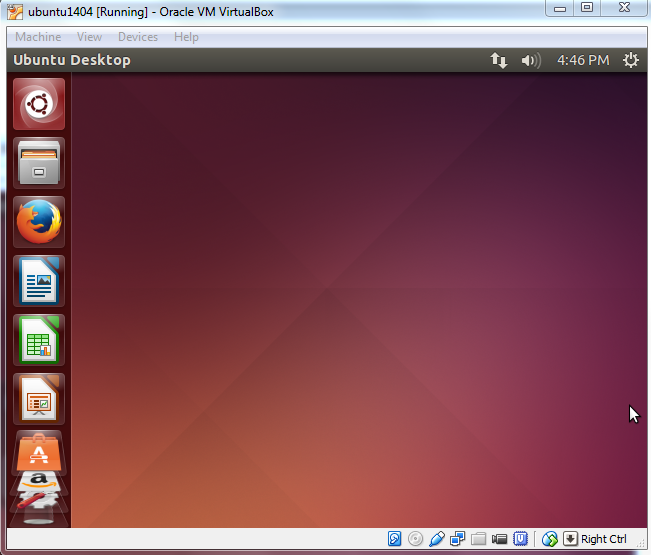
The Ubuntu Desktop OS is ready. You may find the desktop screen is too small. Don’t worry. You can solve this easily with «VirtualBox Guest Additions».
More About VirtualBox
Guest Additions
After the Ubuntu guest machine is installed, you will find the Ubuntu OS screen size is not extendable and you are not able to share folders between the host machine and Ubuntu.
Guest Additions software provide additional capability to a guest virtual machine, including mouse pointer integration, better video support, share folders, share clipboard, et al.
Before we proceed to install Guest Additions, make sure the current user has sudo/root privilege. If the current user does not have sudo/root privilege or it is not sure, run the following terminal command from an account (such as the user created when Ubuntu was first created; see the screenshot of ‘Who are you?’ above) with root privileges to enable the root privilege for the current user where USERNAME should be replaced by the current user’s name.
To install Guest Additions, click Devices > Insert Guest Additions CD images… 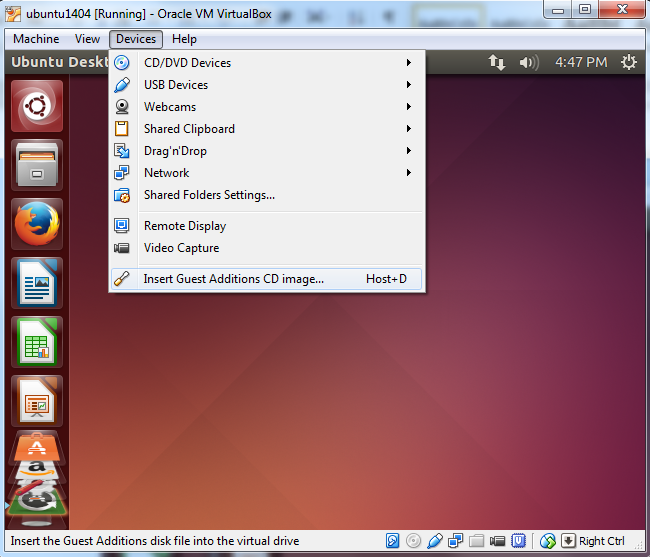
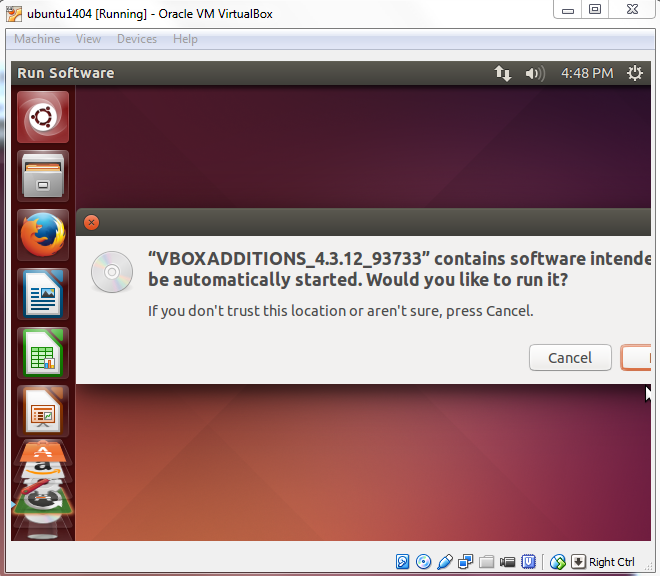
Click ‘Run’ button (next to ‘Cancel’ button) to start the installation. Note that the version of VBOXADDITIONS should be matched with the one of VirtualBox you have installed.
Installing Guest Additions requires root privilege. Enter user’s password (assume the current user has sudo privilege). 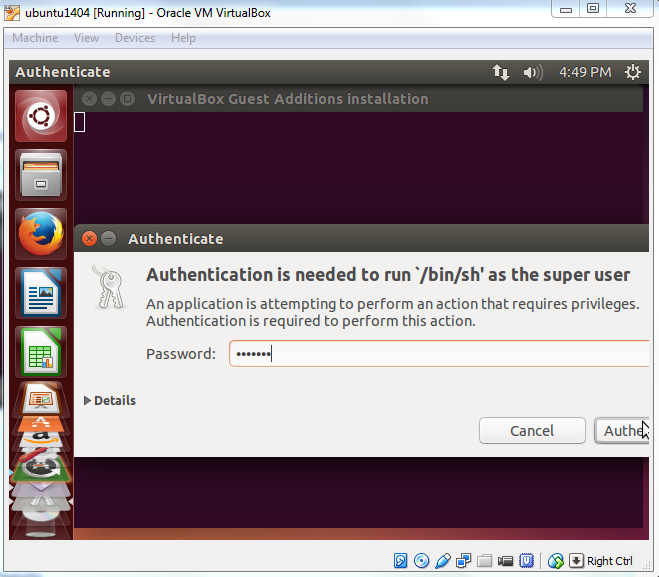
When the installation is finished, press Return key to close the terminal window. 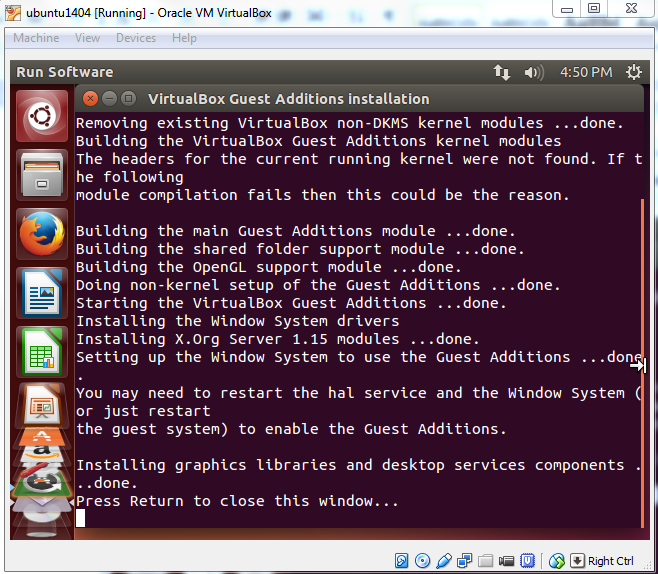
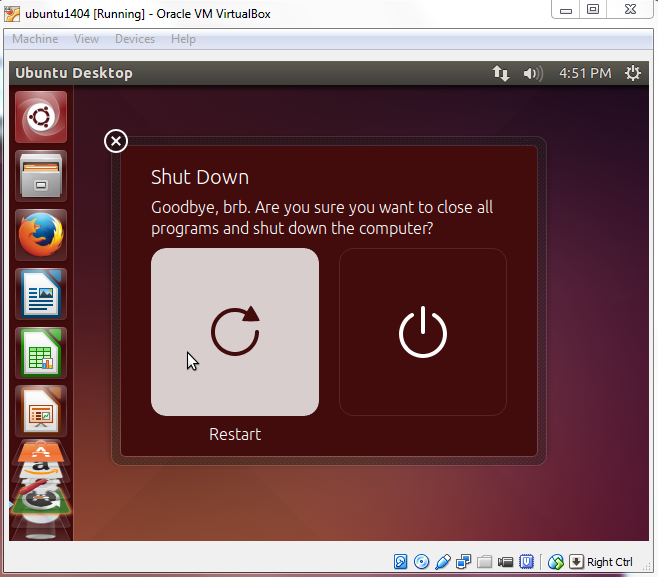
Now prepare to restart the system to enable the change. Click ‘Shutdown’ on the menu and then the ‘Restart’ button. 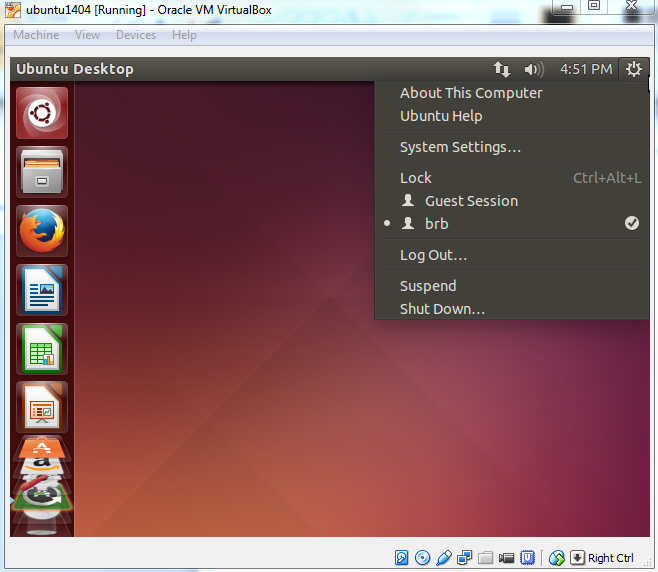
After rebooting Ubuntu, you will see the desktop resolution is much better. 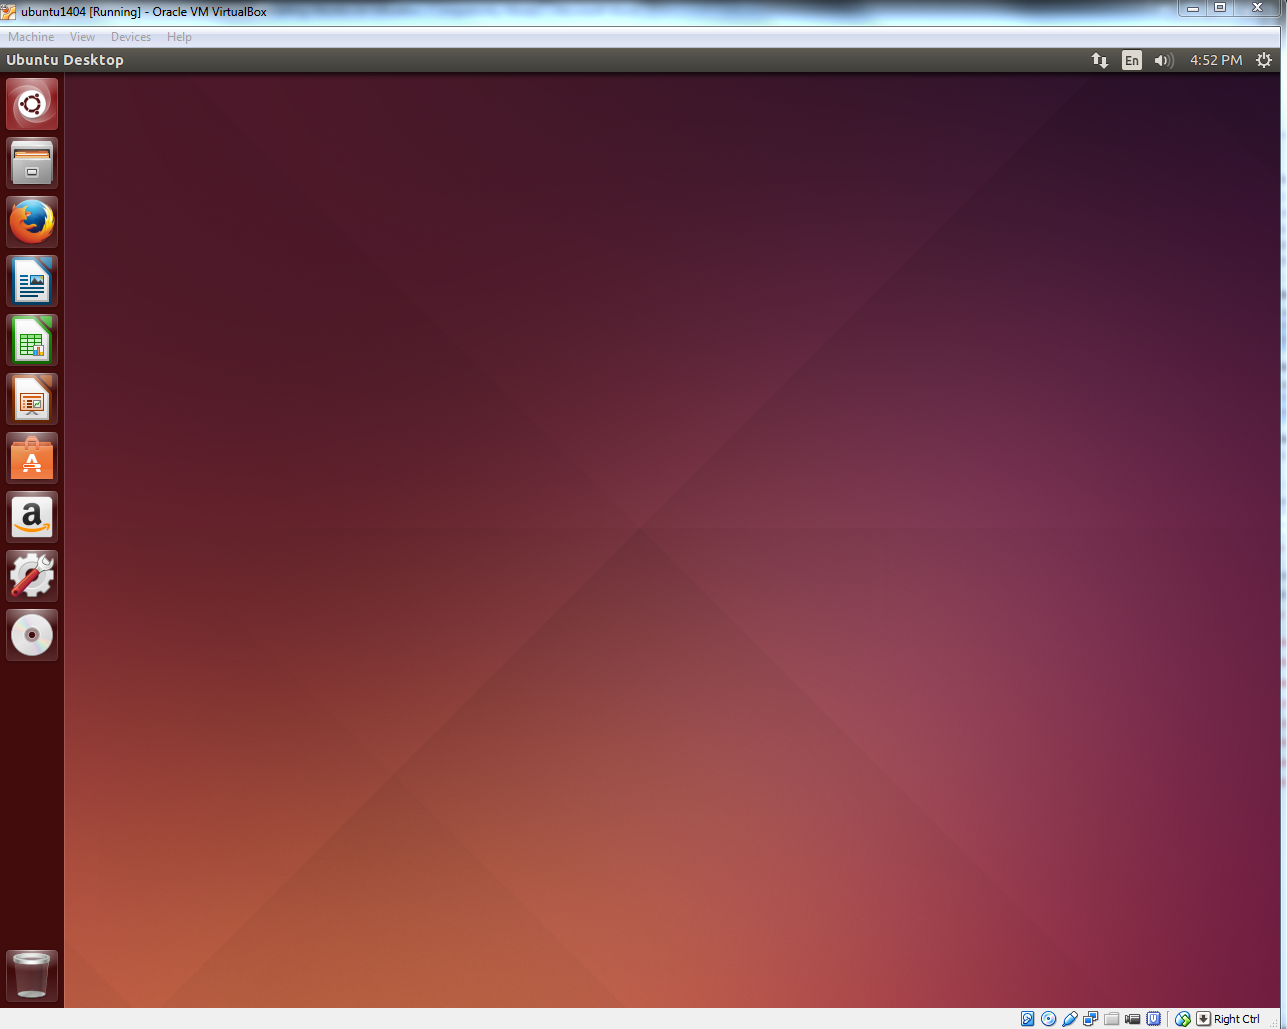
Share Folders
Before you can enable shared folders on the host machine, make sure you have installed VirtualBox Guest Additions software on the guest machine.
When Ubuntu guest machine is on, click on Devices > Shared folders settings… 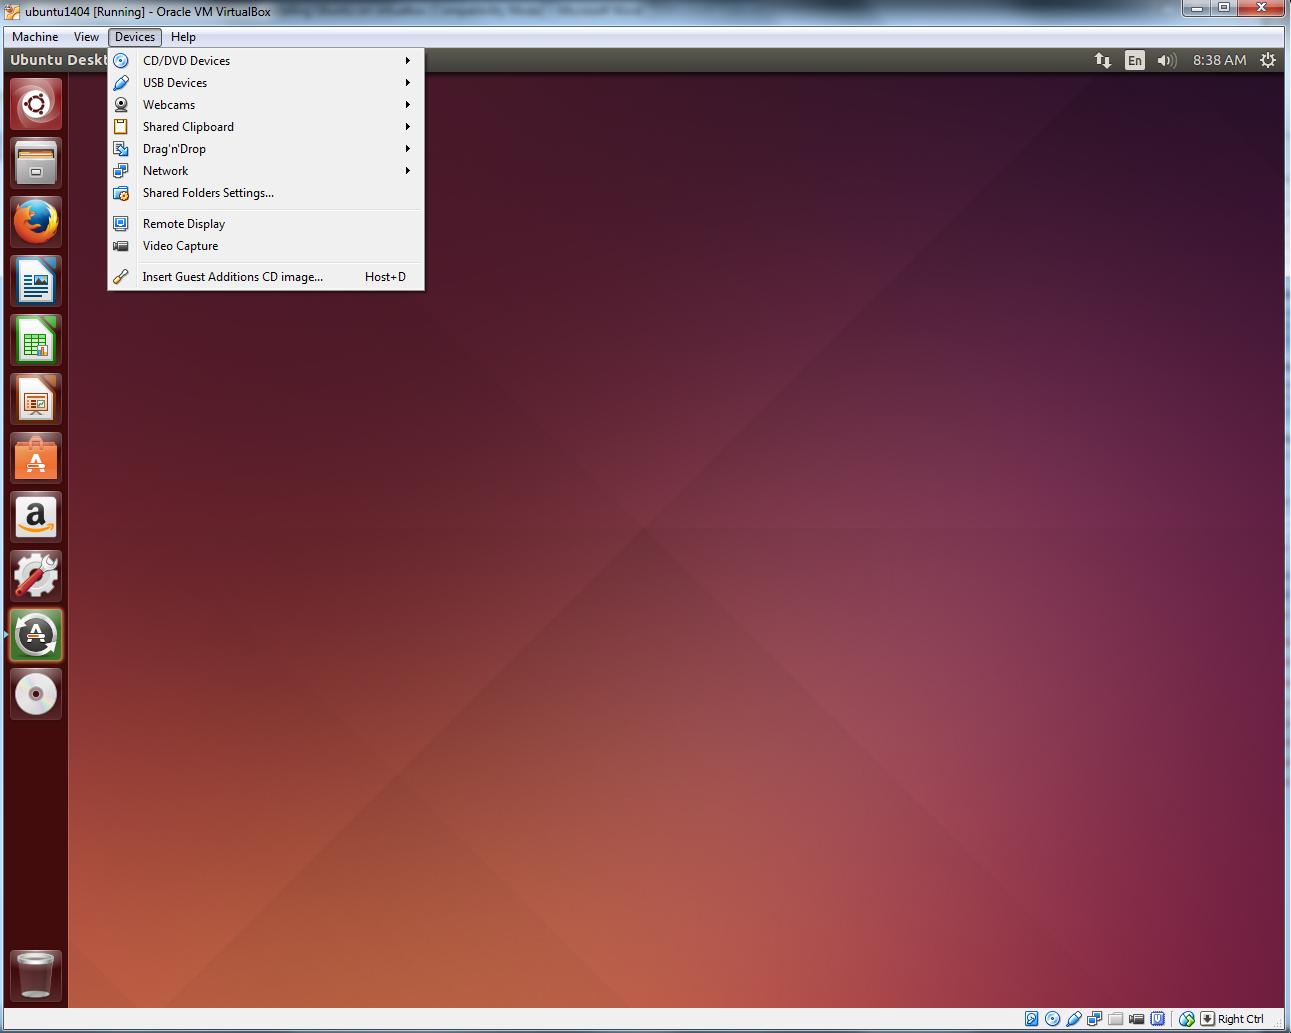
Select Machine Folders and hit the add button (plus sign). 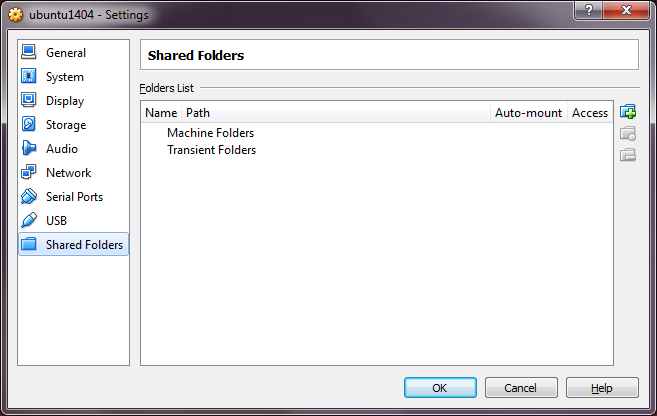
Browse to the folder you wish to access from the guest machine. Check Auto-mount and Make Permanent options and click OK button. 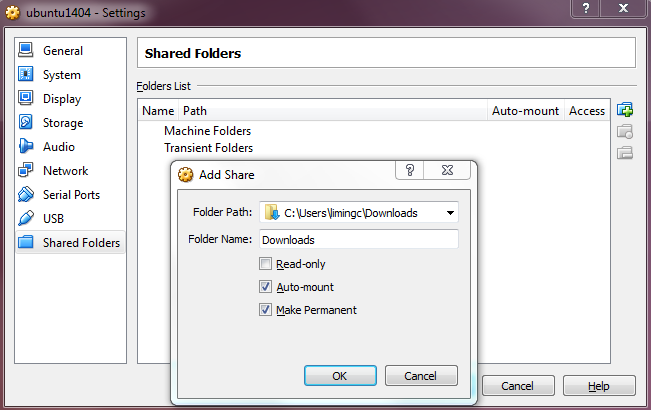
Click OK button once more.
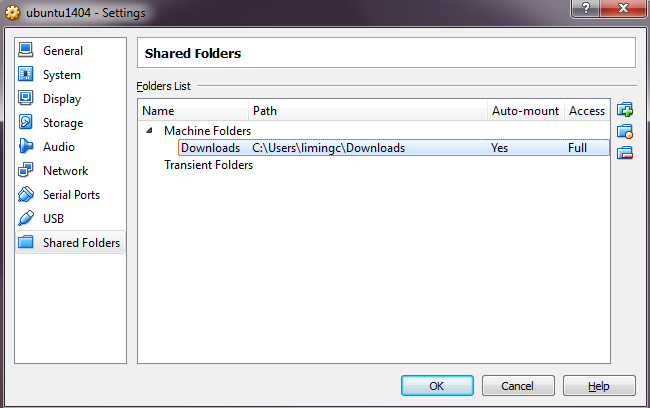
Now type ‘terminal’ in Dash to open a Terminal. 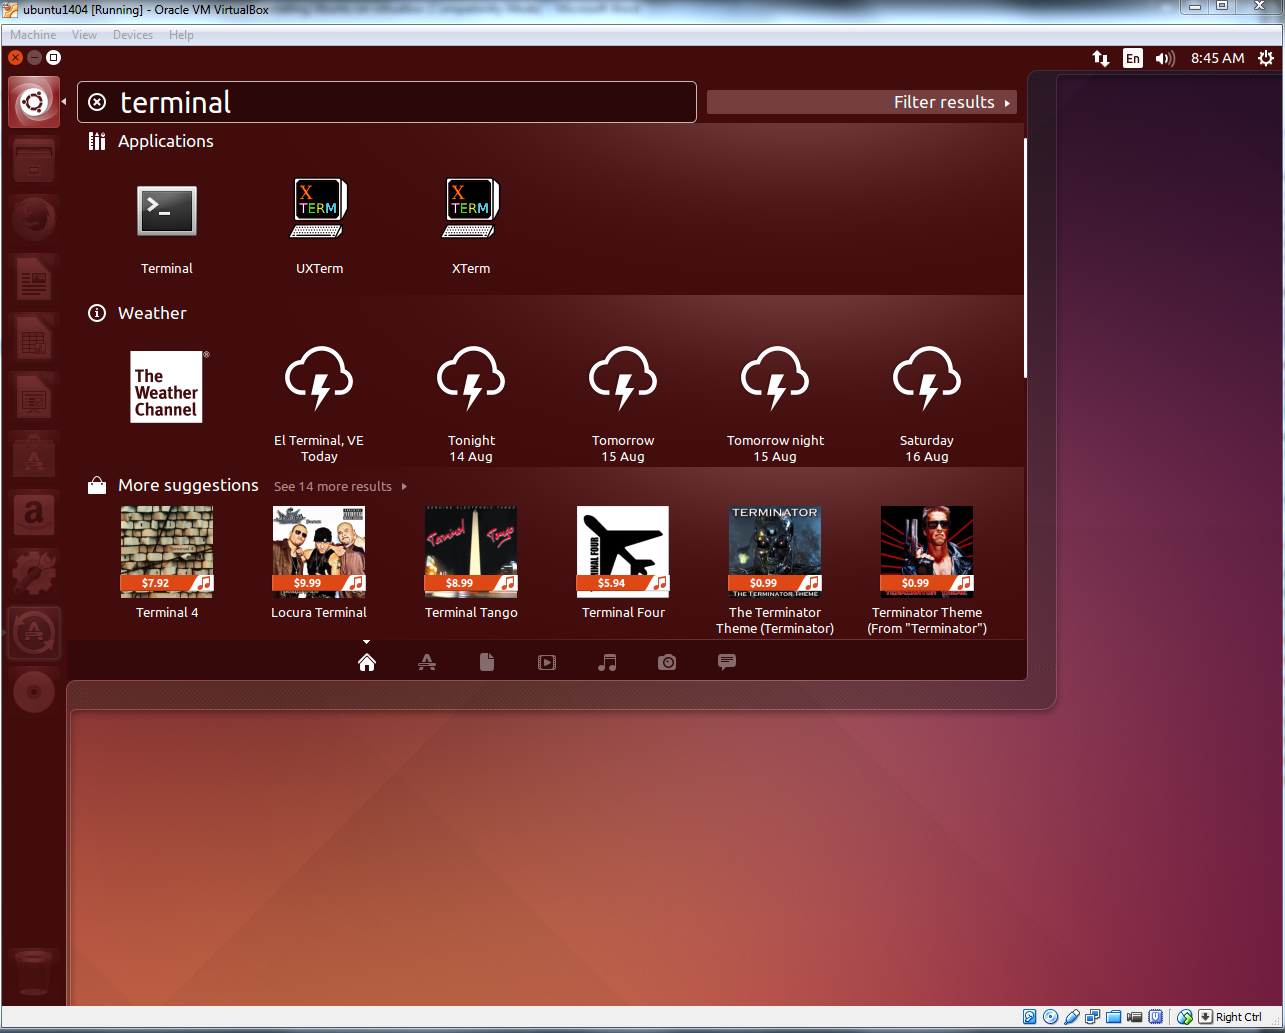
Type the following line in the Terminal to add a user to ‘vboxsf’ group. This step is necessary in order to use the VB’s ‘Shared Folder’ feature. Replace ‘brb’ with your account name in Ubuntu. When you are done, restart the Ubuntu guest machine and go to /media/ directory. From Nautilus (file manager in Ubuntu), click Computer > File System > Media folder and inside it you will see a folder beginning with sf_ (the folder name is sf_Downloads in our example). Now you can transfer files between the Ubuntu guest machine and the Windows host machine in Nautilus.
Although Shared Folder system in VirtualBox is a nice feature, using VirtualBox shared folder directly for fastq data, annotation or output directory can significantly reduce the performance compared to a native (Ubuntu) system or VirtualBox native system.
BRB-DGE
After Ubuntu has been successfully installed on VirtualBox, users can be go back to download and use BRB-DGE program.