How To Draw In Symmetry Mode Using Adobe Illustrator
In this tutorial we’ll be going over how to draw in symmetry mode in Illustrator. This will make it so that everything you draw is mirrored on an opposing axis, and any changes made to the drawing will also be mirrored.
Please enable JavaScript
In short, to symmetry draw in Illustrator we will need to use the Transform Effect (not to be confused with the Transform menu.) However, to mirror your artwork in such a way that allows you to add additional shapes and drawings we will have to use a workflow that includes grouping and Isolation mode as well. Let’s dig in.
How To Mirror Your Work
The following video tutorial will walk you through the entire process of using the Transform effect to create a symmetry drawing in Adobe Illustrator:
Continue on for a step-by-step breakdown.
Draw In Symmetry Mode
- Step 1: Draw an object and place it in a group
- Step 2: Use the Transform Effect to mirror the group on the X or Y axis
- Step 3: Enter Isolation Mode to continue drawing
- Step 4: Expand the appearance of the group to apply the changes
Step 1: Draw an object and place it in a group
Let’s start off by drawing a single shape and placing it in a “group”. For this demonstration we will be drawing a sword icon, which will start out as a vertical rectangle.
With the shape selected, apply a group by navigating to:
The reason why we’re placing the object in a group is because symmetry drawing in Illustrator only works on a single element. So if you want to mirror multiple objects in such a way that allows you to continue adding new elements, the workaround for that is to apply the mirror effect to a group rather than an individual object. Then new objects can be added to that group retroactively.
Step 2: Use the Transform Effect to mirror the group on the X or Y axis
Now we are going to use the Transform Effect to mirror the group to an opposing axis of your choosing.
With the object selected, navigate to:
Effect > Distort & Transform > Transform
The following menu will populate:
The Transform effect menu can be used to mirror selected objects (click to enlarge.)
The settings we will focus on for this lesson are outlined in red above. They include:
- Reflect X: Selecting this option will mirror your selection on the left and right-hand sides of the original copy.
- Reflect Y: Selecting this option will mirror your selection on the top and bottom sides of the original copy.
- Copies: This represents the number of times you’d like to mirror the selected object
- Selection box: This lets you determine where the mirrored copy is placed.
Once the settings in the screenshot above are applied, the object is mirrored to the right of the original copy, and any edits made to it are automatically applied to the mirrored copy:
Changes made to the original copy (using the Anchor Points Tool in this example) are mirrored on the opposing axis.
Step 3: Enter Isolation Mode to continue drawing
Now that we’ve mirrored our drawing to the opposing axis, let’s continue drawing in symmetry mode by adding more design elements. However, we must first enter Isolation Mode to ensure that everything we draw is added to the group.
To do so, navigate to your Layers menu. If you don’t have it open already you can access it by navigating to:
Within the Layers menu, expand Layer 1 and click on the Group item in the list to highlight it:
Click to enlarge.
Then, click the menu icon in the top-right corner of the menu (outlined in red above) and select Enter Isolation Mode from the list.
Now that you are in isolation mode, any new elements that are drawn onto the canvas will be applied to the group and mirrored on the opposite side of the axis: Isolation Mode allows us to continue drawing new objects to be mirrored.
Once you are finished applying your changes you can exit Isolation Mode by clicking the arrow icon near the top-left corner of the screen:
Click to enlarge.
You’ll have to click it twice– once to exit the group and again to exit the layer.
Once you are out of isolation mode you will not be able to add new elements to the mirrored design again unless you re-enter it.
Step 4: Expand the appearance of the group to apply the changes
Once you are satisfied with your design you can finalize everything in such a way that the mirrored copy becomes its own individual set of elements by expanding the appearance of the design.
This can be done by selecting your artwork and navigating to:
Object > Expand Appearance
Once applied, your mirrored copy will become editable. You’ll just have to ungroup everything ( Control + Shift + G ) twice if you want to edit them as individual elements.
In Conclusion
Using symmetry draw in Illustrator is a simple enough process if you’re just looking to mirror and edit a single object. However, if you want to mirror multiple objects, and continue adding more retroactively, then there are a few additional steps to follow.In an ideal world there would be a dedicated feature for doing such, but this workaround works just as well.
Master The Software
Want to learn everything there is to know about your favorite design apps? Check out our interactive video courses and private community for getting help when you need it!
The Inkscape Master Class
A comprehensive series of 60+ videos where I explain every tool and feature in Inkscape.
Affinity Designer Master Class
A series of 80+ explainer videos where I go over every tool and feature in Affinity Designer.
The Illustrator Explainer Series
A series of 100+ explainer videos where I go over every tool and feature in Adobe Illustrator.
The Logo Design Academy
An 18-part video series teaching my entire creative process for designing logos, from start to finish.
LogosByNick.com is an educational media platform for learning about graphic design software.
Recent Posts
In this tutorial we’ll be going over how to find and replace every instance of a color using Affinity Designer. Doing so manually would require you to select objects and change their color.
The Inkscape team recently released version 1.3 and with it comes lots of new tools and features. One such welcomed addition is the Shape Builder Tool, which allows you to create shapes based on the.
Keep In Touch
Join the mailing list to be notified of new posts and receive 200+ FREE design templates!
Как создать симметричные объекты в Illustrator
Share this.
В этом уроке мы покажем несколько способов создания симметричных объектов используя возможности графического редактора.
Способ 1.
Рисуем любую фигуру с которой будем работать. Выбираем инструмент «Зеркальное отражение» (О), что бы открыть настройки инструмента нажимаем дважды на него.

Устанавливаем желаемые параметры, и нажимаем «Копировать».
Способ 2.
Симметрично разместить объекты можно используя инструмент «Поворот» (R).
Выбрав инструмент удерживаем клавишу Alt и устанавливаем положение оси симметрии. В открывшемся окне настроек указываем угол наклона, и нажимаем копировать.

Что бы повторить копирование используем сочетание клавиш Ctrl+D.

Способ 3.
Так же можно создать динамическую зеркальную симметрию. Она будет полезна если вам нужно разом изменить форму всех объектов симметрии.
Открываем эффект «Трансформировать», изменяем параметры смещения нашего объекта. Установите галочку в окне «Просмотр» что бы видеть результат.

Для того что бы изменить размеры объекта выбираем инструмент «Прямое выделение». После изменения размеров объекта все изменения будут применены ко всем объектам.

Что бы изменить параметры трансформации нужно открыть панель «Оформление», после чего нажать на эффект «Трансформировать».

Вот так за короткое время мы показали несколько способов для того что бы разместить симметрично объекты в иллюстраторе.
How to Do Live Mirror Drawing in Adobe Illustrator CC
Some of the graphic and 3D editors have a Live Mirror Drawing feature, which allows you to draw simultaneously on both sides of one or more axes of symmetry. Unfortunately, Adobe Illustrator does not have this feature although it is a very powerful and multi-feature application. We can, however, implement Live Mirror Drawing in Illustrator by using only its basic features. You will learn how to do it from reading today’s article.
Tutorial Details
- Program:Adobe Illustrator CS4 – CC
- Difficulty: Beginner
- Topics Covered: Transform effect
- Estimated Completion Time: 10 minutes
Final Image
As always, this is the final image that we’ll be creating:

Create a template for Live Mirror Drawing
Step 1
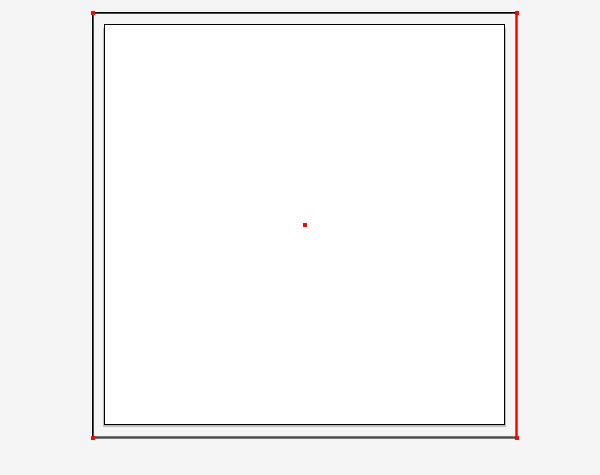
Open Adobe Illustrator and create a new document (File > New). Artboard sizes and color mode of the new document depends only on your preferences. Take the Rectangle Tool (M) and create a rectangle of the size larger than the size of artboard. Stroke colors of the rectangle do not matter at all, but you’ll need to set the fill to 0 in order to see a preview of the mirrored image.
Step 2
Turn on the Rulers (Command / Ctrl + R) and create horizontal and vertical guides by dragging them from the corresponding rulers. The guides must pass through the center of the created rectangle.

It is not necessary to create the guides since they just show the position of the axes of symmetry. We basically have them set up for our own convenience.
Step 3
Create a random object on the artboard. I created an arrow to indicate the direction of the path.

Step 4
Select the entire layer in the Layers panel.
Get millions of stock images and videos at the best price
Unlimited access. No attribution required. Starts at just $9/month.

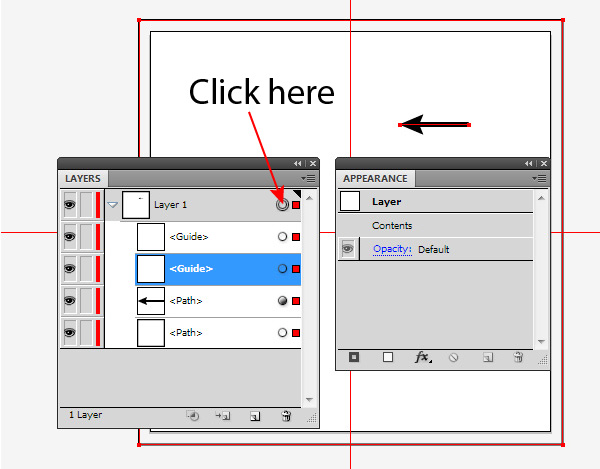
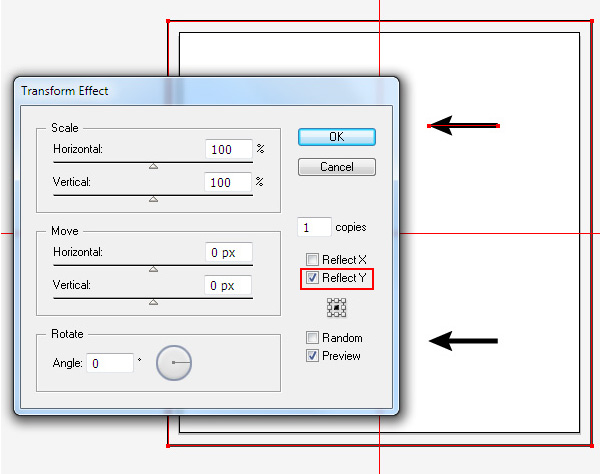
Now go to Effect > Distort & Transform > Transform… and in the dialog box, specify the axis of symmetry and the number of copies equal to 1. For visual control over the situation, check the Preview option and press OK.
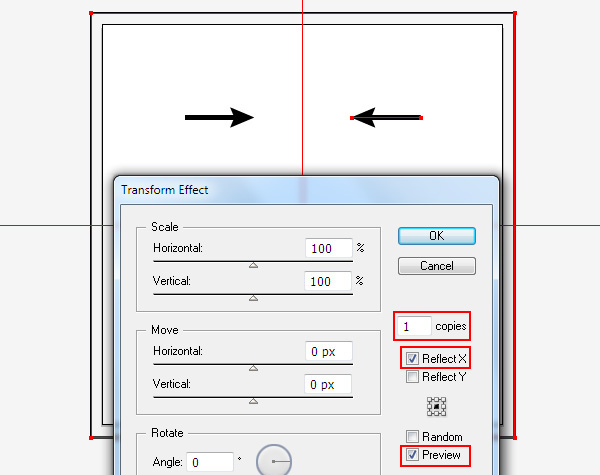
Your template is complete, so you can start drawing.
Live Mirror Drawing
Step 5
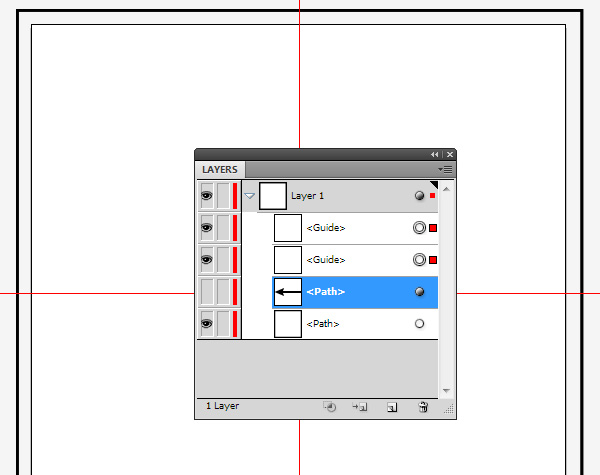
Turn off the visibility of the created object (in my case it’s an arrow) in the Layers panel.
Step 6
Now select any of the drawing tools, for example the Paint Brush Tool (B), and create a path.
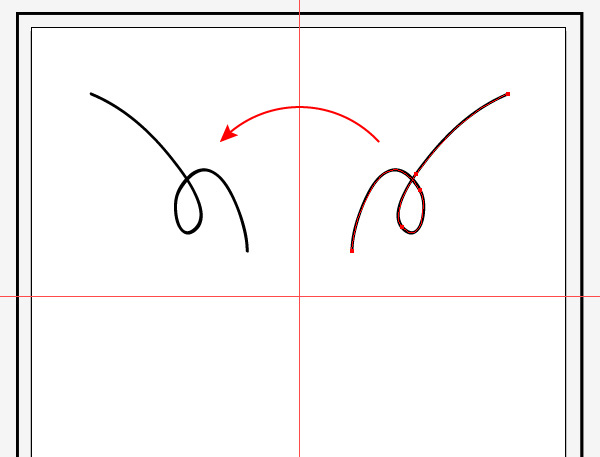
As you can see, we’ve got immediate symmetry relative to the horizontal axis. At the same time you can draw on both sides of the axis of symmetry.
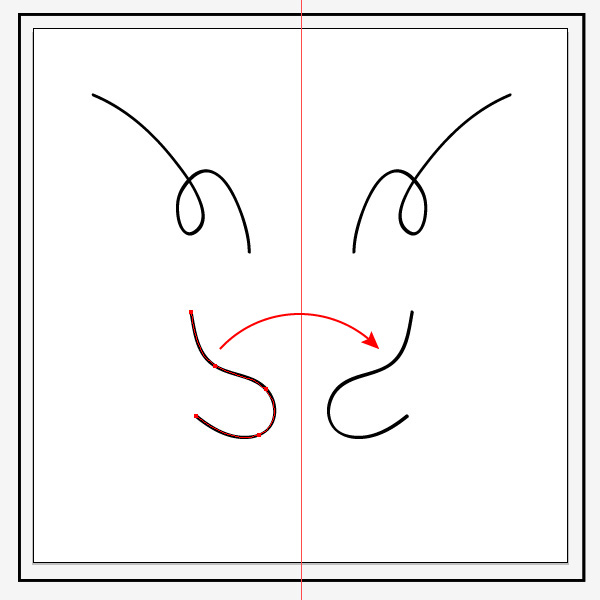
Unfortunately, this method has two drawbacks which of course I have to warn you about. When crossing the axis of symmetry, the connection of the created path with its mirror copy is absent.
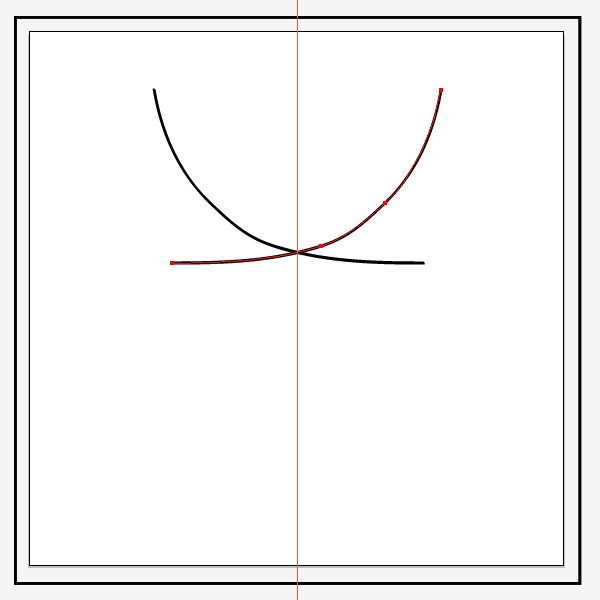
The path exists on both sides of the axis of symmetry. This must be taken into consideration and try not to cross the axis of symmetry, unless you plan it, of course.
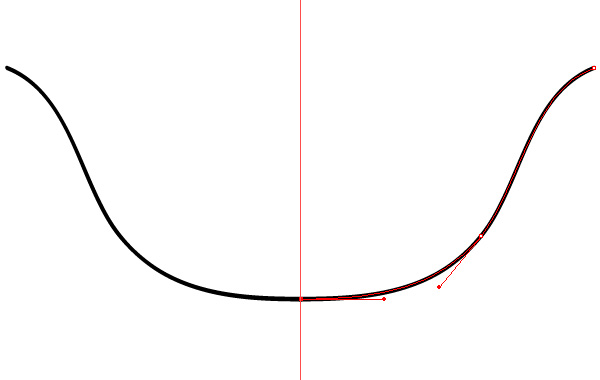
Also you can’t draw beyond the boundaries of the rectangle created in the first step, as this will ruin the symmetry of the entire system. That is why we have created a rectangle that is bigger than the artboard.
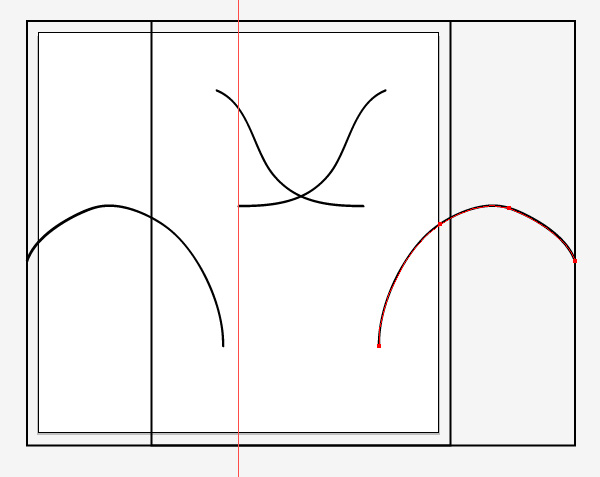
Editing a Live Mirror Drawing template
Step 7
You can always reset the configurations of the template. To do so, select the layer with the template and click on the Transform effect in the Appearance panel (Window > Appearance). This will open the dialog with the parameters of the effect.
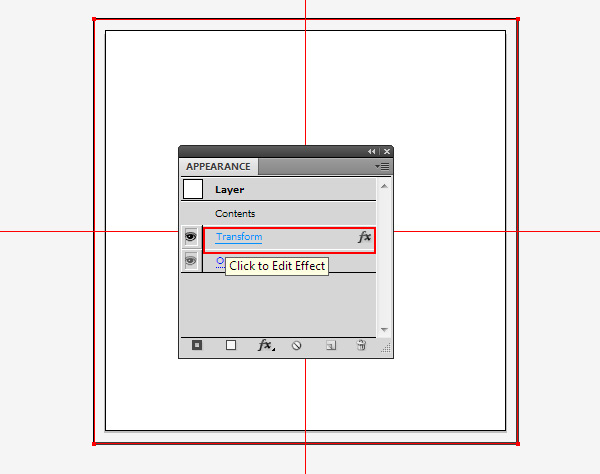
For example, you can change the axis of symmetry.
Step 8
You can even set multiple axes of symmetry, by choosing at the same time the options Reflect X, Reflect Y and setting the number of copies required and the rotation angle.
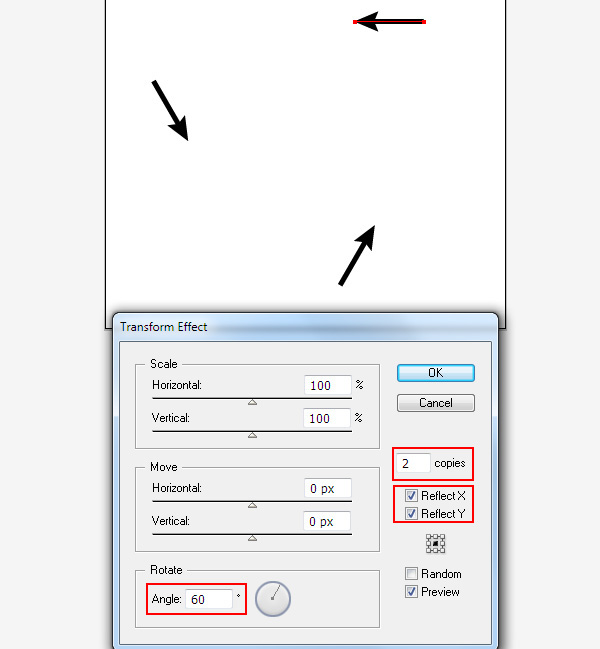
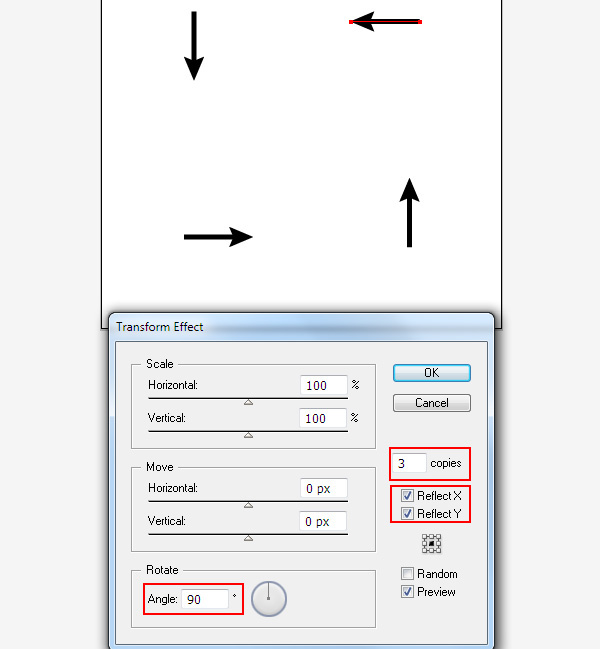
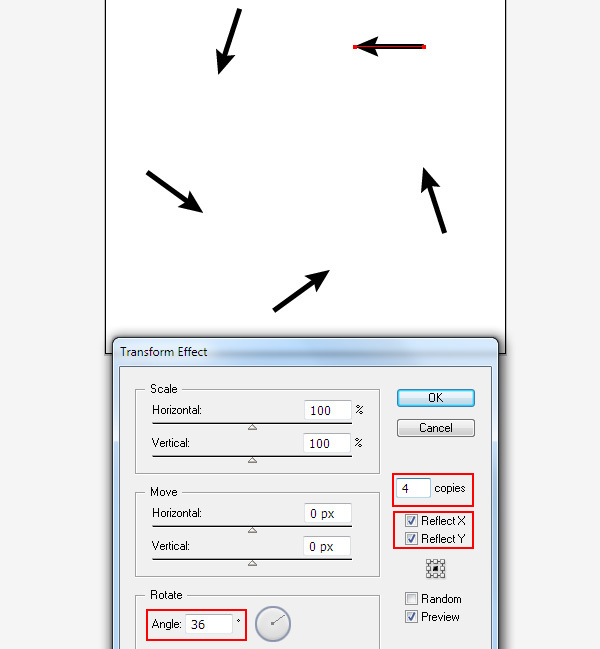
But in this case, in addition to the symmetry, we also get a rotation relative to the point of intersection of the axes.
The completion of the mirror drawing
Step 9
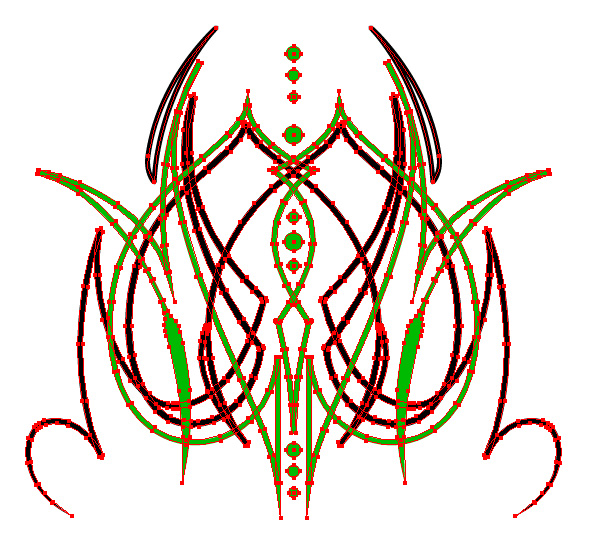
Now let’s draw something. I created an abstract design in the style of freehand pinstriping.

When the drawing is complete, select the whole layer, then go to Object > Expand Appearance. Mirror reflection materialized into regular vector objects.
Step 10
Auxiliary elements such as arrows and rectangles can now be deleted.

Today, I told you how to make a mirror drawing using standard features of Adobe Illustrator. This method seems slightly inconvenient with some limitations. Note that this is not the only way to make a mirror drawing. Recently there appeared a new MirrorMe plug-in for instantaneous symmetry in Adobe Illustrator, which is much more convenient to use, and it also has more features as well.
Как рисовать симметричные орнаменты и узоры в Adobe Illustrator
Всем привет! В этом уроке я покажу вам, как рисовать симметричные орнаменты в Adobe Illustrator с помощью шаблонов отражения Live Mirror. Благодаря этим шаблонам можно очень легко построить симметричное изображение и редактировать его. Все изменения сразу будут видны на рабочей области.
В архиве Live Mirror вы найдёте 27 самых разных шаблонов отражения. Для рисования узора мы будем использовать шаблон Live-Mirror-Template-03.ait. Устанавливать шаблоны не надо. Просто открываем его в иллюстраторе (Ctrl+O). Вы увидите вот такой документ.

Активным будет текст в левом верхнем углу шаблона. Его можно выделить и удалить. И затем рисовать там части узора.

Я расположил их пока вертикально для удобства. Как видите, это простые ромбики и линии. Если перевести иллюстратор в режим просмотра кривых (Ctrl+Y), то будет видно, что фактически объекты расположены в левом верхнем углу, а остальные копии шаблон делает сам.
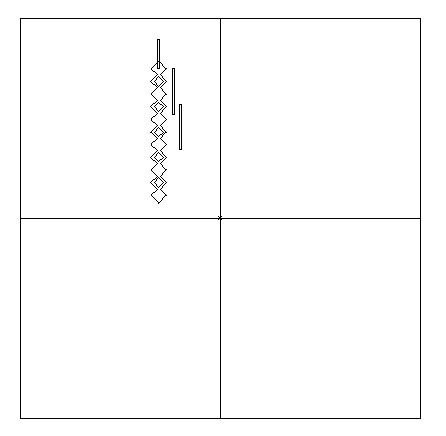
Затем можно сделать скос объектов через параметр Shear в панели Transform. Копии в противоположных углах точно также изменятся.

Далее дорисовываем остальные детали. В моем случае я ограничился разными геометрическими фигурами и стрелочками. Но вы можете покреативить в своё удовольствие, и порисовать что-то ещё.

Когда работа закончена, нужно разобрать эффекты отражения шаблона. Выделяем всё Ctrl+A и идём Object > Expand Appearance. Затем разбираем открытые пути через Object > Expand (галочка Stroke). После этого на рабочей области у вас останутся простые векторные формы.

С помощью шаблонов Live Mirror можно рисовать самые разные орнаменты и узоры. И симметричное отражение будет строиться автоматически во время рисования, что очень наглядно и удобно. Вот что получилось у меня.
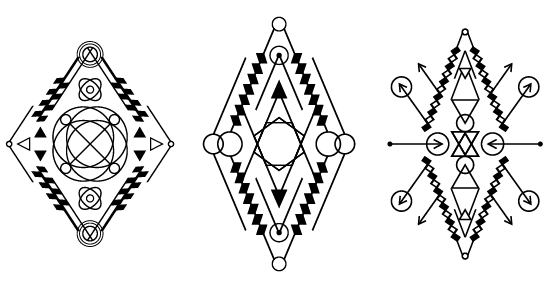
На этом у меня все. До скорого!
Подписывайтесь на канал Иллюстратор, чтоб не пропускать новые интересные уроки.